How to put an iPhone into Recovery Mode
The revised HTML framework is presented below.
- Device restoration via recovery mode might be necessary under the circumstances detailed subsequently.
- Should you have forgotten your passcode, a device reset will become mandatory.
Step 1 | Connect to a Computer

- Establish a connection between your iPhone and a Mac or PC utilizing a Lightning or USB-C cable.For macOS versions prior to Mojave, or when using a PC, verification of iTunes installation is essential.A Lightning connector facilitates the data transfer between the iPhone and the host computer.Alternatively, a USB-C cable can be employed to achieve the same connectivity.The selection of cable type depends on the ports available on your Mac or PC.Ensure that the appropriate cable is securely plugged into both the iPhone and the computer.
- Successful data synchronization requires a functioning connection between the devices.If iTunes is absent, download and install it from Apple's official website.The presence of iTunes is mandatory for older macOS systems and PCs to enable iPhone management.Proper cable connection and iTunes installation are prerequisites for subsequent repair procedures.
Step 2 | Button Combination Press
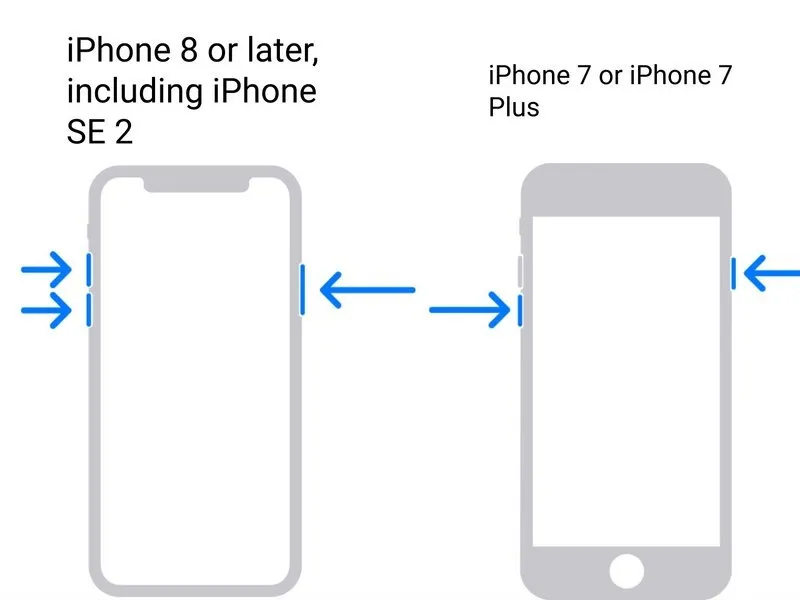
- These instructions apply specifically to iPhone models 8 and newer.Initiate the process by briefly depressing the Volume Up control, then releasing it.Subsequently, briefly depress the Volume Down control and release it.Following the previous step, maintain a prolonged press on the Side button.The display will then transition to the Recovery Mode interface.The following steps are applicable to iPhone 7 and iPhone 7 Plus devices.To enter Recovery Mode on these models, concurrently depress and hold the Side button.Simultaneously with the Side button, maintain pressure on the Volume Down control.
- The Recovery Mode screen will appear after a short duration of holding both buttons.These instructions are intended for iPhone 6s and older models.Begin by applying sustained pressure to both the Power button and the Home button.Continue holding both buttons concurrently until the Recovery Mode screen is visible.The Recovery Mode screen indicates successful entry into the diagnostic mode.Ensure a firm grip on both buttons to maintain consistent pressure.
- Releasing the buttons prematurely will interrupt the Recovery Mode initiation.The duration of the button press is crucial for successful mode entry.The 'Side' button is located on the right side of newer iPhone models.Older iPhone models utilize a 'Home' button positioned at the bottom center.The 'Power' button is used to turn the device on and off, and also initiates Recovery Mode.The 'Volume Up' and 'Volume Down' buttons adjust the audio output level.
Step 3 | Recover the device

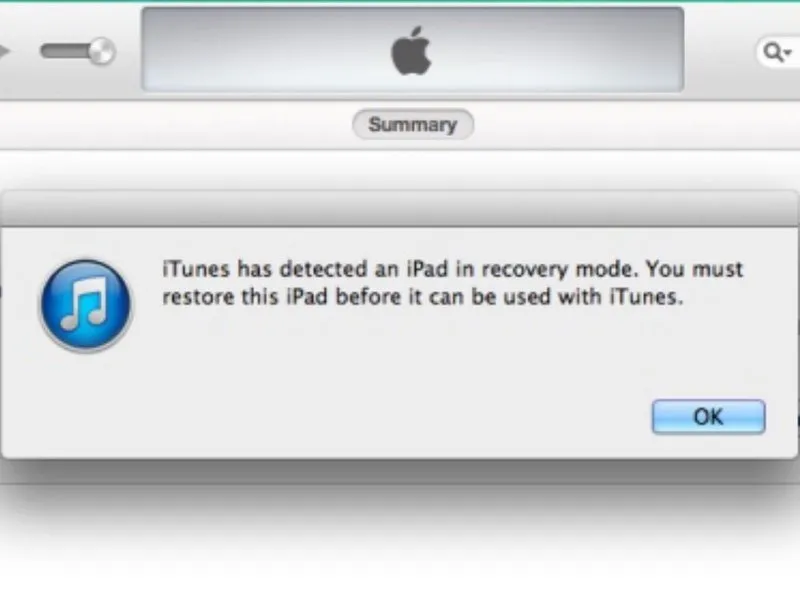
- Instructions for macOS versions Catalina and newer are detailed below.Initiate Finder on your macOS system.Within the Finder sidebar, identify your connected device.Selecting the device presents options including 'Update' and 'Restore'.The 'Update' function reinstalls the operating system while preserving existing user data.Should the update process encounter errors or if access is restricted, opt for 'Restore' to reinstall the operating system, which will completely erase all stored data.
- The following steps apply to macOS Mojave and earlier versions, as well as Windows systems.Launch the iTunes application on your computer.Find the iPhone icon positioned in the upper-left area of the iTunes window.Selecting the iPhone icon reveals options for 'Update' and 'Restore'.Similar to macOS Catalina and later, 'Update' reinstalls the operating system without data loss.If the update fails or you are unable to access the device, utilize 'Restore' to reinstall the operating system, resulting in complete data erasure.