How to repair an iPhone that won't charge - Tristar Replacement
Charging difficulties are a frequent occurrence with iPhones, and this guide details a progressive troubleshooting approach to identify and resolve the underlying cause.
- Verify that the power outlet to which the iPhone is connected is delivering electricity.
- Confirm the operational status of both the charging cable and the power adapter.
- Employing an alternative charging cable or adapter can help isolate the source of the problem.
- A forced restart of the iPhone can be initiated by simultaneously pressing and maintaining pressure on the Sleep/Wake button and the Home button.To execute the reset, these buttons must be held concurrently for a minimum duration of 10 seconds.Should the charging problem continue after attempting these steps, professional assistance from an authorized service center is recommended.This will allow for more in-depth diagnostics and necessary repairs to be performed.The instructions specifically designate the Sleep/Wake and Home buttons for clarity.
- These buttons are referenced within the guide to ensure accurate identification during the reset procedure.
Step 1 | Check for a new charger

- To resolve charging issues, substituting the existing cable with a replacement is advisable, with preference given to cables bearing MFI certification (Made For iPhone).A functional cable capable of supplying a minimum current of 5V-1A can also serve as a viable substitute.If the problem persists, evaluating the charging adapter is recommended; replacing it with a verified working unit is a potential solution.Ensure the replacement charging adapter is capable of providing a power output of at least 5V-1A.The use of an MFI certified cable guarantees compatibility and adherence to Apple's specifications.
- A cable that reliably delivers a minimum of 5V at 1A is essential for proper charging functionality.Employing a verified, operational charging brick is crucial for troubleshooting power delivery problems.Confirming the charging adapter's ability to supply a minimum of 5V and 1A is necessary for effective charging.
Step 2 | Checking the charging port

- Inspect the charging port for accumulations of debris or physical blockages.
- Employ a slender implement to carefully eliminate any visible contaminants from within the port.Caution: The user assumes all responsibility for any potential harm or malfunction resulting from this procedure.This guide disclaims liability for any damage incurred during the repair process.
Step 3 | Try known-good internals

- Verify functionality using a confirmed operational battery; a resumption of charging indicates a faulty battery requiring replacement.
- Confirm the Lightning charging port's proper operation with a verified functional unit; charging restoration suggests a defective port necessitating replacement.
- Observe that the depicted image illustrates an iPhone 7; consult the accompanying video for the specific procedures applicable to the iPhone 6S in the subsequent step.
Step 4 | Video guide to these tests

A complete procedural guide in French can be accessed at the provided link; visual instruction via video format may assist those who primarily understand English.
Step 5 | Now some real challenge
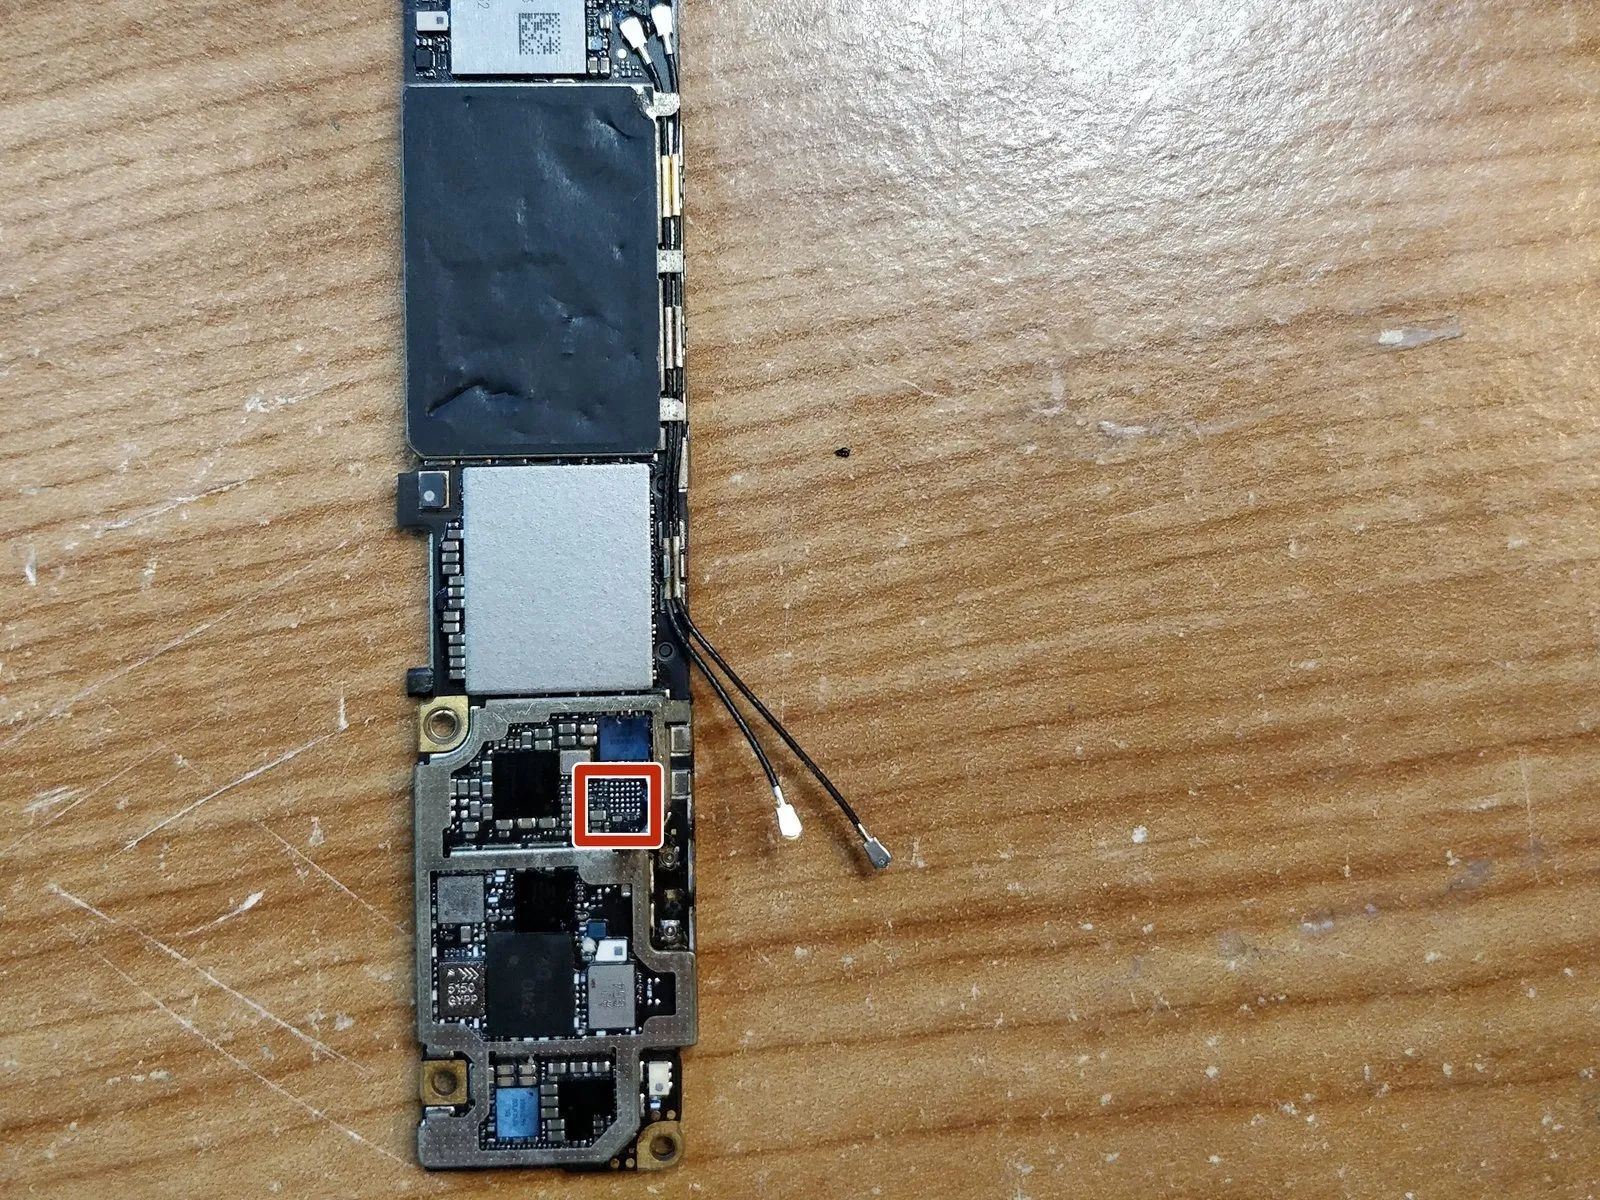

Continued engagement with this guide suggests a potential malfunction within the iPhone's primary circuit board.
Specific integrated circuits, identified as U4500 or Tristar components, frequently exhibit defects and premature failure within iPhone devices.These particular components are recognized as a common source of issues in iPhone repair scenarios.Resolution of this fault necessitates a complete replacement of the iPhone's motherboard assembly.
Step 6 | Tristar Replacement

- A visual demonstration illustrating the Tristar replacement procedure on an iPhone 6S is accessible.
- The process of substituting the Tristar component within an iPhone 6S is detailed in the accompanying video tutorial.