iPhone 11 Battery Replacement
The capacity of iPhone batteries diminishes gradually with repeated usage, resulting in a reduced ability to retain a complete charge. Apple designs its batteries to retain a functionality level of 80% of their original capacity, enduring approximately 500 charge cycles, which typically translates to a lifespan of about 18 to 24 months for the average user. Deterioration of the battery's chemical composition can also contribute to slower operational speeds on your iPhone.
Follow this detailed procedure to substitute your battery and return your iPhone 11 to its original performance level.
- Exercise necessary care and safety measures if you observe any swelling in your battery.
Be aware that, following the repair process, your iPhone might display a notification indicating the "genuineness" of the battery, even when utilizing authentic Apple components. If your iPhone operates as expected, this message can be disregarded without concern.
To ensure peak operational efficiency, after finishing this guide, it is recommended to condition your newly installed battery:
- Fully charge it to 100% and continue the charging process for a minimum of two additional hours.
- Utilize your iPhone normally until it automatically powers down due to depleted battery power.
- Charge the device continuously until it reaches a full 100% charge.
You will require replacement adhesive to successfully conclude this repair.
Step 1 | Remove the pentalobe screws
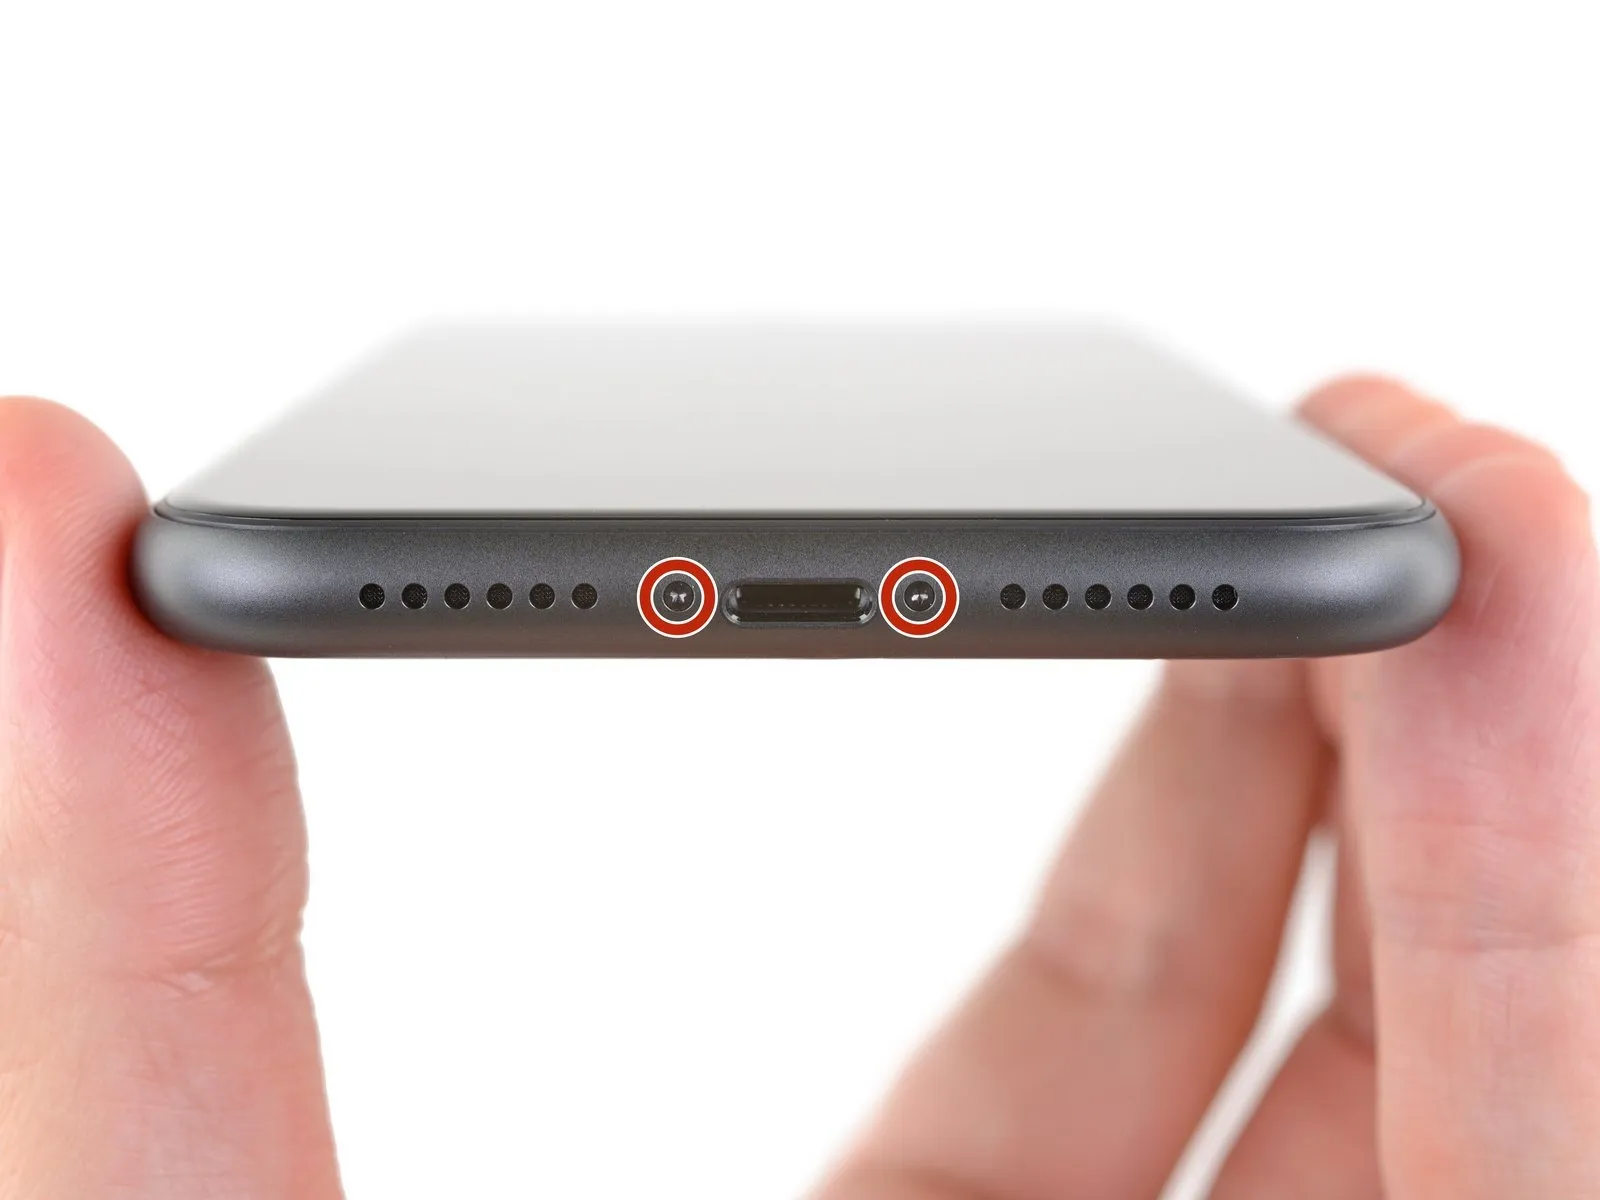
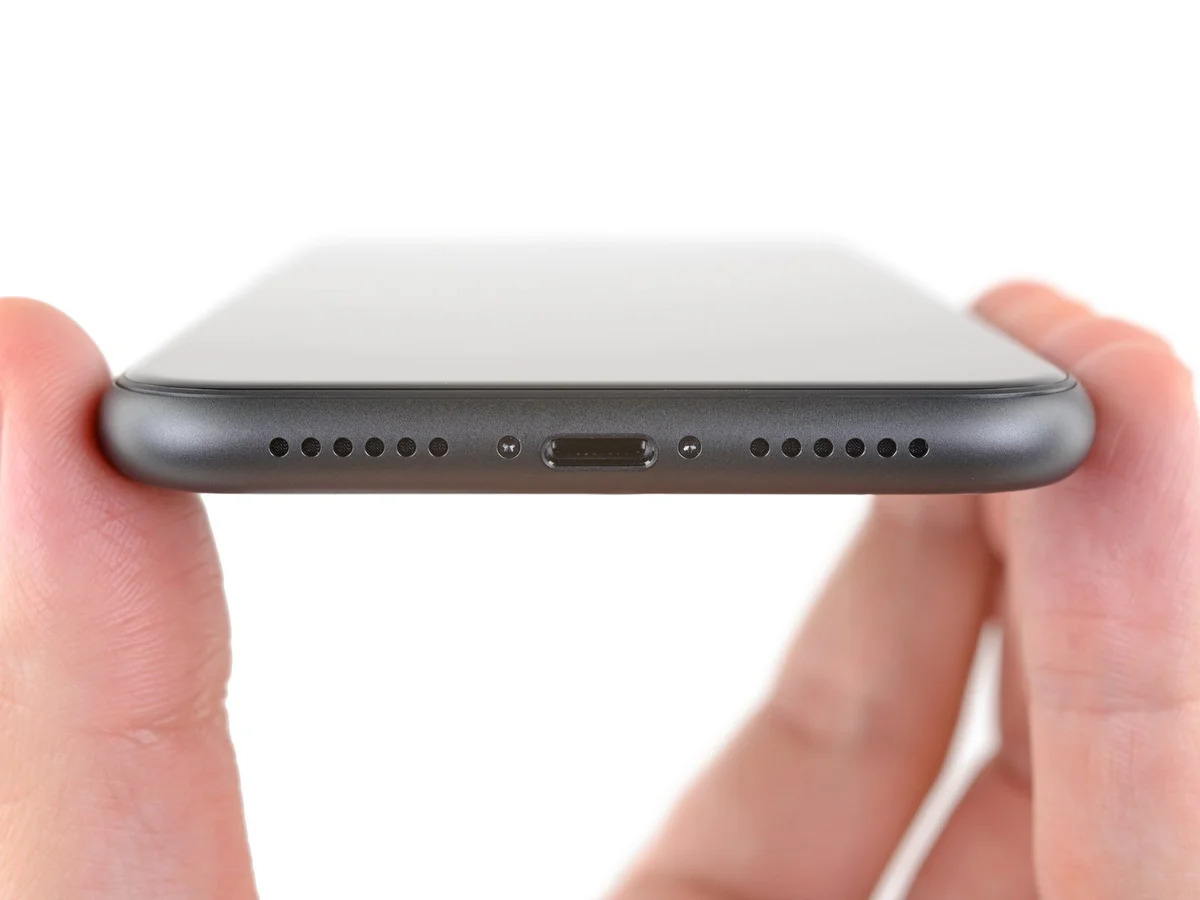
- As a preliminary safety measure, ensure your iPhone's battery level drops below 25% prior to commencing the repair process.A fully charged lithium-ion batteryposes a significant fire hazard and potential explosion risk if it sustains accidental physical damage, such as a puncture.
- To prevent electrical shorts and ensure safety, completely de-energize the iPhone by powering it down before starting the disassembly procedure.
- Using a suitable screwdriver, unscrew and remove the pair of pentalobe P2 screws, each measuring 6.7 mm in length, which secure the bottom edge of the iPhone's enclosure.
- Separating the iPhone's display assembly from the chassis will inevitably damage the integrated waterproof barriers; therefore, prepare replacement seals beforehand to maintain water resistance, or exercise extreme caution to prevent liquid ingress if you intend to reassemble the iPhone without new seals.
Step 2 | Mark your opening picks


- To avoid potential harm to your device, ensure the opening pick does not extend beyond a safe depth; this procedure details how to identify that limit on the pick itself.
- Determine the distance of3 mmoriginating from the pick's pointed end, and use a permanent marker to create a visible indicator on the opening pick.
- For enhanced precision, consider marking the other edges of the pick with varying measurements as well.
- As an alternative method, affix a coin to the pick's shaft,3 mmaway from its tip.
Step 3 | Tape over any cracks


- To minimize additional damage and potential injury while repairing a fractured iPhone display, secure the glass fragments with tape.
- Apply multiple, overlapping layers of transparent packing tape across the entire iPhone screen surface.
- Always utilize eye protection, specifically safety glasses, to guard against glass shards that may become dislodged during the repair process.
- Should the suction cup fail to adhere adequately during subsequent procedures, create a handle by folding a durable tape, like duct tape, and employ it to gently raise the screen.
- As a last resort, secure the suction cup to the screen's surface using superglue.
Step 4 | Anti-Clamp instructions


- The following three procedures illustrate the function of the Anti-Clamp, a specialized tool developed to simplify the initial opening process; if you choose not to utilize this tool, proceed past these three steps to an alternative approach.
- Detailed instructions regarding the Anti-Clamp's operation can be found in a separate, dedicated guide.
- Grasp theblue handleand move it in a rearward direction to disengage the Anti-Clamp's gripping arms.
- Carefully position the arms across either the left or right side of your iPhone.
- Place the suction cups in close proximity to the lower edge of the iPhone, with one positioned at the top and the other at the bottom.
- Apply pressure by compressing the cups together to establish a secure suction hold on the intended area.
- Should the iPhone's surface prove excessively slick, preventing the Anti-Clamp from maintaining a firm grip, applying adhesive tape can create a more textured surface for improved adhesion.
Step 5


- To engage the locking mechanism, draw the blue handlein a forward direction.
- Rotate the handlethrough a full 360-degree rotation, or continue until the suction cups begin to expand.
- Confirm that the suction cups maintain their parallel orientation; should they become misaligned, gently release the suction cups and reposition the arms.
Step 6


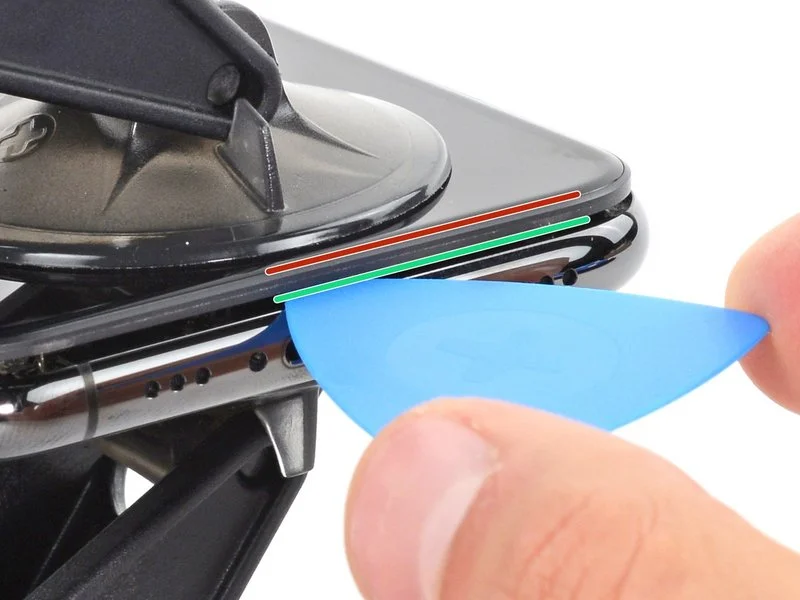
Employ heat using aniOpenerand carefully guide it between the arms of the Anti-Clamp device.
Alternative heat sources, such as a hair dryer, heat gun, or hot plate, are acceptable; however, excessive heat poses a risk of damage to the display assembly and/or the internal battery, necessitating cautious operation.
Position theiOpenerin a folded configuration so that it rests along the lower edge of the iPhone.
Allow a sixty-second interval to permit the adhesive to soften and create a separation.
Introduce an opening pick into the created space located beneath the screen and the plastic bezel, ensuring it does not contact the screen directly.
Should the Anti-Clamp fail to establish an adequate separation, increase the heat applied to the region and rotate the handle by ninety degrees.
Avoid incremental rotations exceeding ninety degrees, and incorporate a sixty-second pause between each adjustment; allow the Anti-Clamp and time to facilitate the separation process.
Omit the subsequent three procedural steps.
Step 7 | Heat the lower edge of the phone
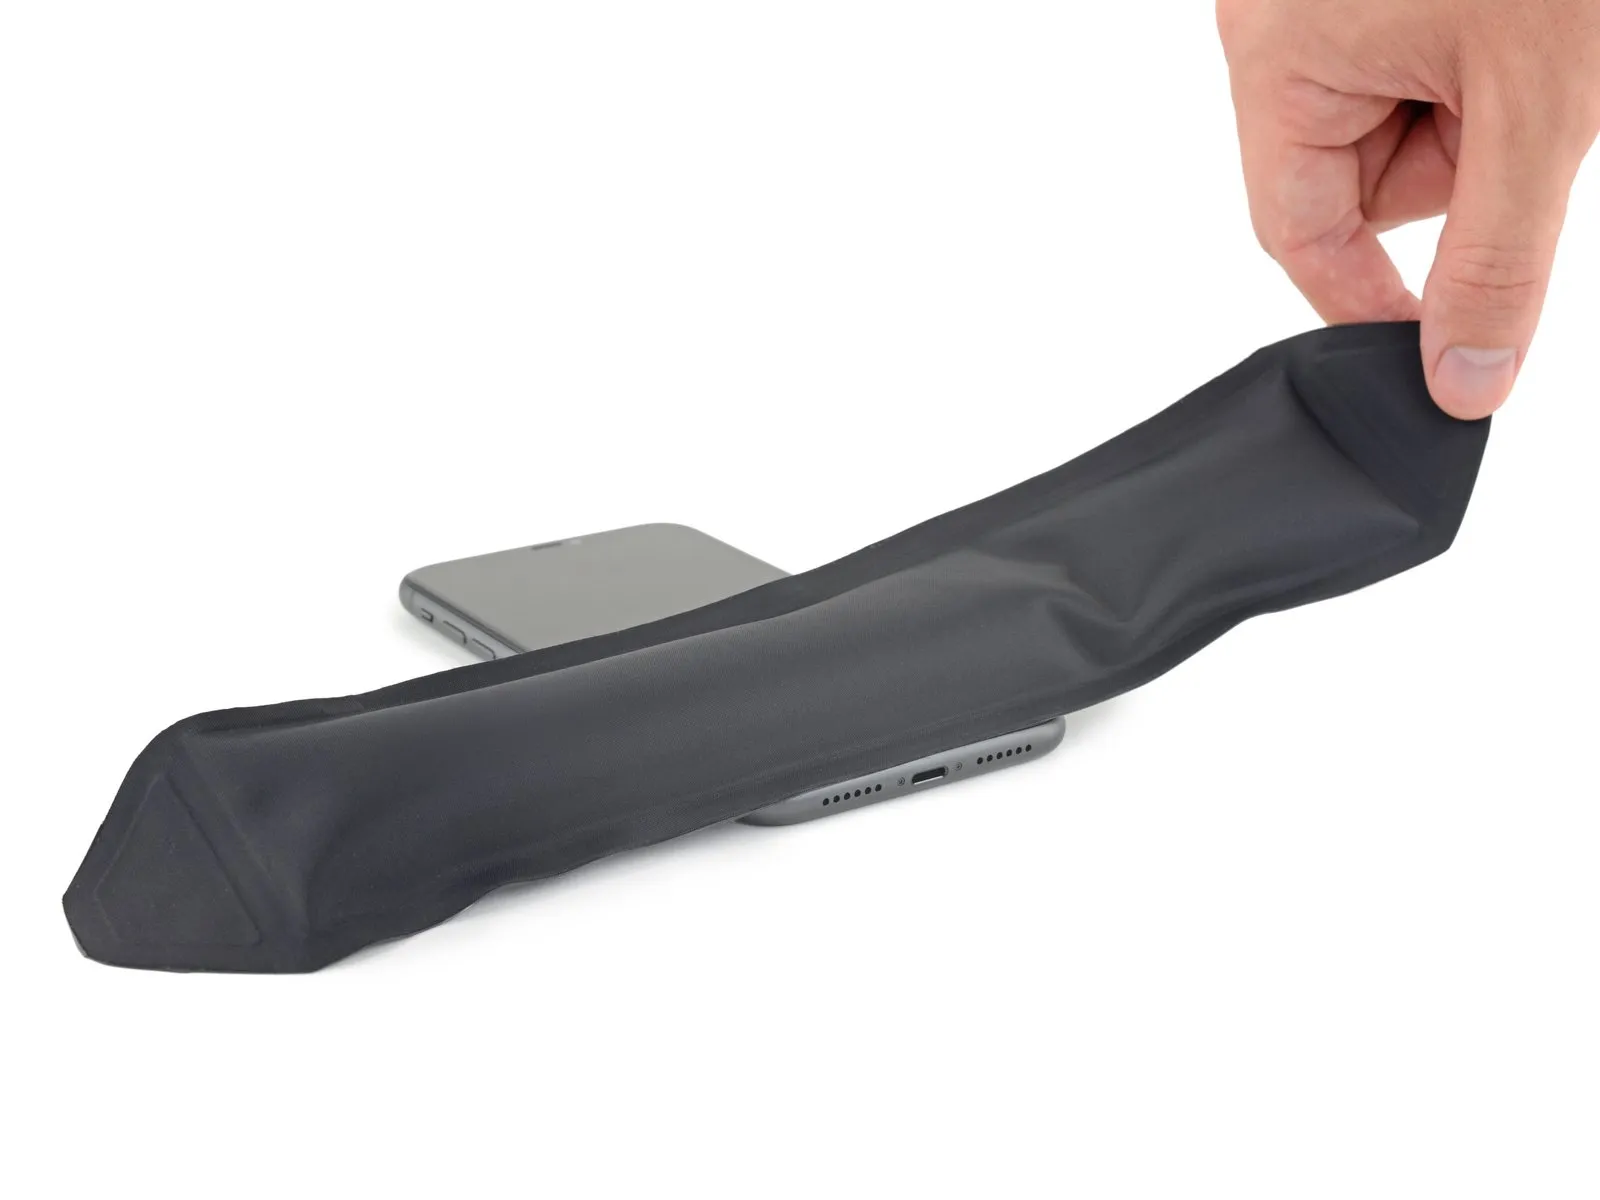
Applying warmth to the iPhone's bottom perimeter assists in loosening the adhesive that holds the display in place, which simplifies the opening process.
Employing a hairdryer, heat gun, or utilizing an iOpener is recommended, followed by directing heat towards the iPhone's lower edge for approximately one minute.
Step 8
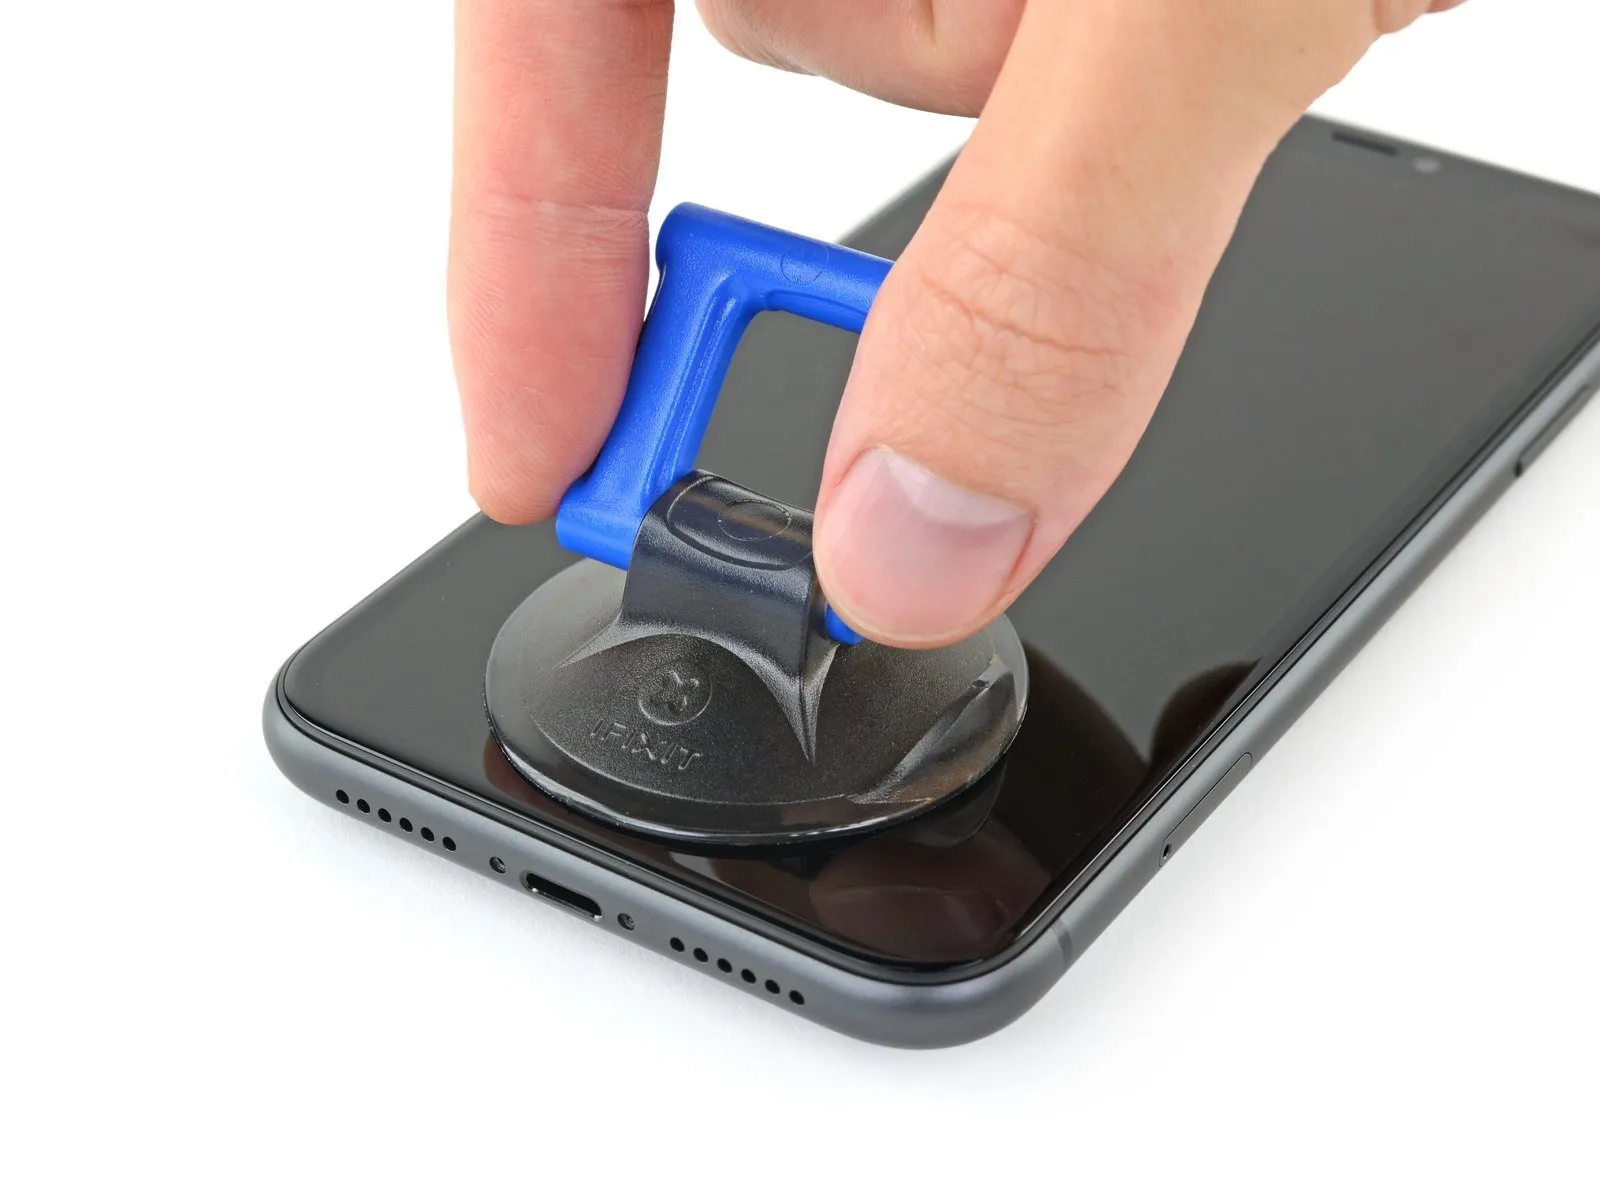
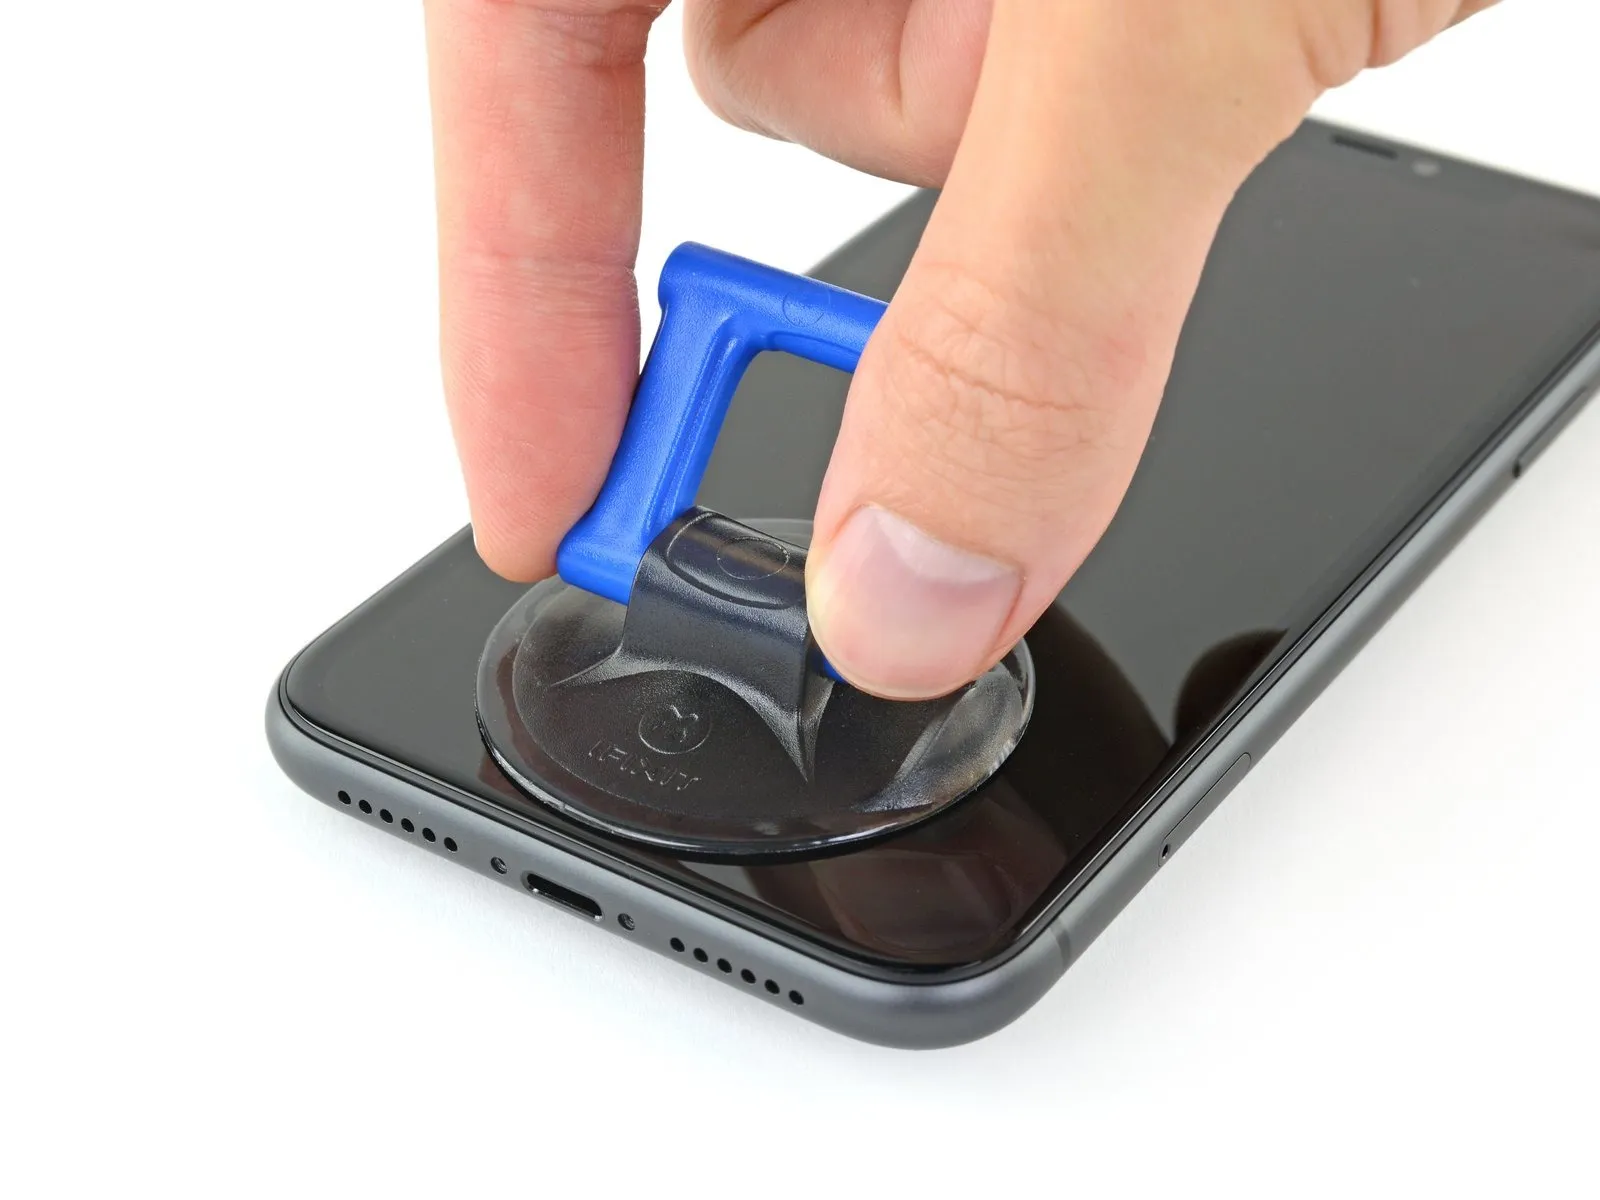
When employing a solitary suction handle, position it against the lower perimeter of the device's frame, ensuring it does not contact the rounded glass surface.
Step 9 | Lift the display slightly
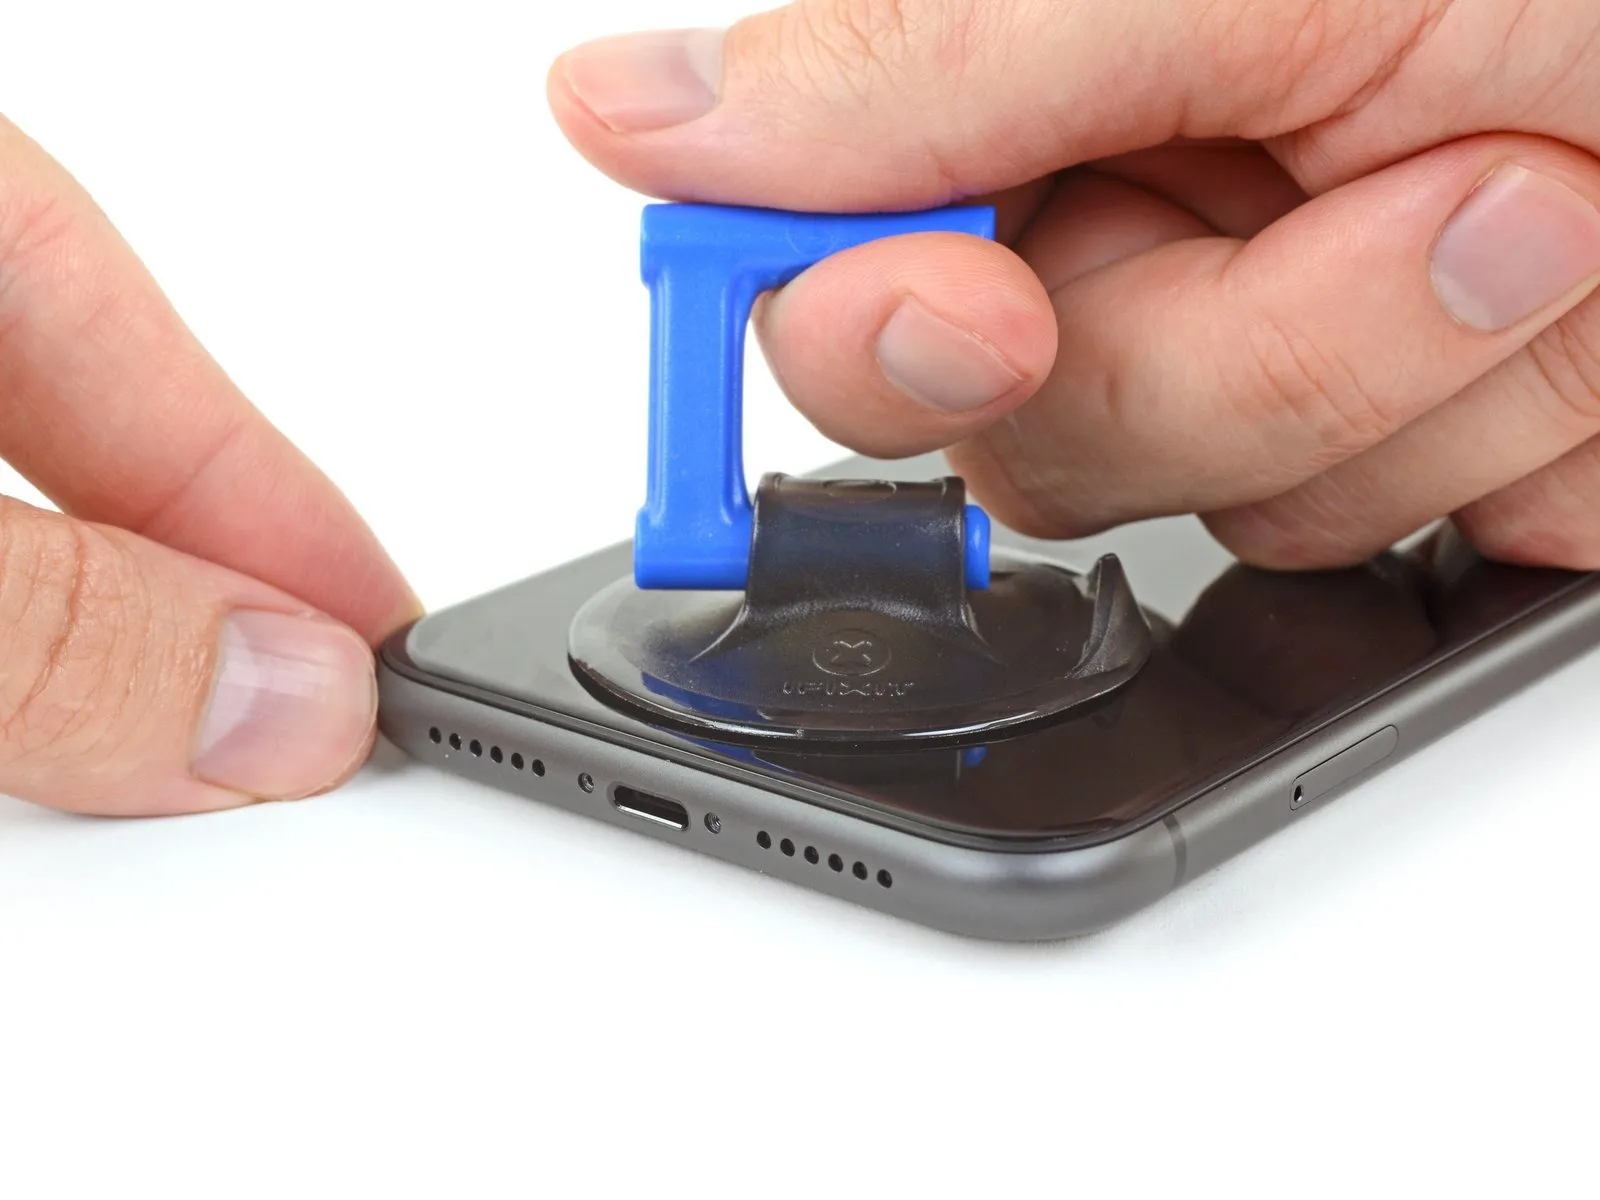
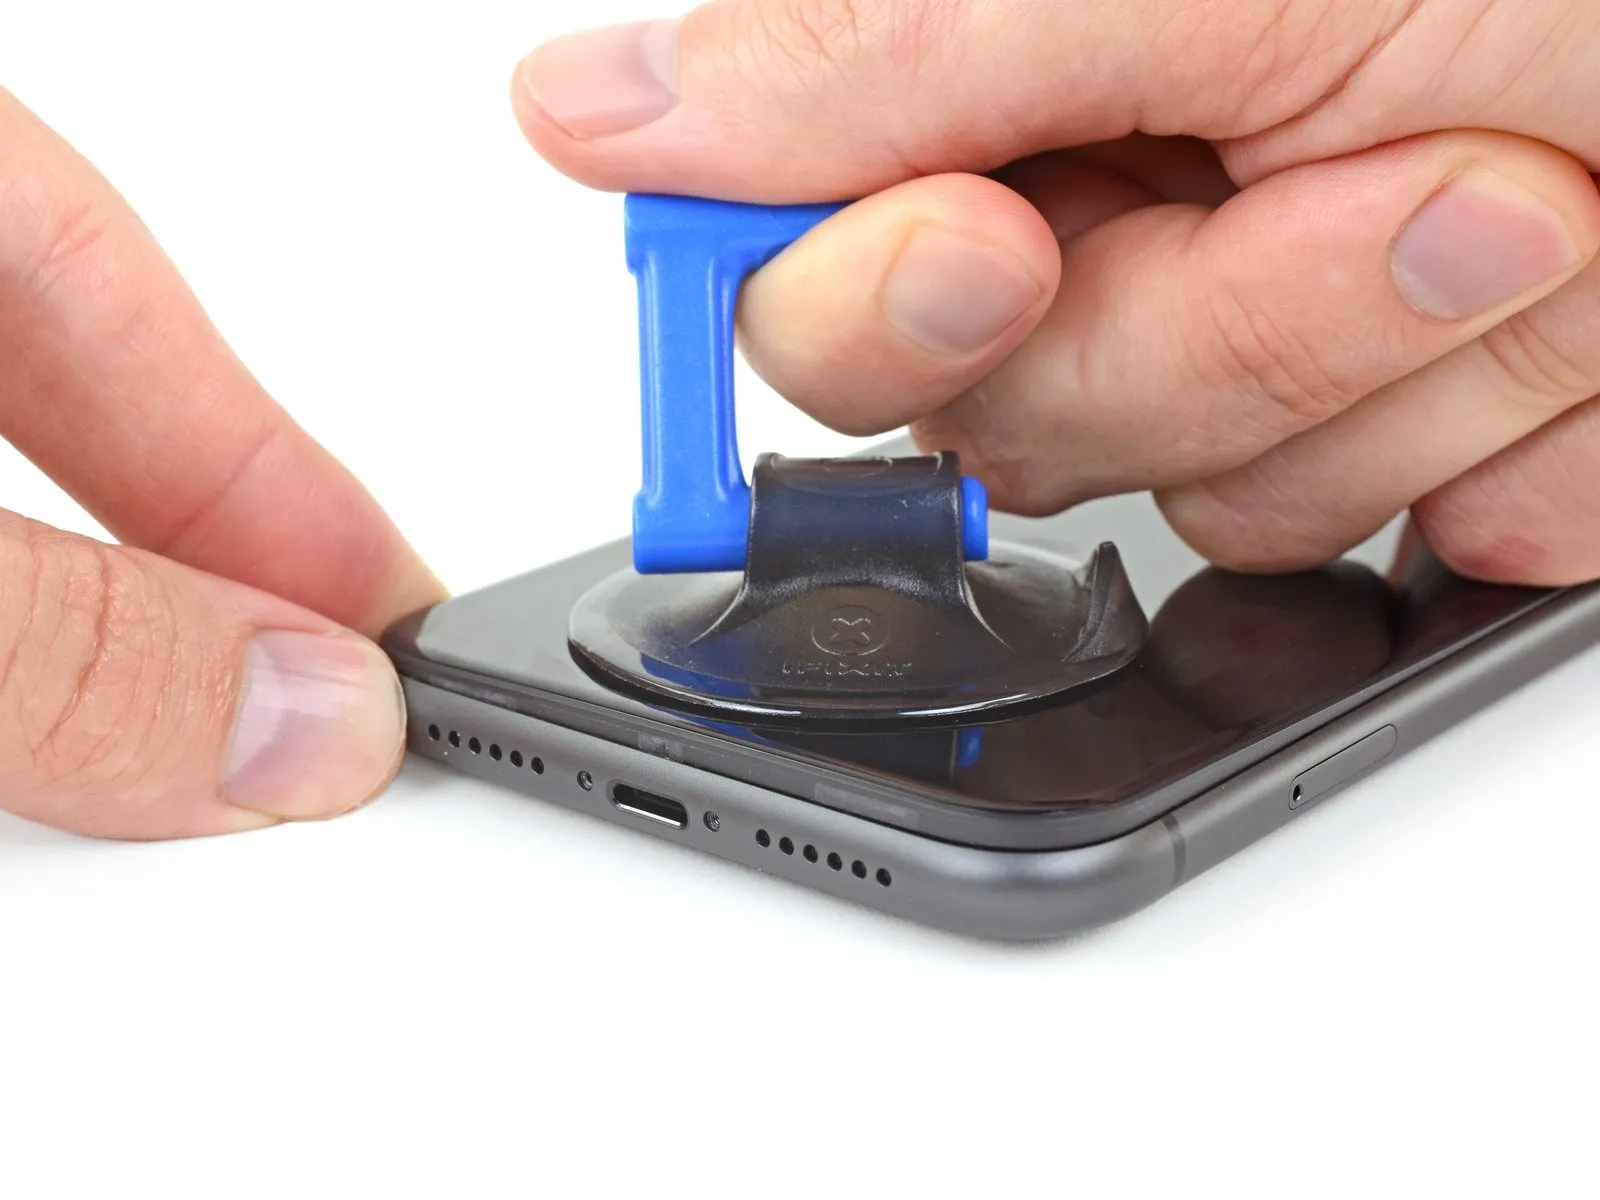
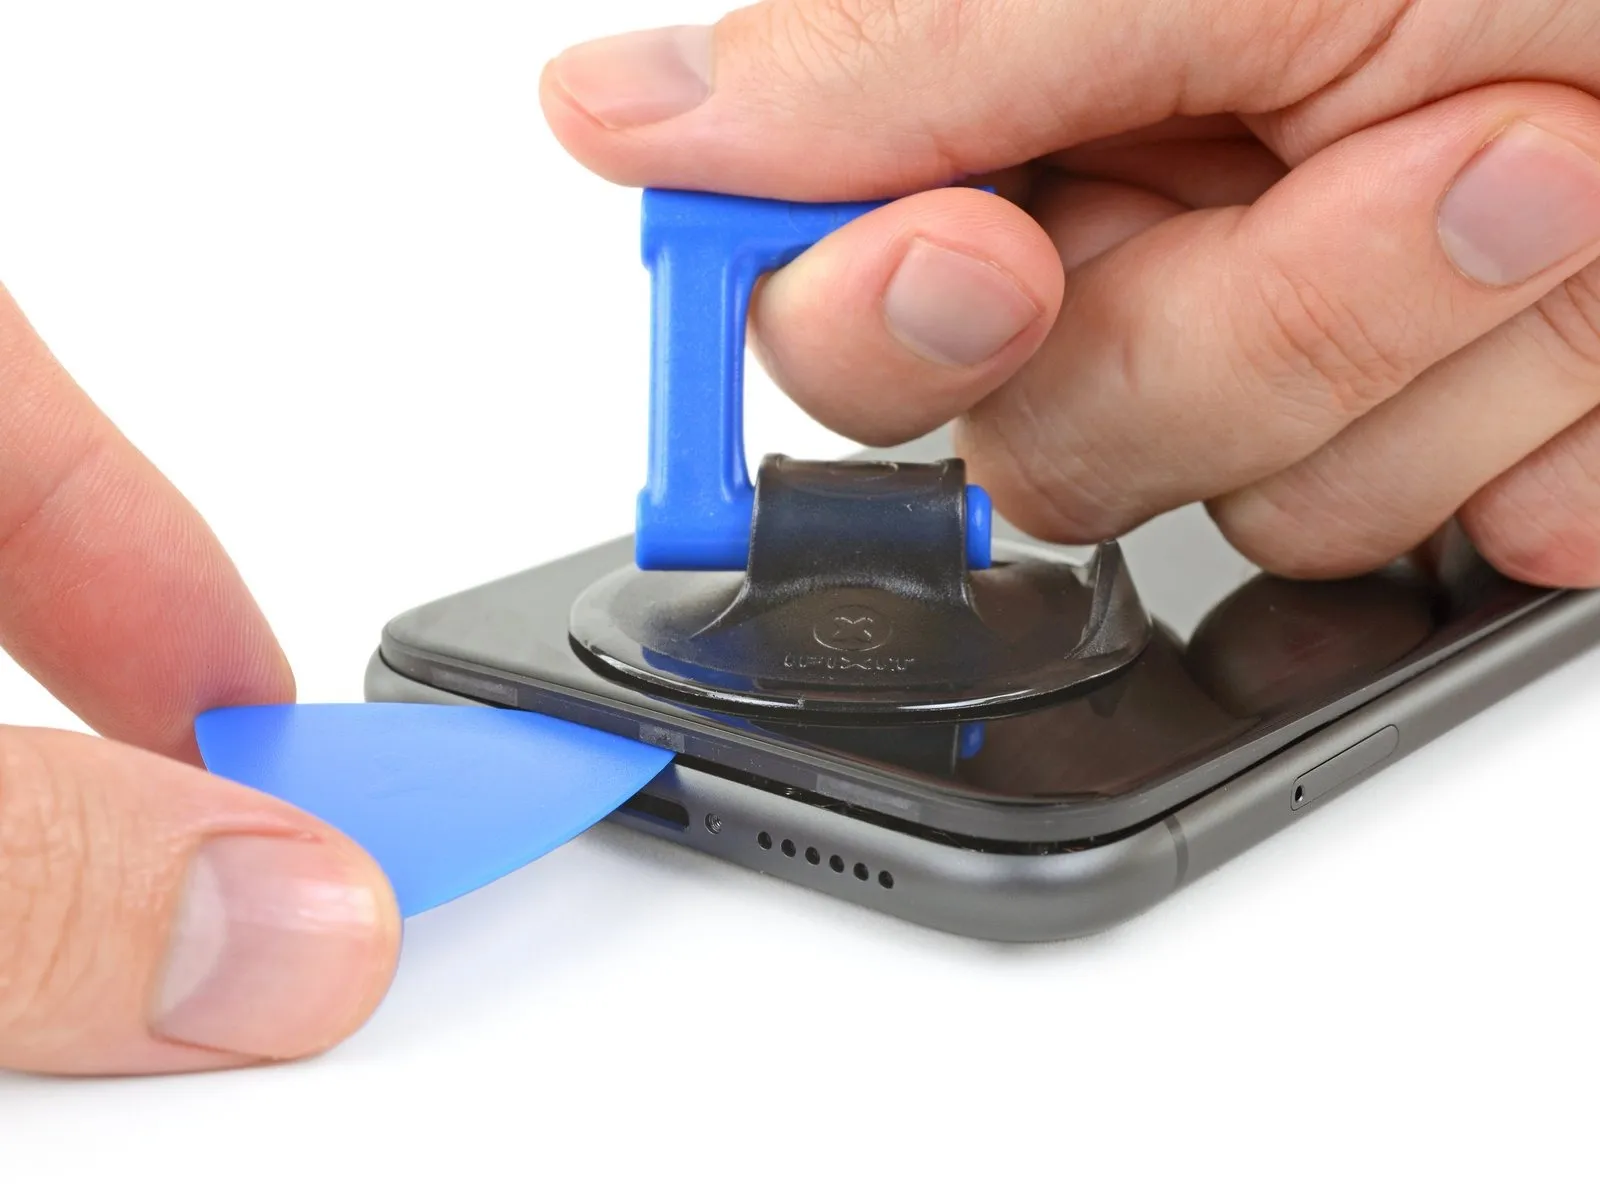
- Apply steady, forceful upward pressure to the suction cup to generate a small separation between the front panel assembly and the device's rear casing.
- Carefully slide an opening tool into the space formed beneath the display screen and the surrounding plastic trim, ensuring it does not contact the screen's surface directly.
- Due to the robust, waterproof adhesive securing the display, establishing this initial separation requires considerable force; should you encounter difficulty, apply additional heat and gently oscillate the screen in an upward and downward motion to reduce the adhesive's strength until a sufficient gap is achieved for tool insertion.
Step 10 | Separate the screen adhesive
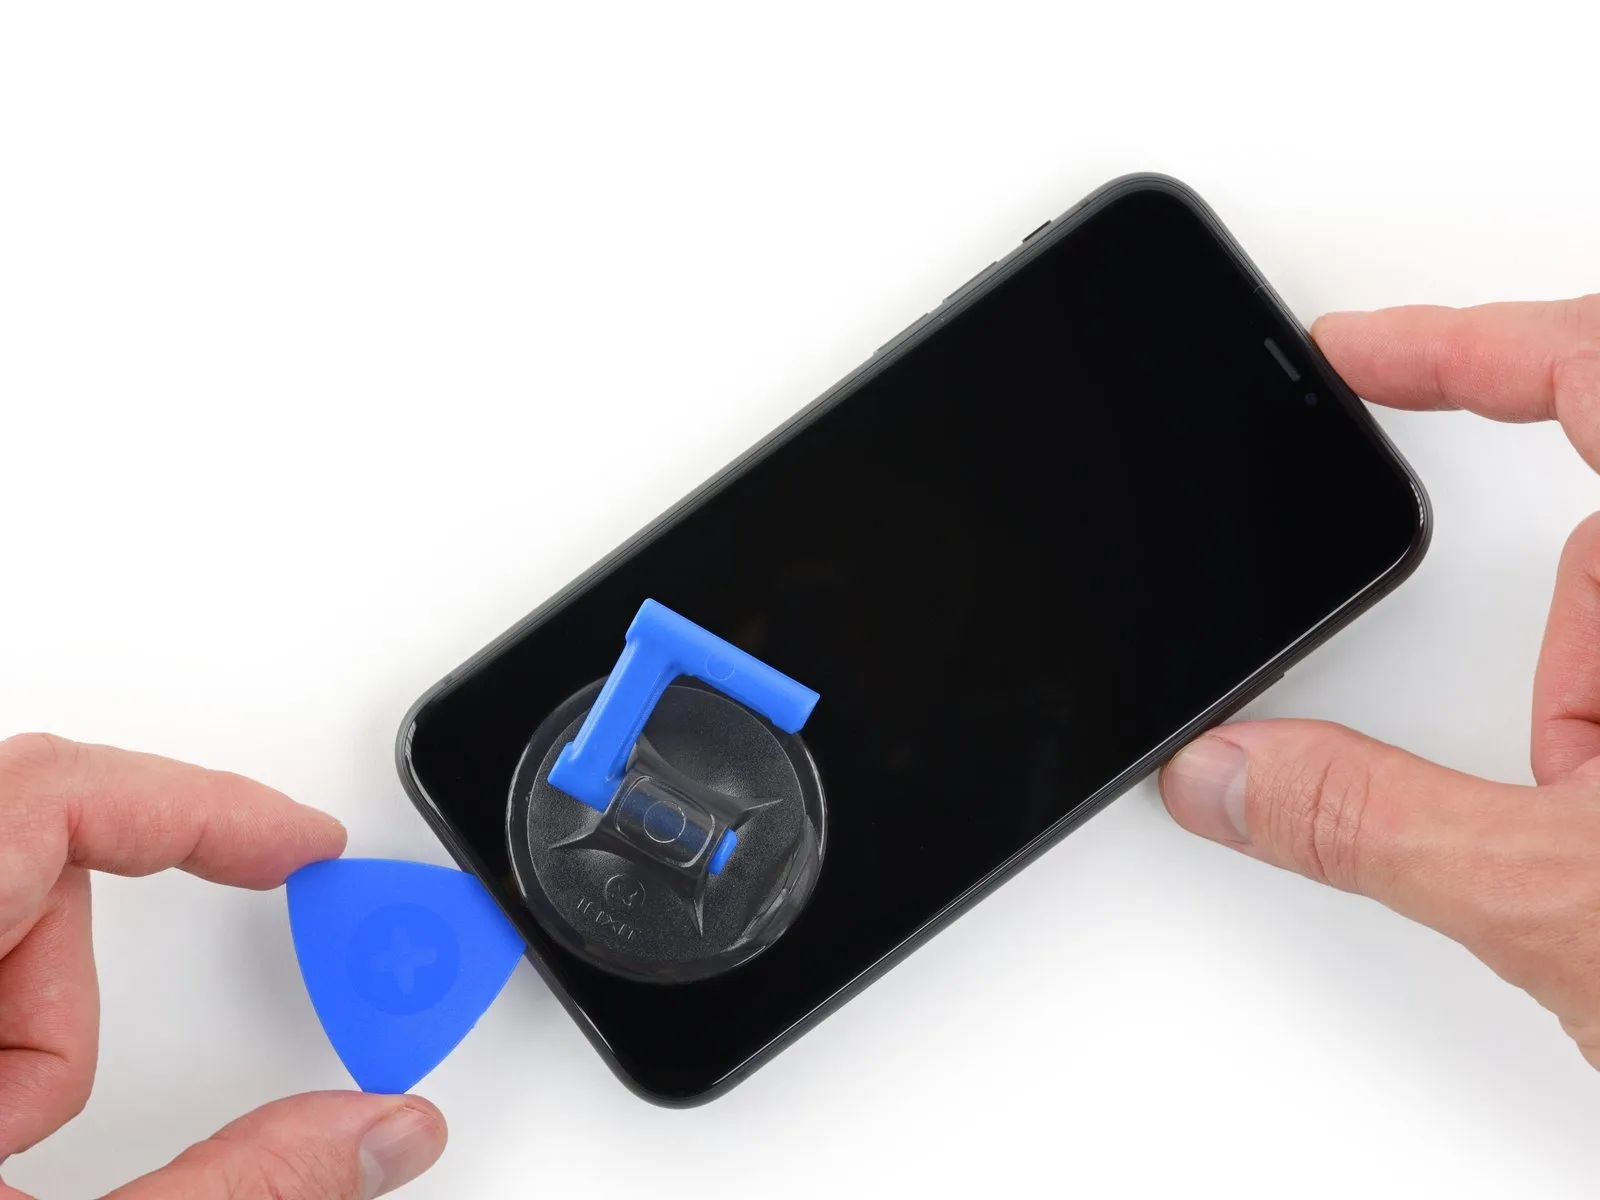
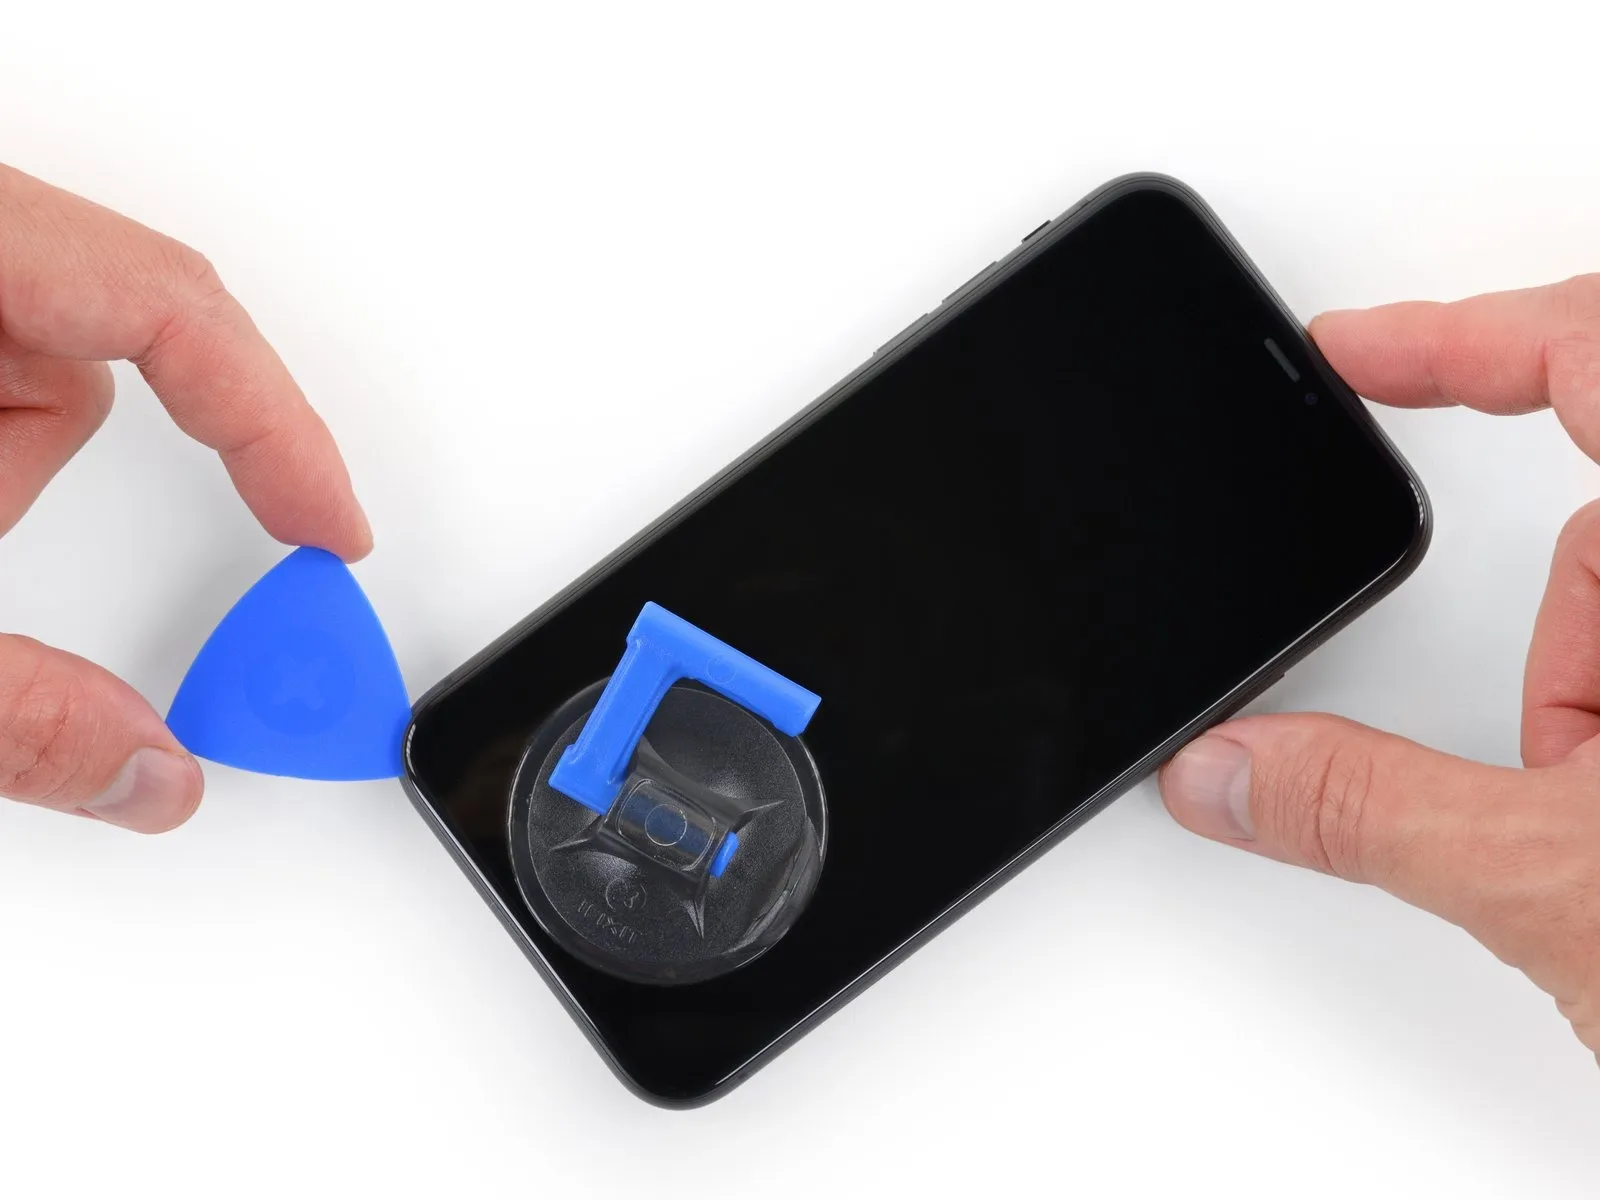
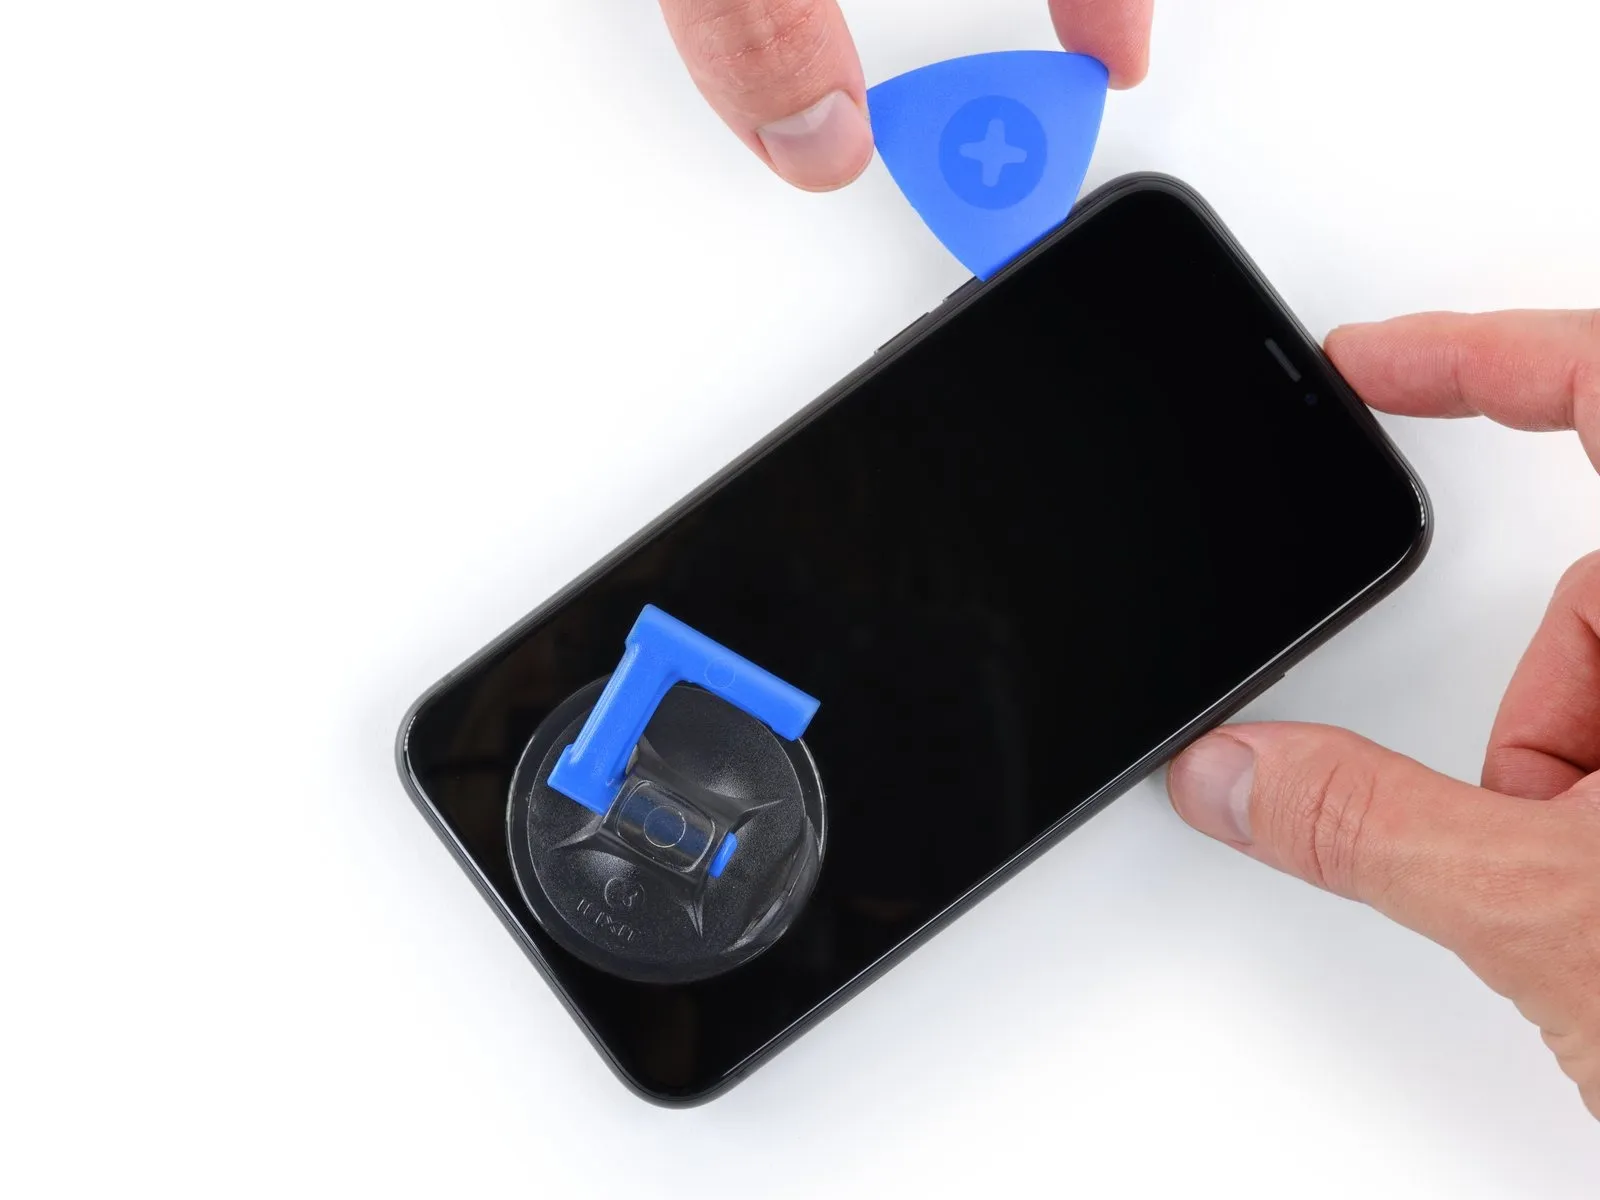
- Carefully maneuver the opening pick along the bottom-left perimeter of the iPhone, progressing upwards along the left side, to sever the adhesive securing the display assembly.
- Ensure the pick's insertion depth remains limited to3 mmto prevent potential harm to delicate internal parts.
Step 11 | Screen information
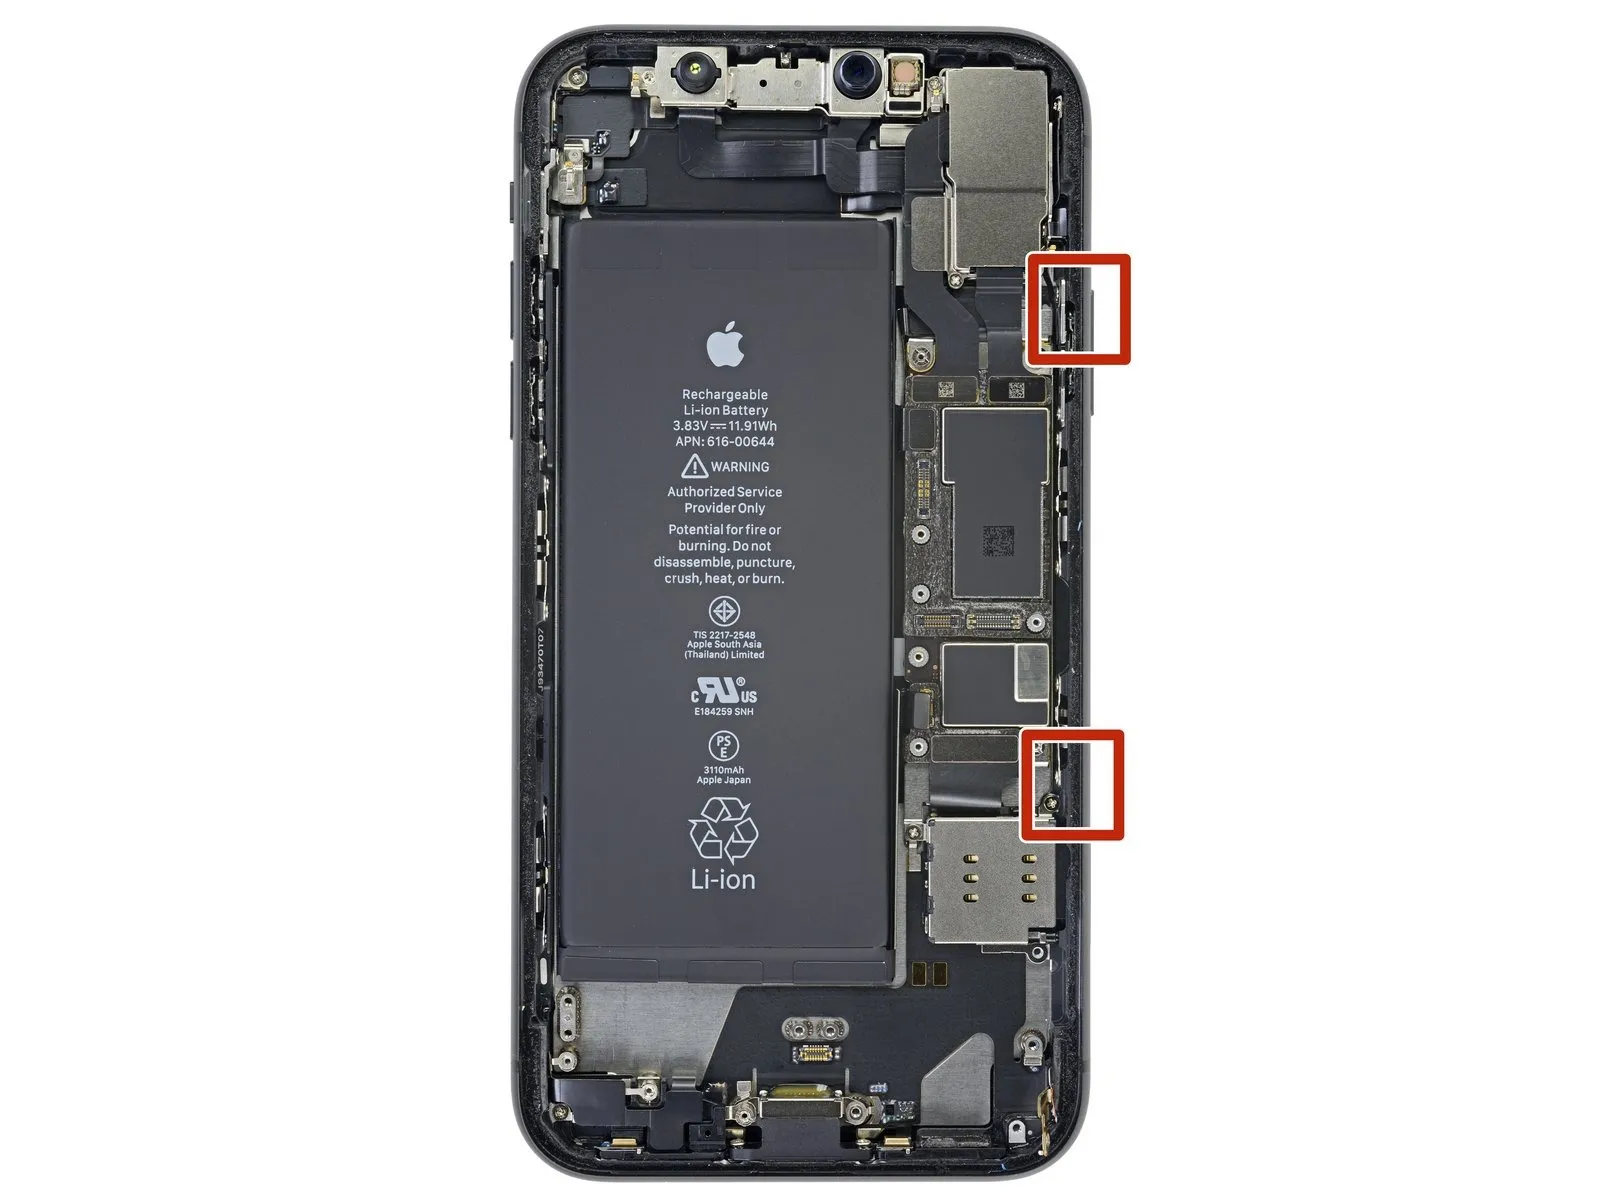
Fragile wiring is situated along the right-hand side of your iPhone; avoid inserting any tools in this area to prevent potential cable damage.
Step 12
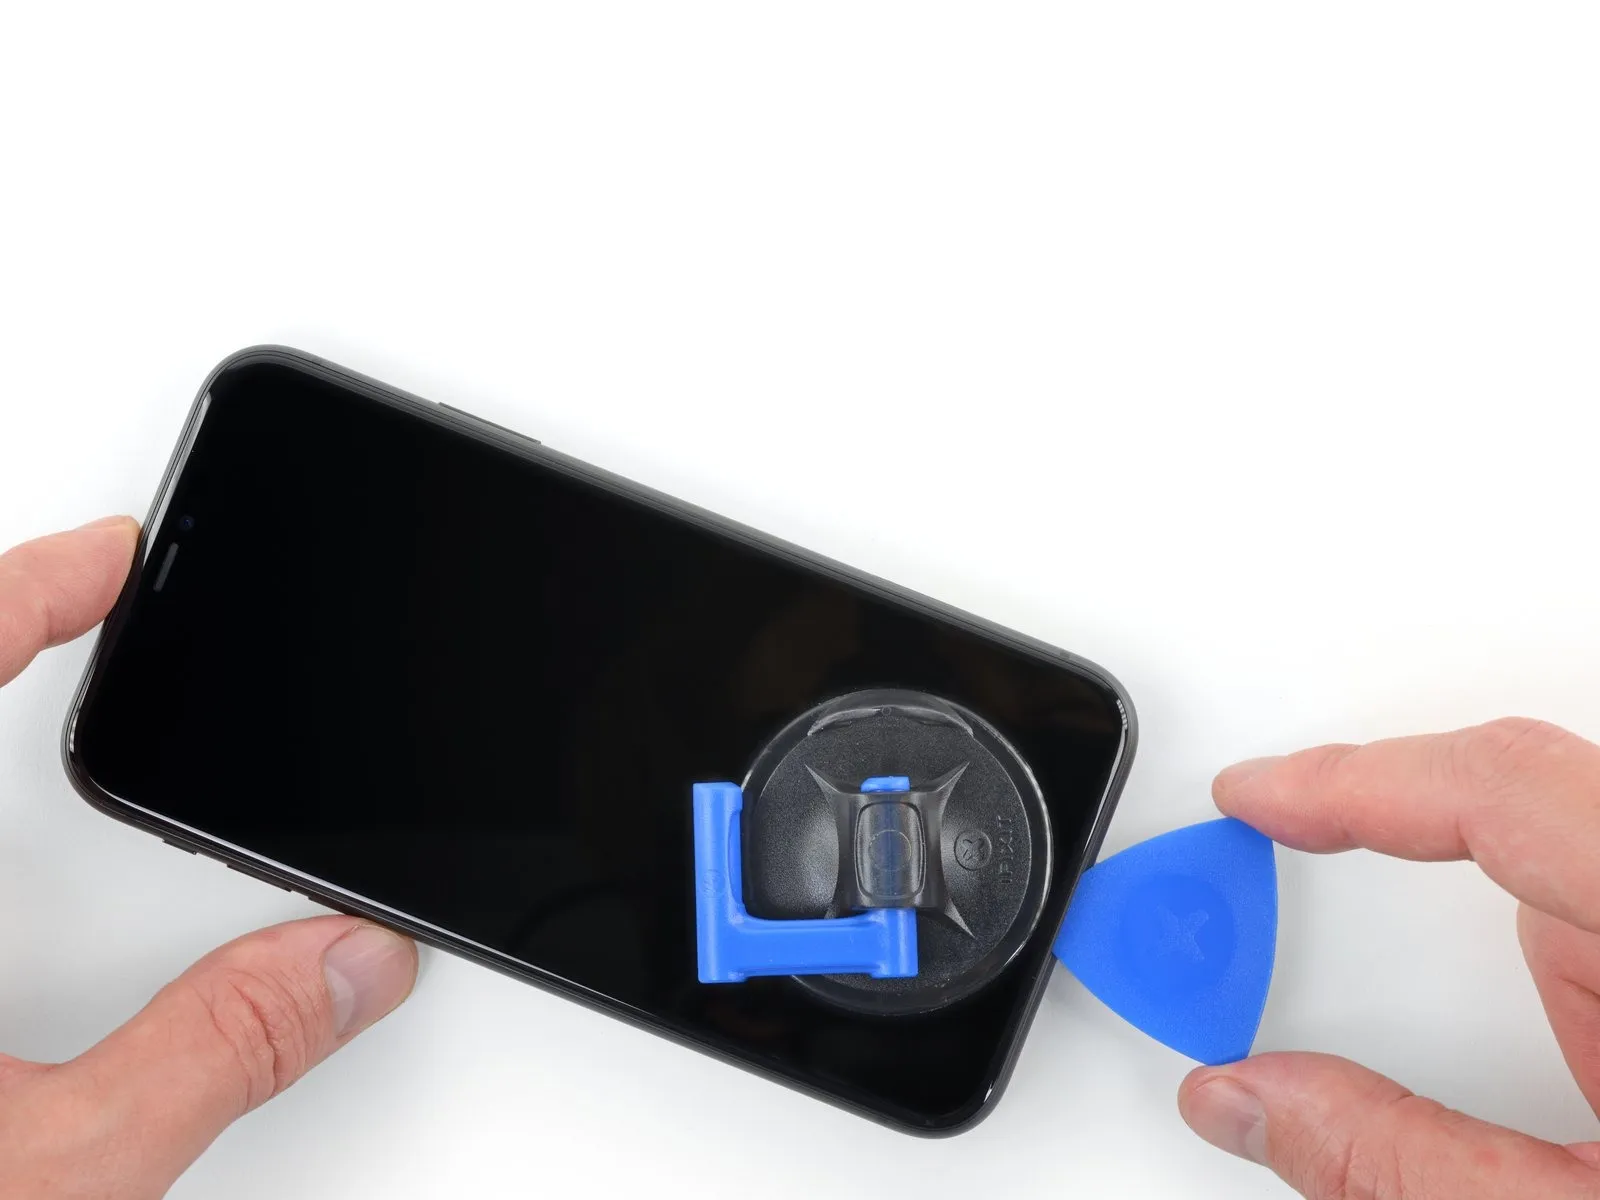
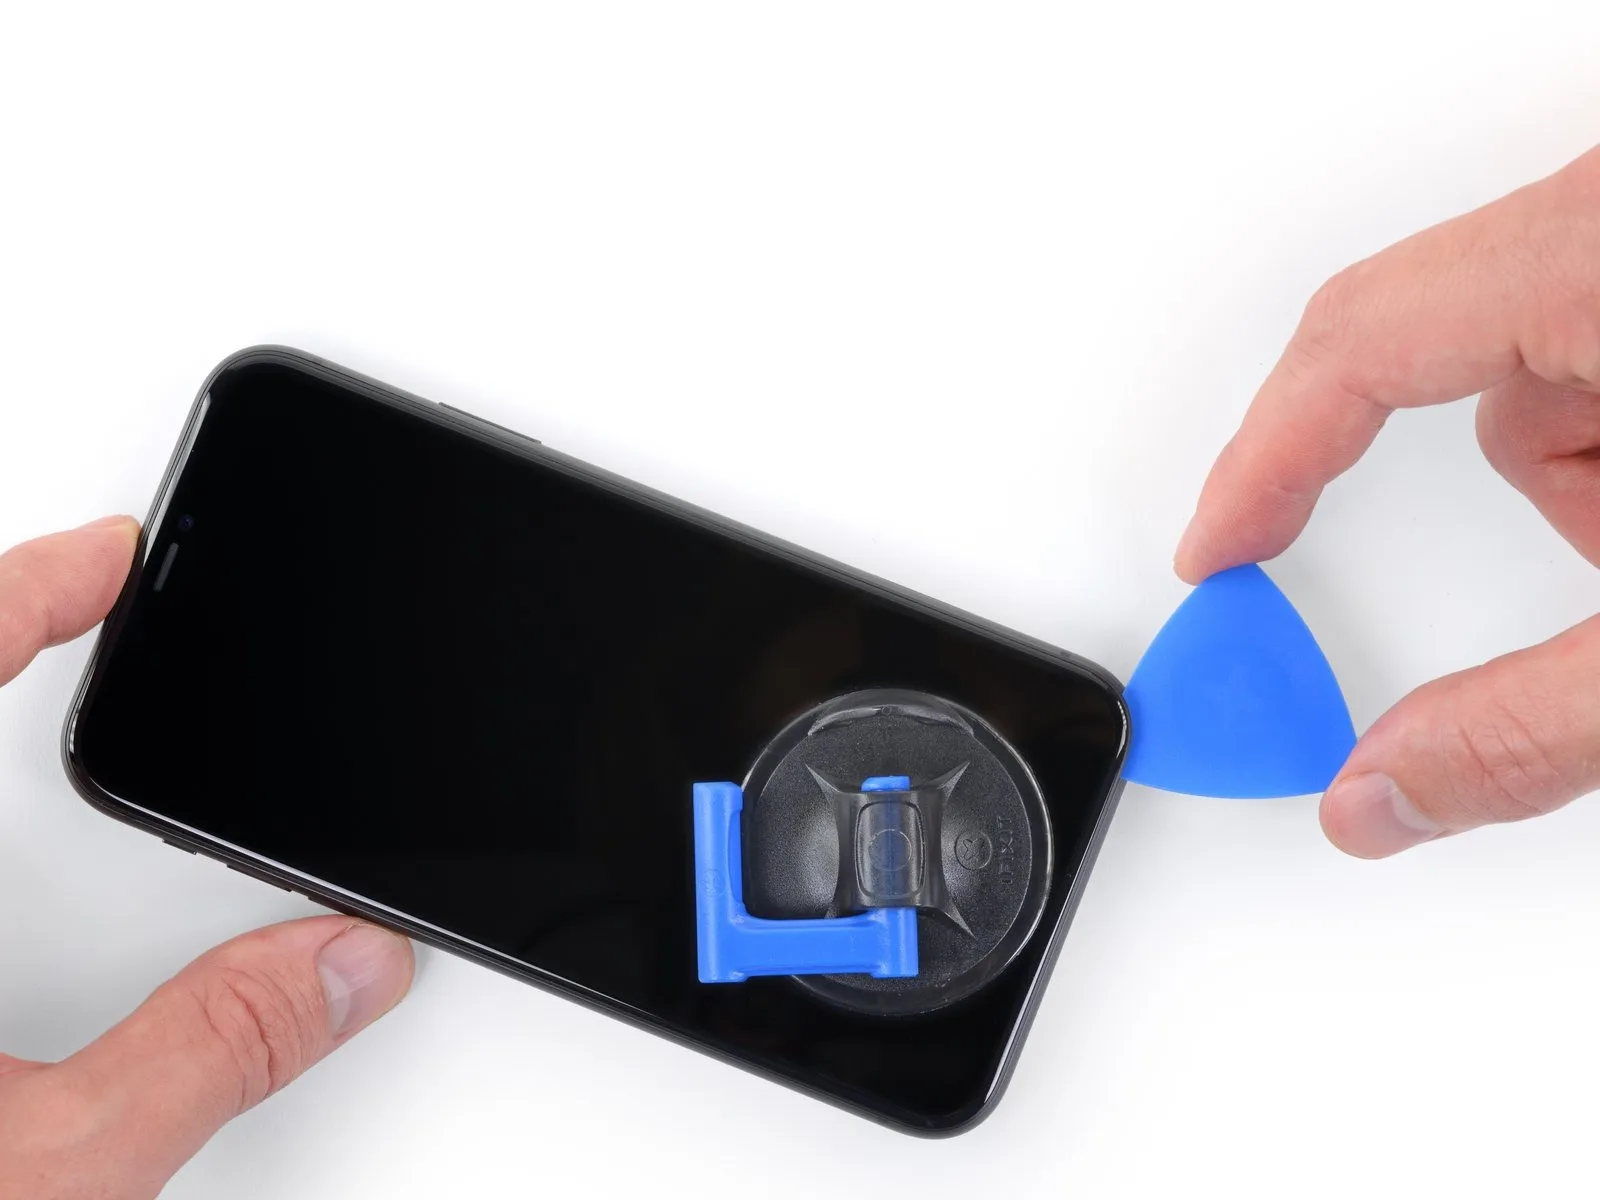
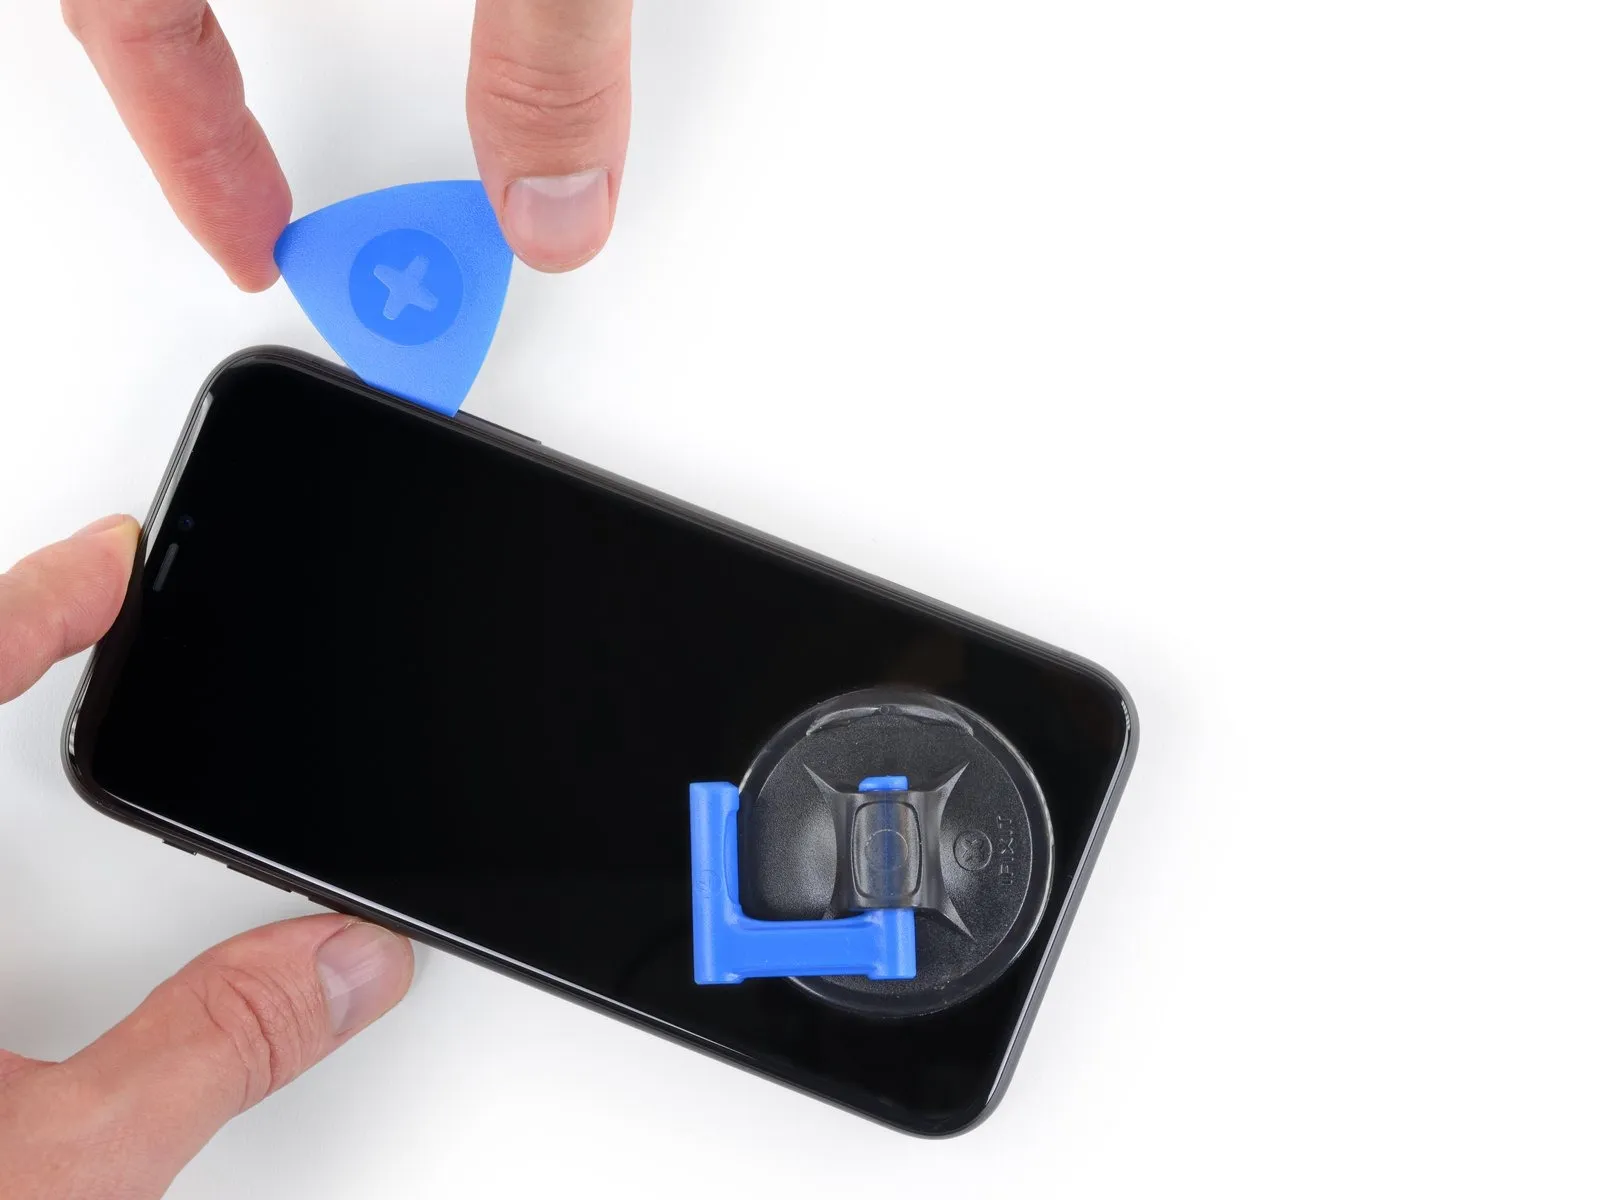
- To proceed with separating the adhesive, re-position your opening pick along the lower edge of the iPhone's casing, then slide it upwards along the right-hand side.
- Ensure your opening pick does not penetrate deeper than3 millimetersto prevent potential harm to the delicate display cable connections.
Step 13
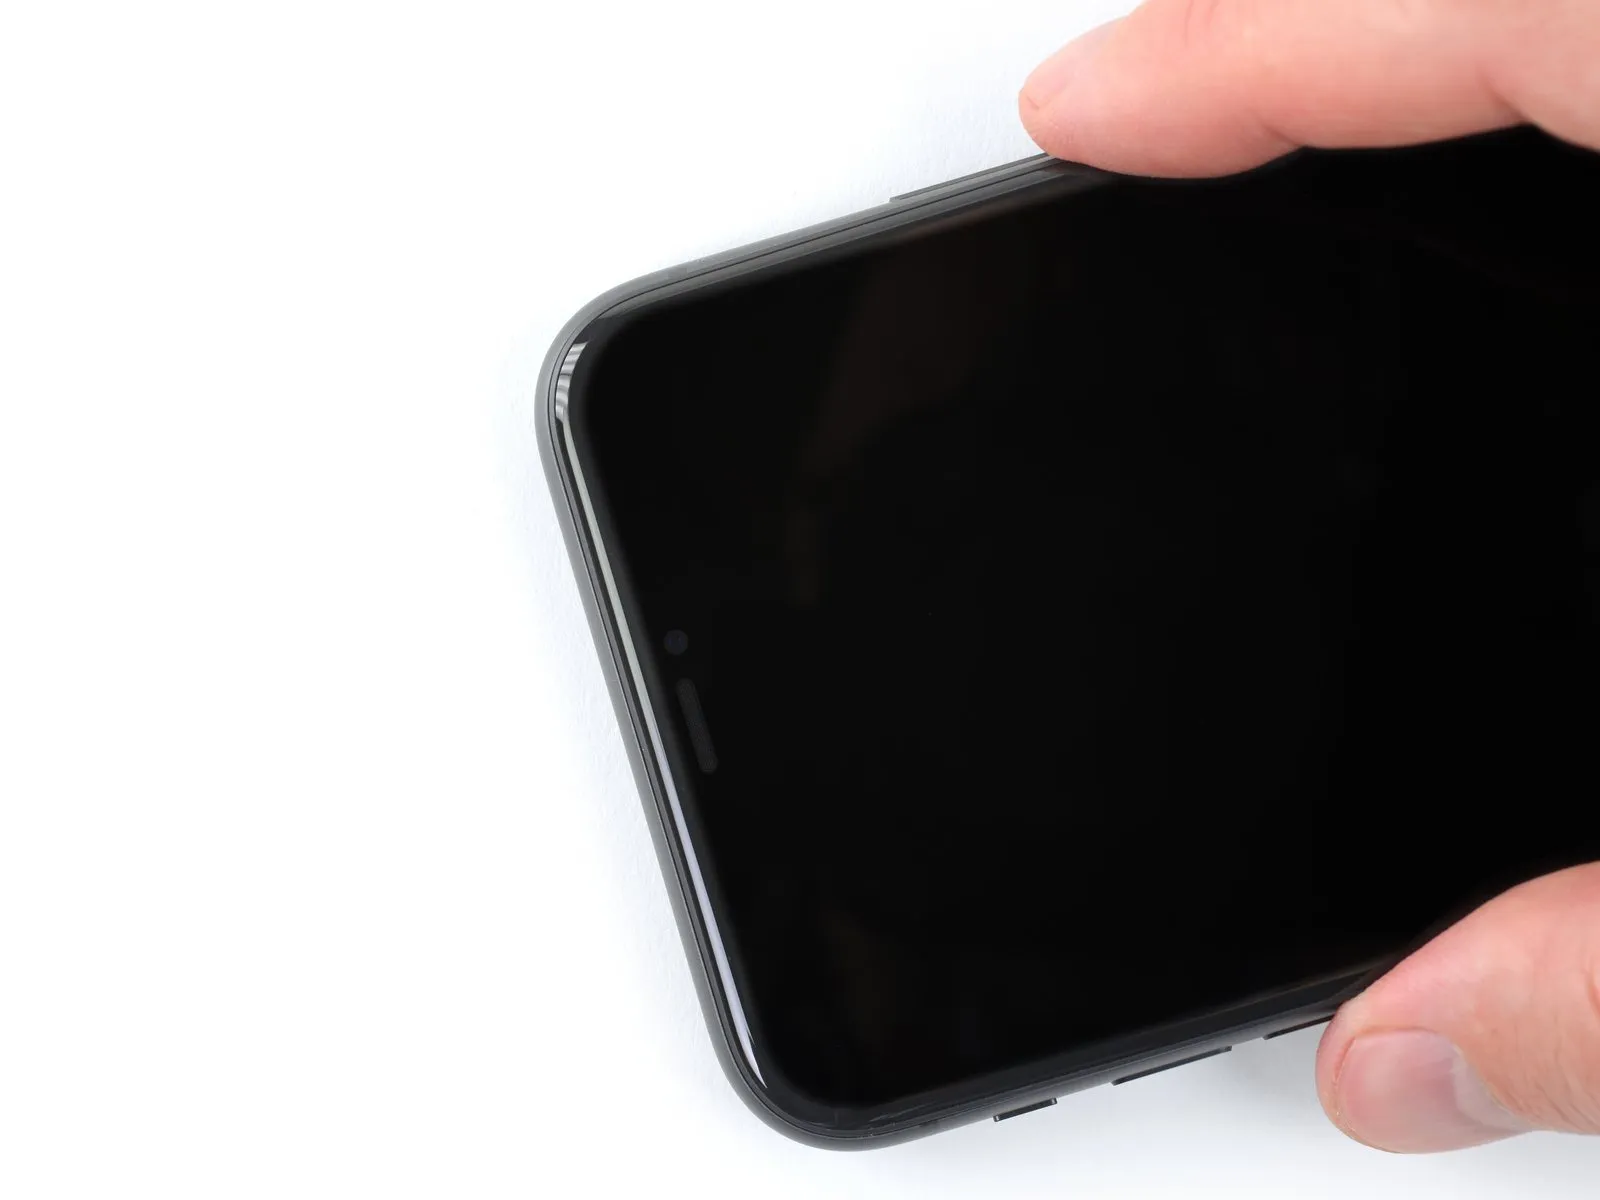
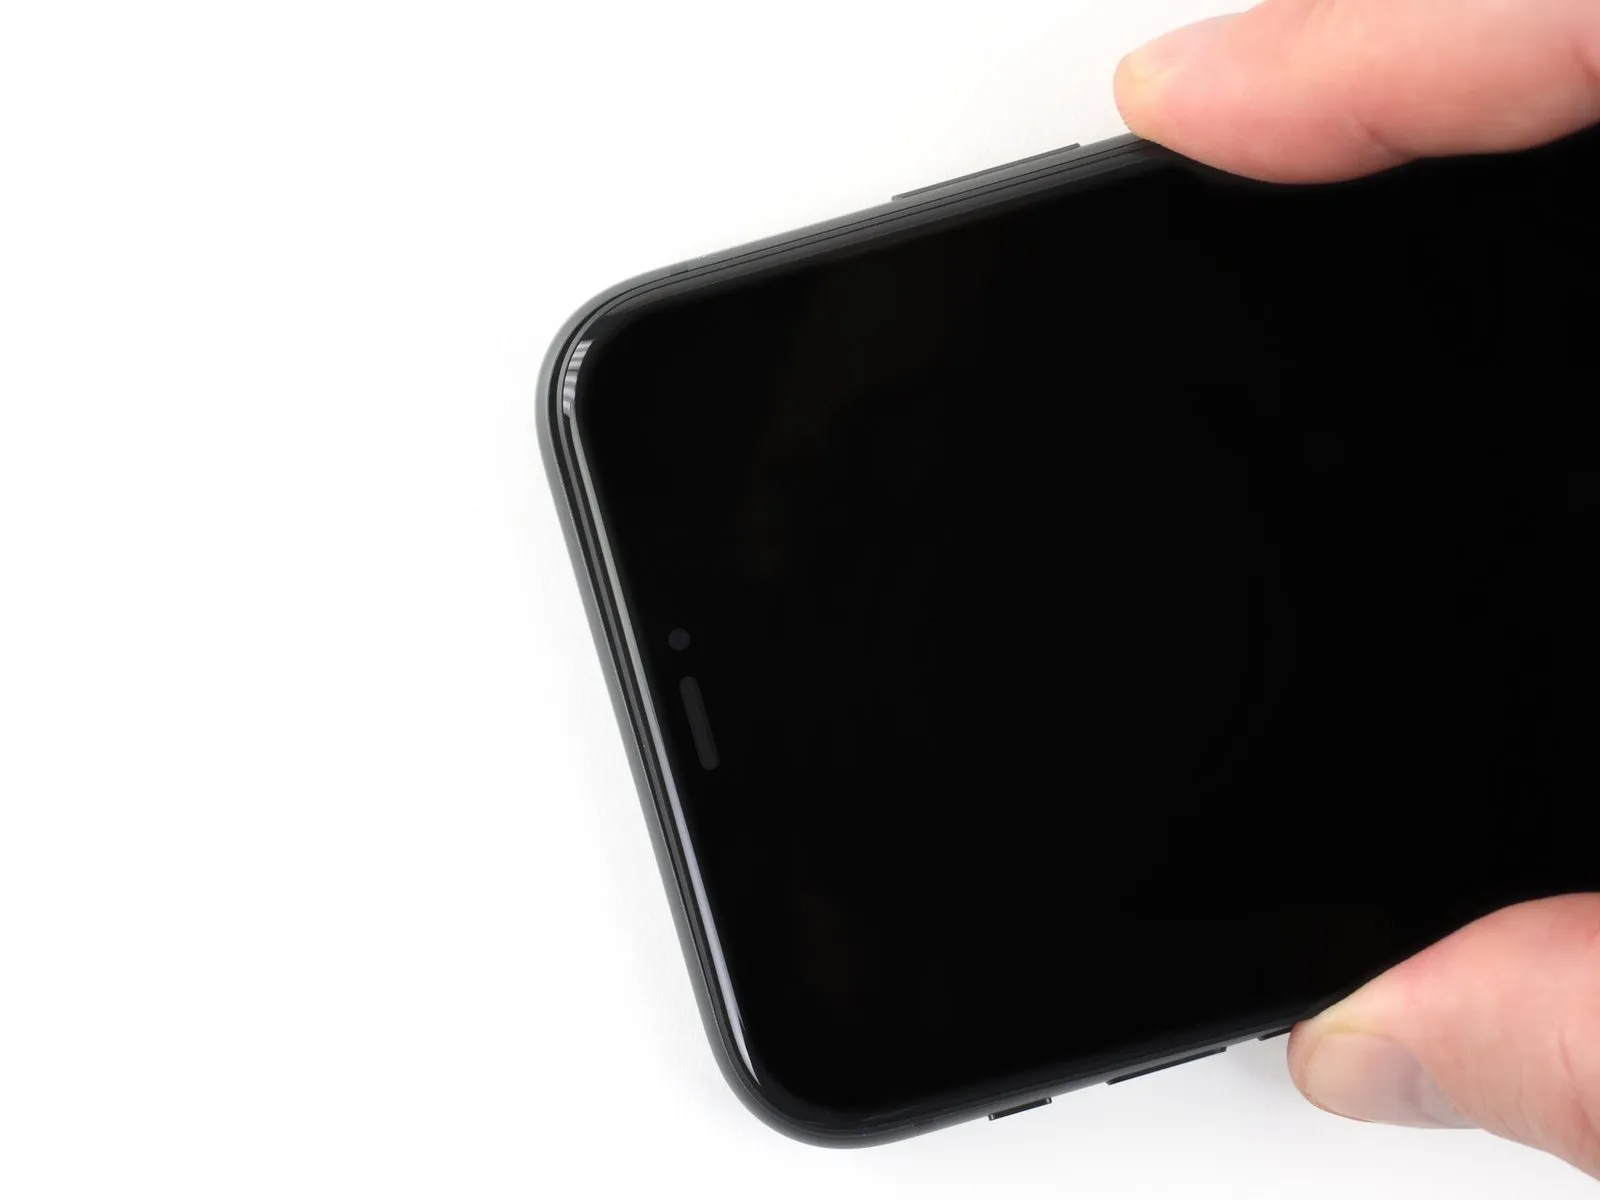
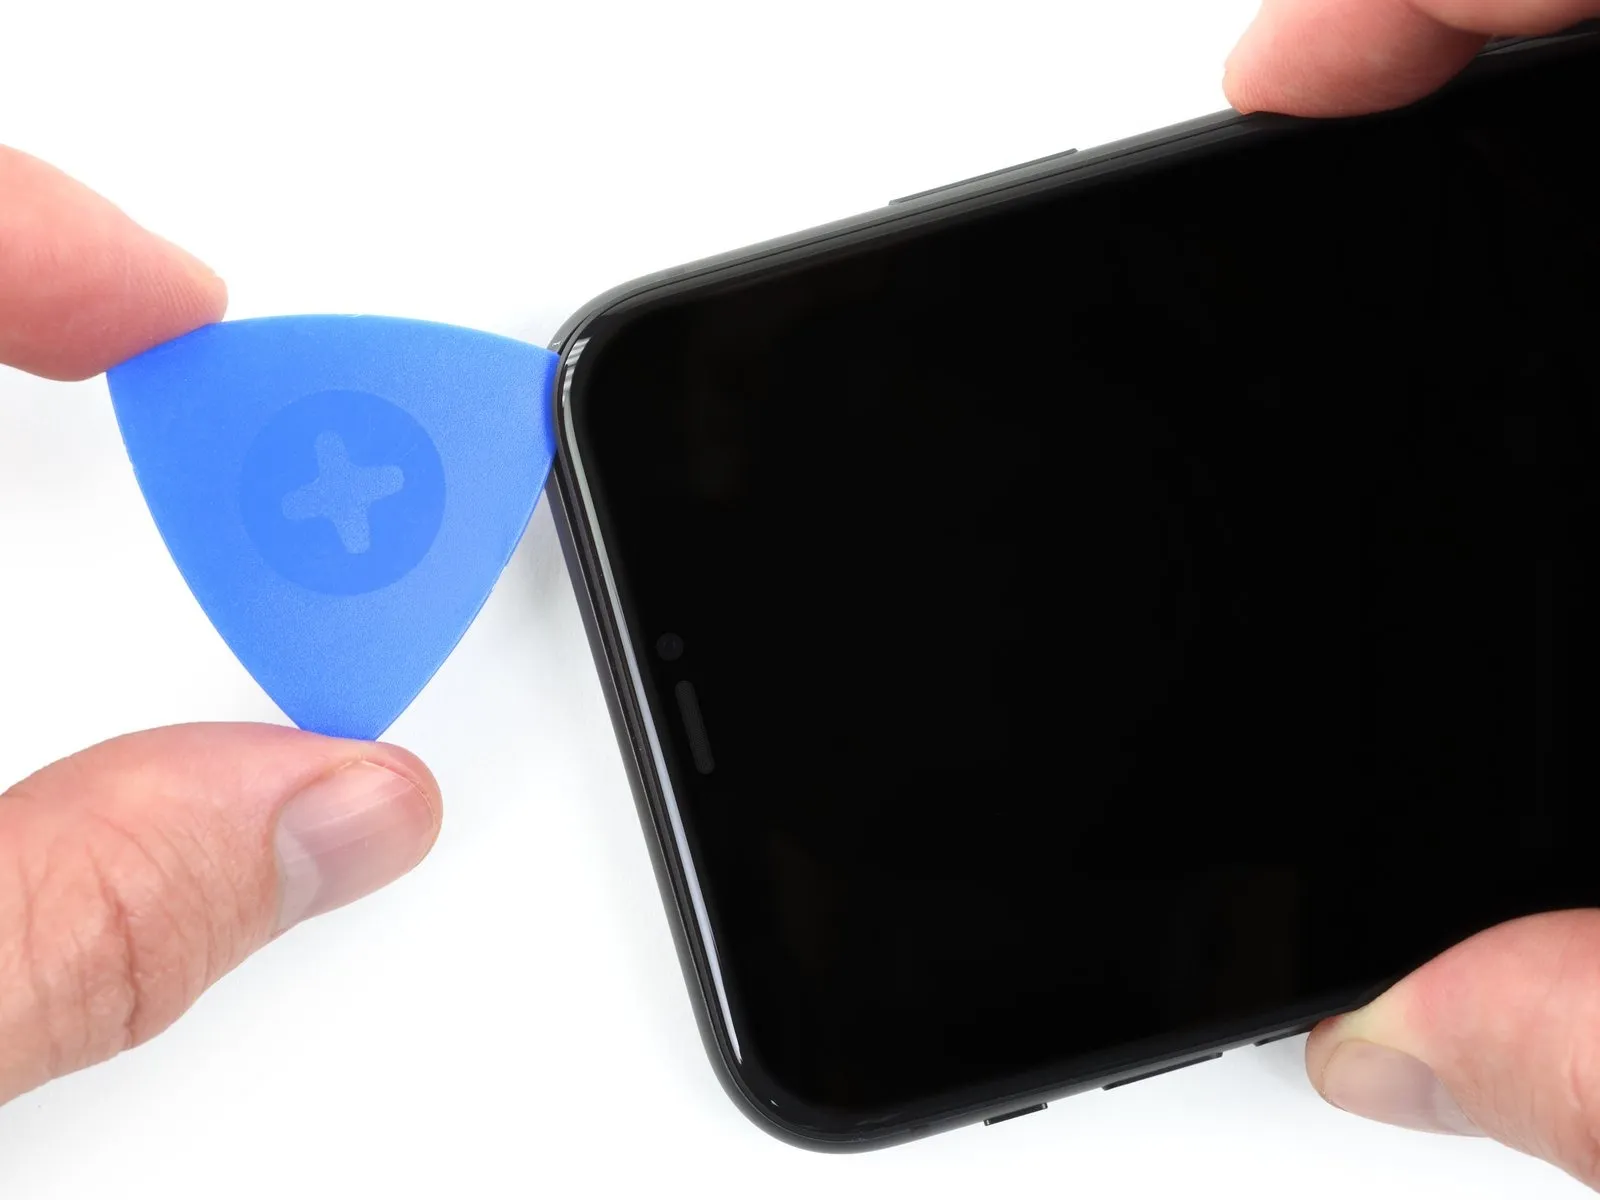
- Adhesive and retaining clips together fasten the display's uppermost boundary.
- Carefully exert a slight downward force on the display's right side, orienting the movement toward the Lightning port.
- Position a specialized opening tool within the upper-right corner of the device's enclosure.
Step 14
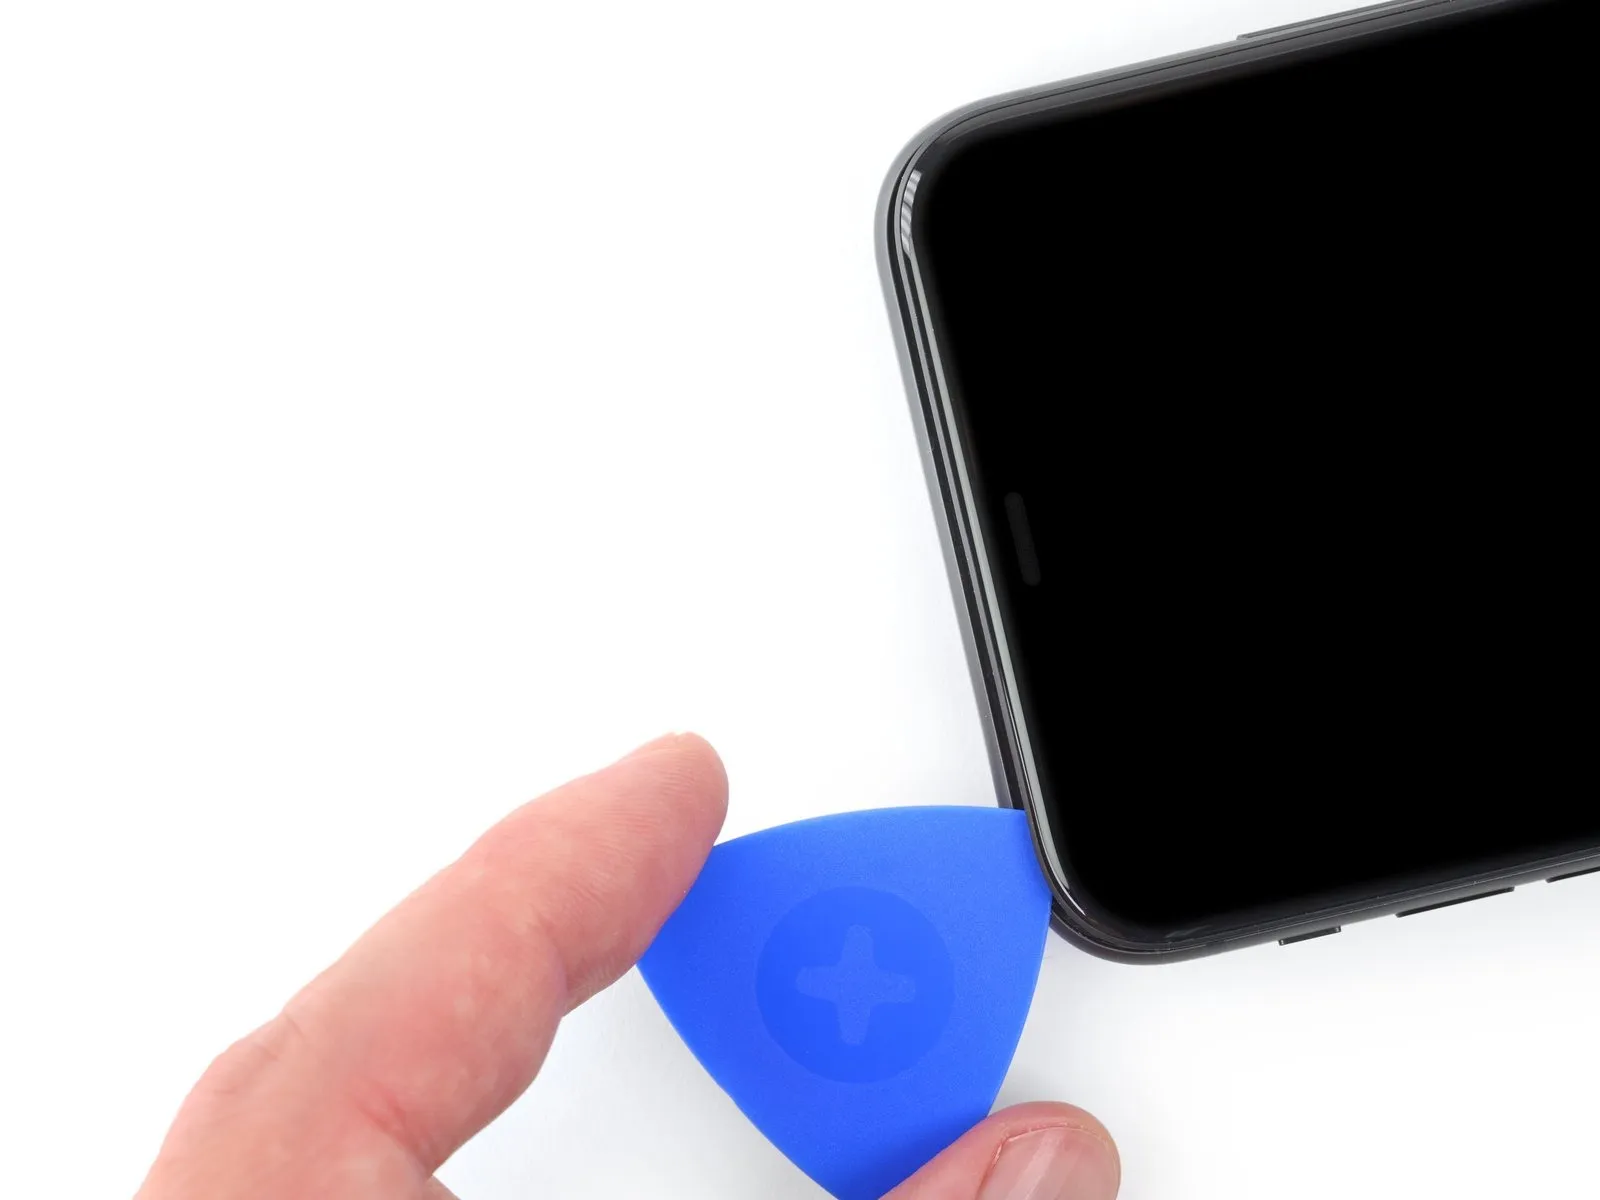
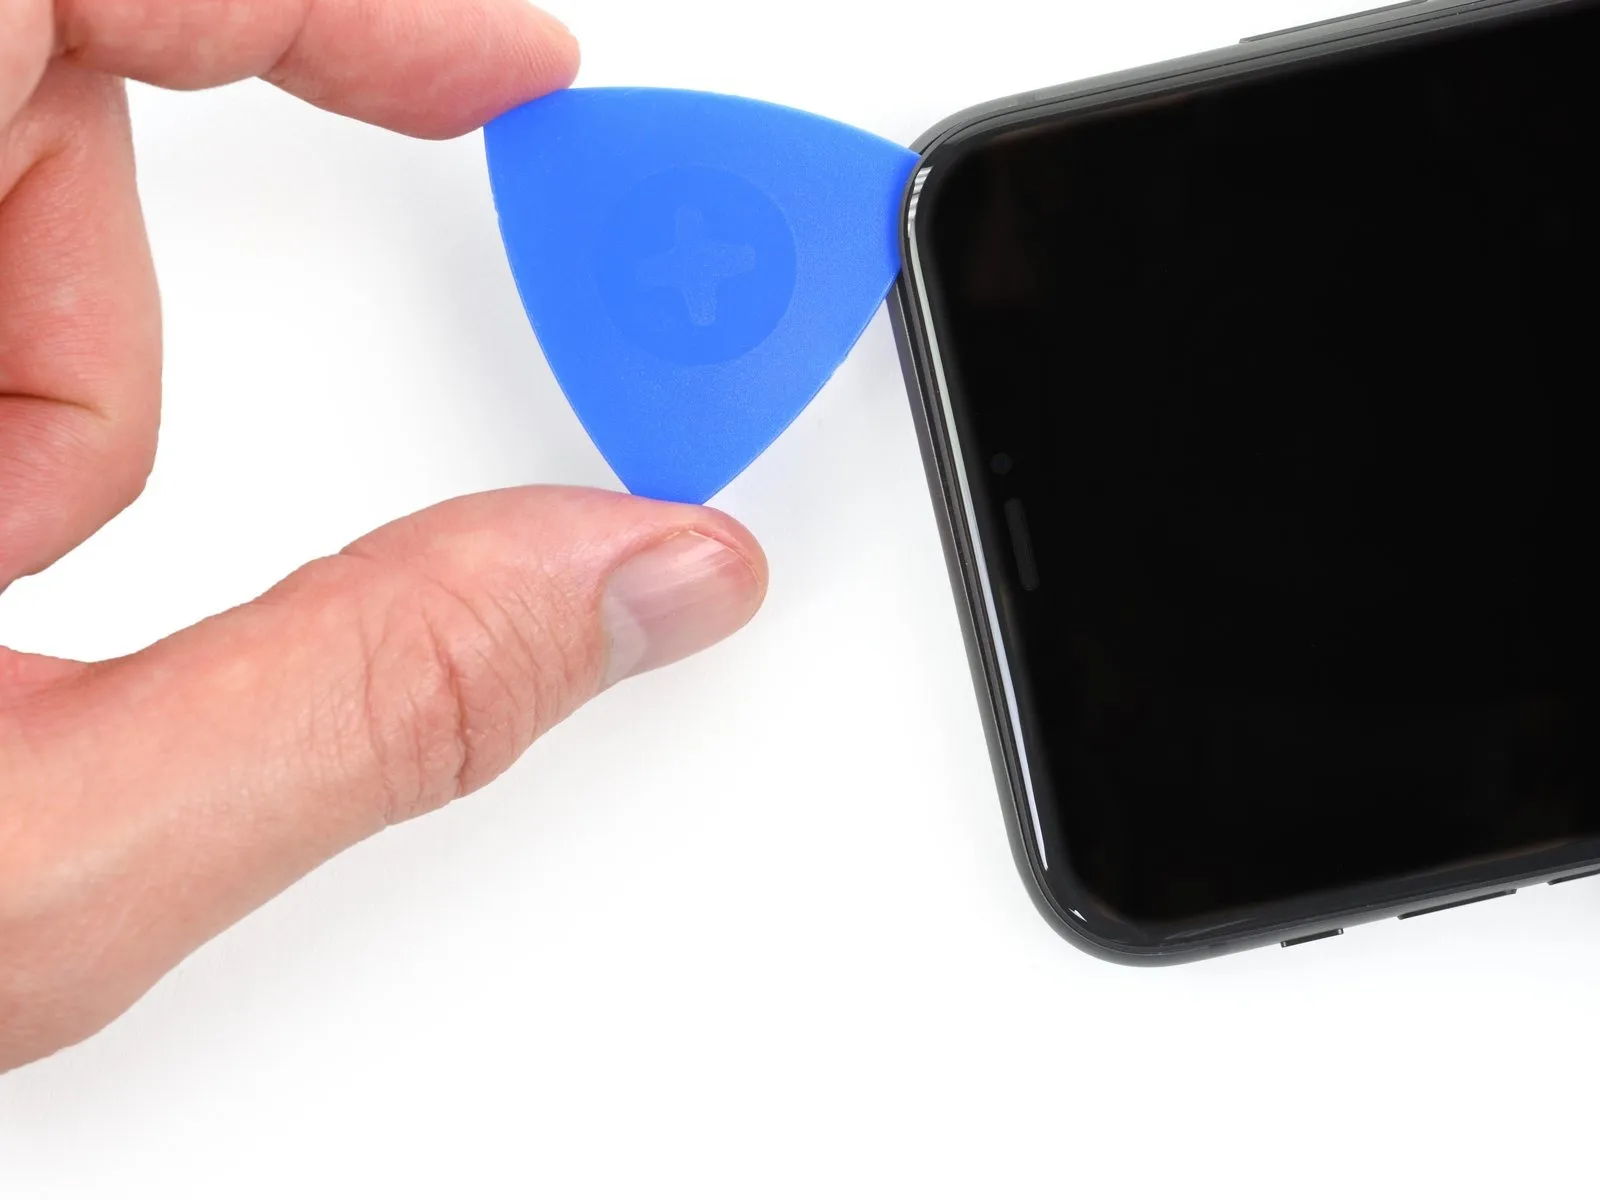
- As necessary, maintain downward pressure on the display, directing it towards the Lightning port, to create a sufficient separation for tool insertion.
- Employ the pick to move along the upper left edge, severing any residual adhesive that is holding the display in place.
- Exercise caution to prevent the pick from penetrating beyond a depth of 3 millimeters, to avoid potential harm to the Face ID sensor array.
Step 15 | Remove the suction cup
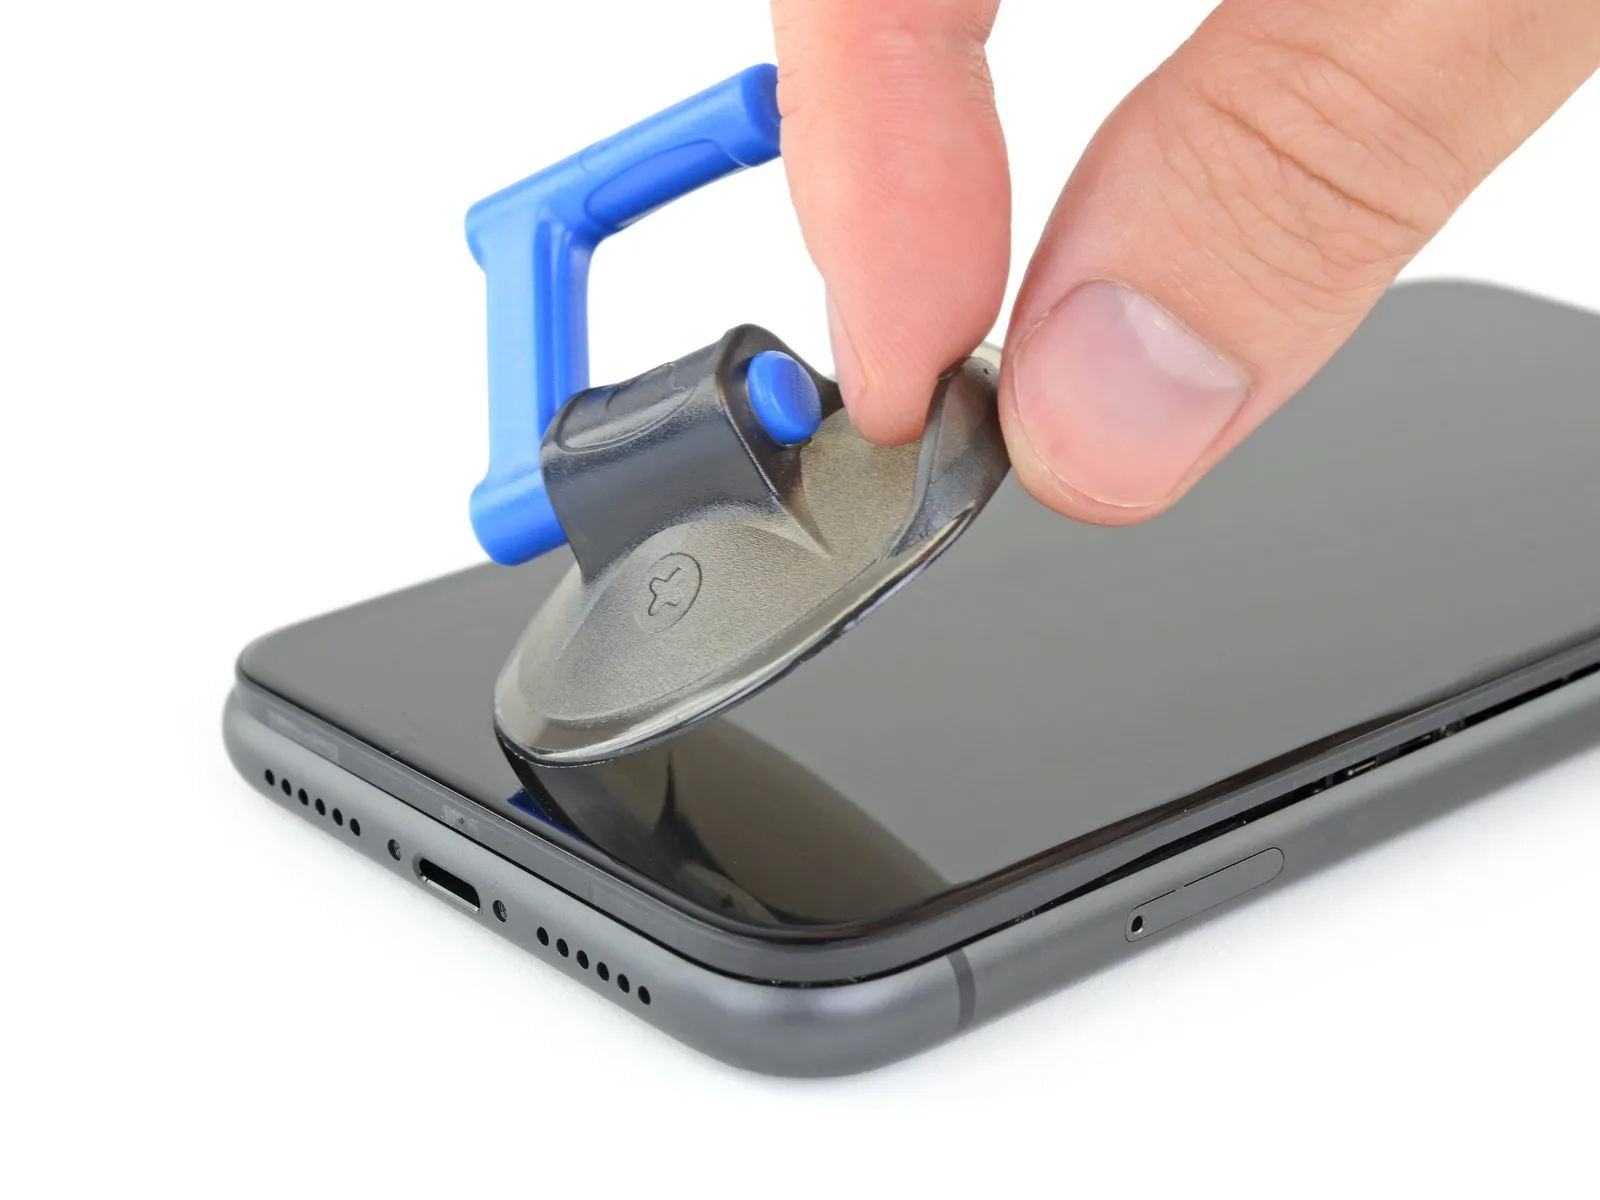
To release the suction cup from the front panel, grasp and draw the small protrusion located on its surface.
Step 16 | Open the iPhone
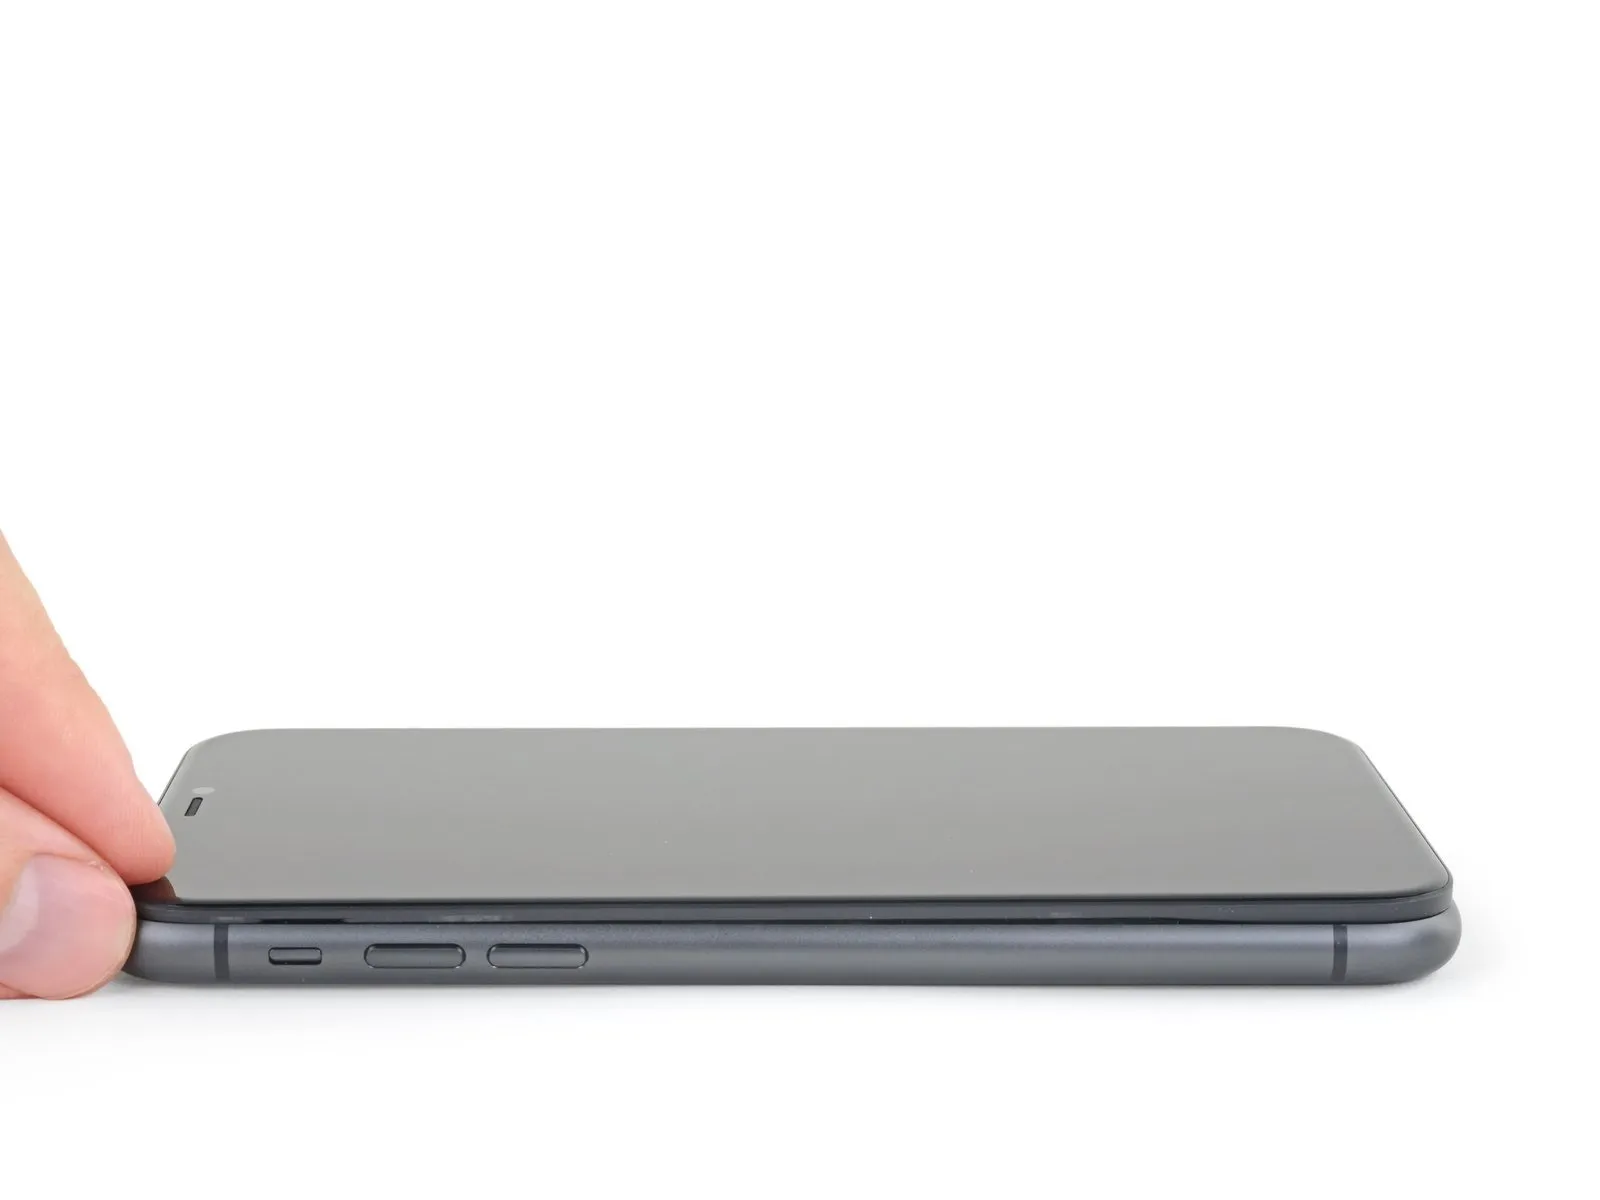
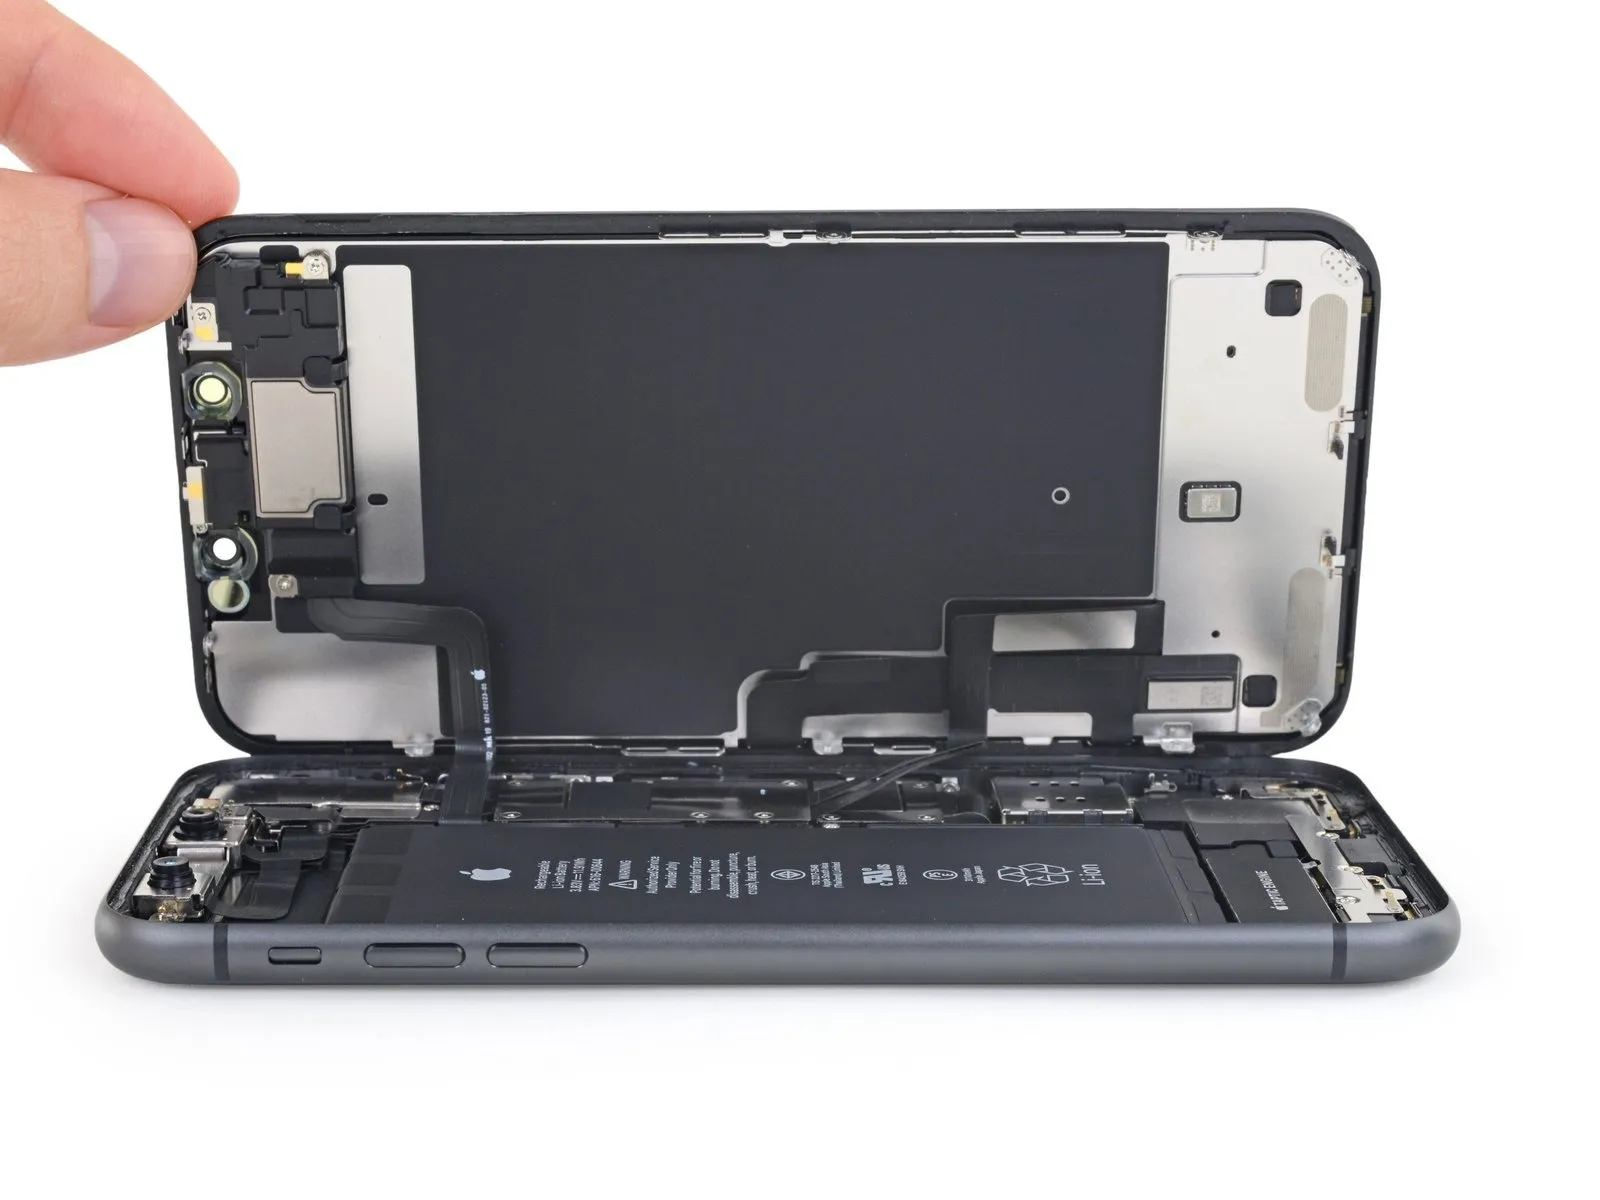
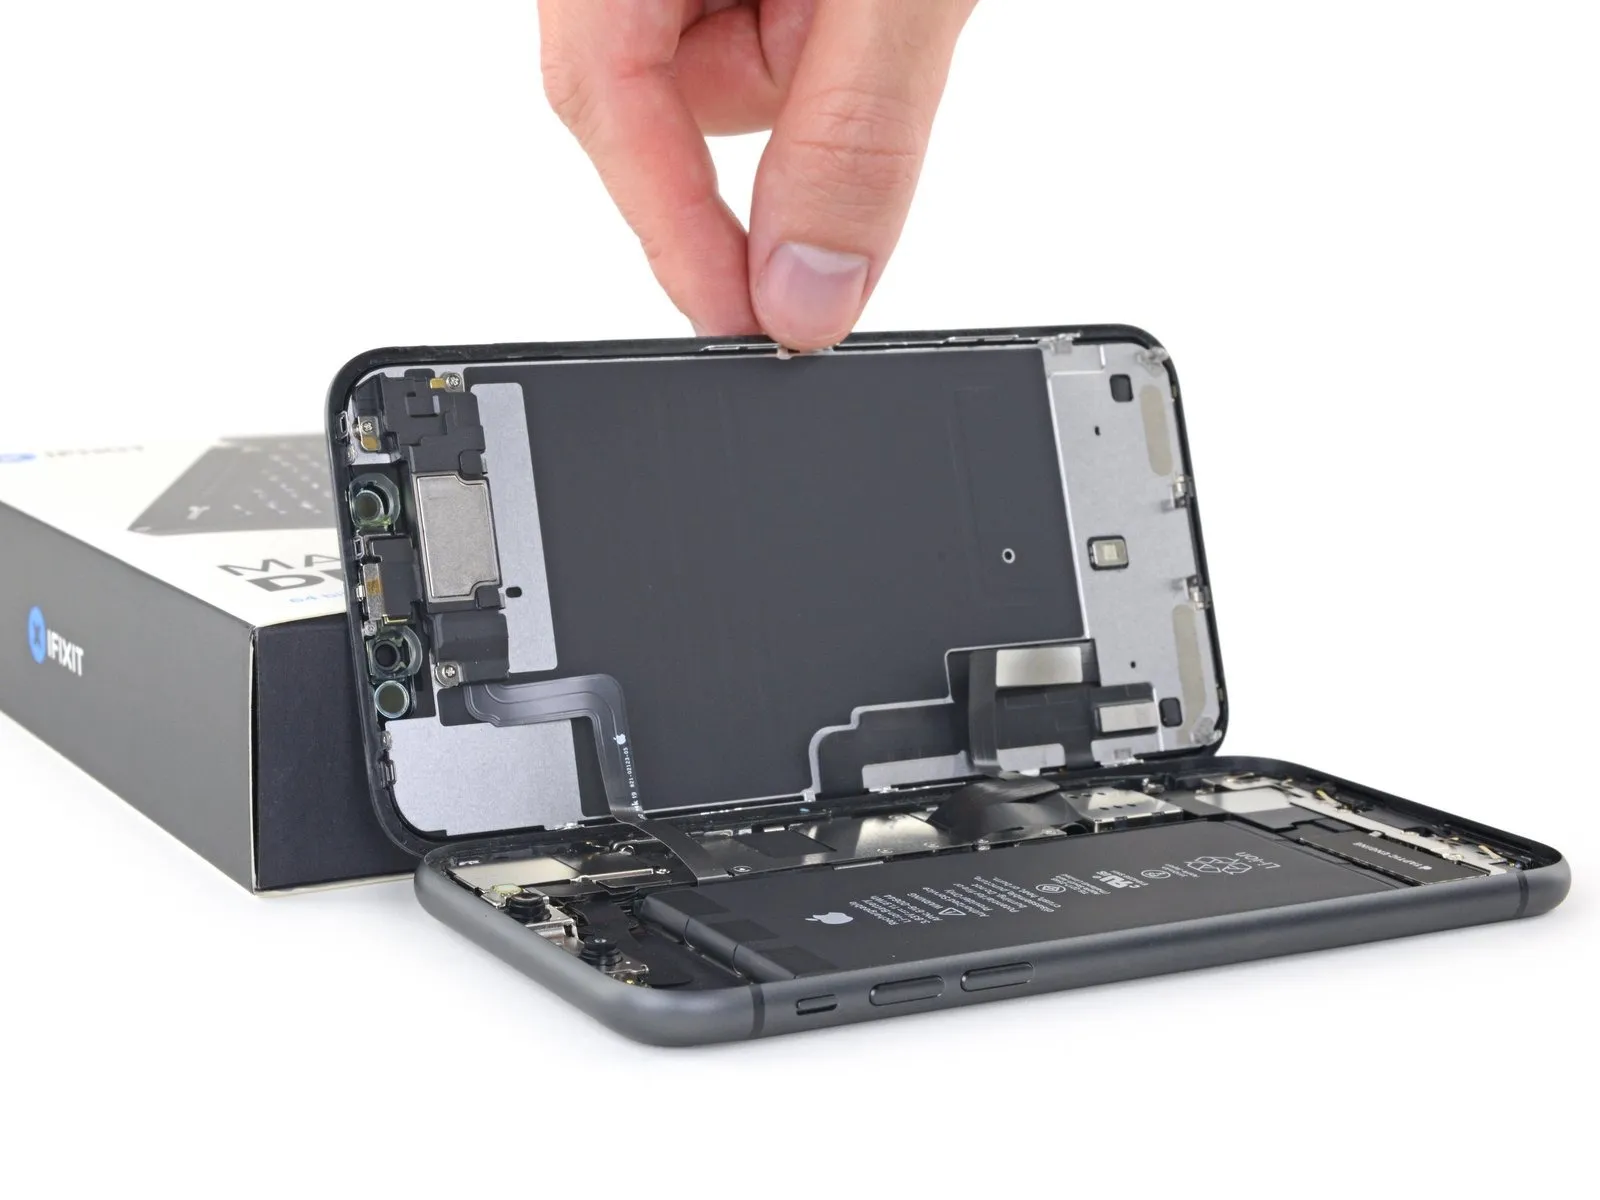
Avoidattempting a complete separation of the display at this stage, because delicate ribbon cables remain connected to the iPhone's logic board.
Secure the display in an upright position using a stable support.
When reassembling, position the display, ensure the clips along the upper edge are properly aligned, and gently apply pressure to the top edge before securing the remainder of the display. Should the display not easily lock into place, examine the condition of the clips surrounding the display's perimeter to confirm they are not deformed.
Step 17 | Display Assembly
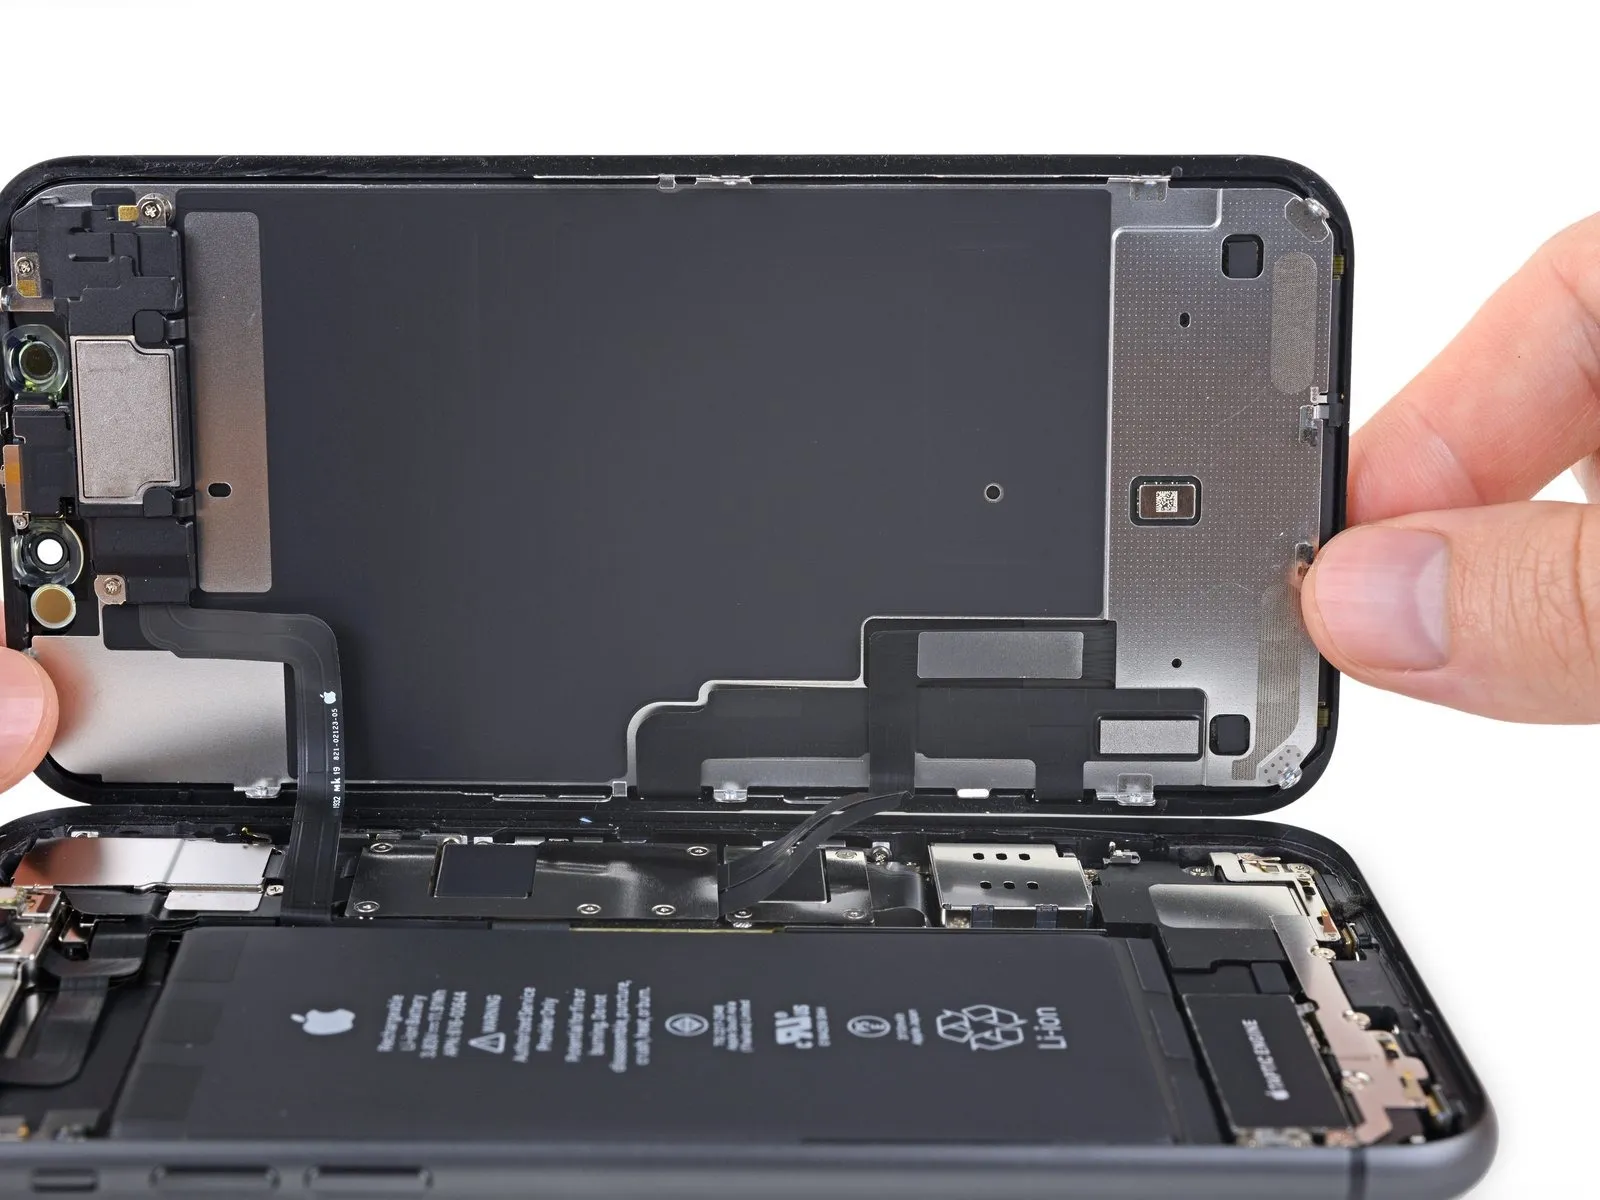
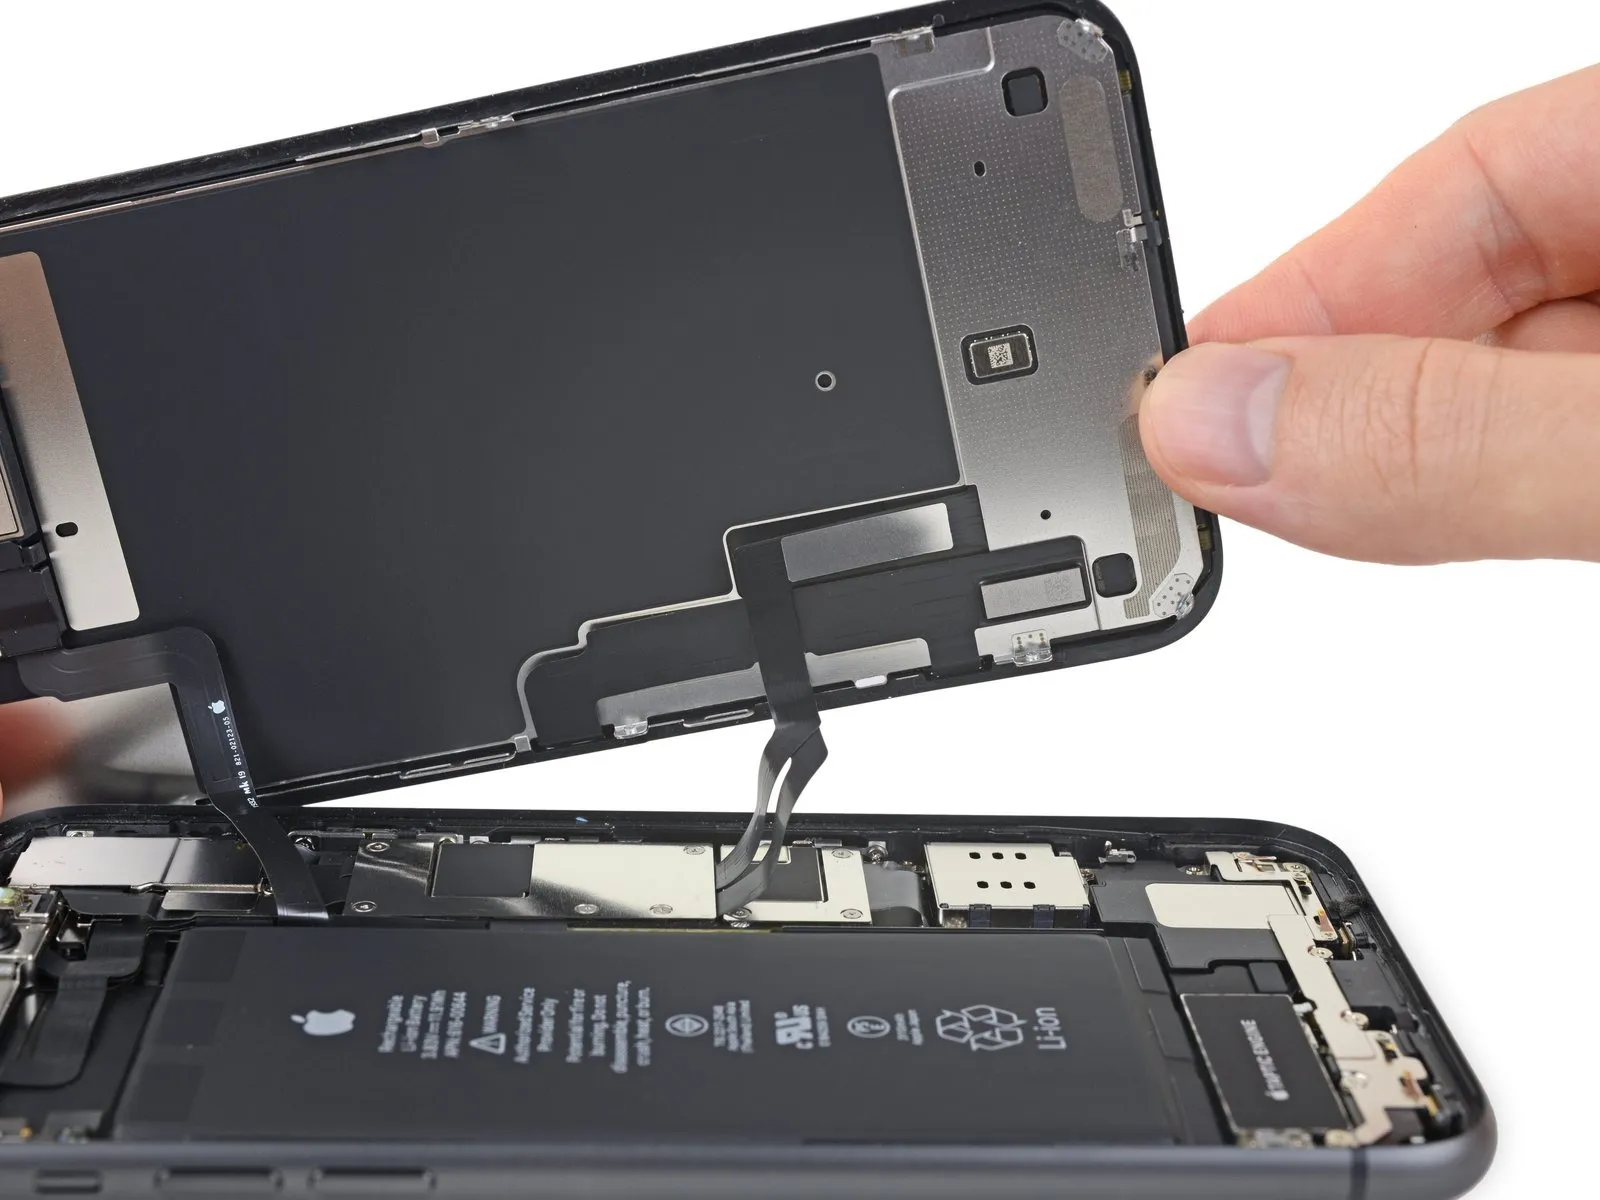
- Exercise caution to prevent undue stress or damage to the display cable connections.
Step 18 | Unscrew the battery connector cover
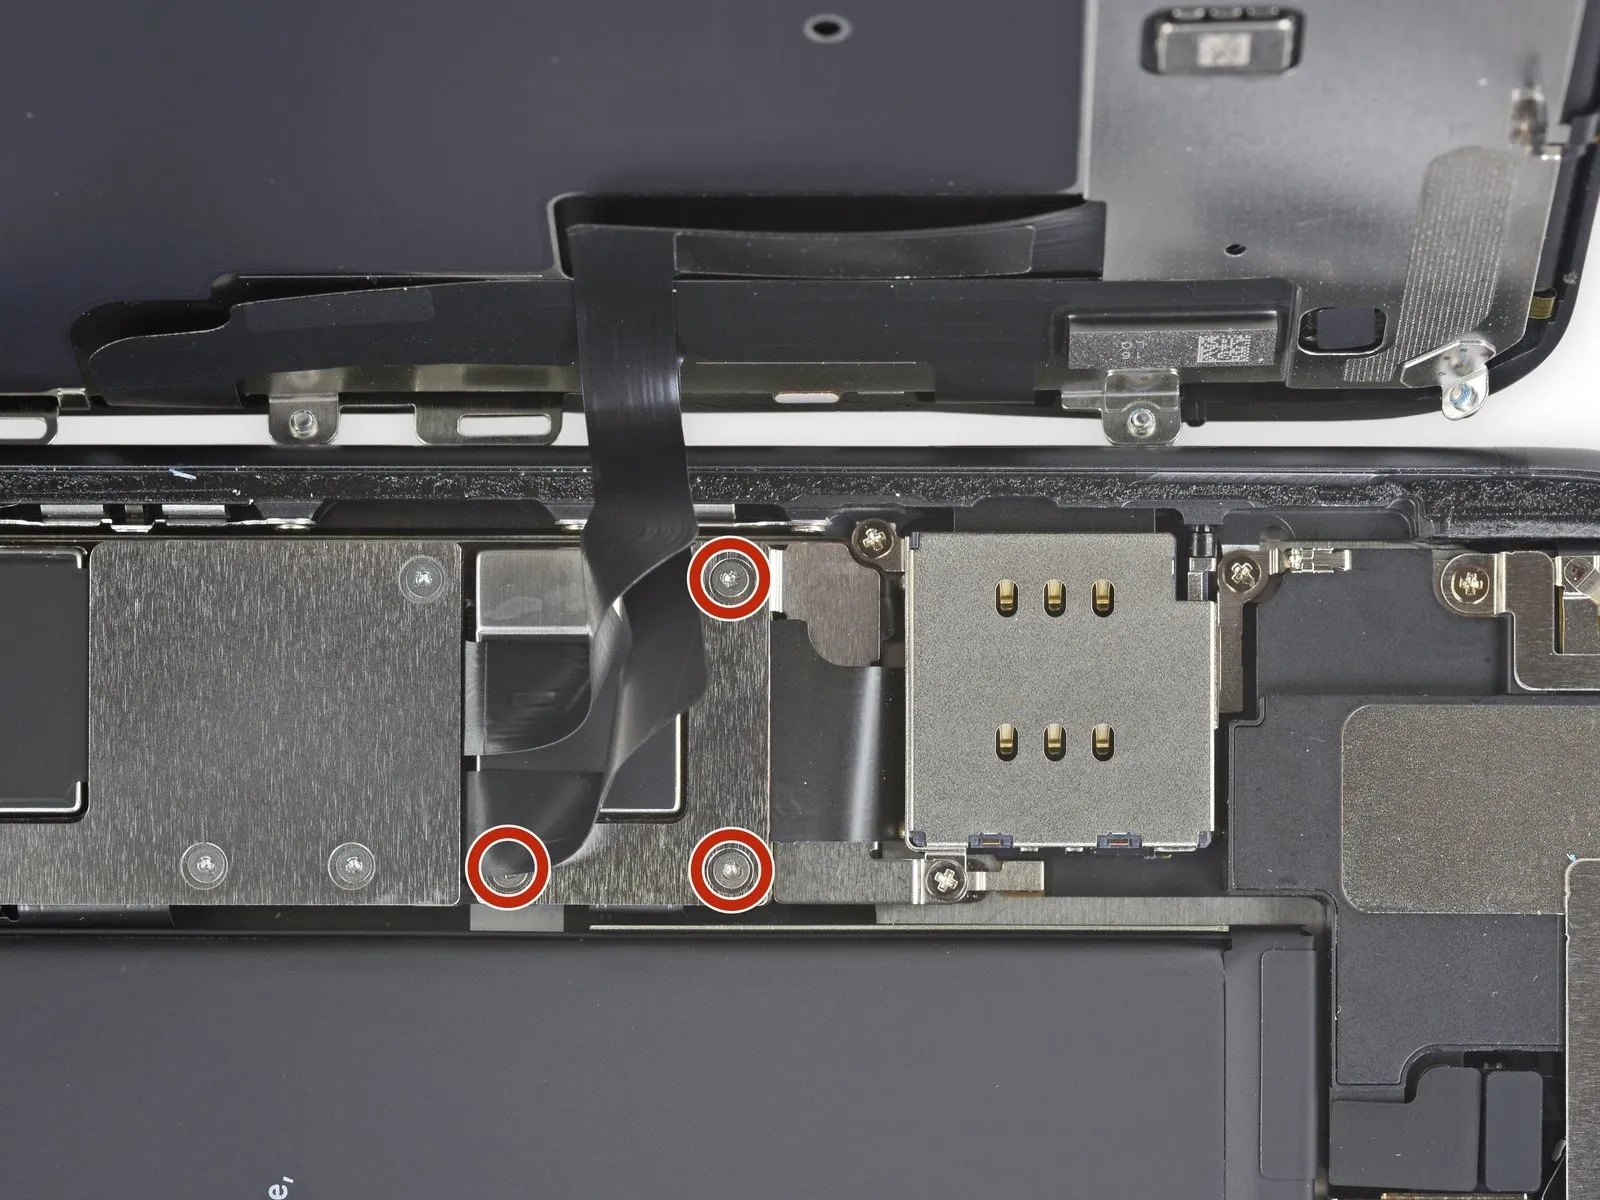
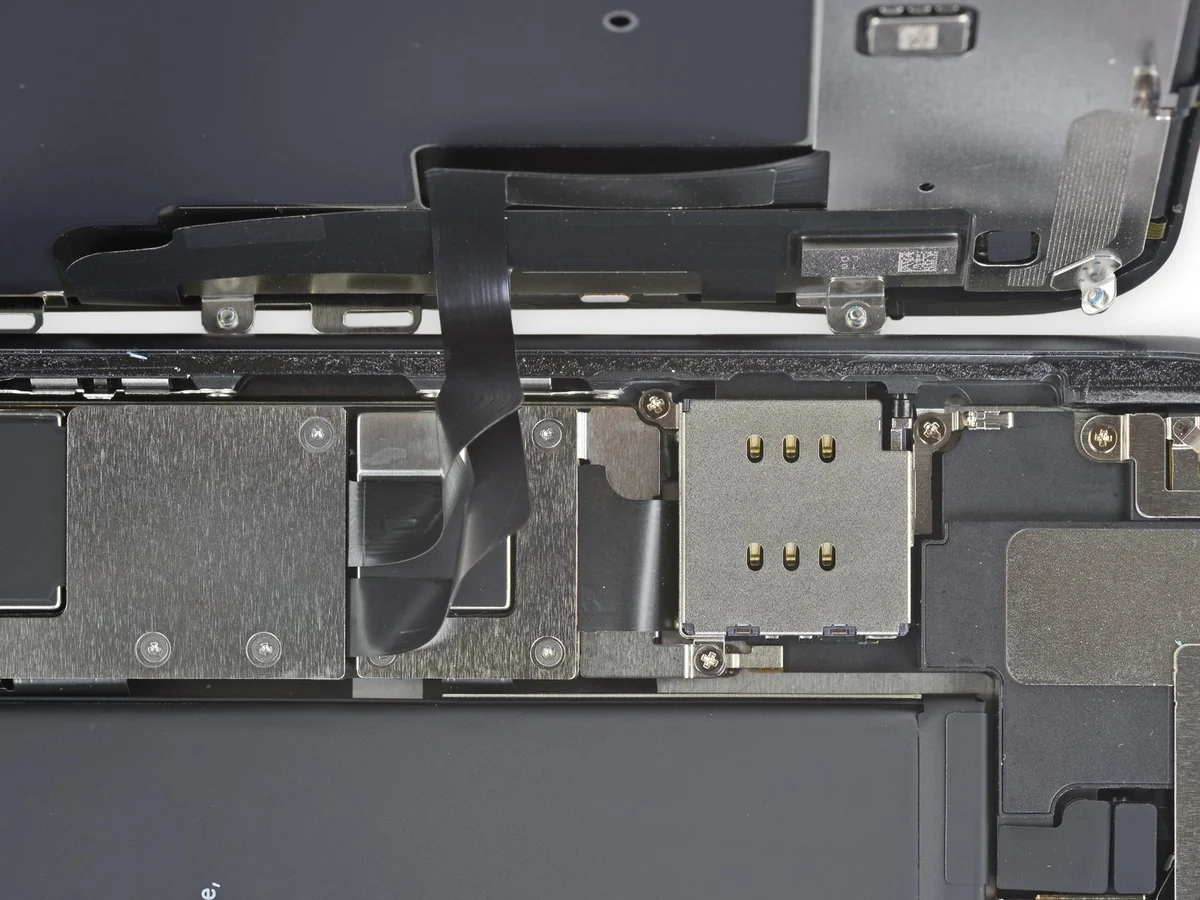
- Prior to permanently affixing the display, it is advisable to verify full functionality by briefly powering on the iPhone.
- Complete device shutdown is mandatory before resuming the repair process.
Step 19 | Remove the battery connector cover
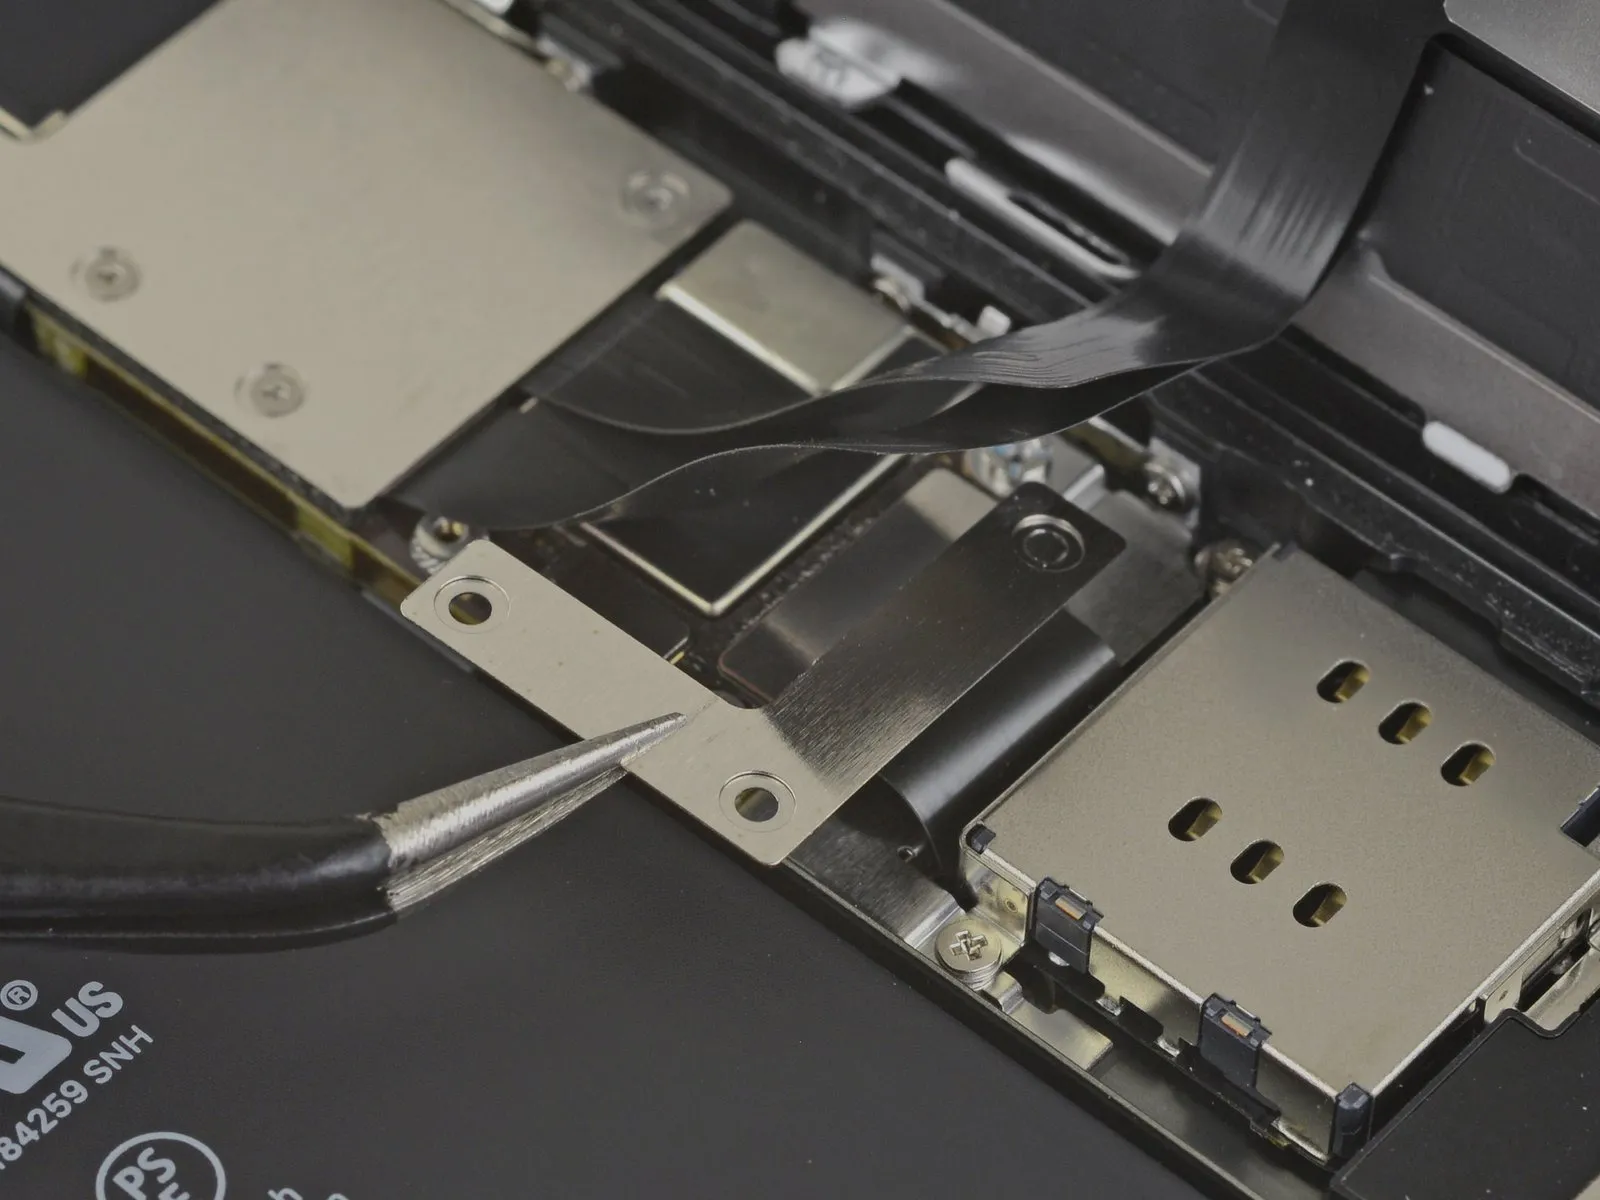
Step 20 | Disconnect the battery
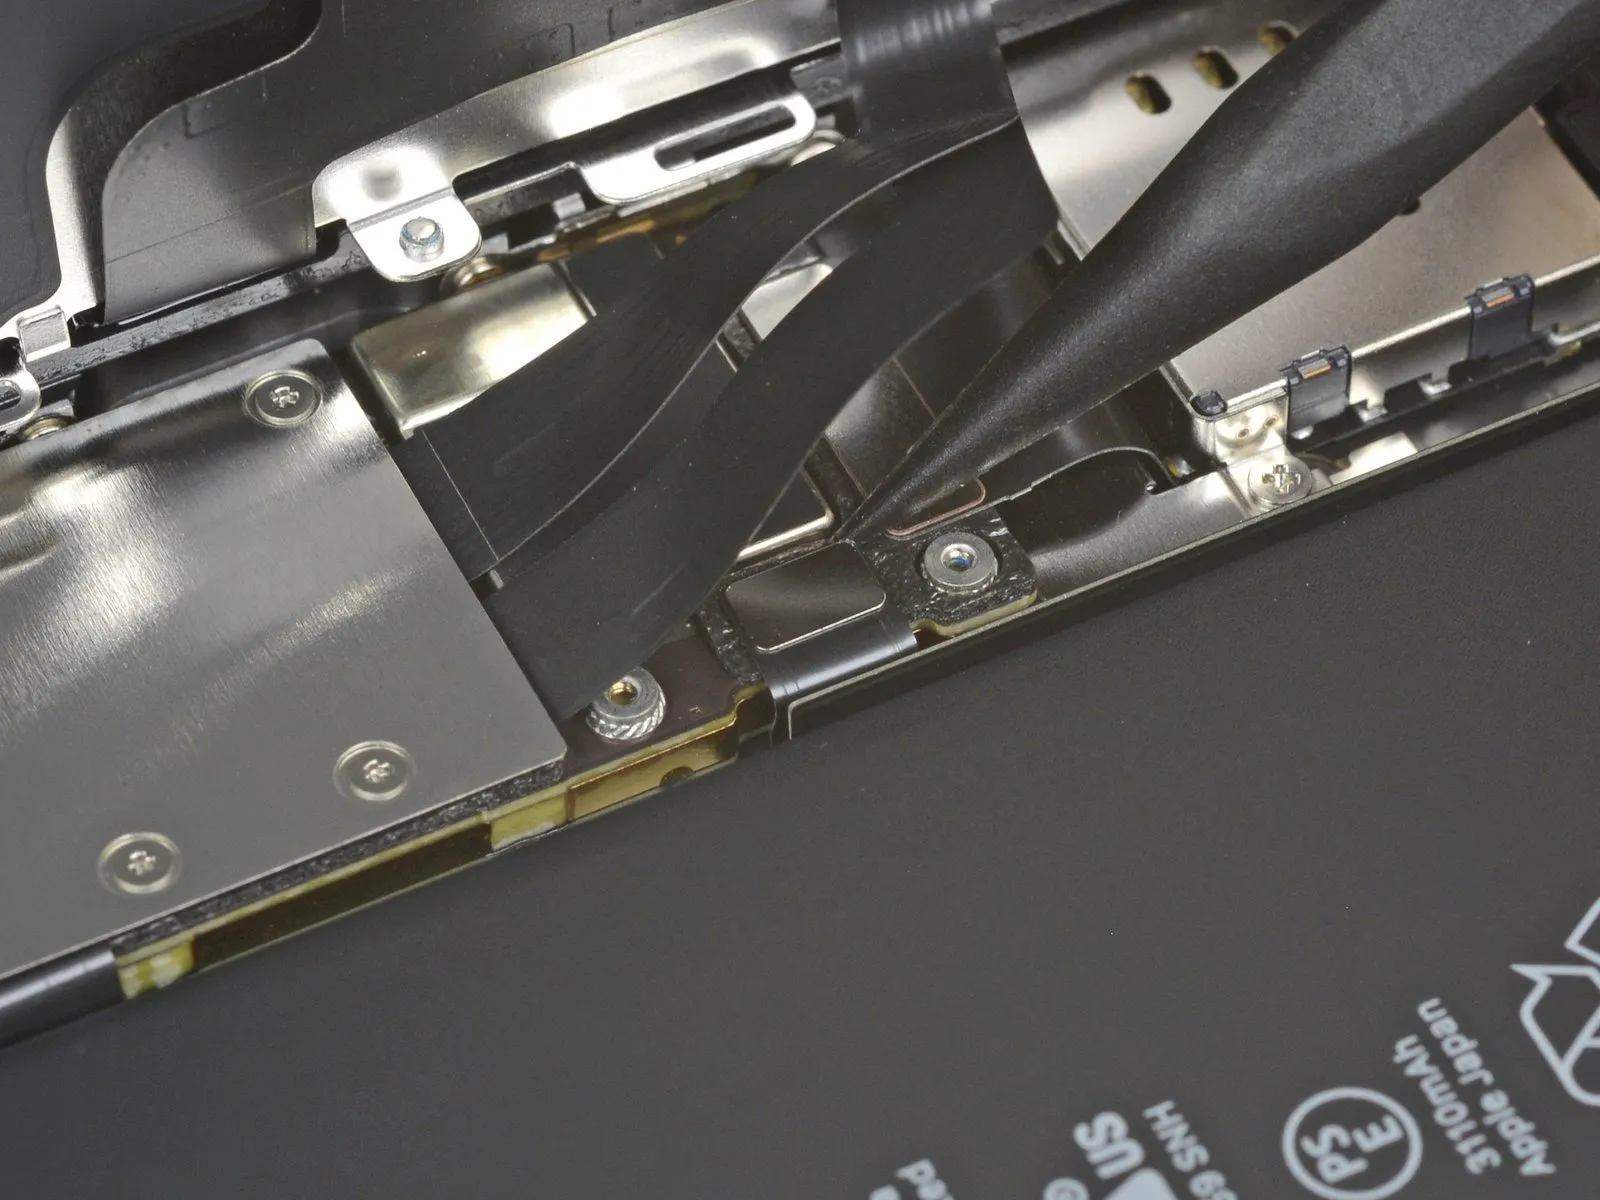
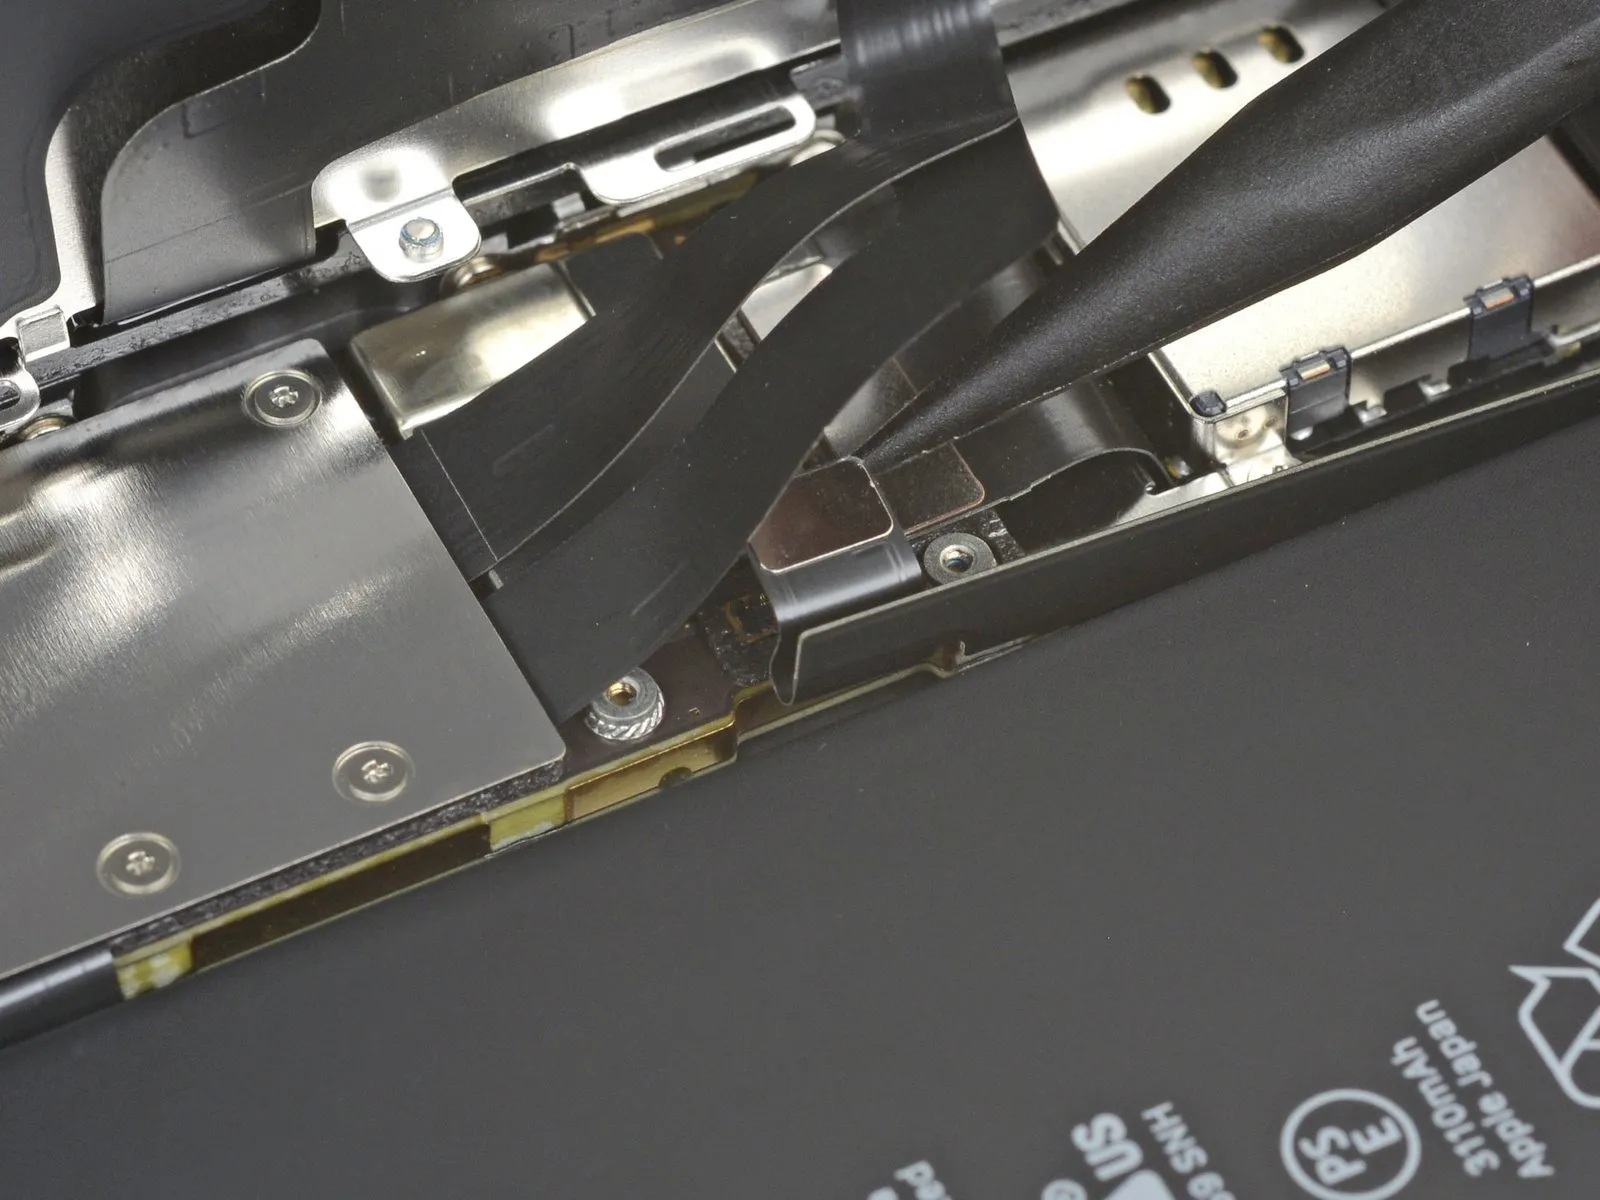
- Exercise caution to avoid compromising the black silicone sealant that encases this and other board connections, as it offers supplemental defense against water and particulate contamination.
- Slightly deflect the connector away from the logic board's surface to inhibit unintended reconnection with the socket.
Step 21 | Unscrew the logic board cover screws
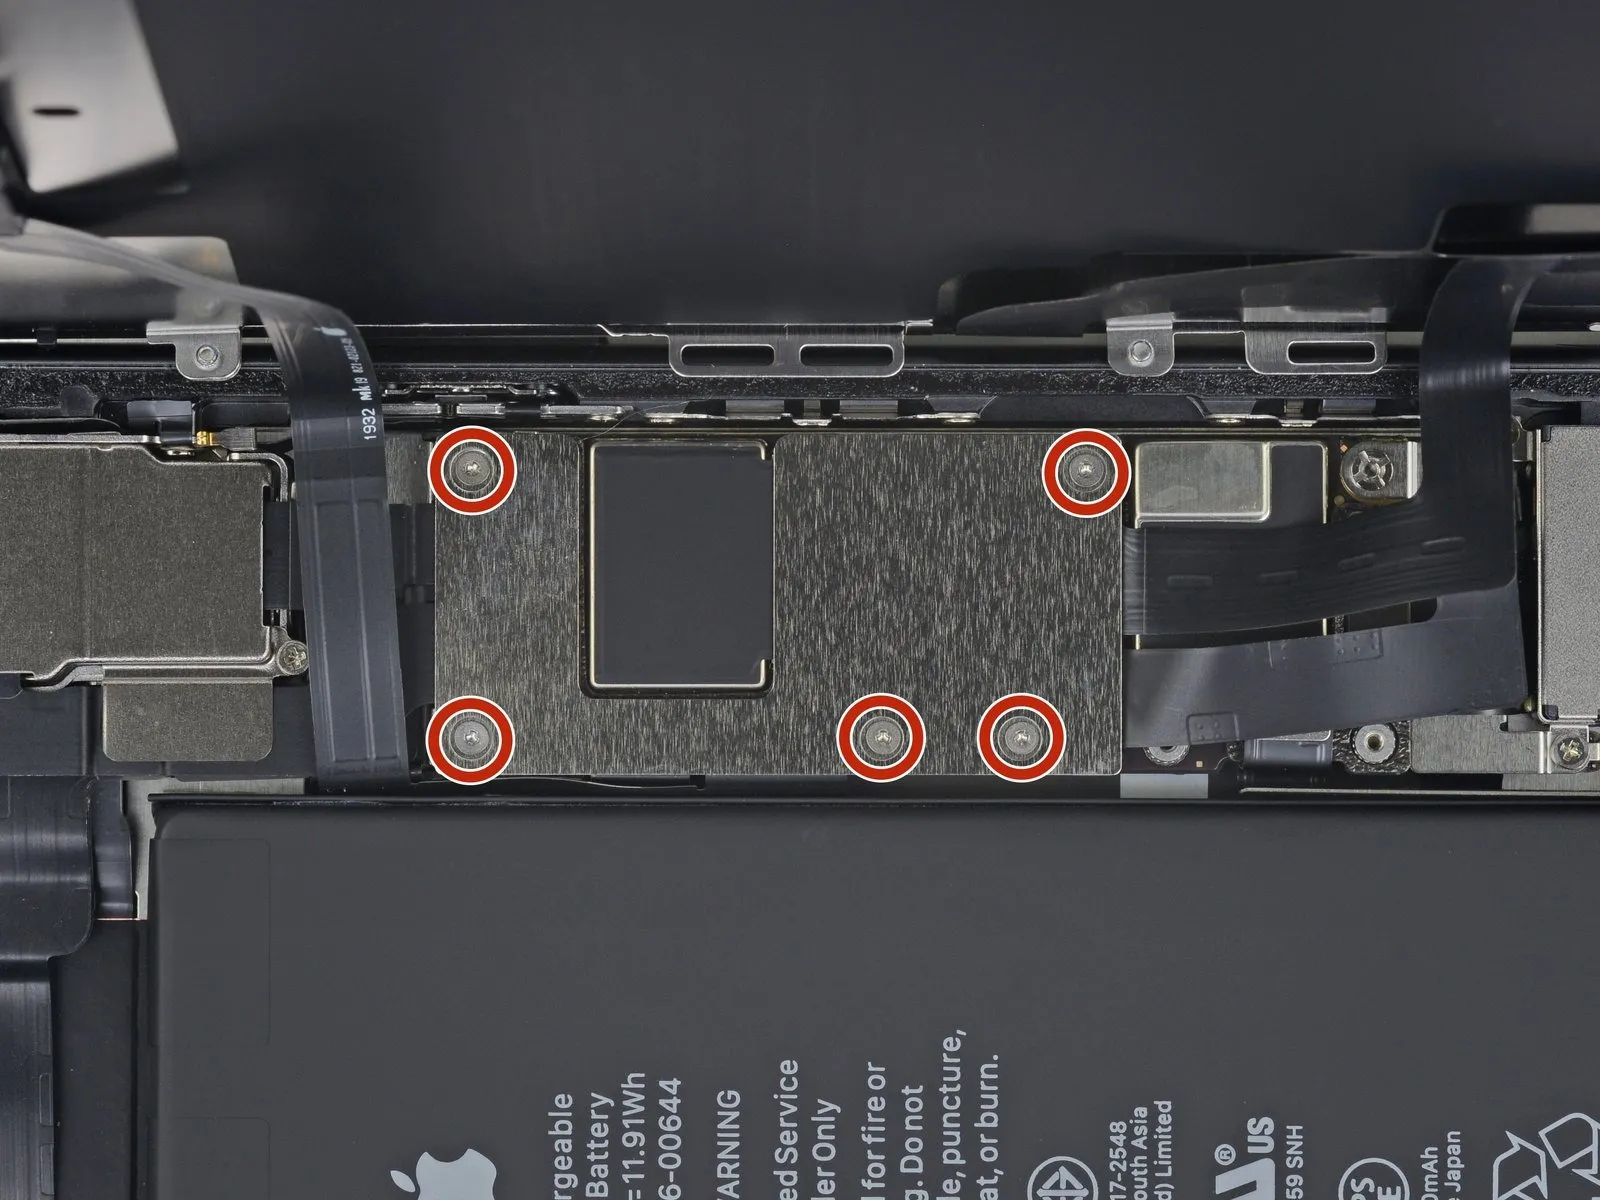
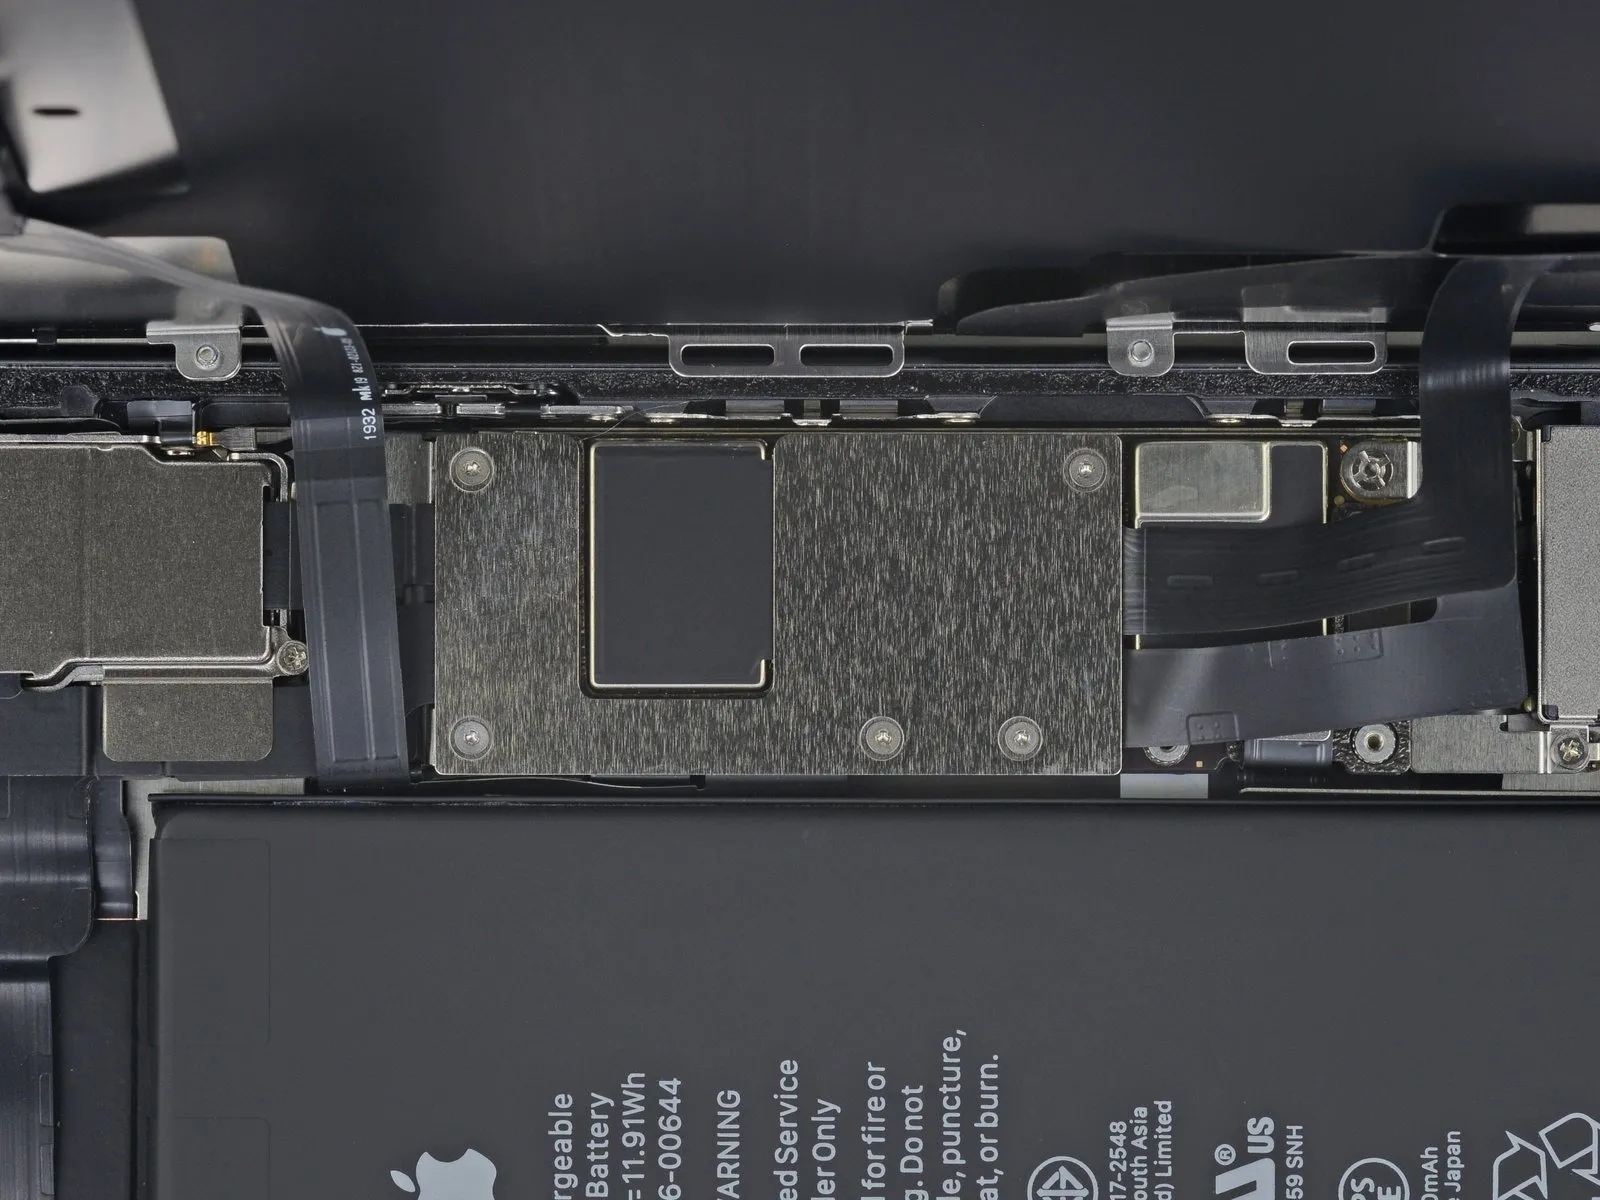
- Employ a Y000 driver for the purpose of detaching the five 1.1 mm screws which fasten the logic board cover bracket in place.
Step 22 | Remove the logic board cover bracket
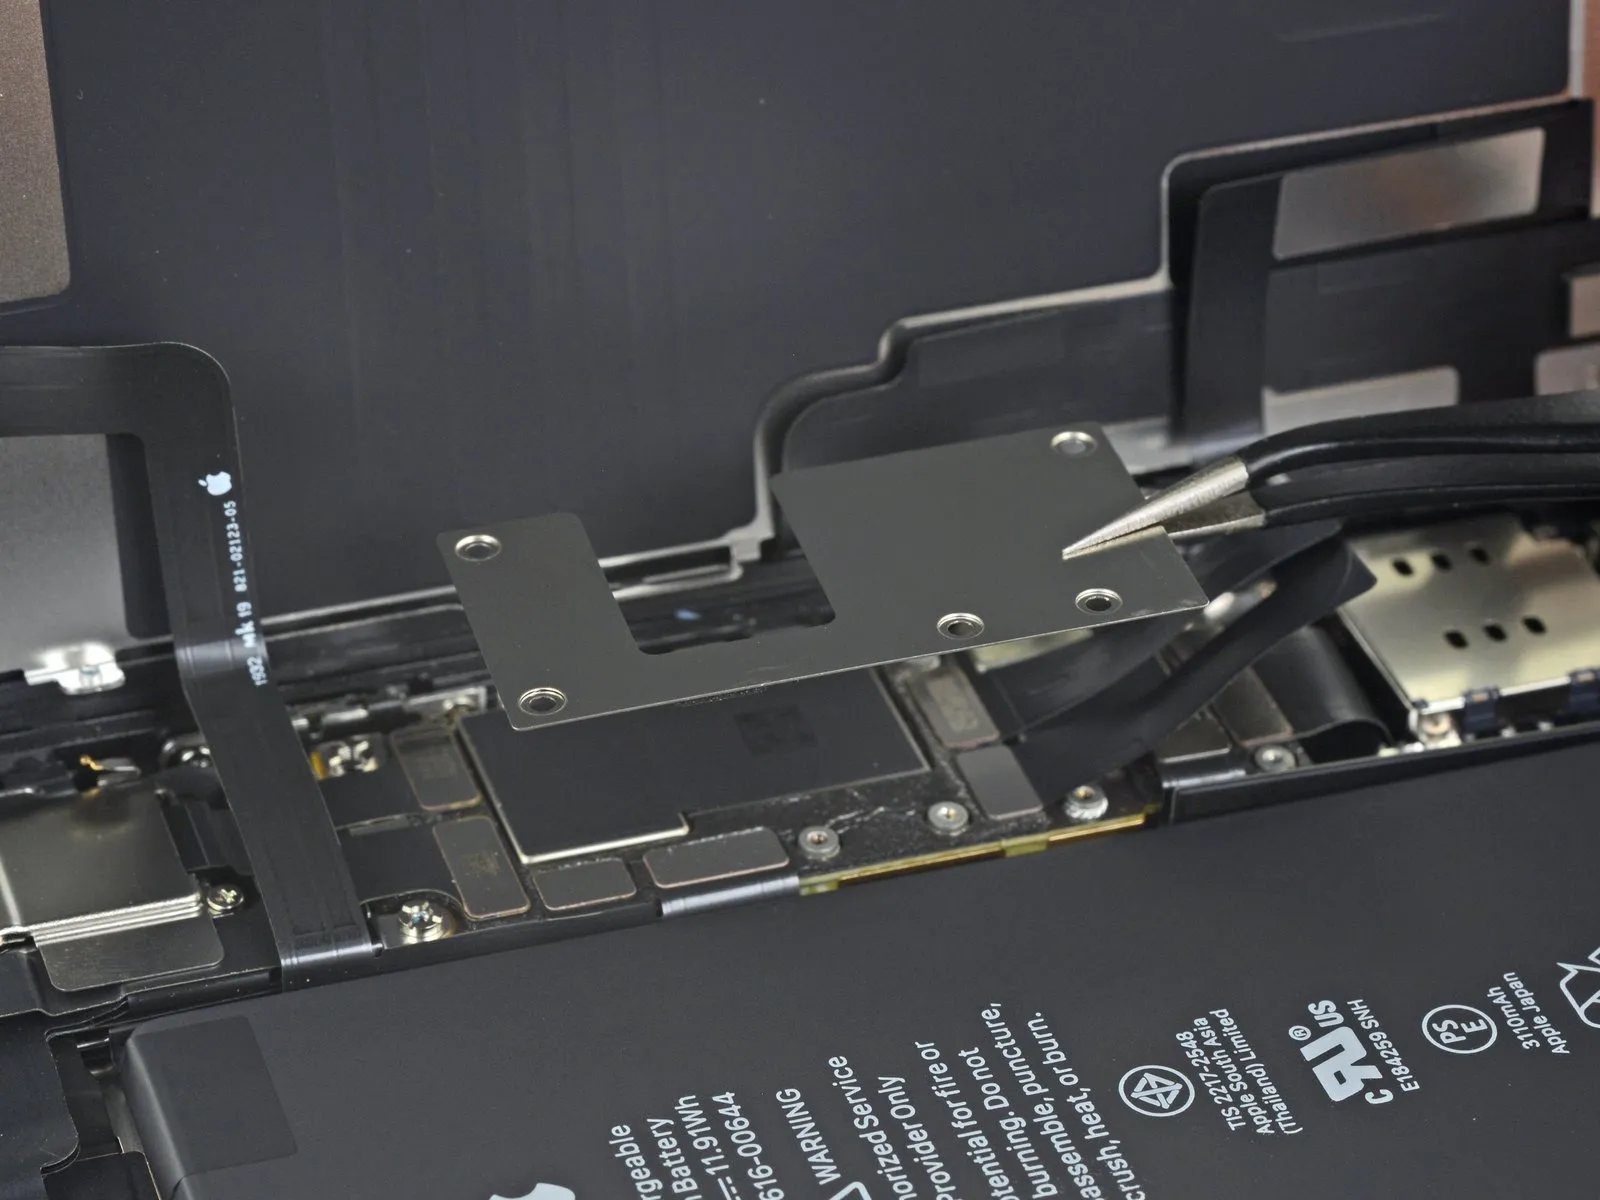
- Detach the bracket from its affixed location.
Step 23 | Disconnect the display
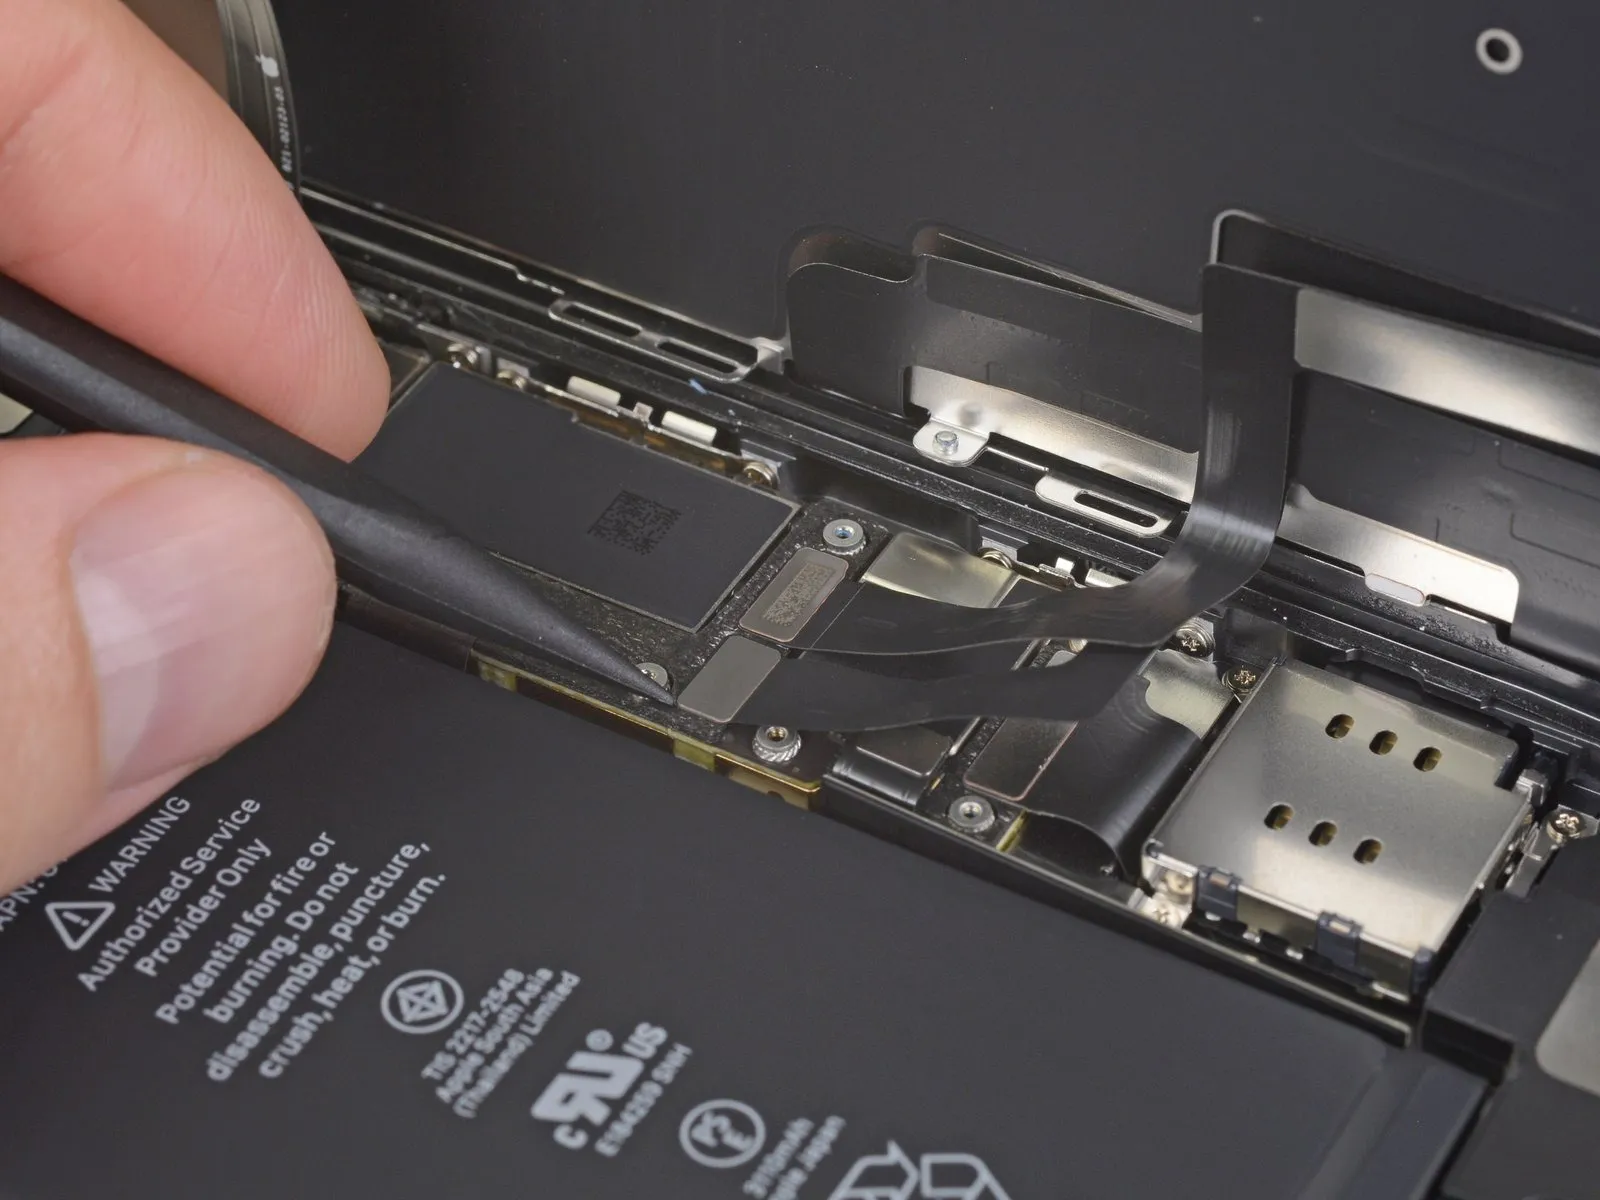
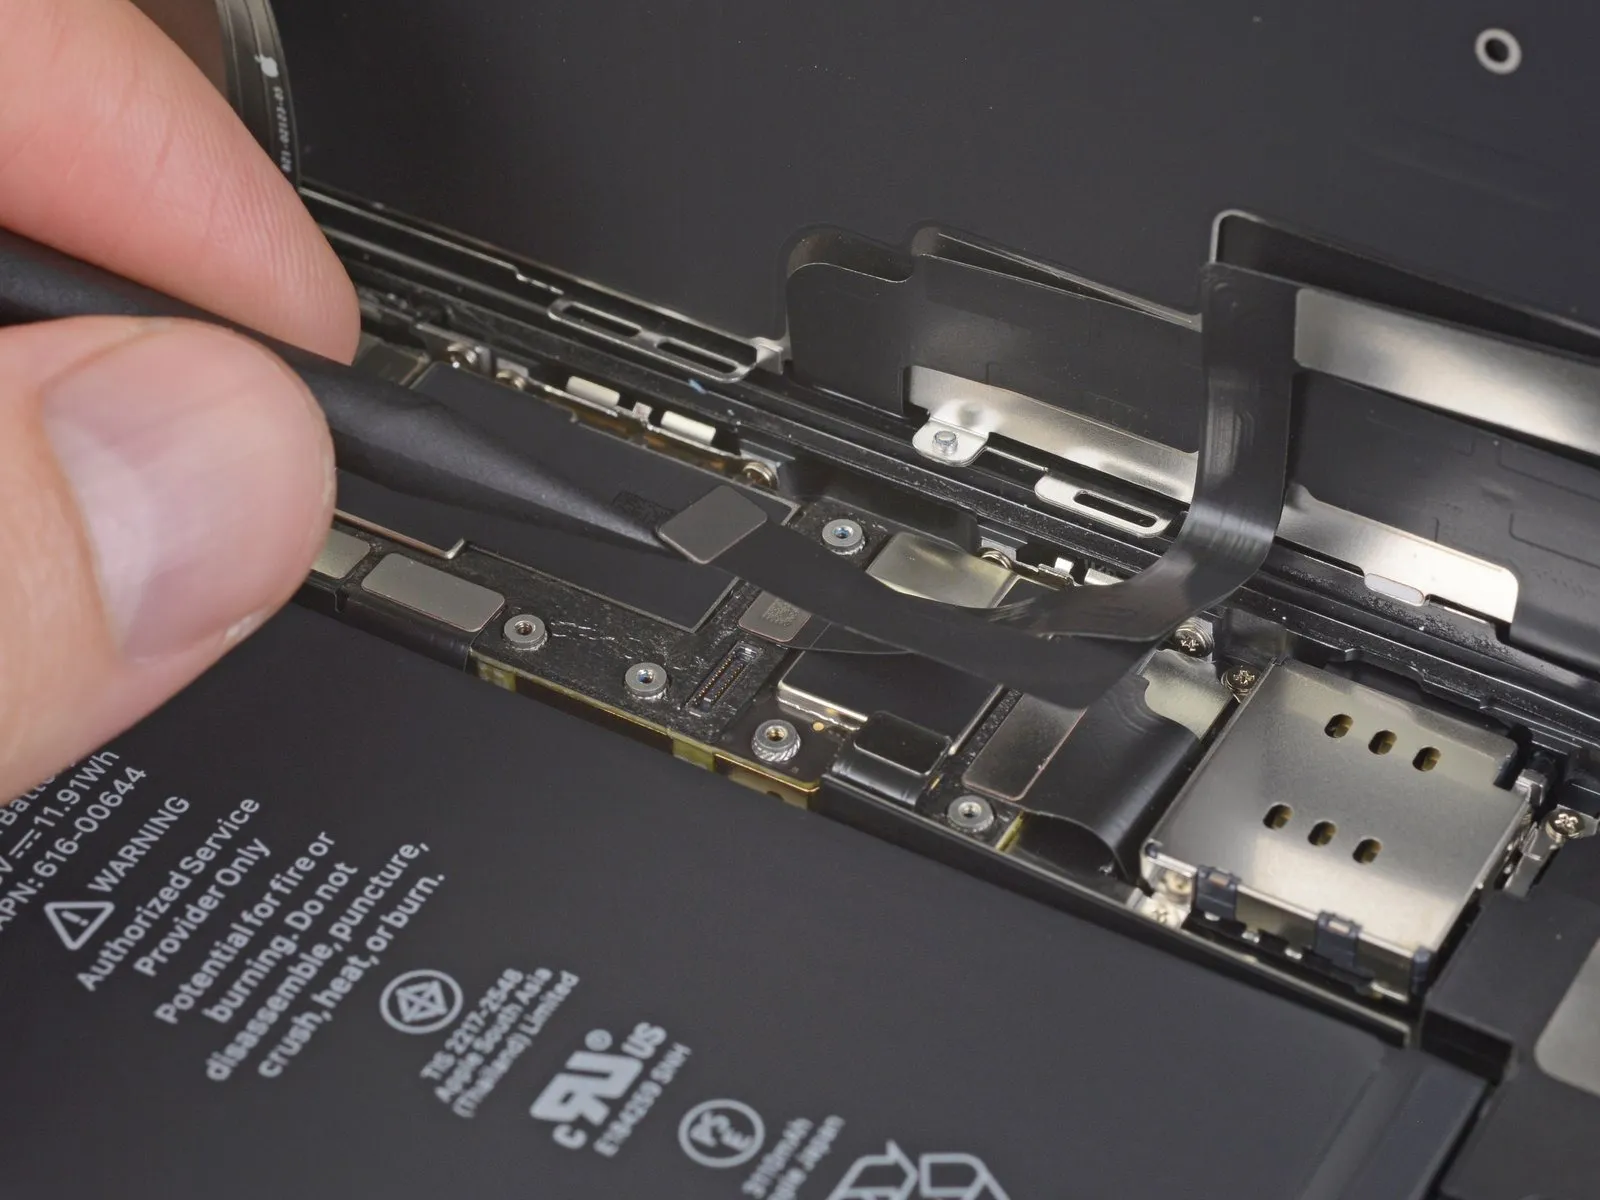
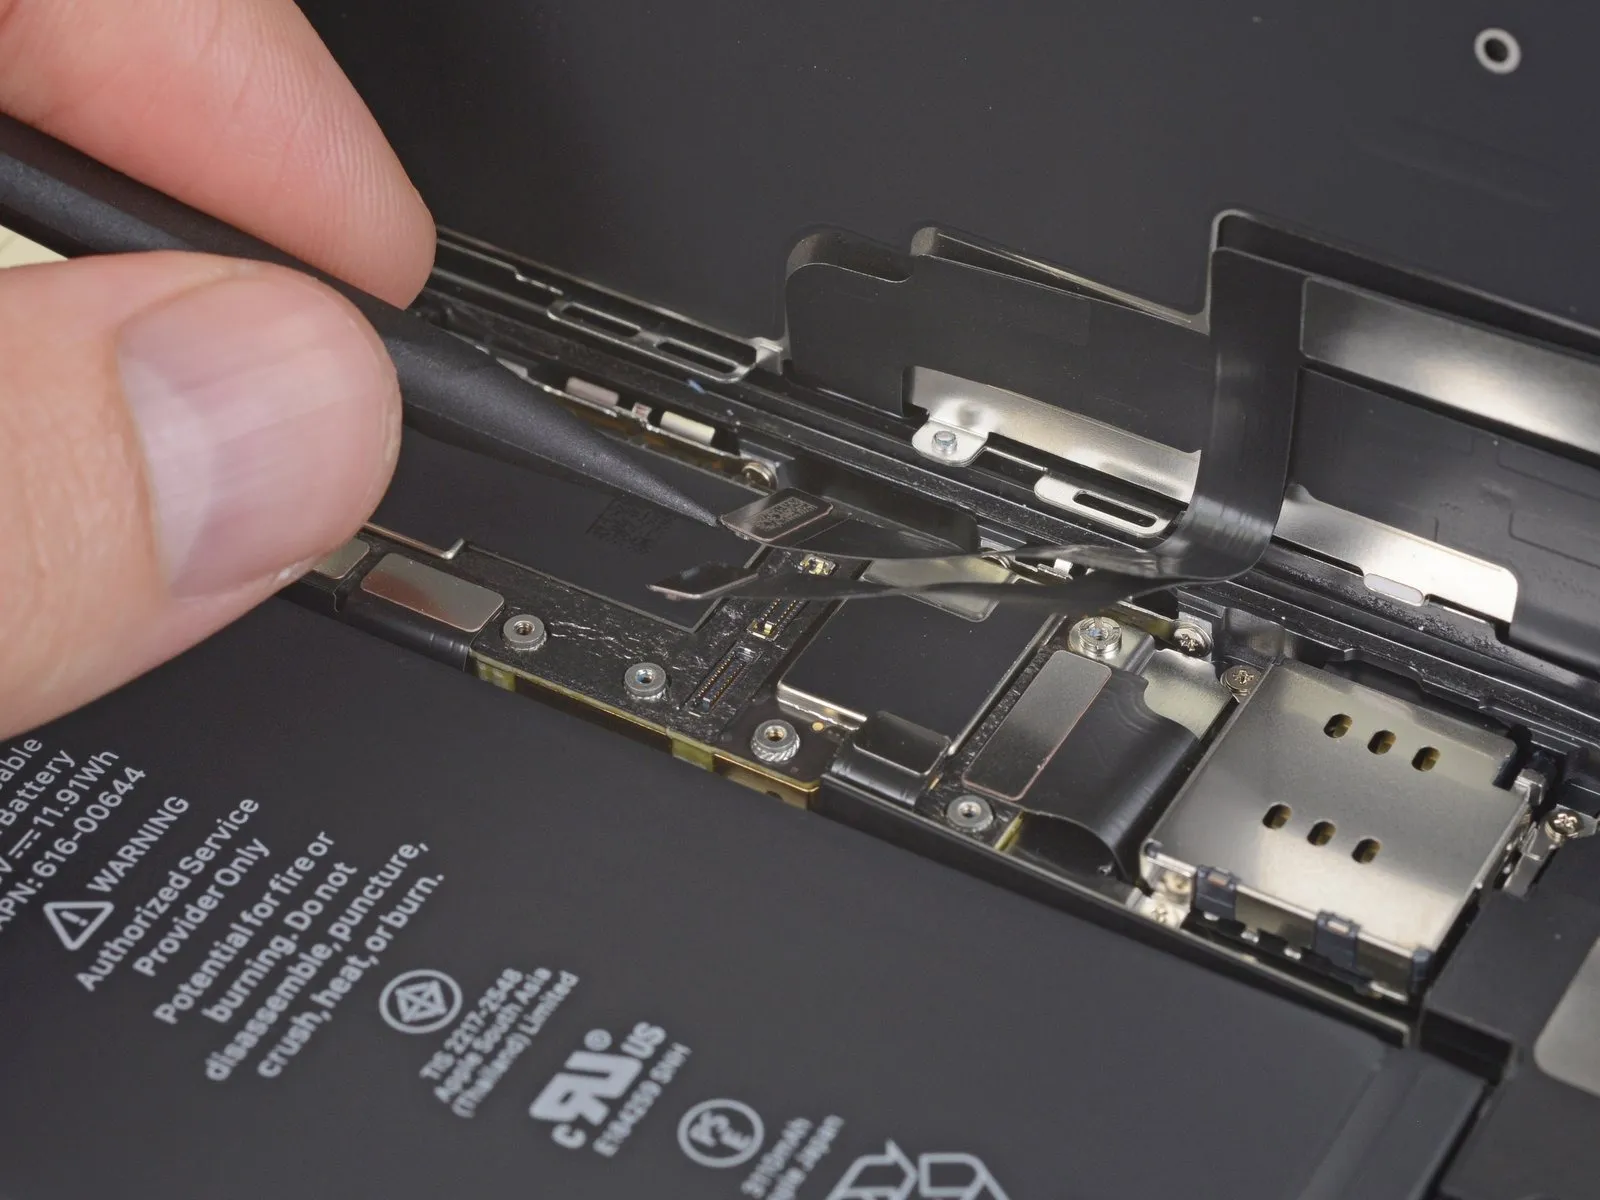
- Employ a spudger alternatively, a fingernail can be utilized to release the LCD panel cable's connection.
Subsequently, detach the digitizer connector, which is situated in close proximity.
Step 24 | Disconnect the front sensors
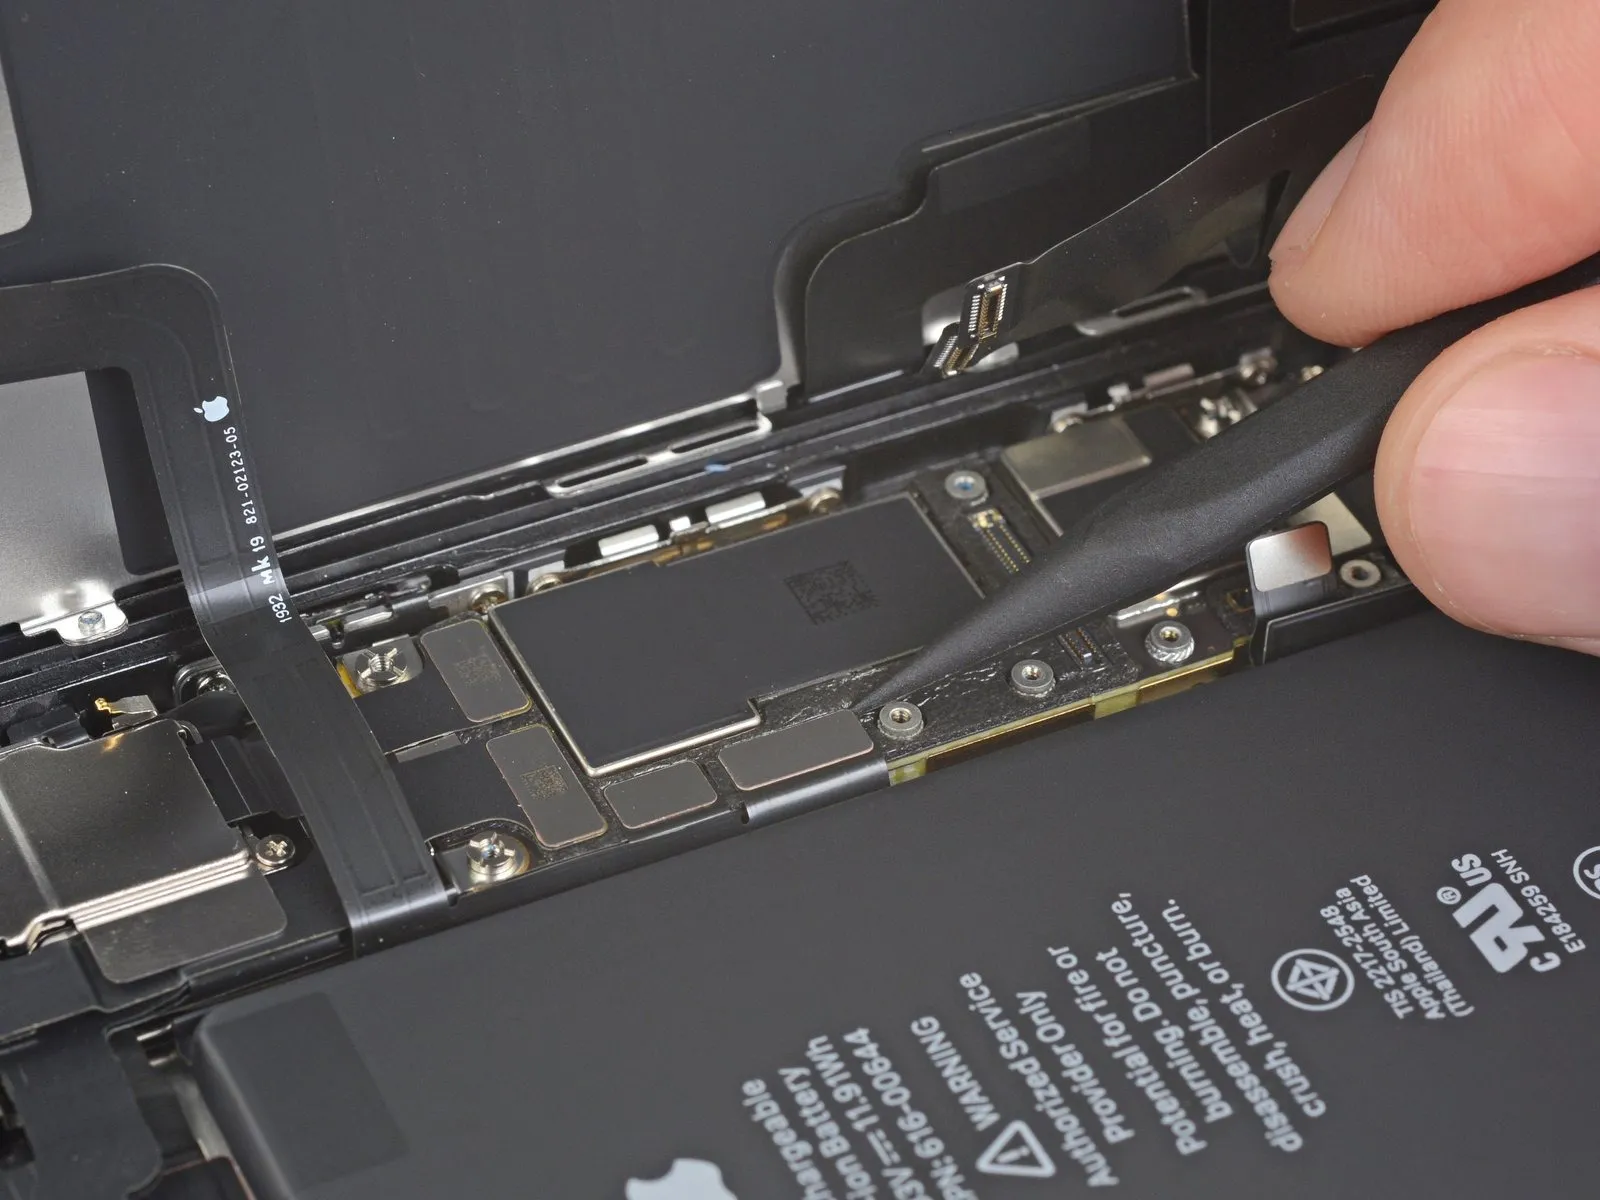
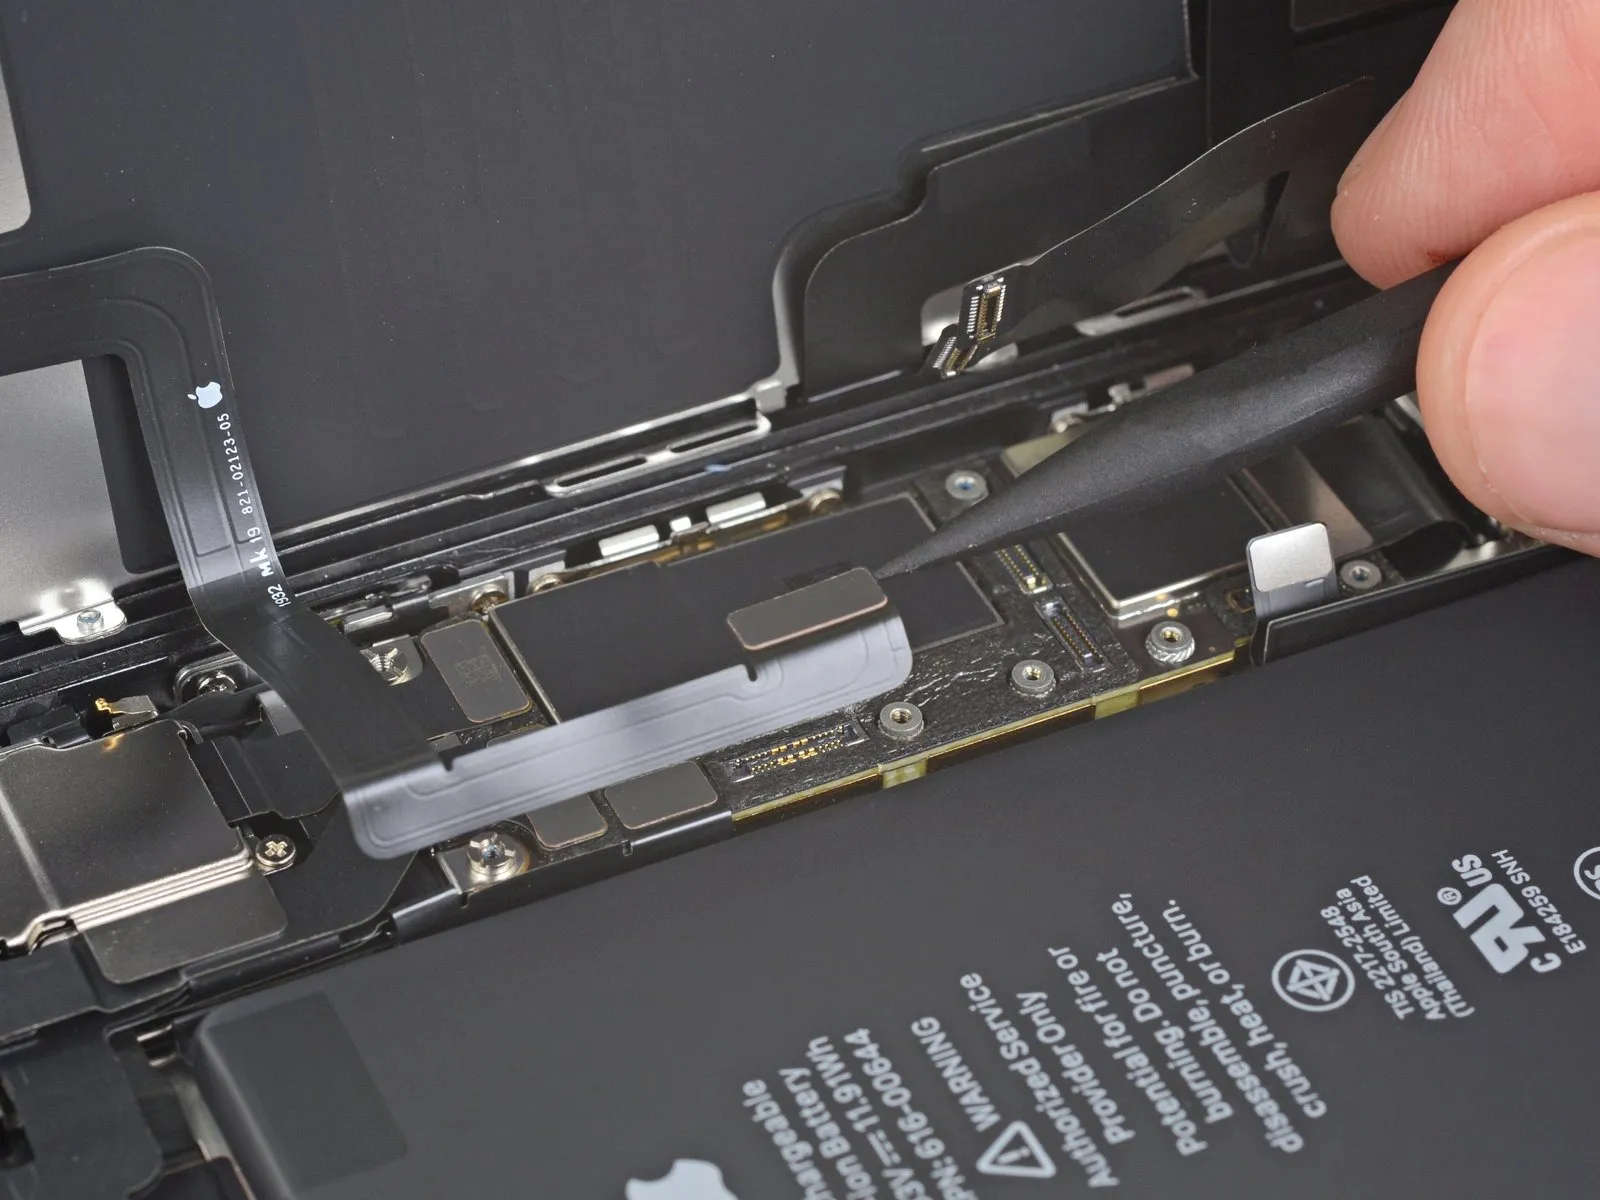
- Employ the tip of a spudger or a fingernail to release the front panel sensor assembly connector from its socket.
Step 25 | Remove the display assembly
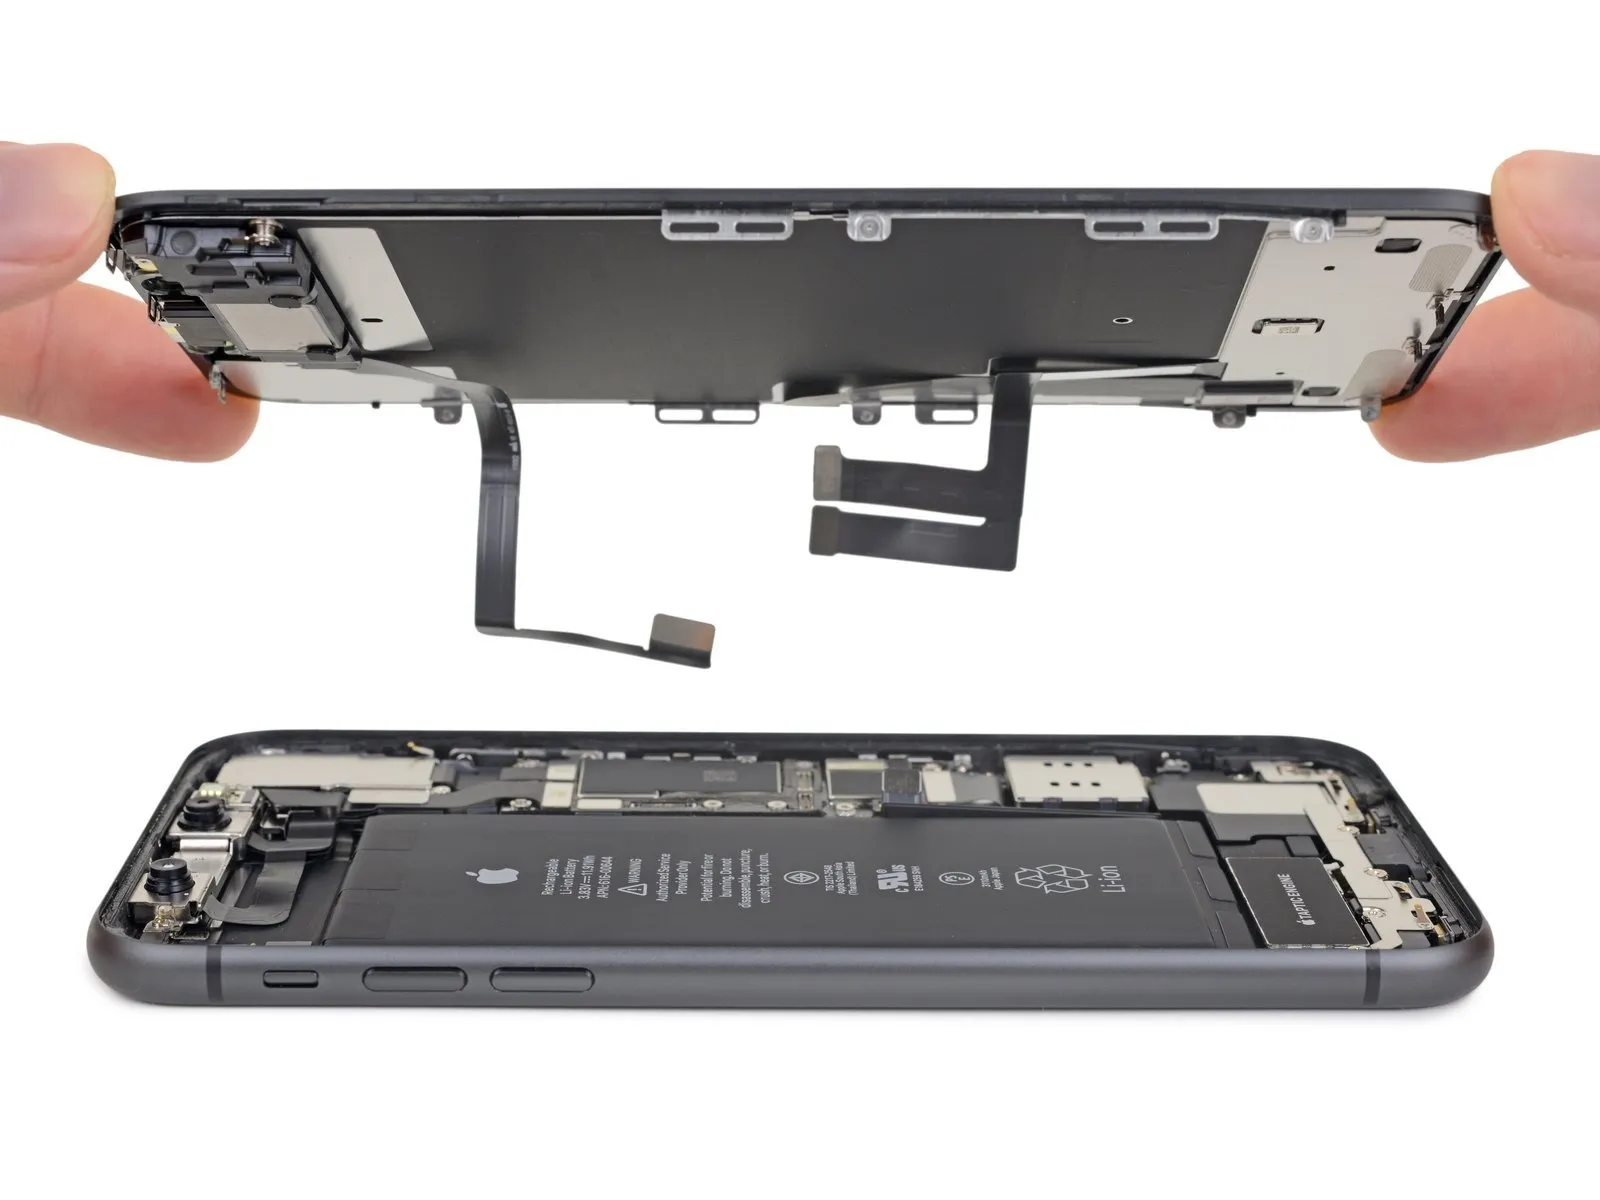
- Detach the display unit from the device.
- When putting the device back together, halt at this point should you desire to substitute the waterproof sealant that borders the display's perimeter.
Step 26 | Remove the lower bracket screws
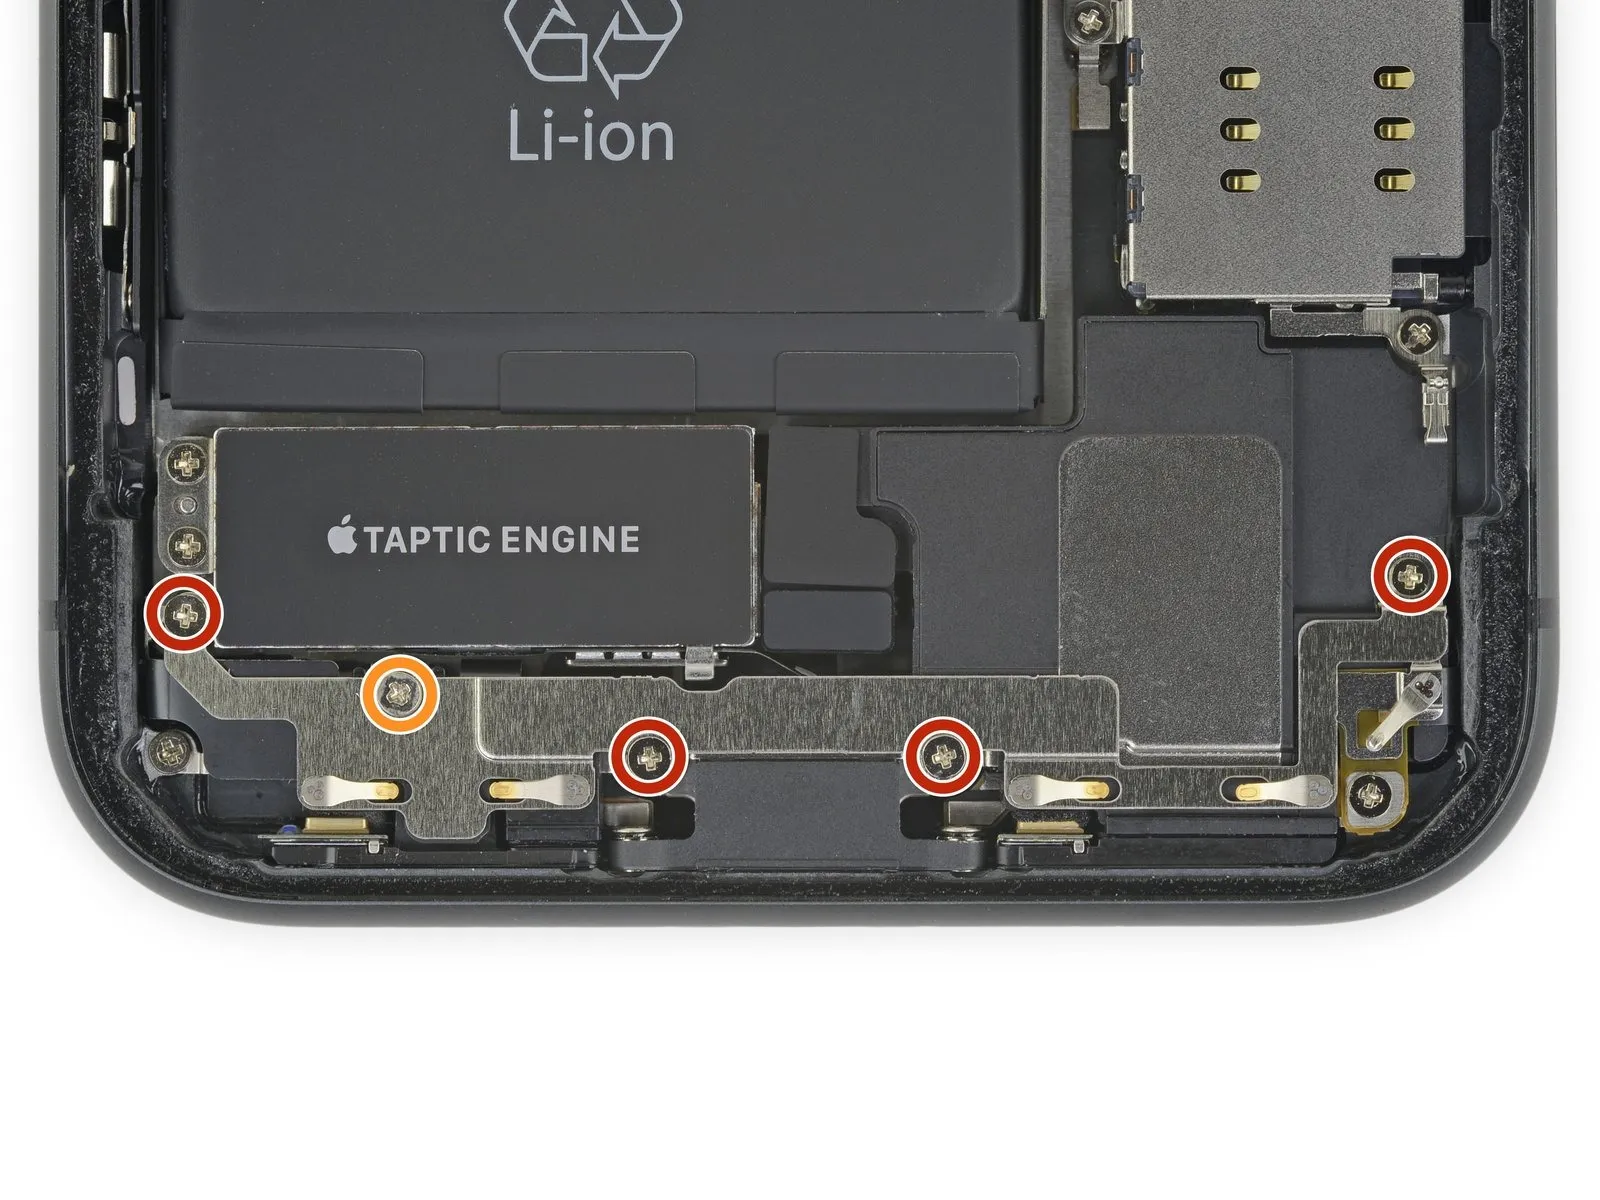
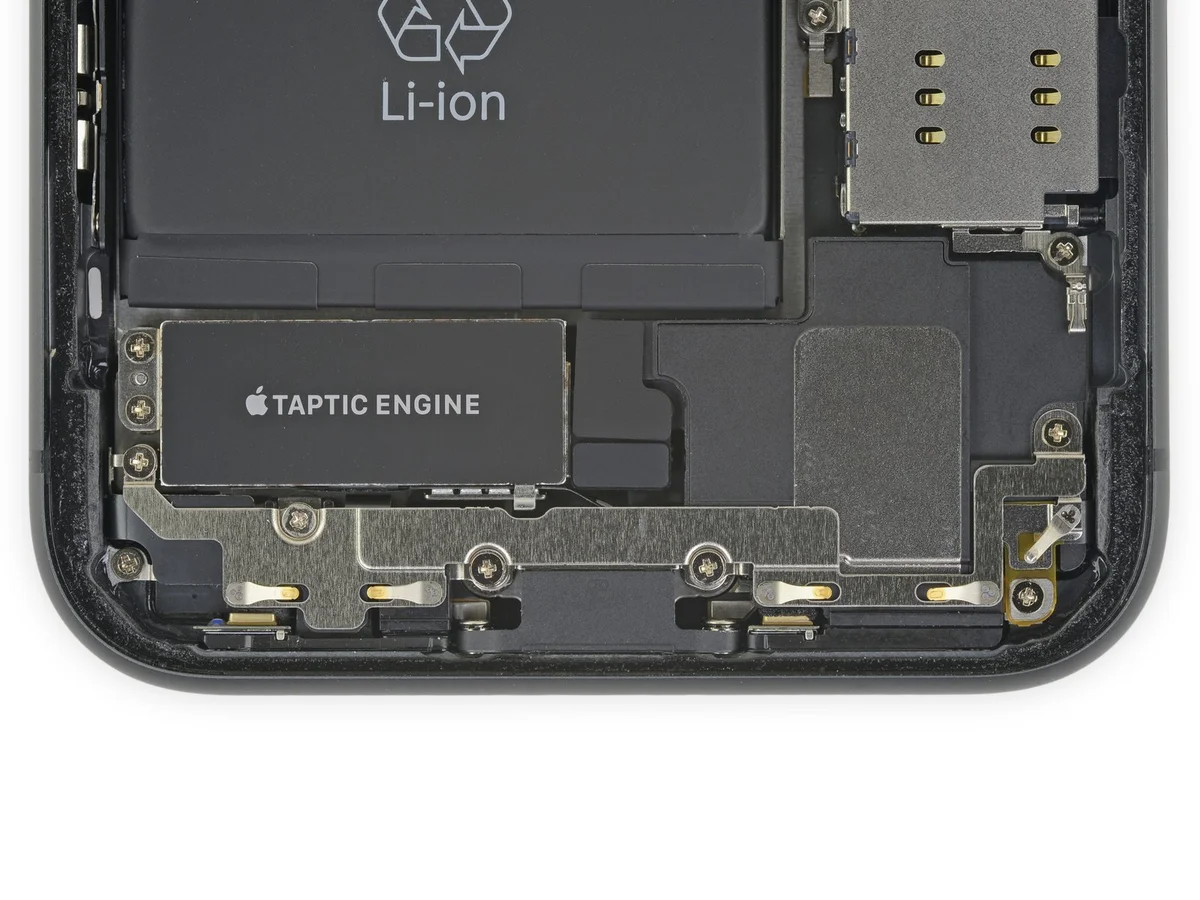
- Employing a Phillips driver, proceed with detaching the bracket situated beneath the Taptic engine and speaker assembly.A Phillips driver is the appropriate tool for this step.The bracket is held in place by five screws, which must be removed.
- Four screws, each measuring 1.6 millimeters in length, are present.
- A single screw with a 1.3-millimeter dimension is also included.
Step 27 | Remove the lower bracket
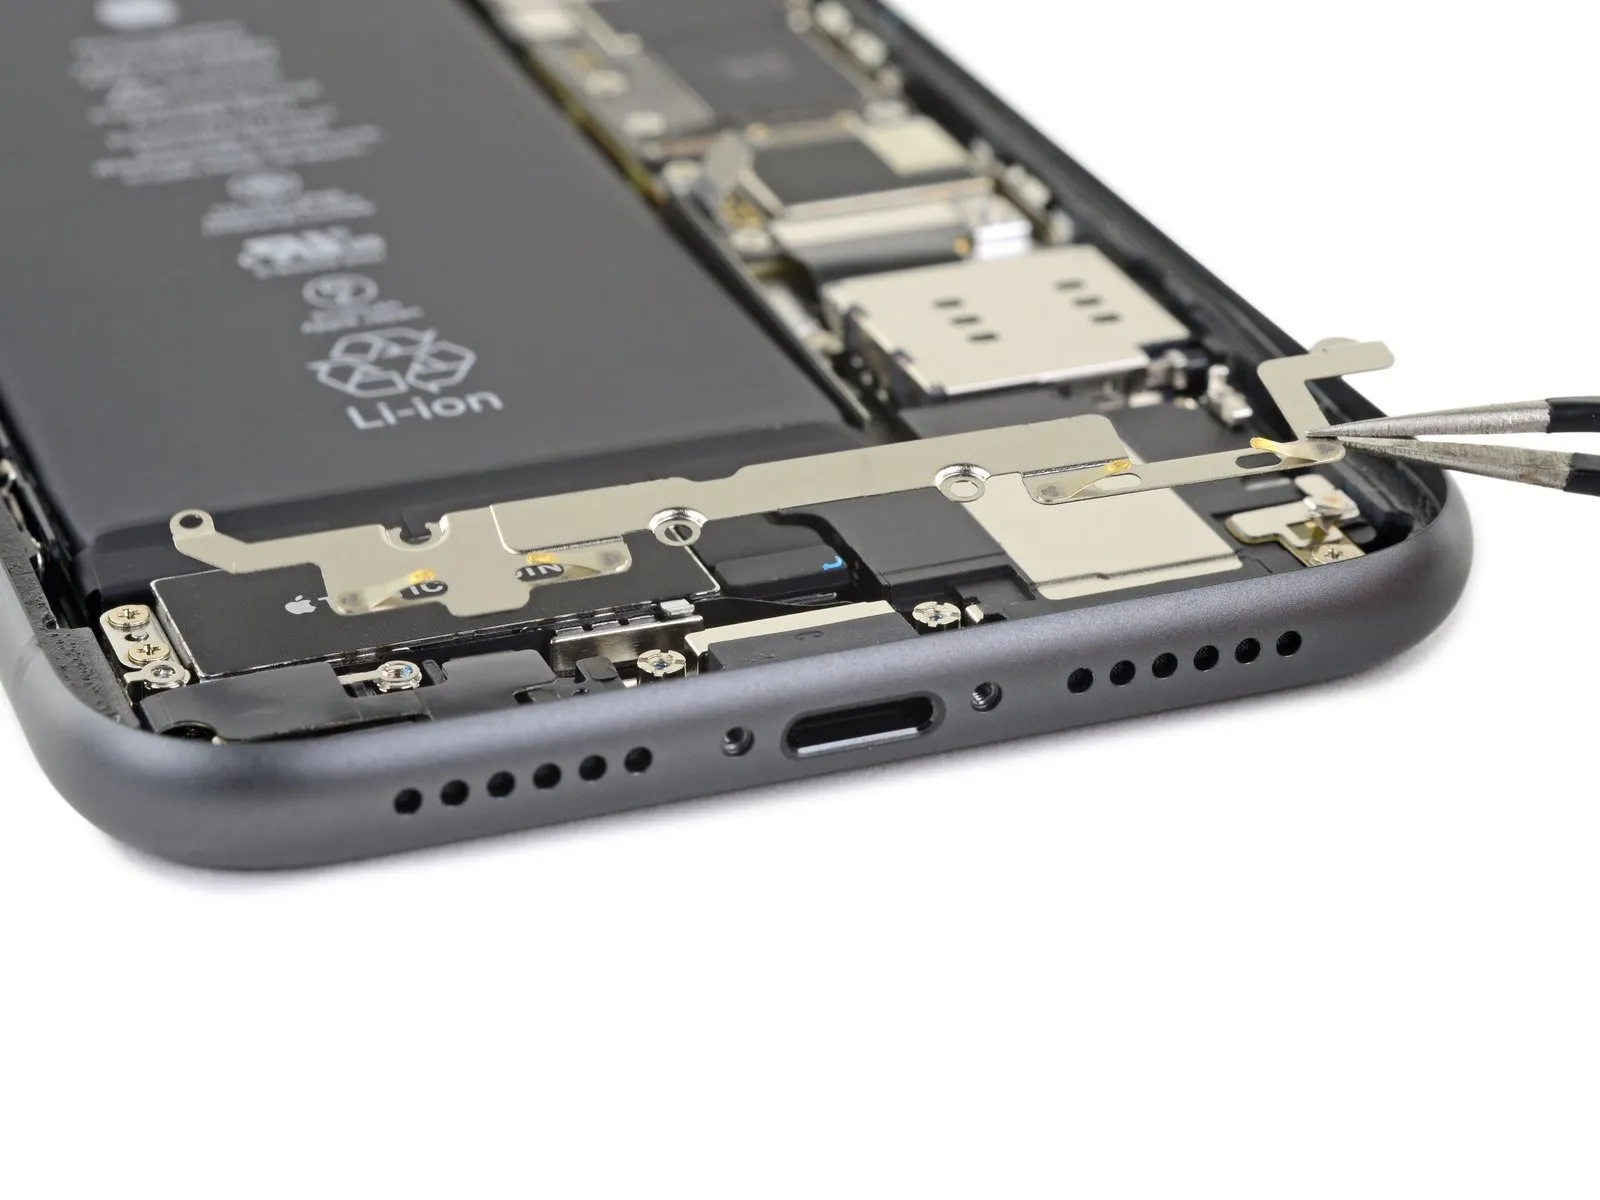
Detach the lower support structure.
Step 28 | Remove the Taptic Engine connector tape
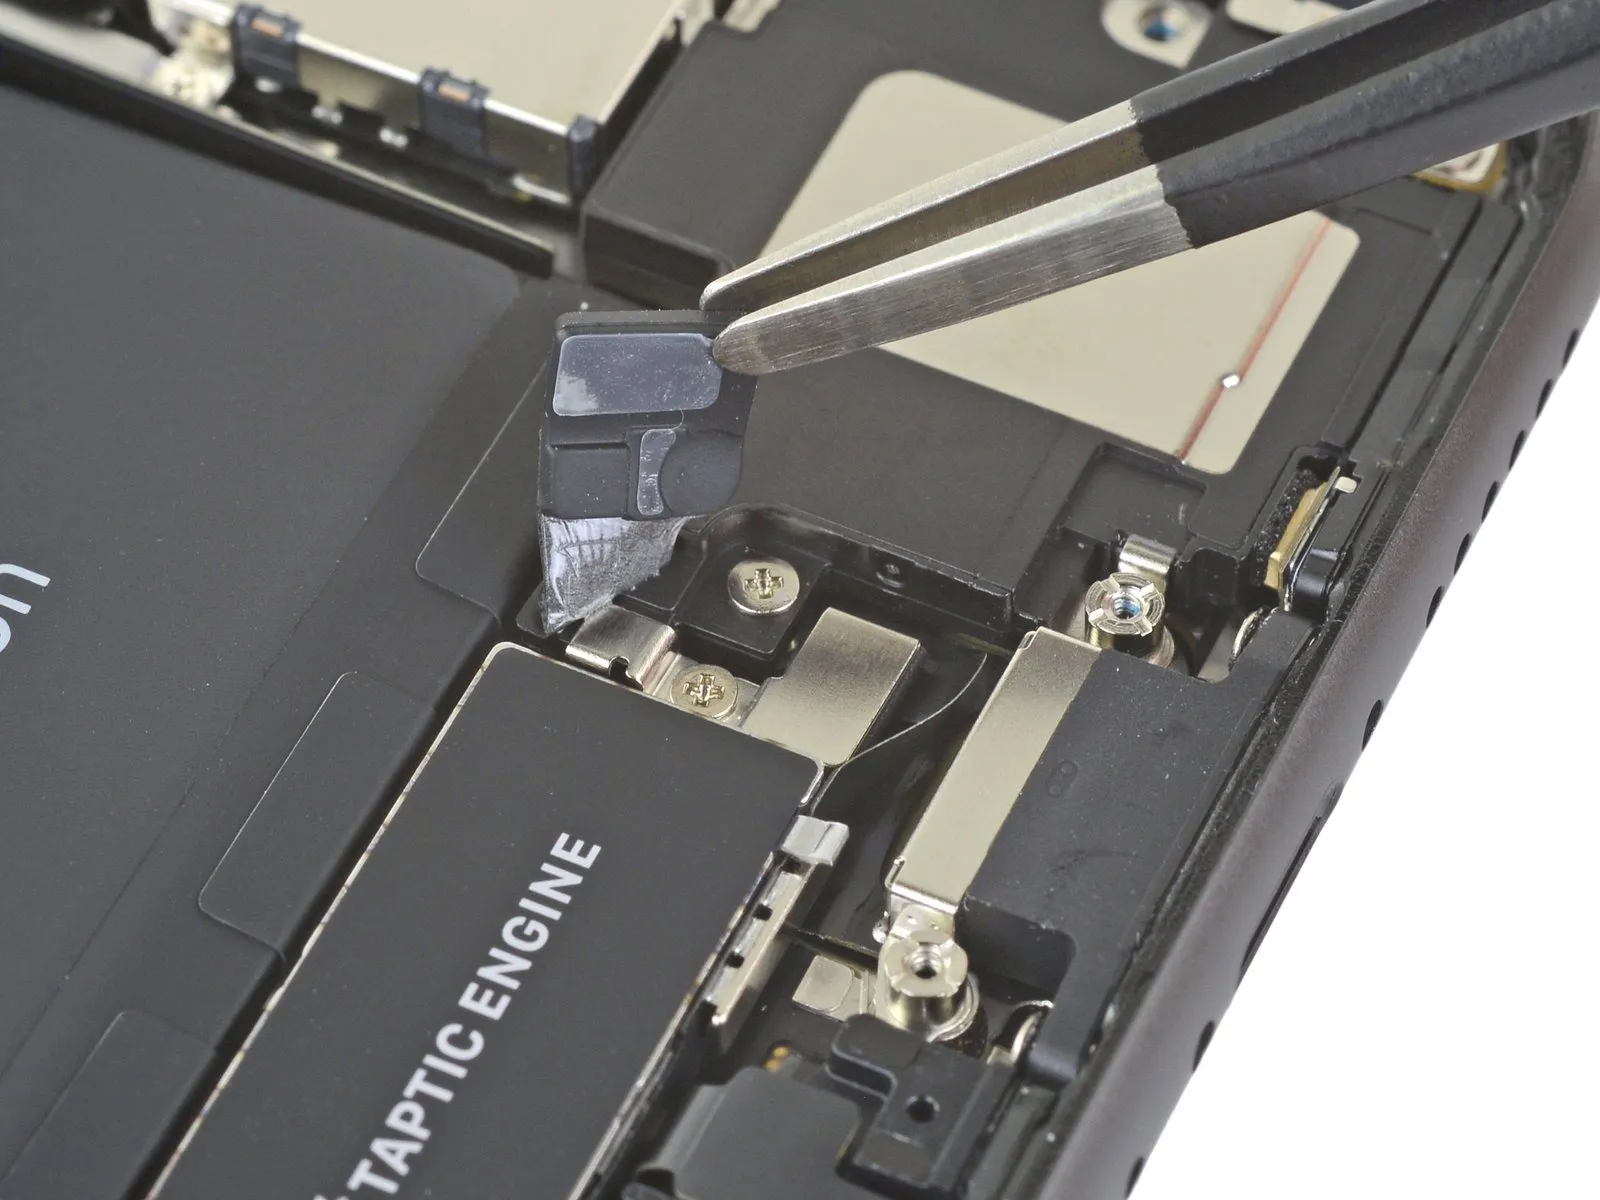
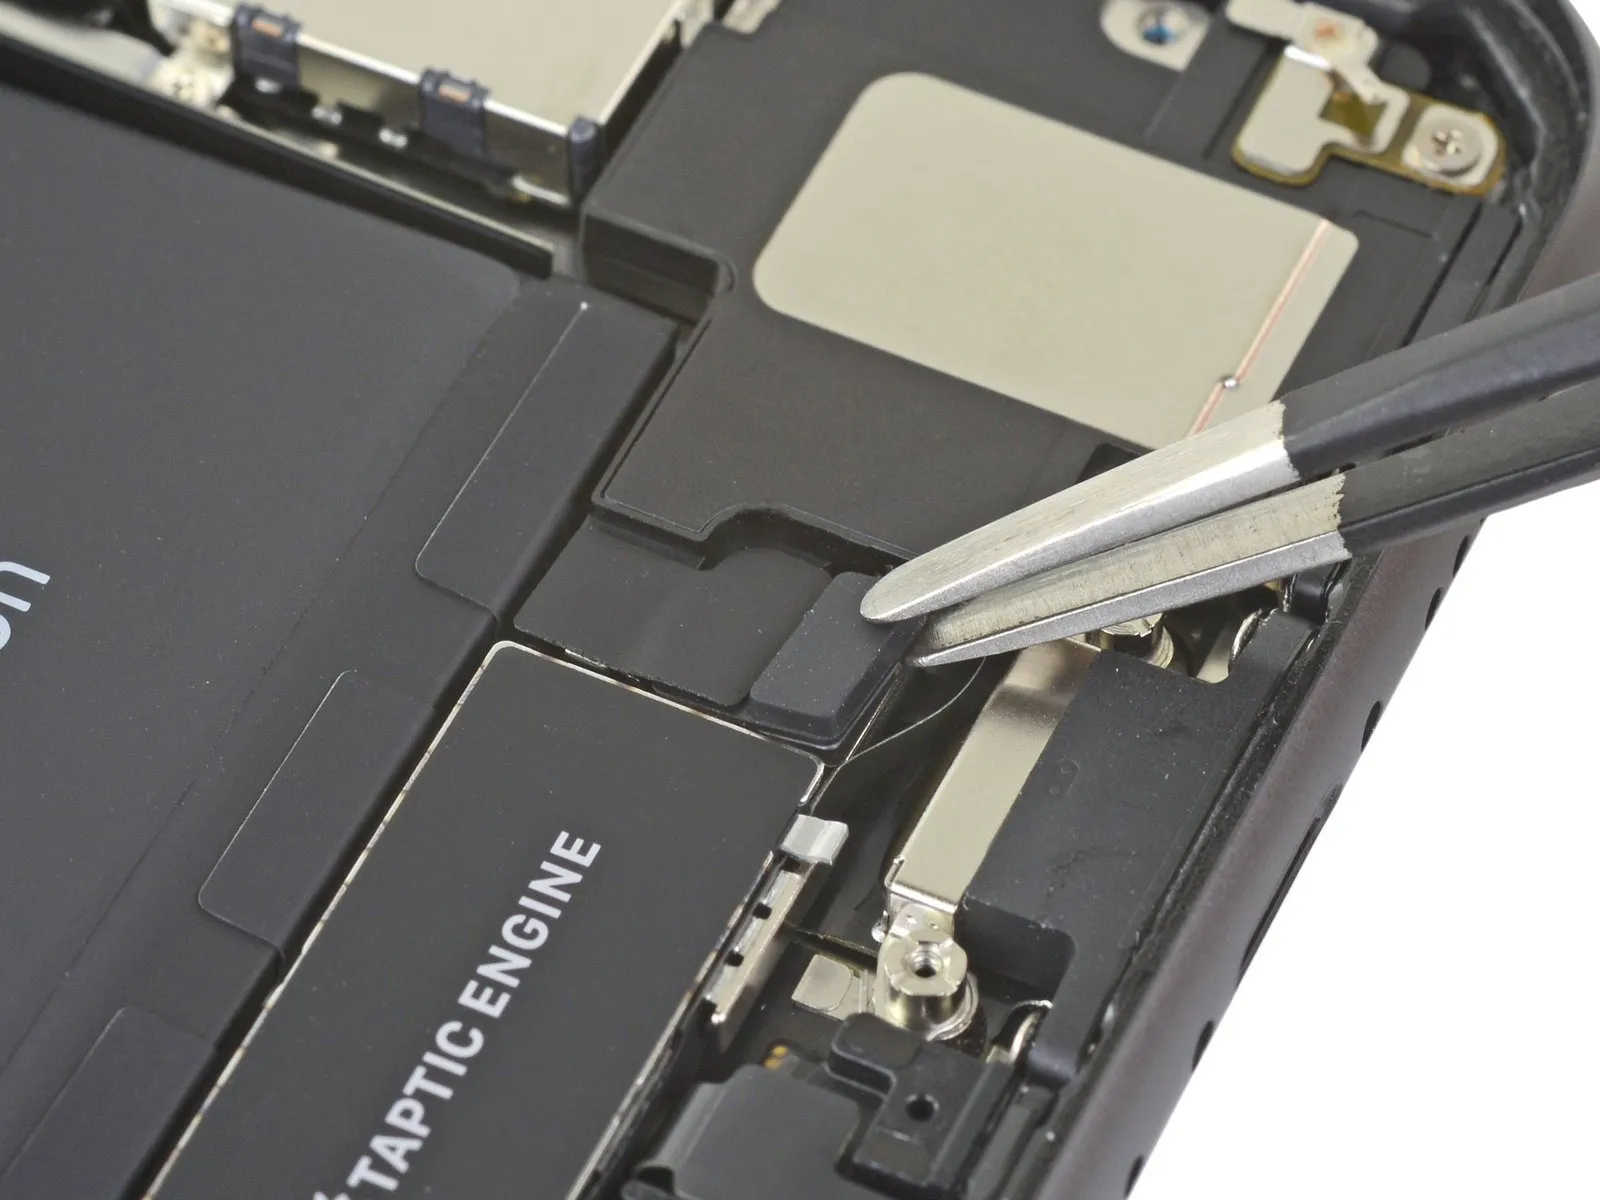
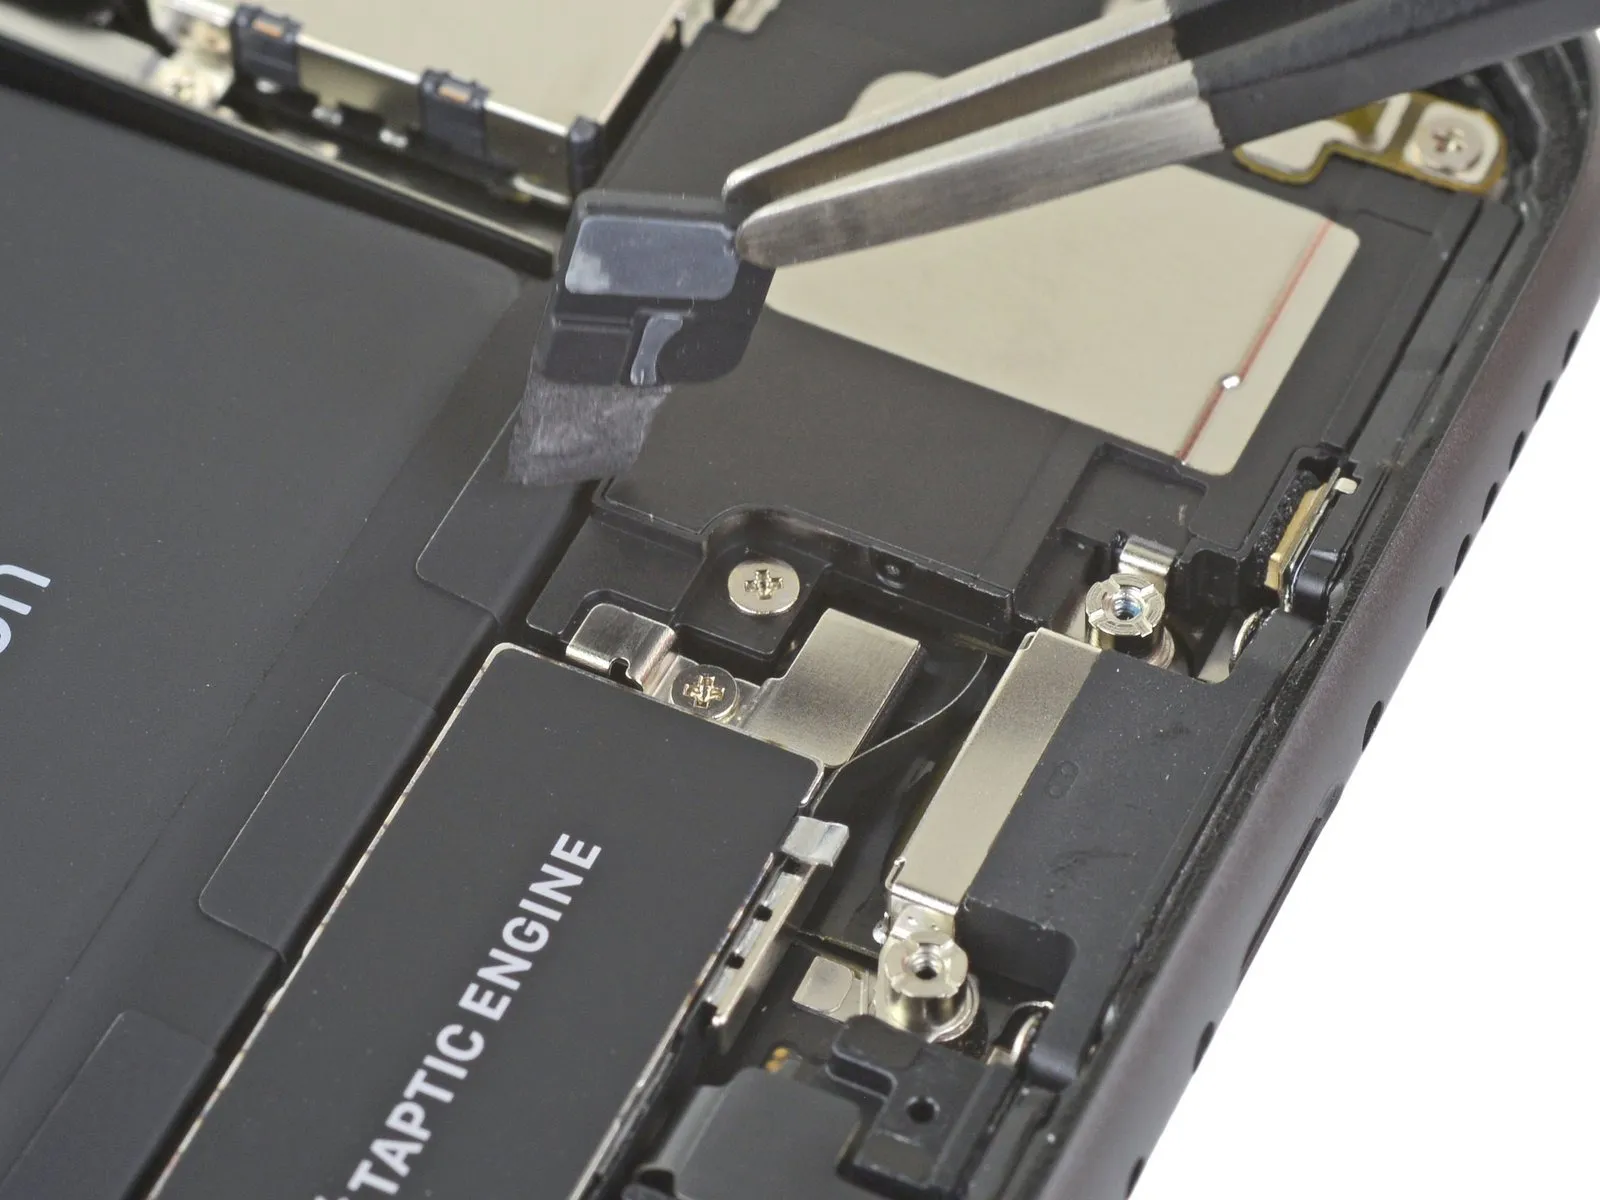
Employing tweezers, carefully detach the black tape and the accompanying rubber pad that shield the Taptic Engine connector.
Applying gentle warmth with a hair dryer or iOpener can facilitate the peeling process of the tape, allowing for its subsequent reapplication.
Step 29 | Unscrew the lower speaker
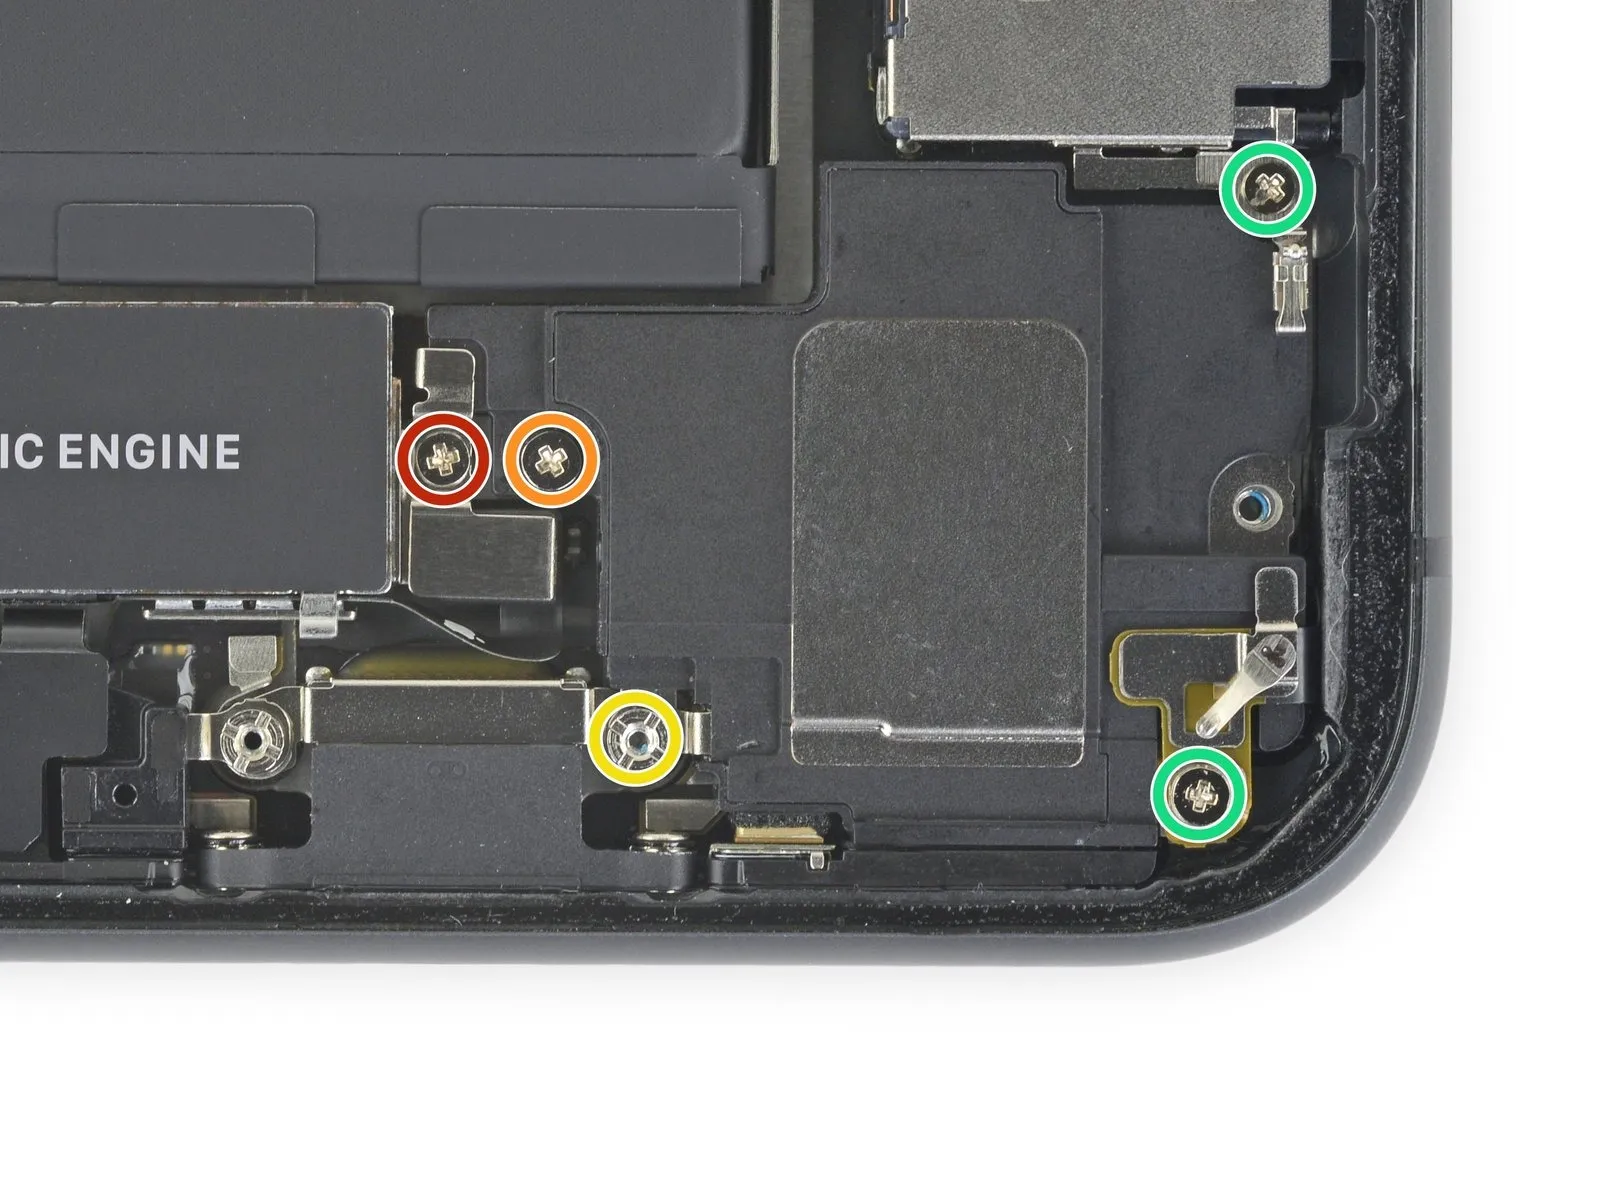
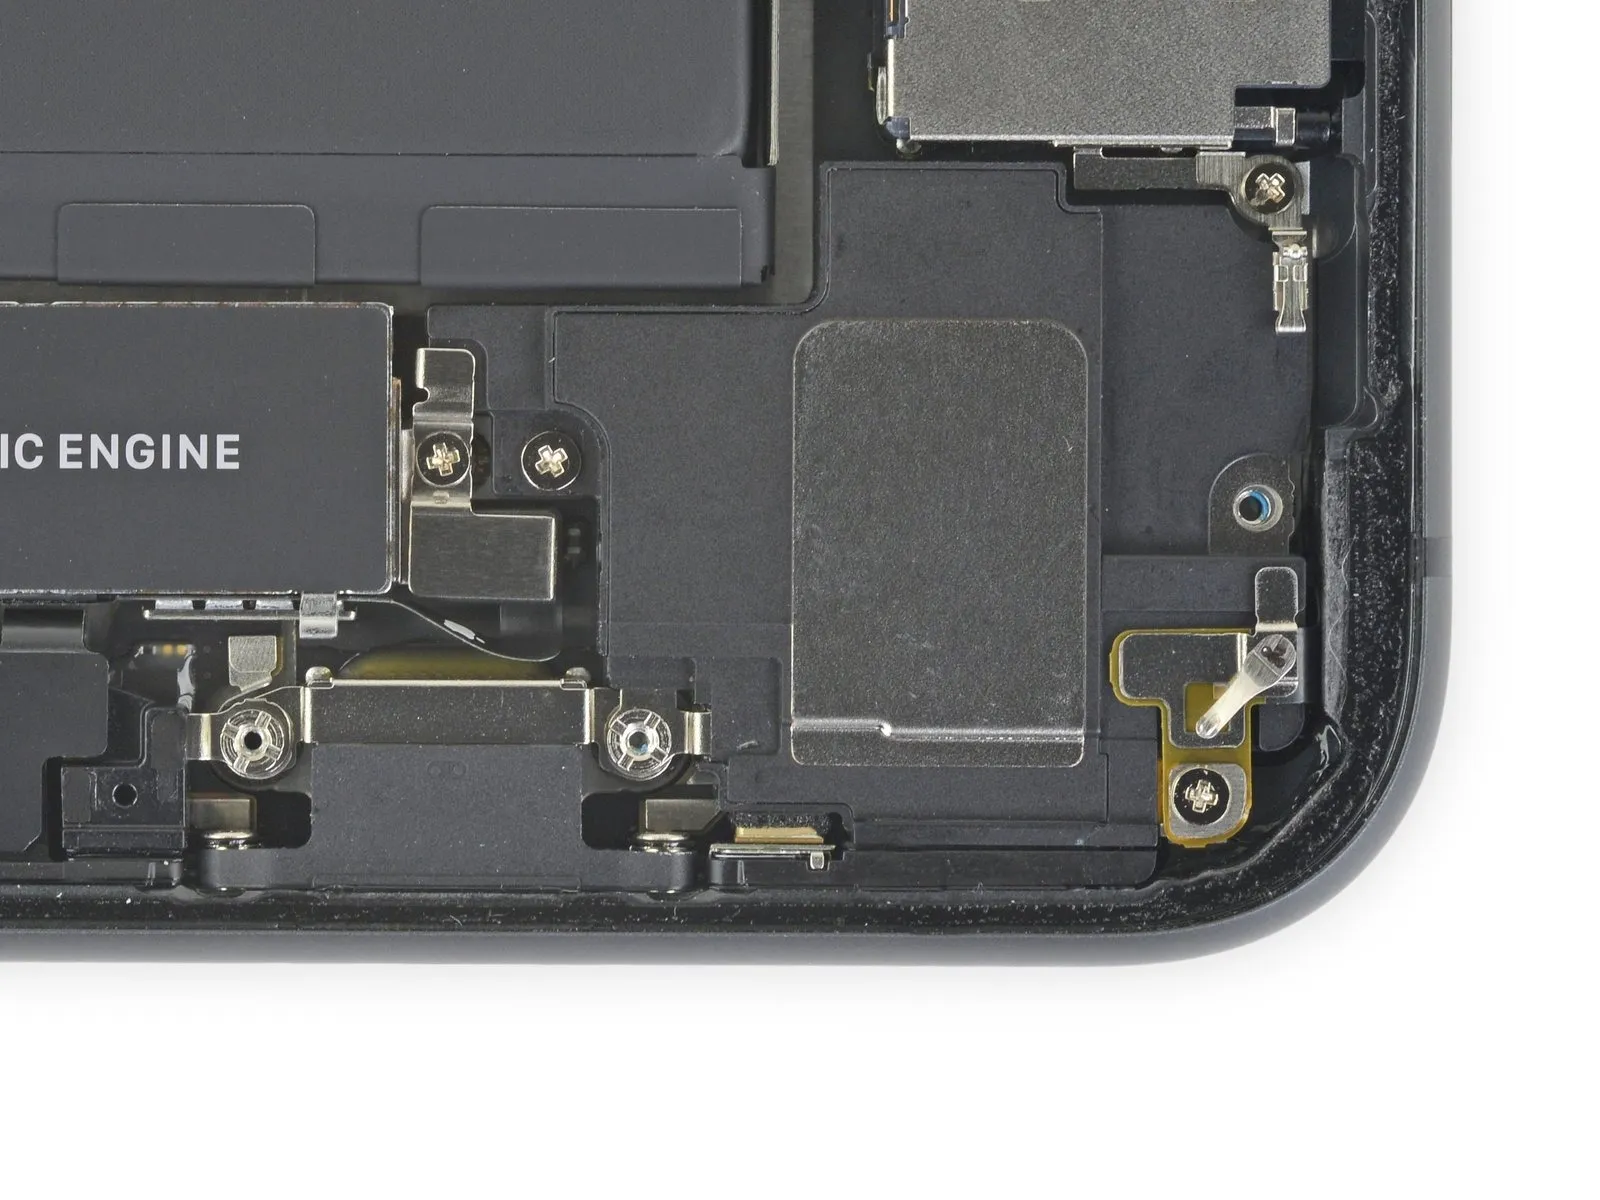
- To detach the speaker and its supporting hardware, first eliminate the five screws that hold them in place.
- A single Phillips head screw with a diameter of 1.9 millimeters is required.
- A Phillips head screw measuring 2.3 millimeters in diameter is also needed.
- A standoff screw, featuring a 3.1-millimeter thread, must be removed.
- Additionally, two Phillips head screws, each with a 1.6-millimeter diameter, are part of the assembly.
Step 30 | Remove the grounding clip
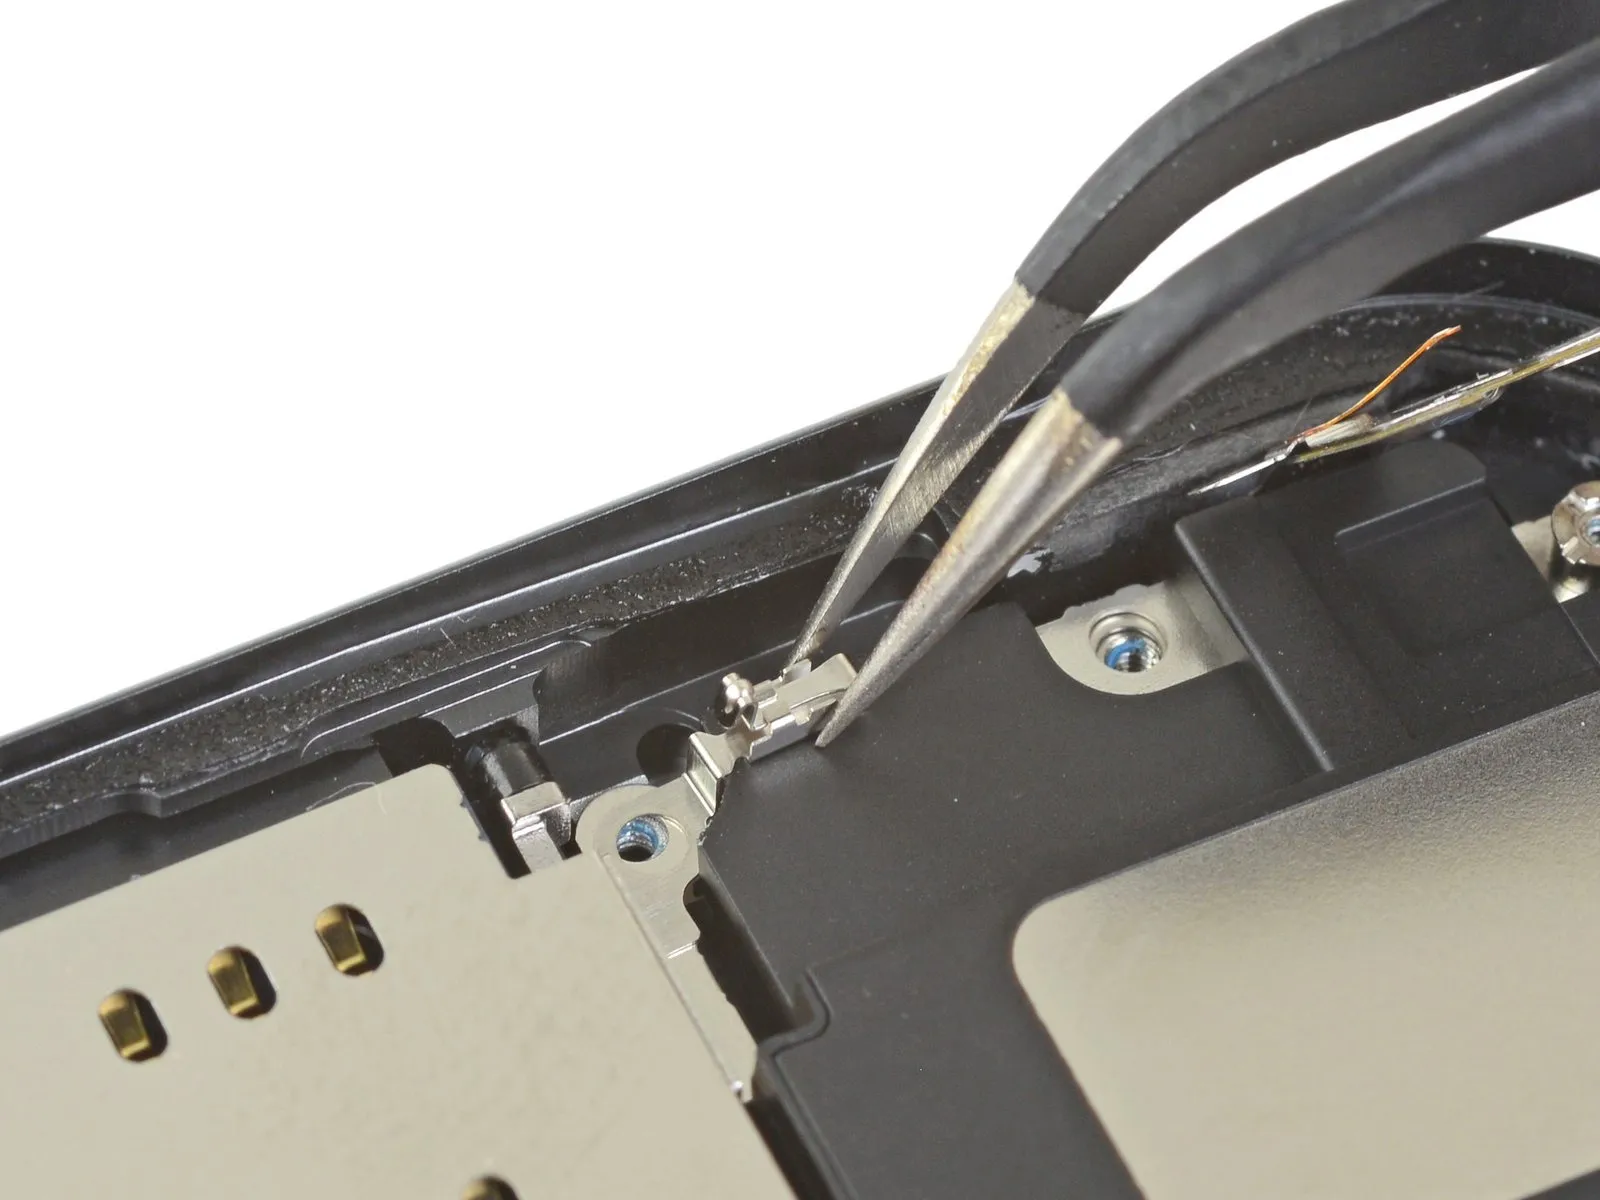
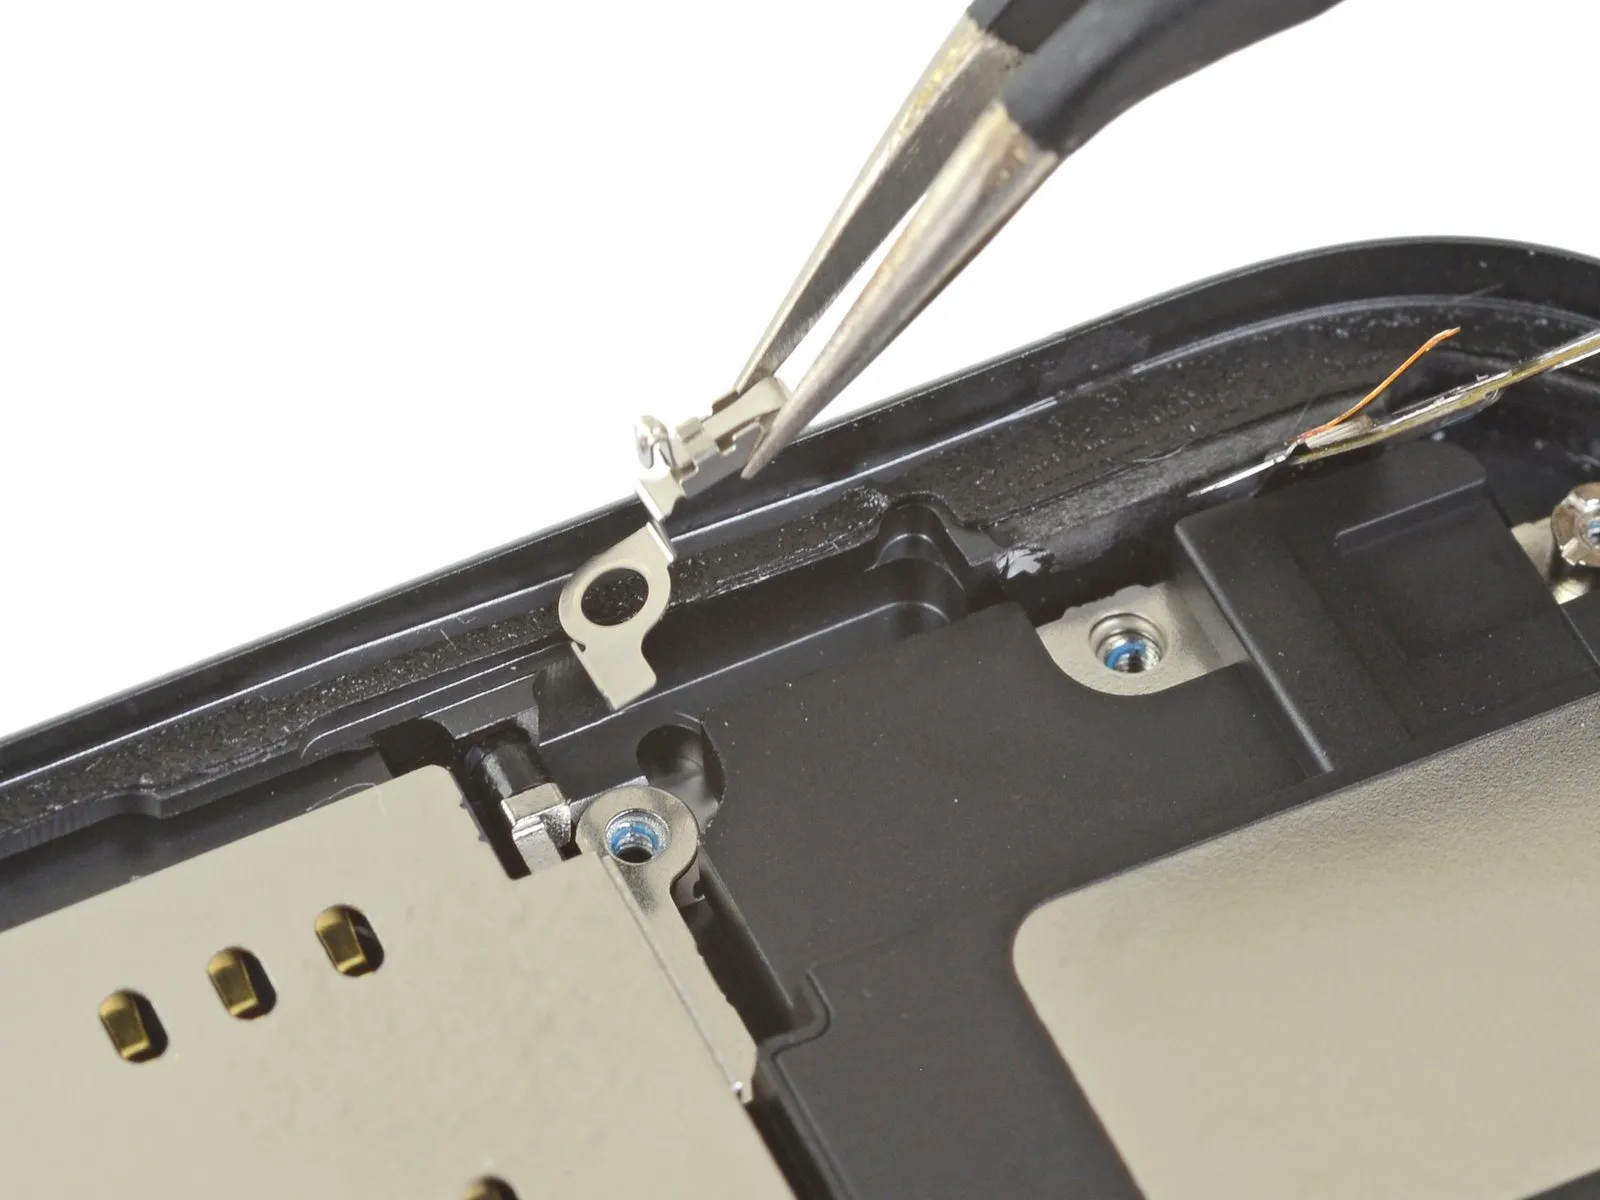
Detach the minor grounding connector situated in the upper-right area of the speaker's housing.
Step 31 | Remove the Taptic Engine connector cover
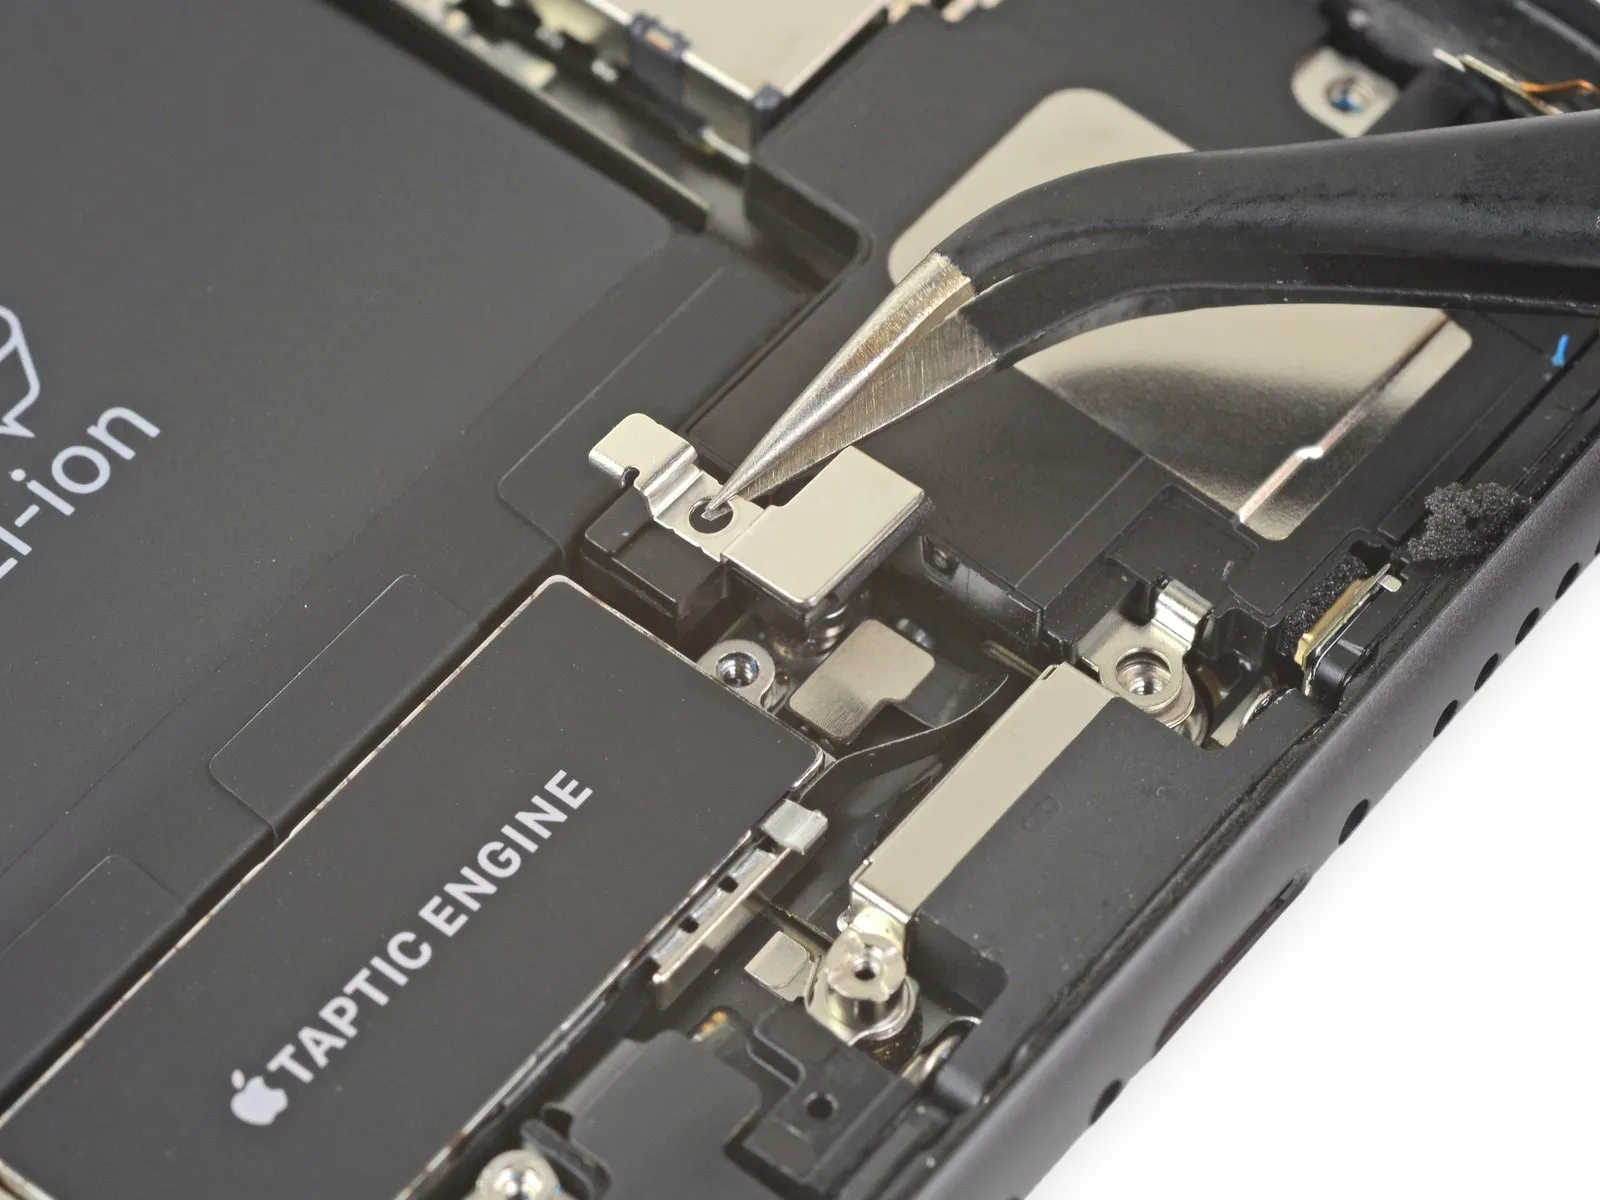
Step 32 | Remove the speaker standoff screw
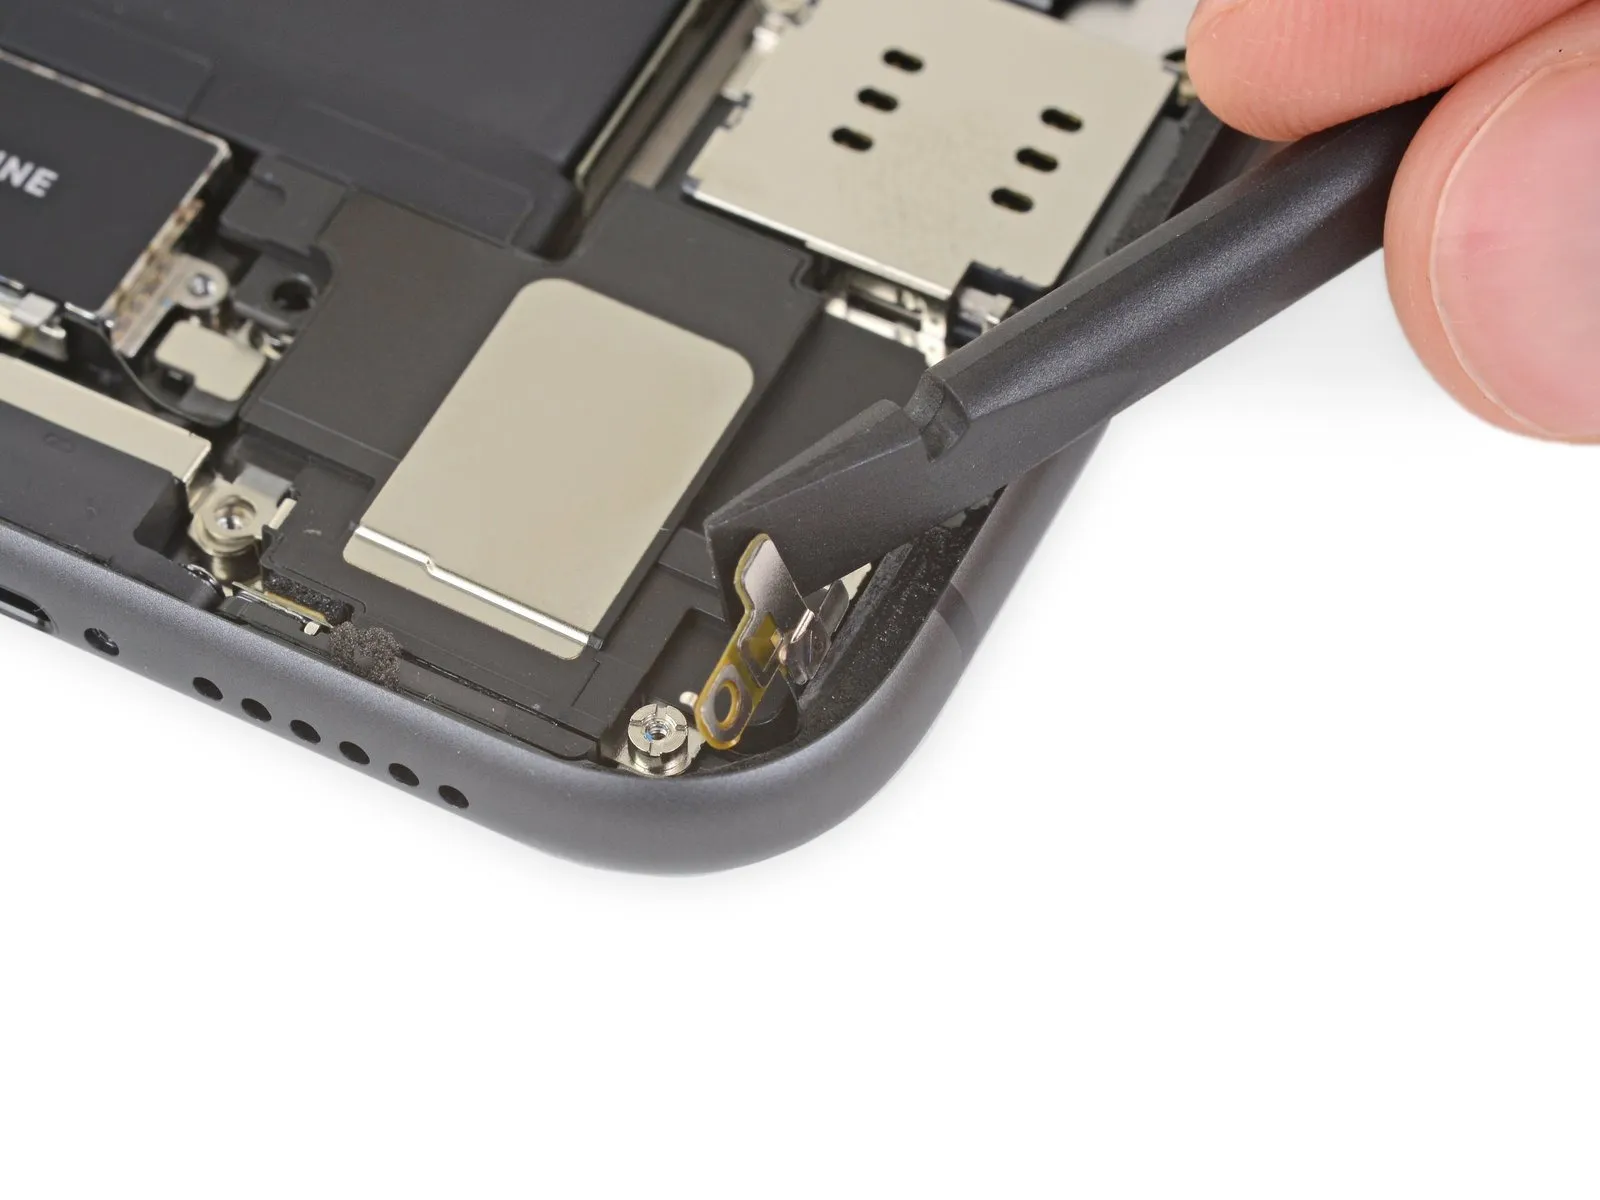
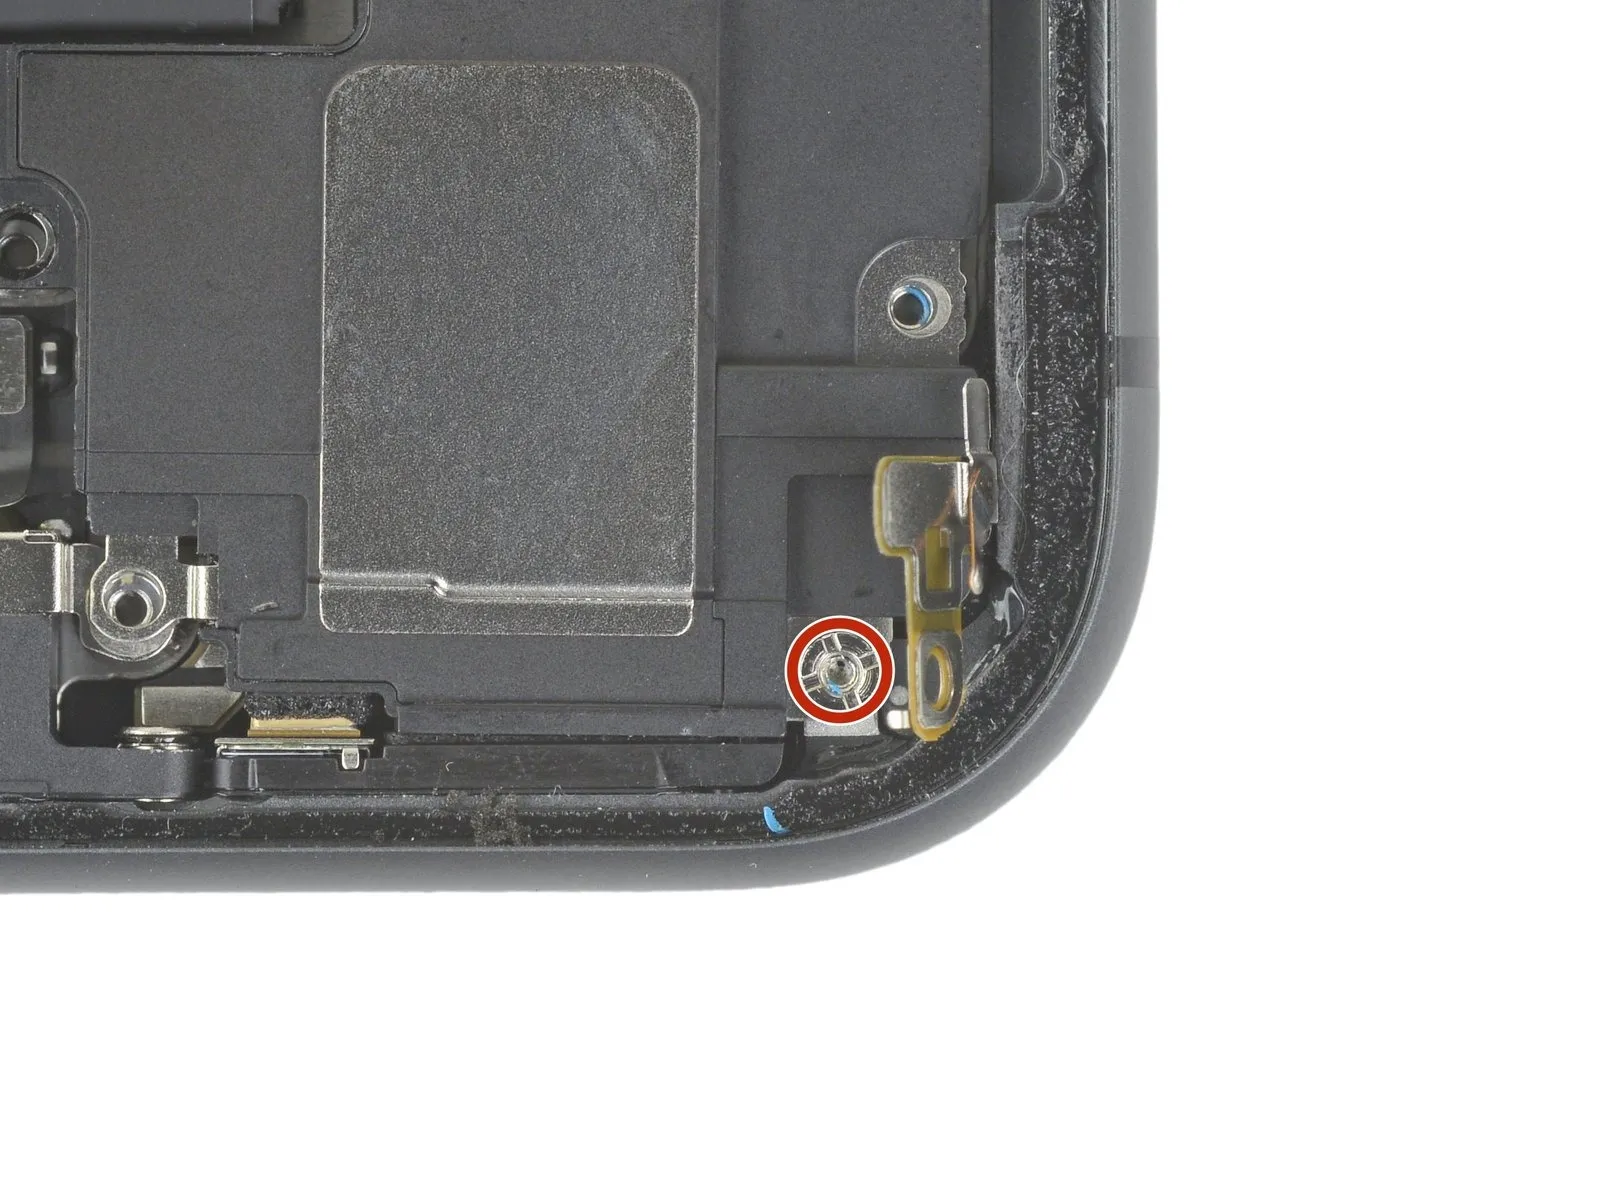
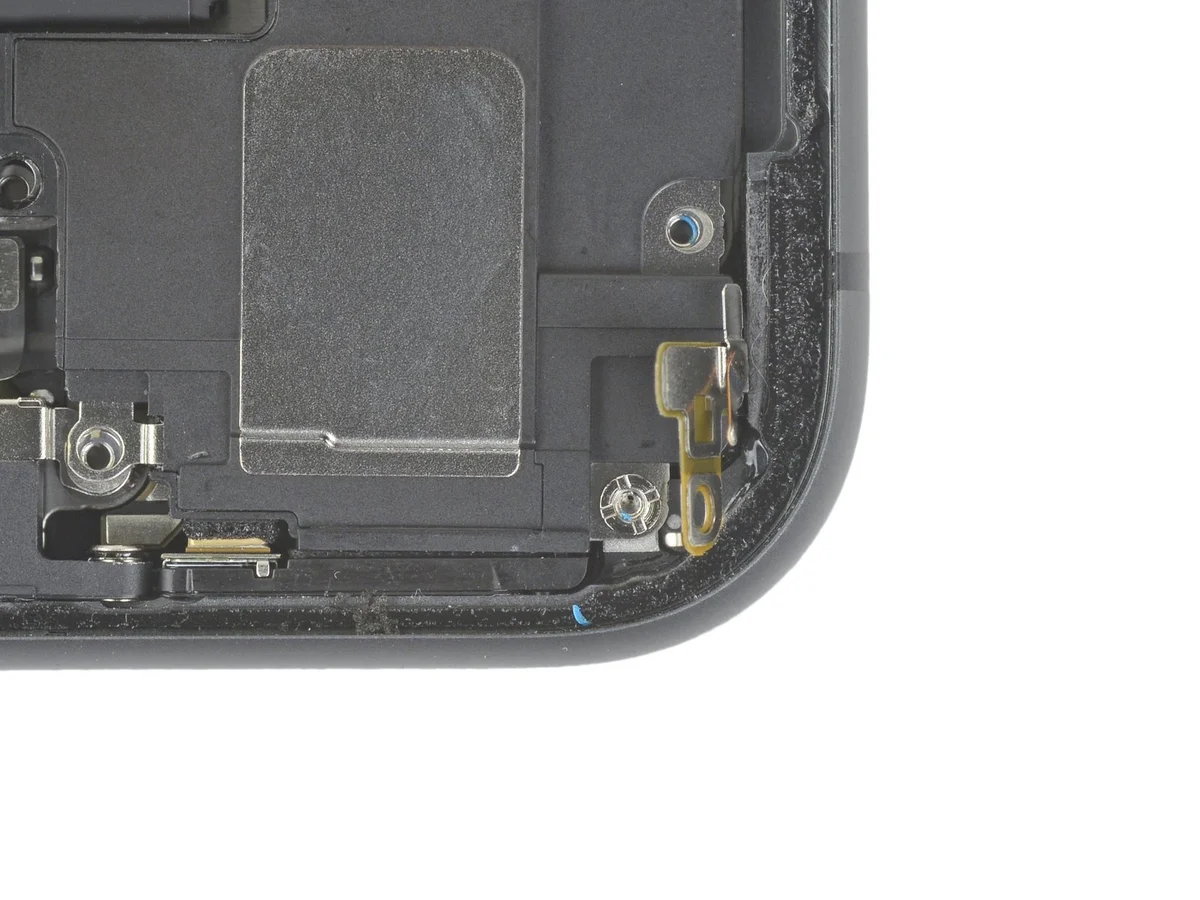
- Carefully raise and move the diminutive circuit board that shields the final speaker securing screw, located in the lower-right section of the iPhone.
Extract the2.4 mm standoff screw positioned below.
Step 33 | Loosen the speaker
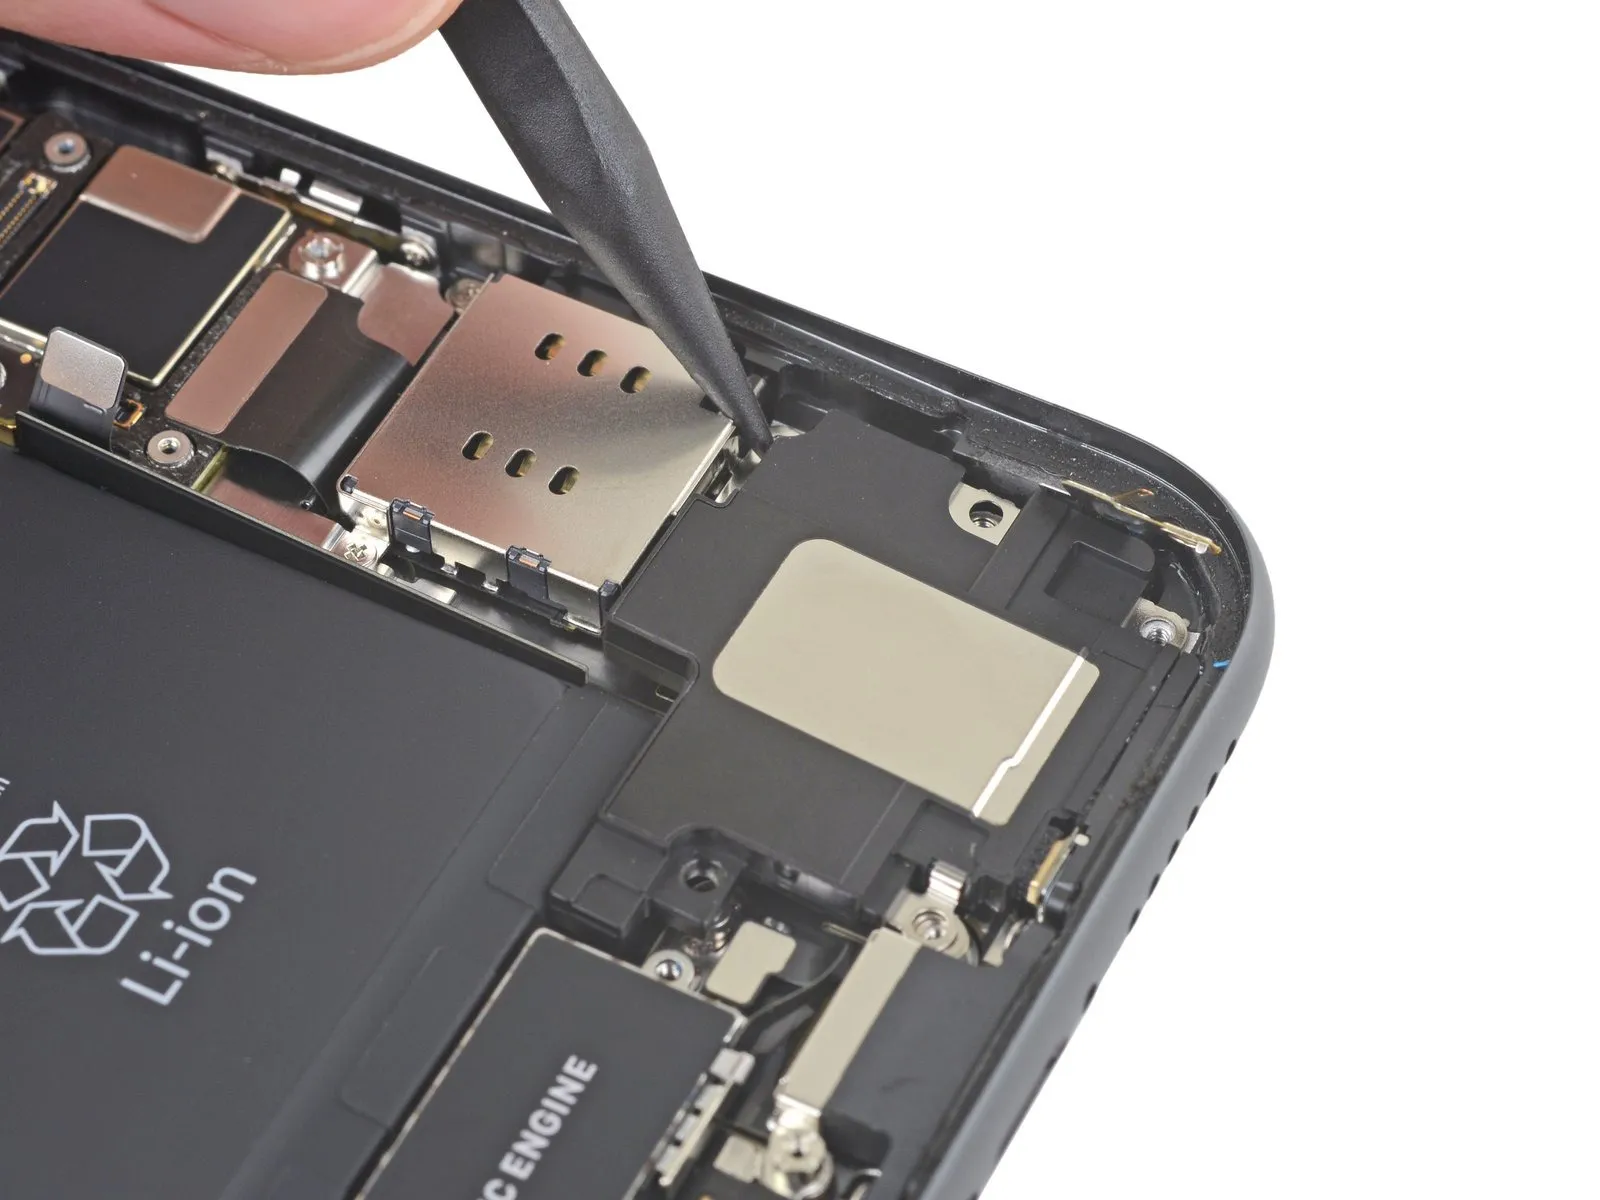
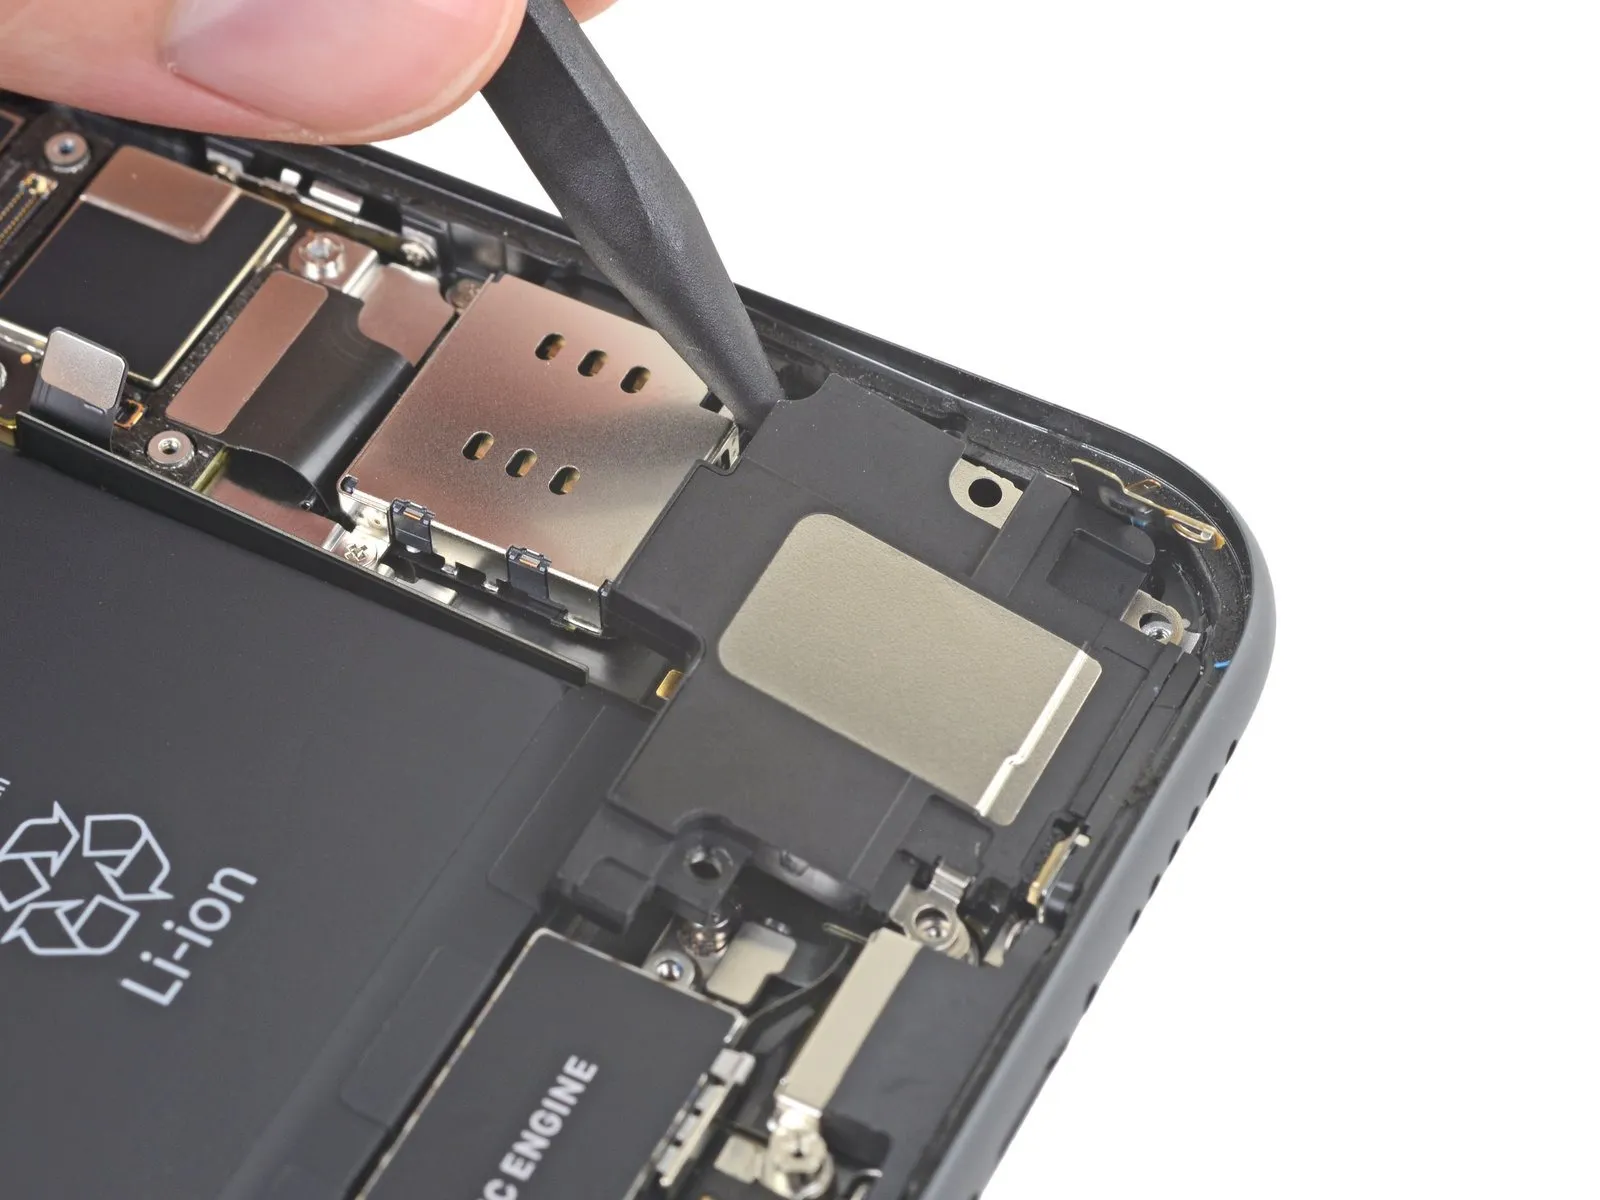
- Carefully slide a spudger beneath the upper boundary of the speaker, positioning it close to the perimeter of the iPhone's enclosure.
- With a delicate motion, elevate and detach the superior edge of the speaker.
Step 34
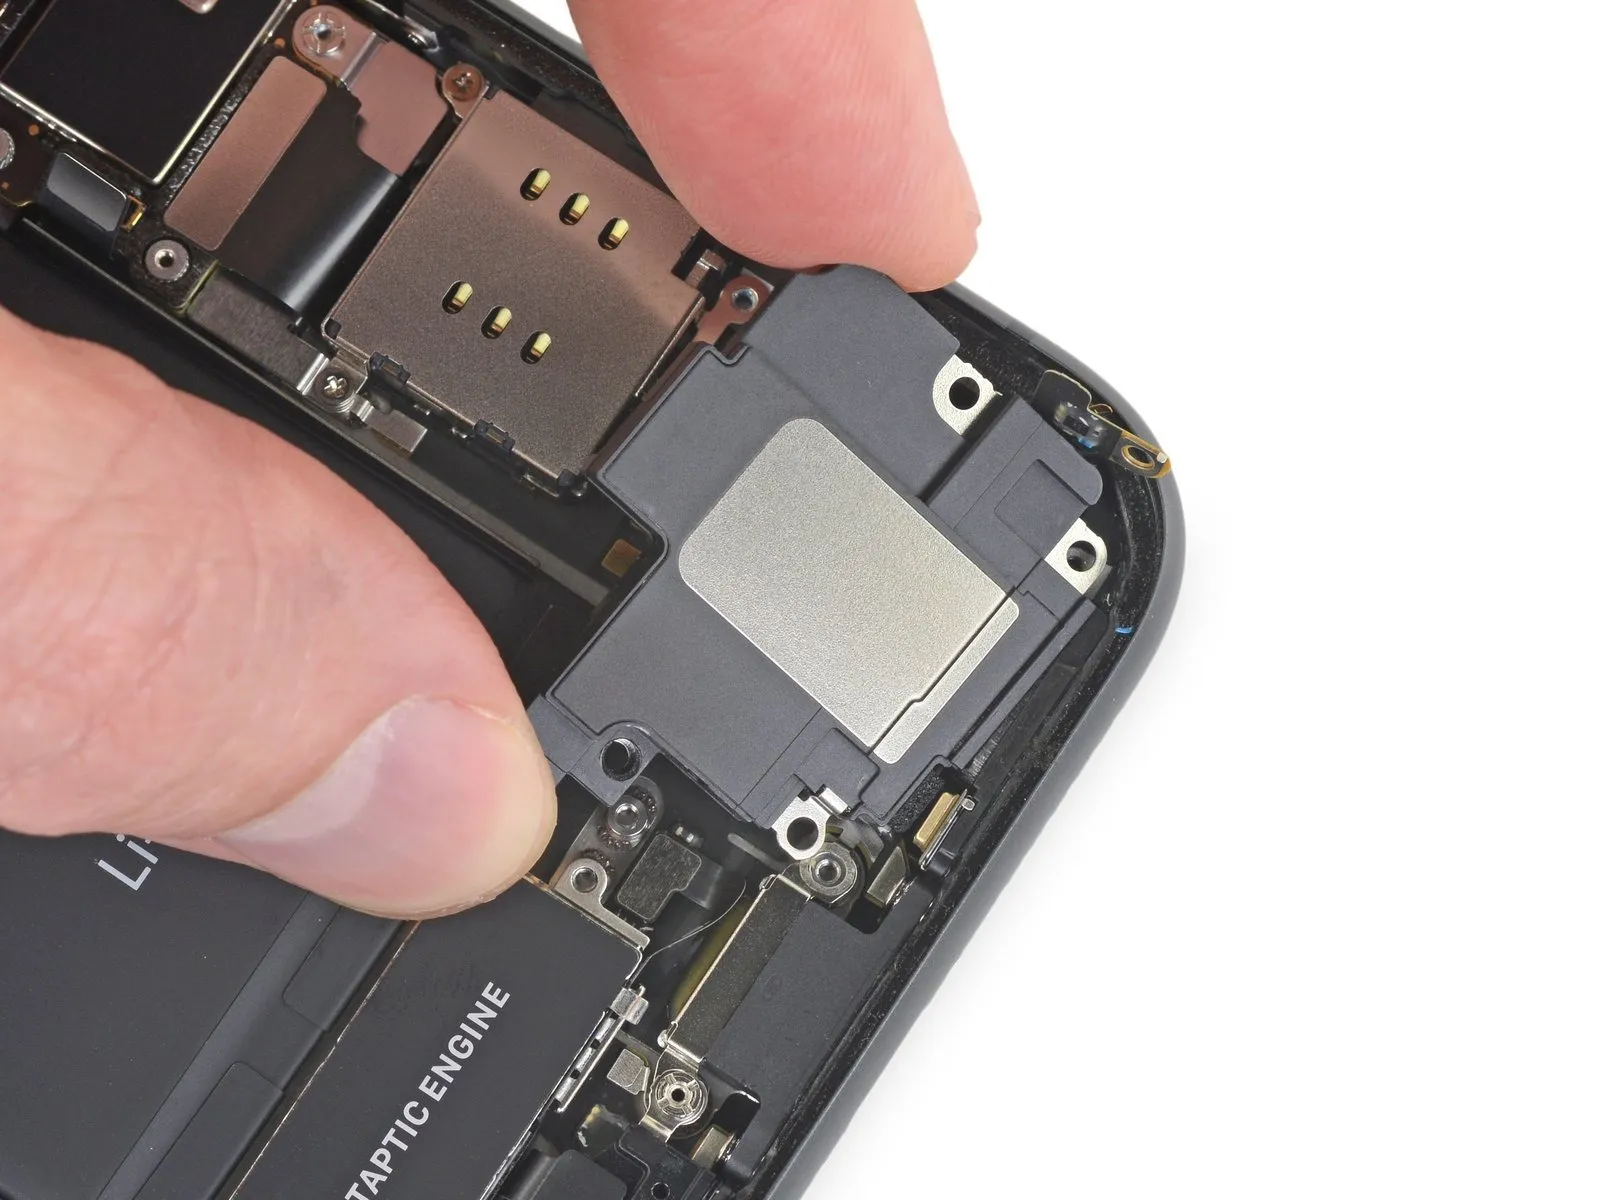
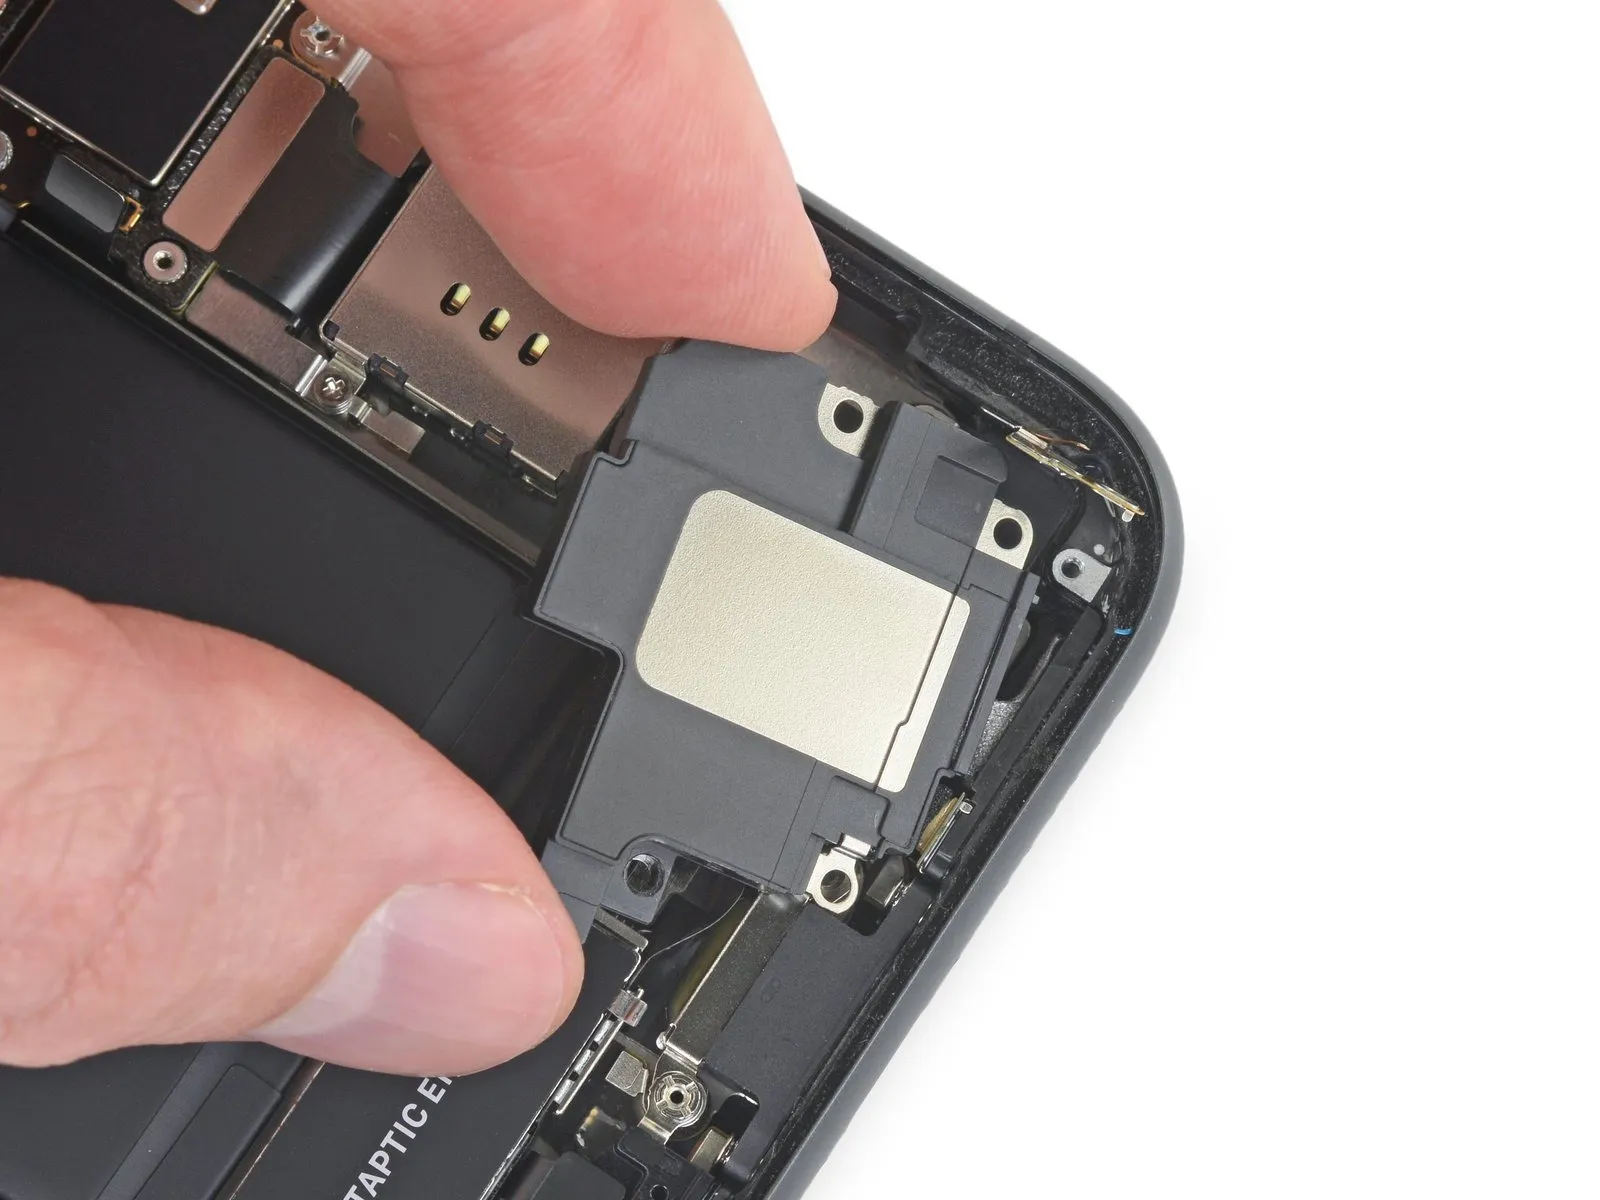
- Grasp the speaker firmly along its lateral borders, gently oscillating it to disengage the adhesive that bonds it to the iPhone's lower rim.
- Continue moving the speaker outward from the iPhone's base until the adhesive gasket fully detaches.
Step 35 | Remove the speaker
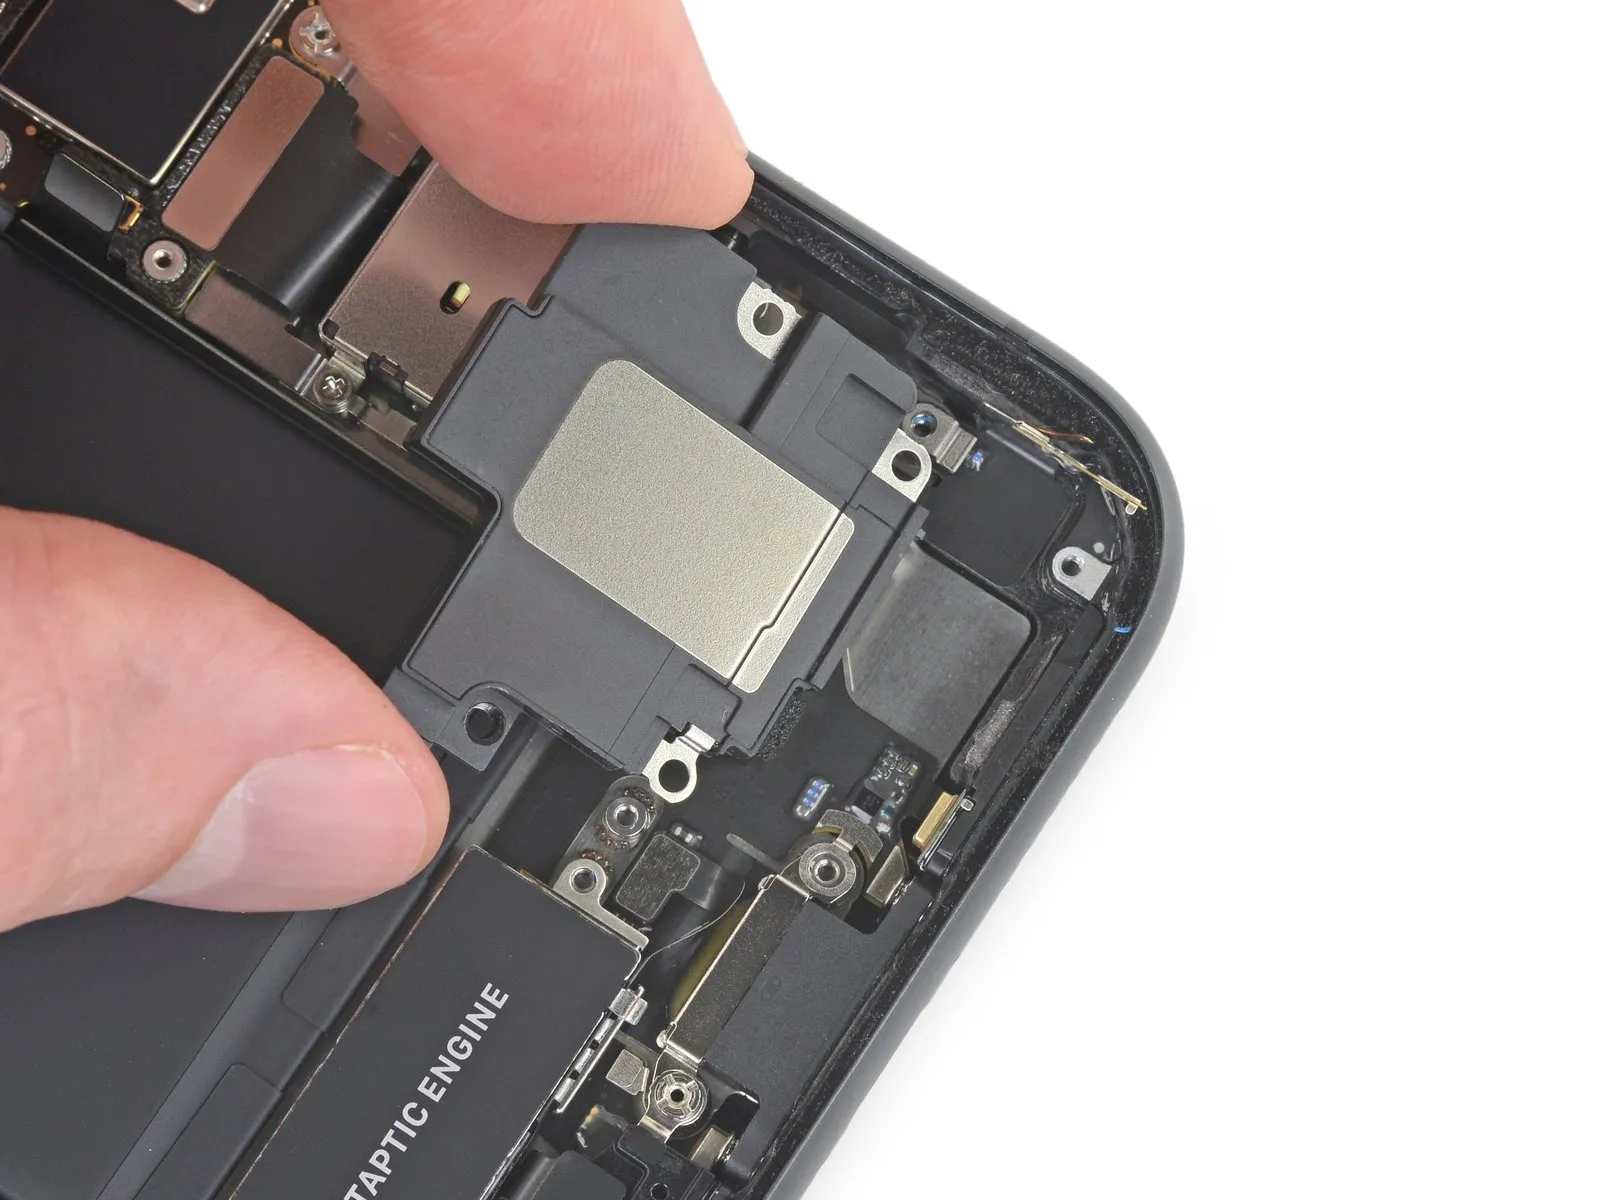
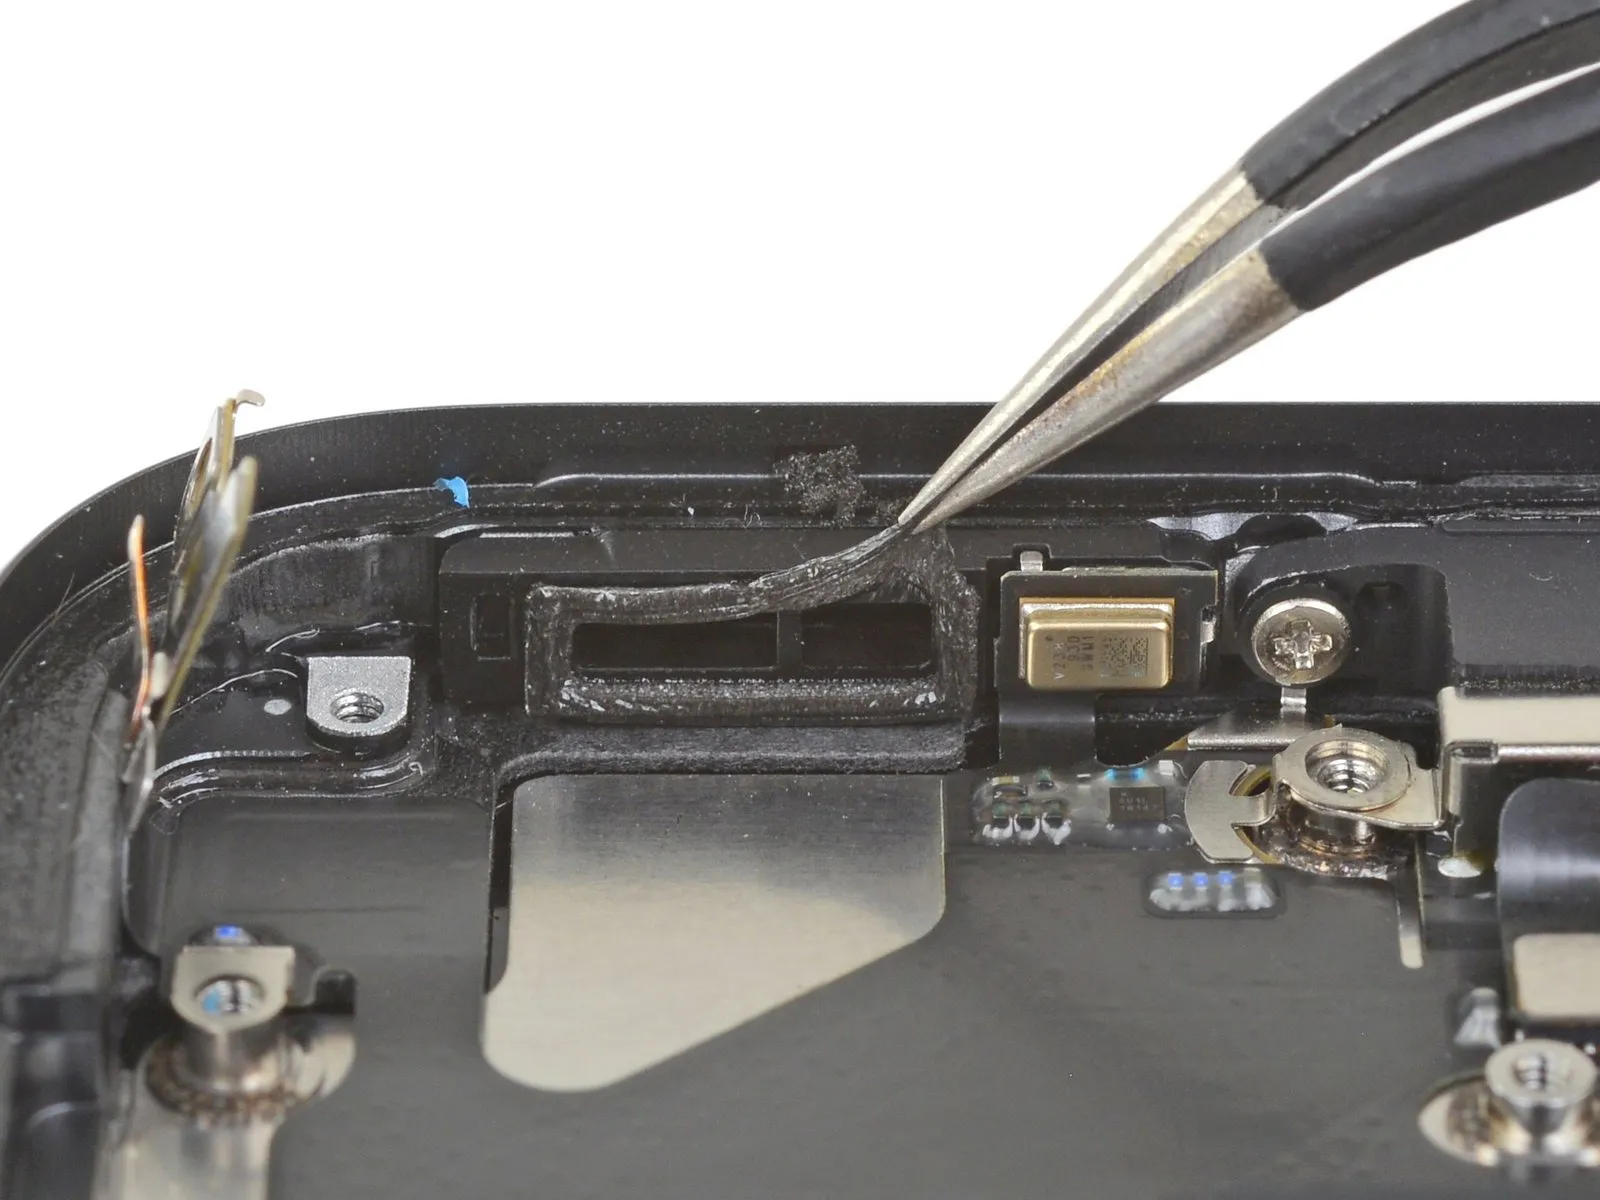
- Detach the speaker component.
- As a precautionary measure to minimize the risk of water or dust entering, consider substituting the speaker's adhesive gasket when putting everything back together.
- Carefully remove any lingeringadhesiveresidue using tweezers.
- Thoroughly clean the surface beneath the speaker using a small amount of isopropyl alcohol and a lint-free cloth or coffee filter to ensure proper adhesion of the gasket.
- Apply a freshgasketto the speaker, subsequently reattaching the speaker.
Step 36 | Unscrew the Taptic Engine
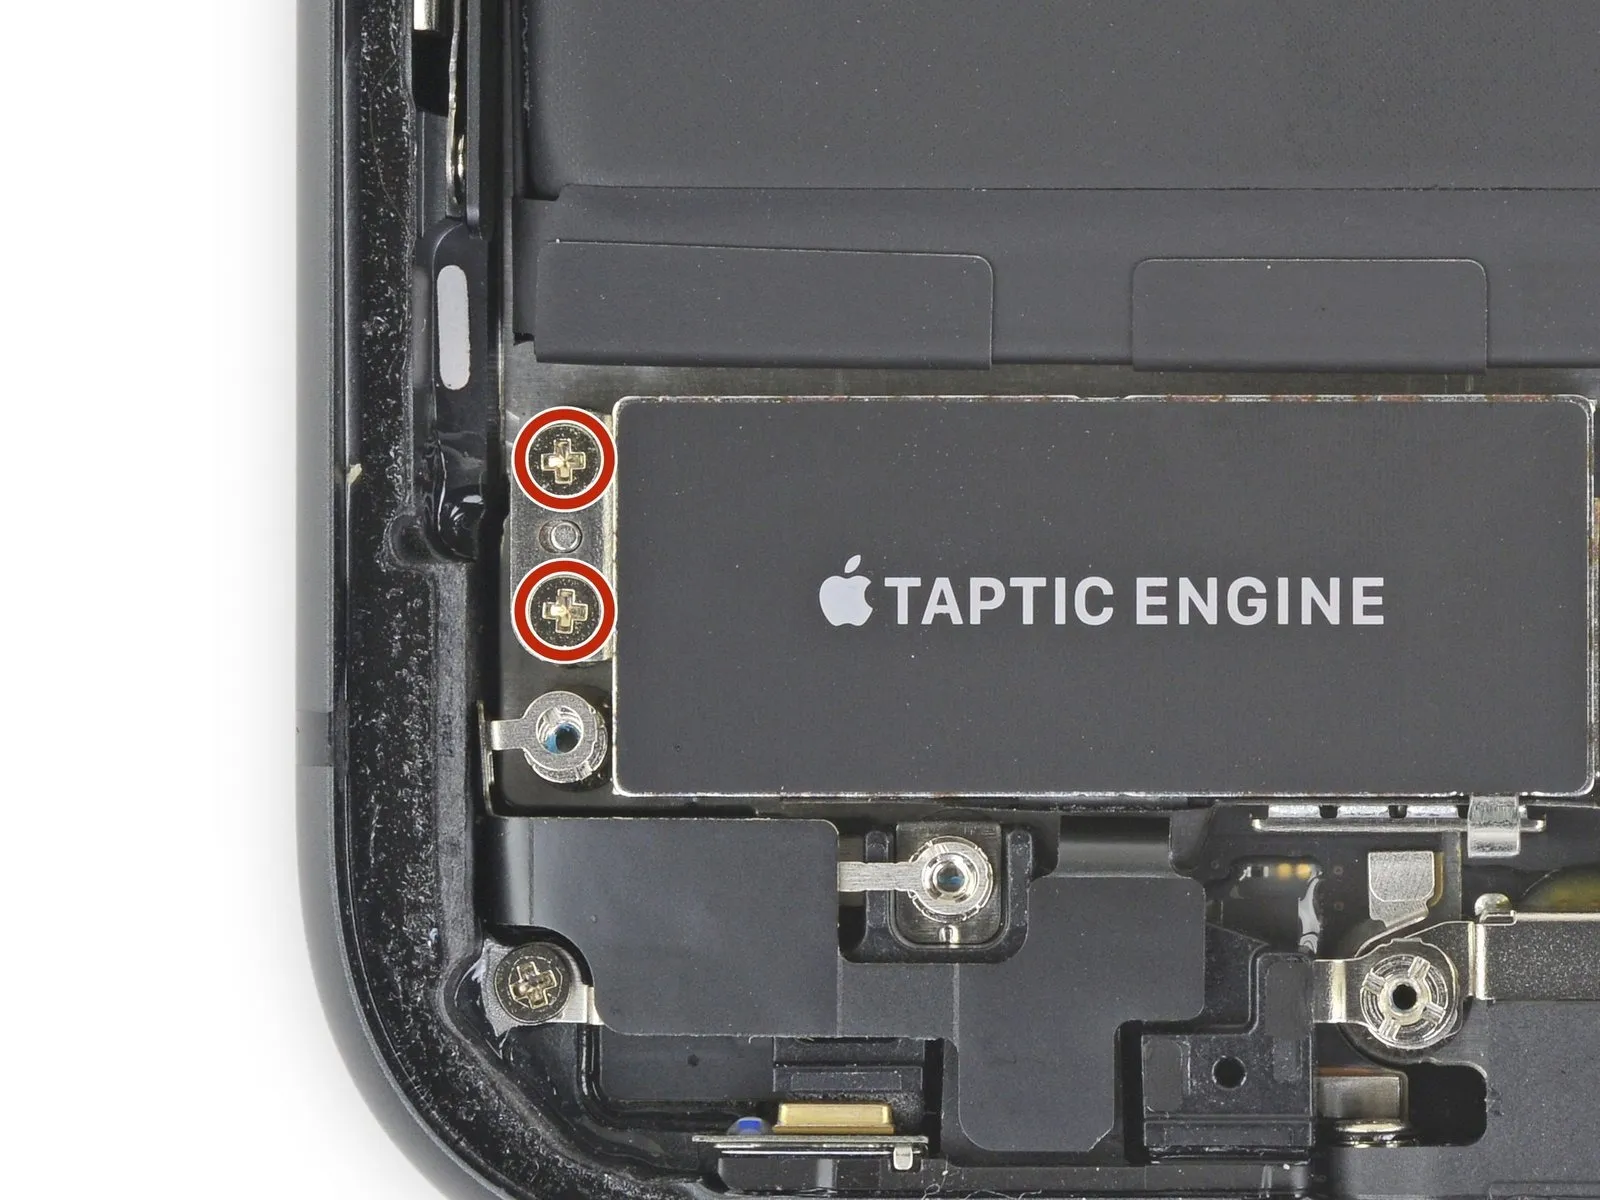
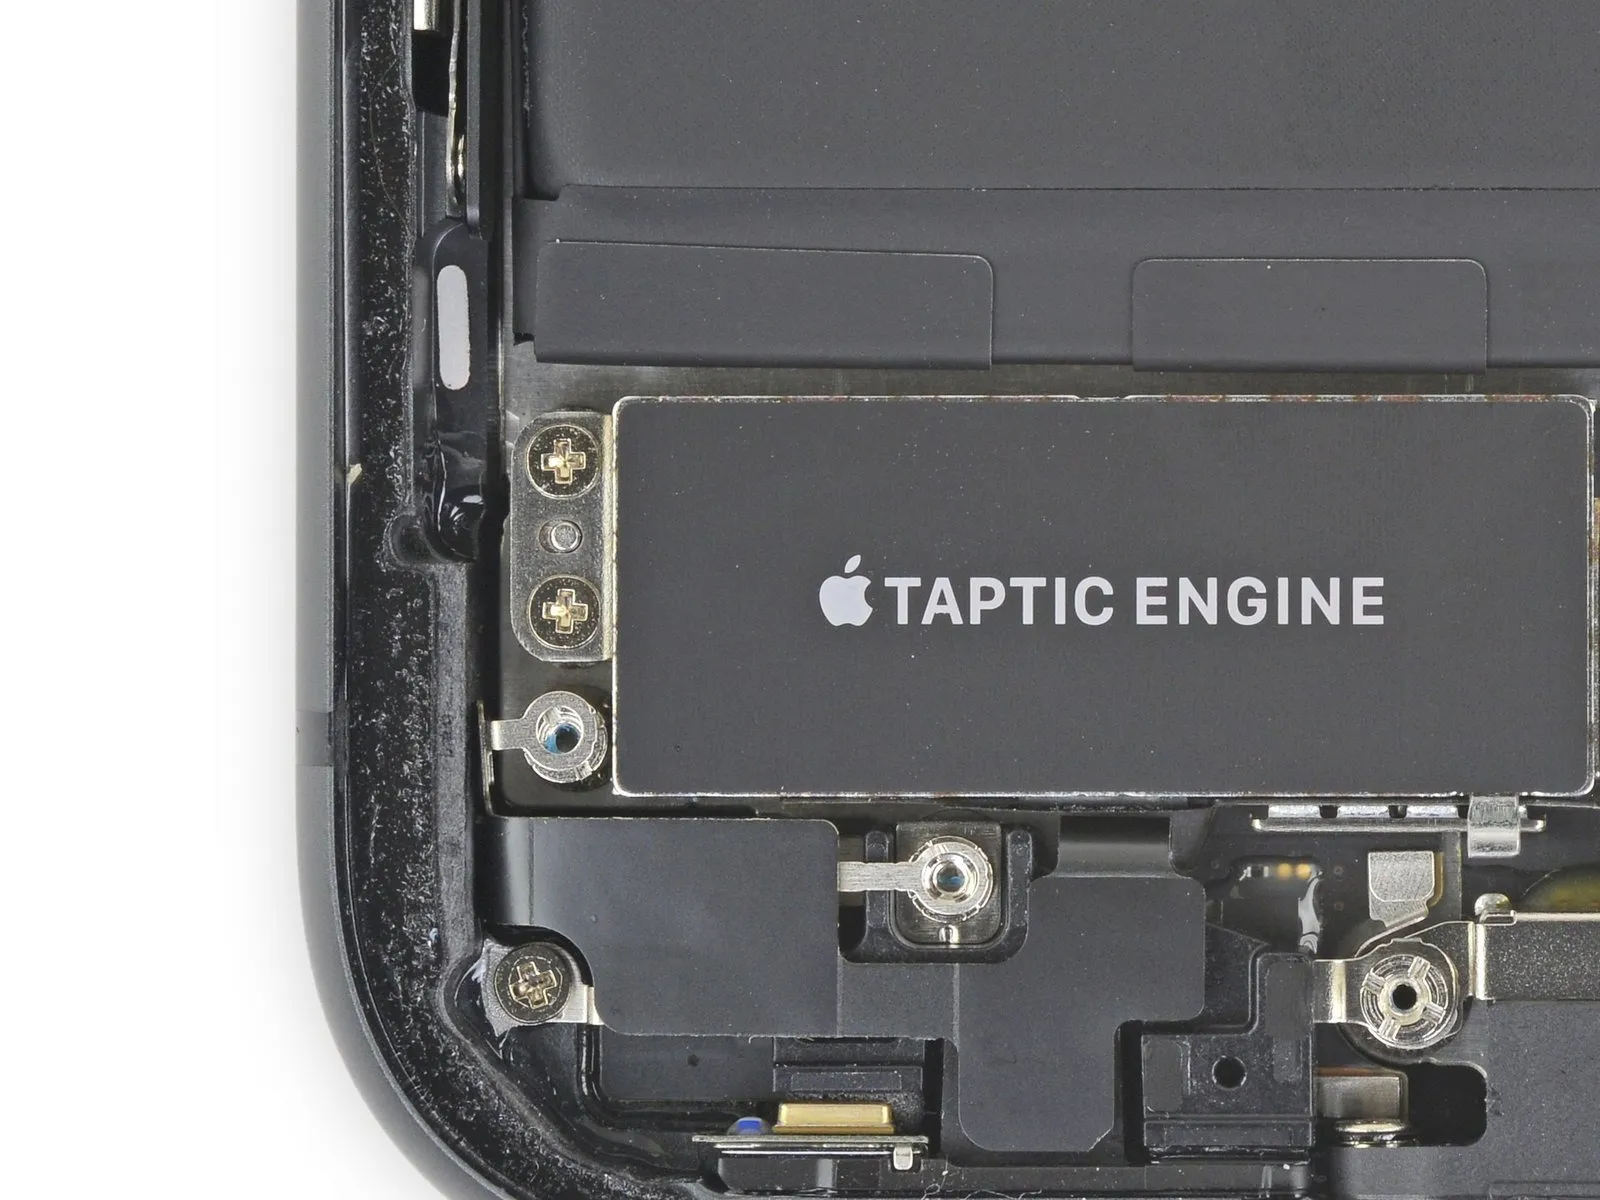
- Employ a Phillips-head screwdriver to detach the pair of 1.8-millimeter screws that hold the Taptic Engine in place.
Step 37 | Disconnect the Taptic Engine
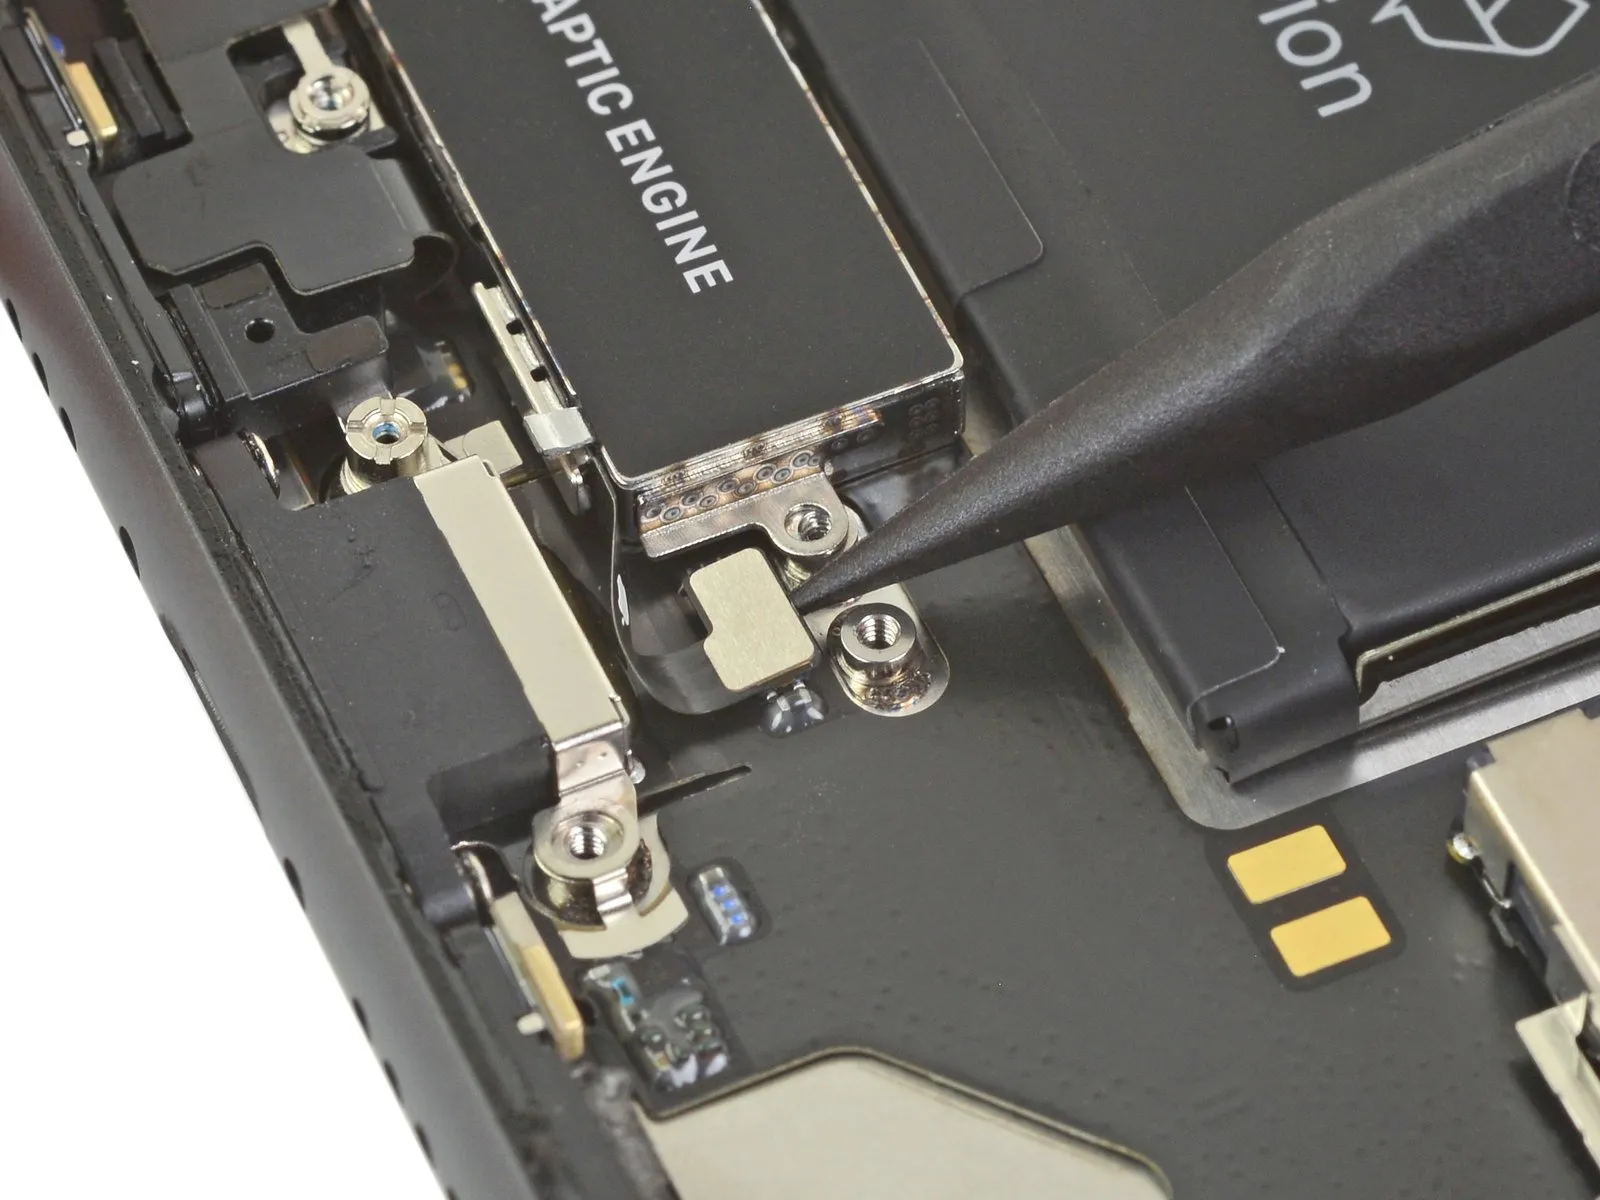
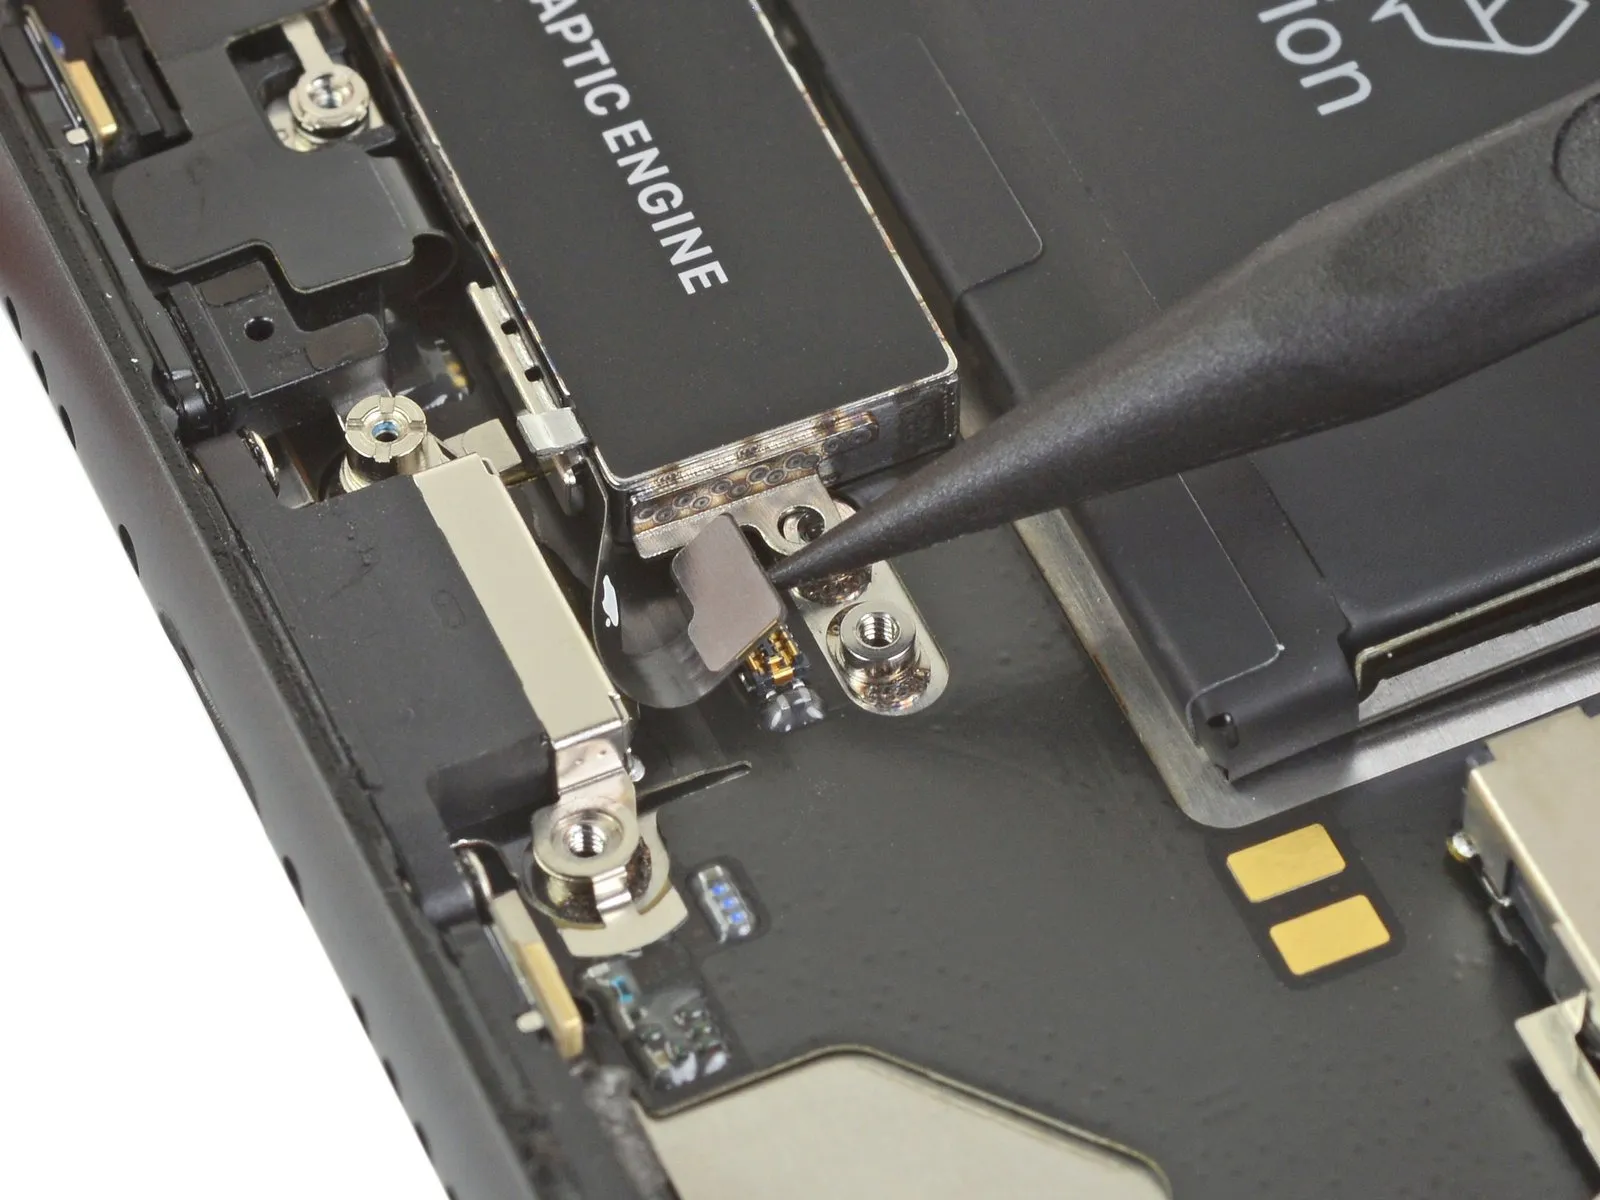
- Employ a spudgerto release the Taptic Engine flex cable, lifting it vertically away from its connector.
Step 38 | Remove the Taptic Engine
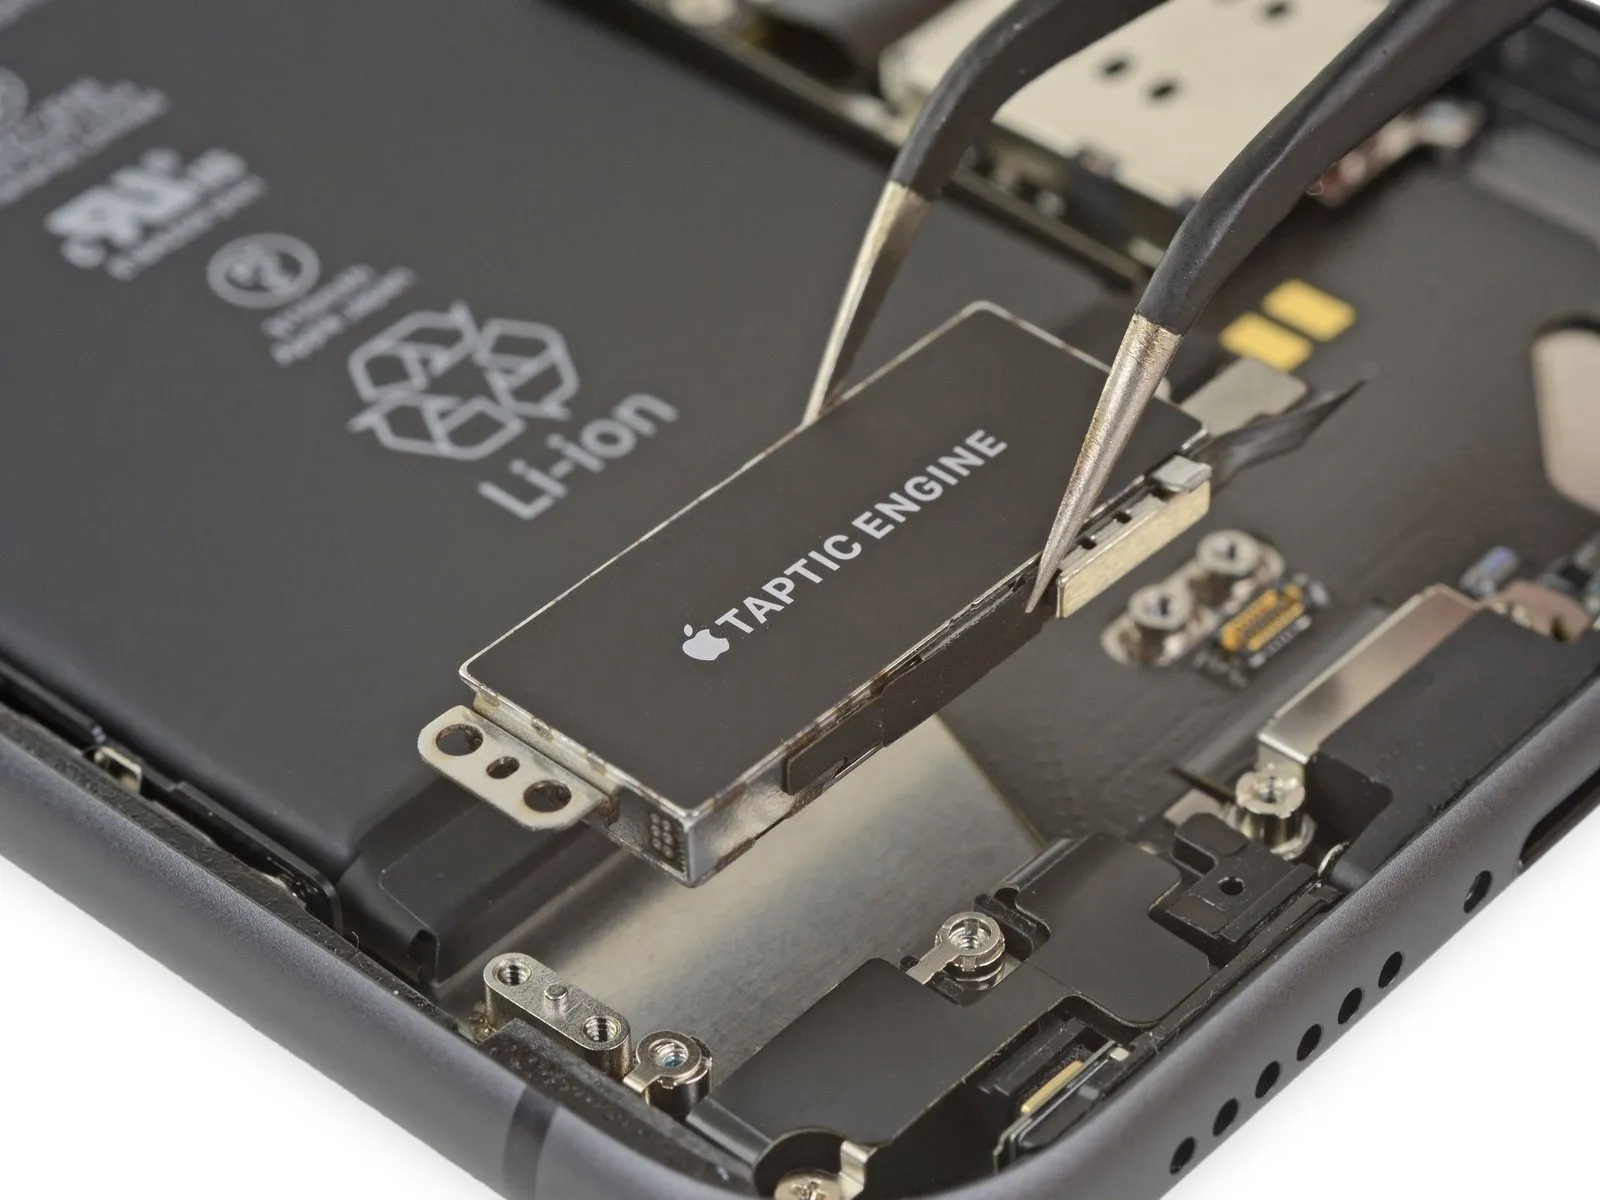
- Detach the Taptic Engine component from its position.
Step 39 | Locate the adhesive pull tabs
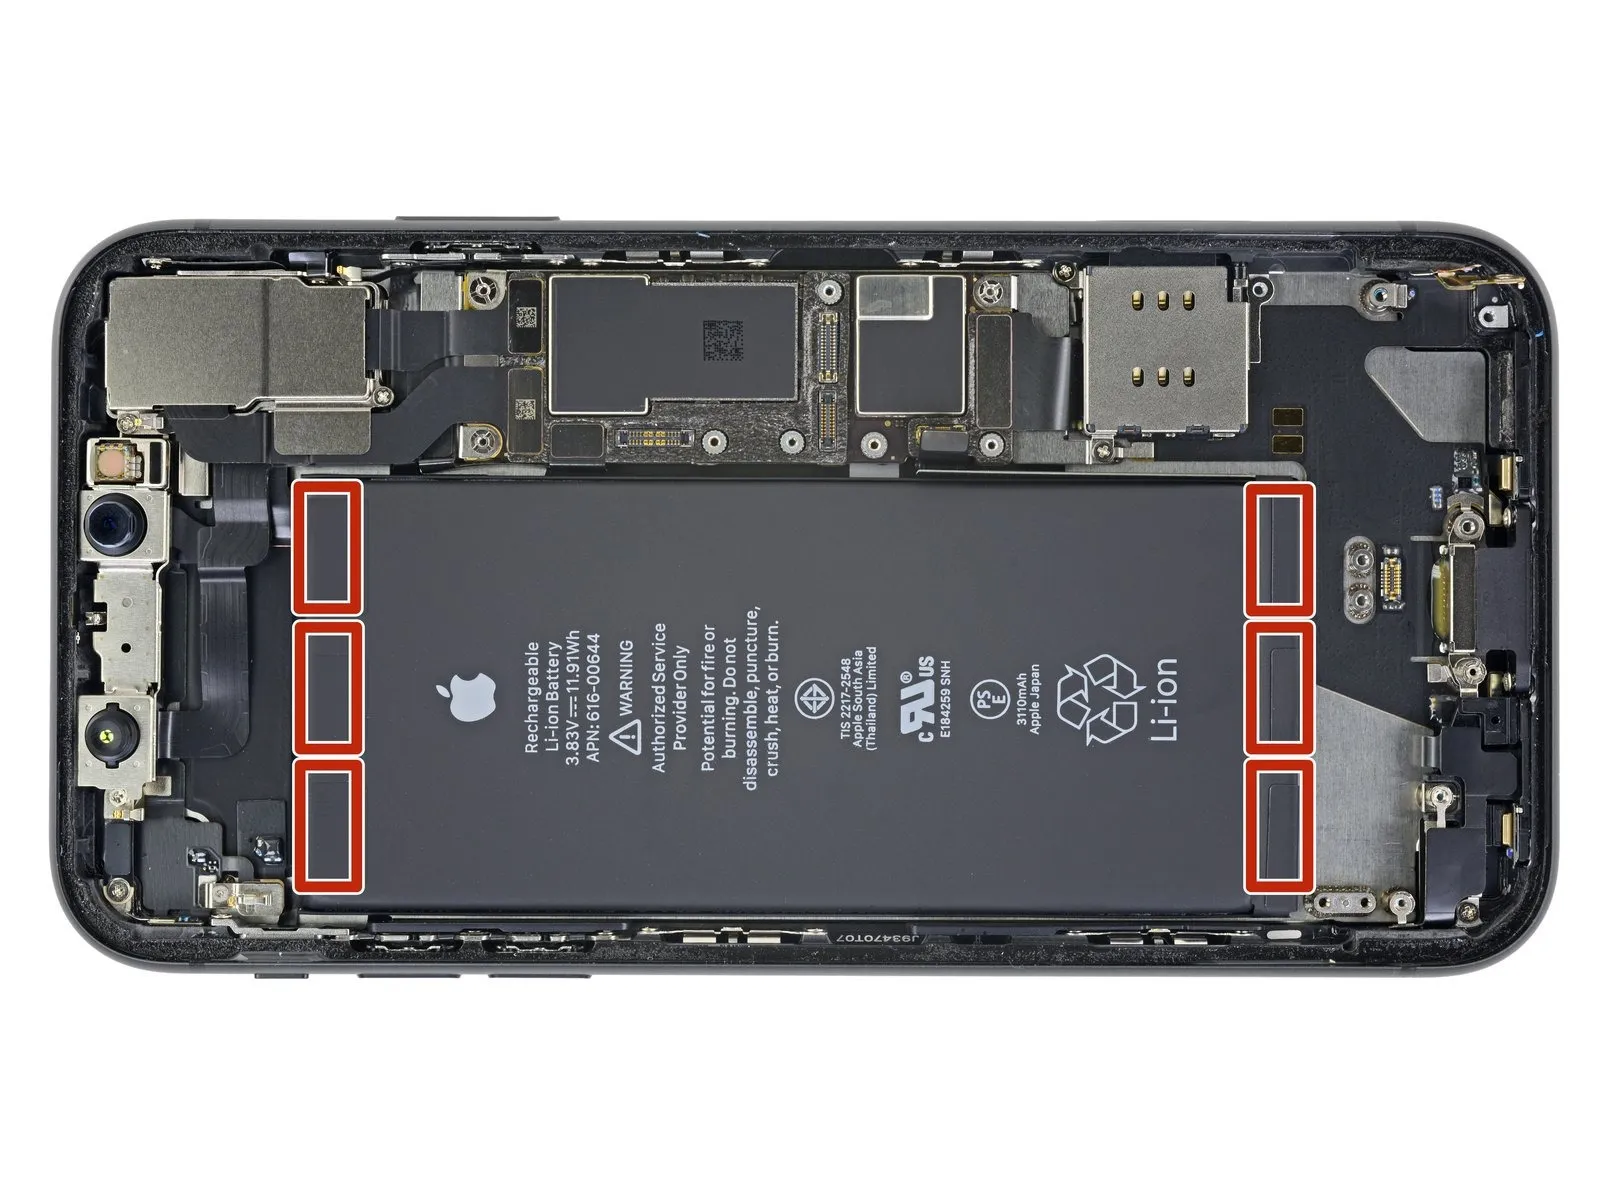
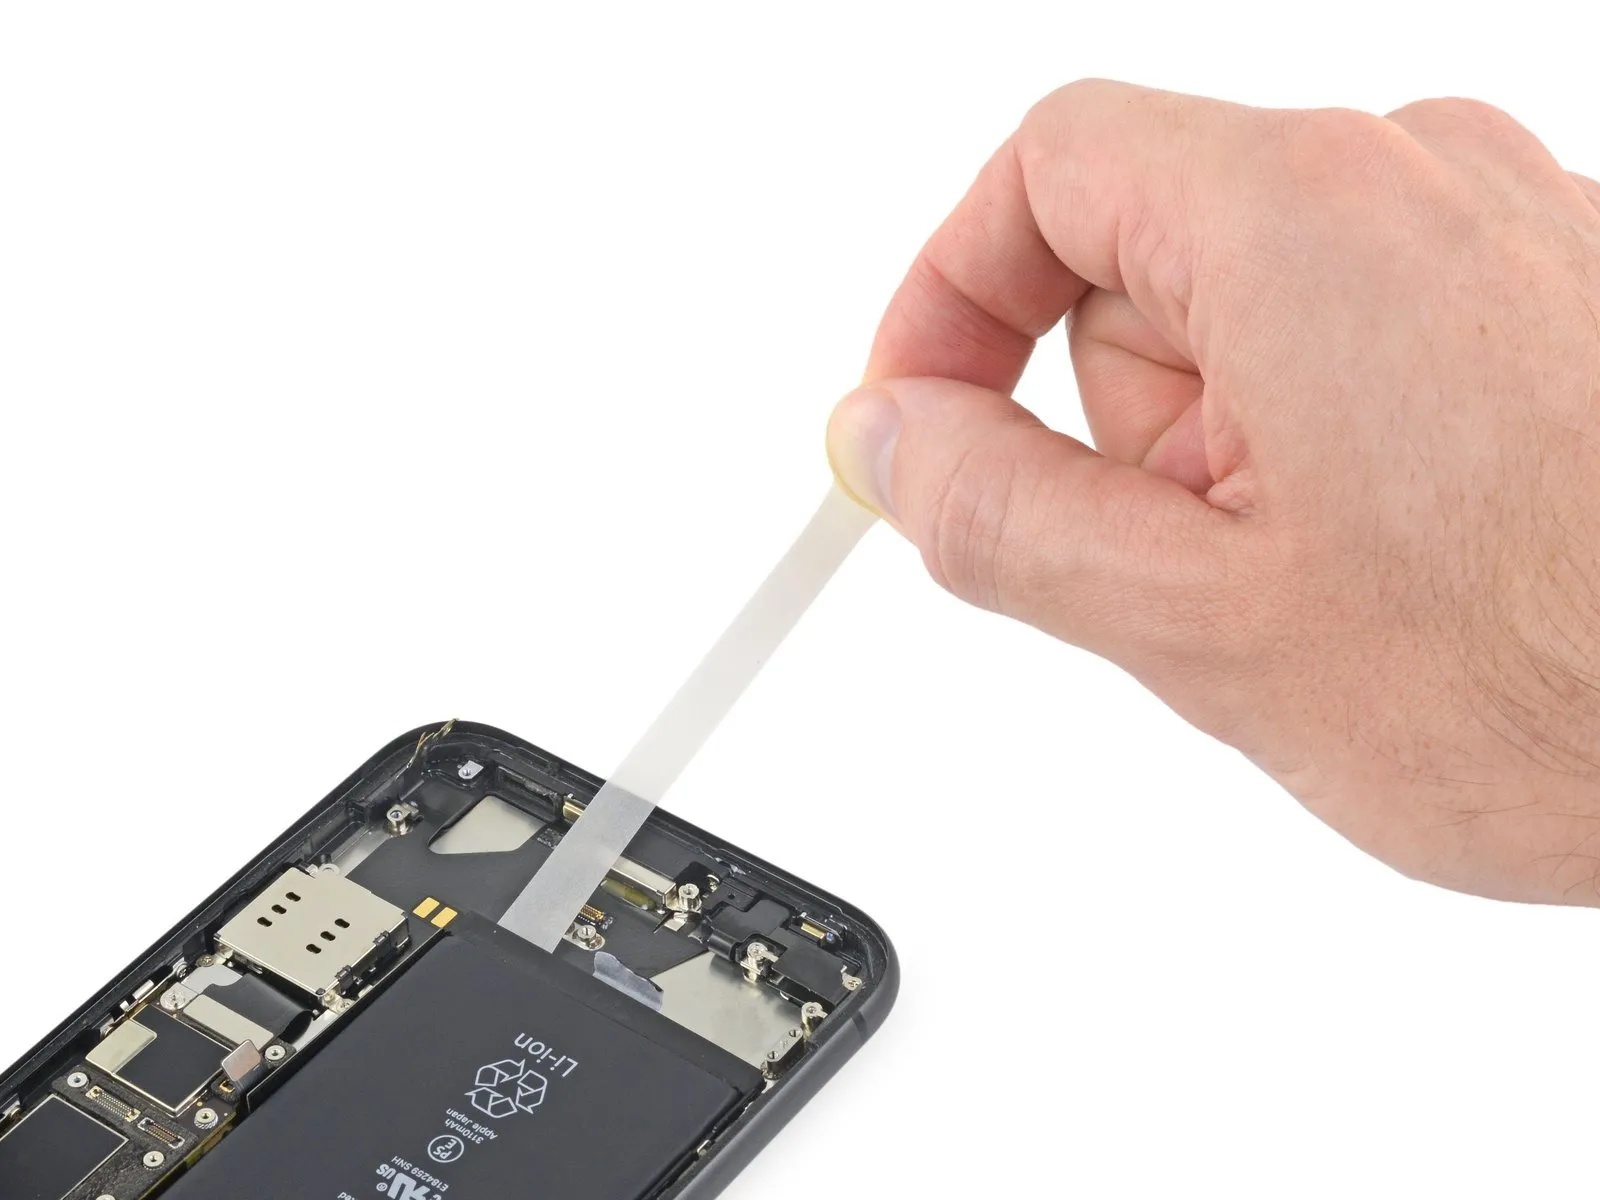
- The battery is secured by six strips of stretch-release adhesive, with three positioned close to the upper border and three positioned close to the lower border.
A black pull-tab extends from one end of each adhesive strip, initially weakly attached and folded over the battery's surface.
Step 40 | Peel back the lower pull tabs
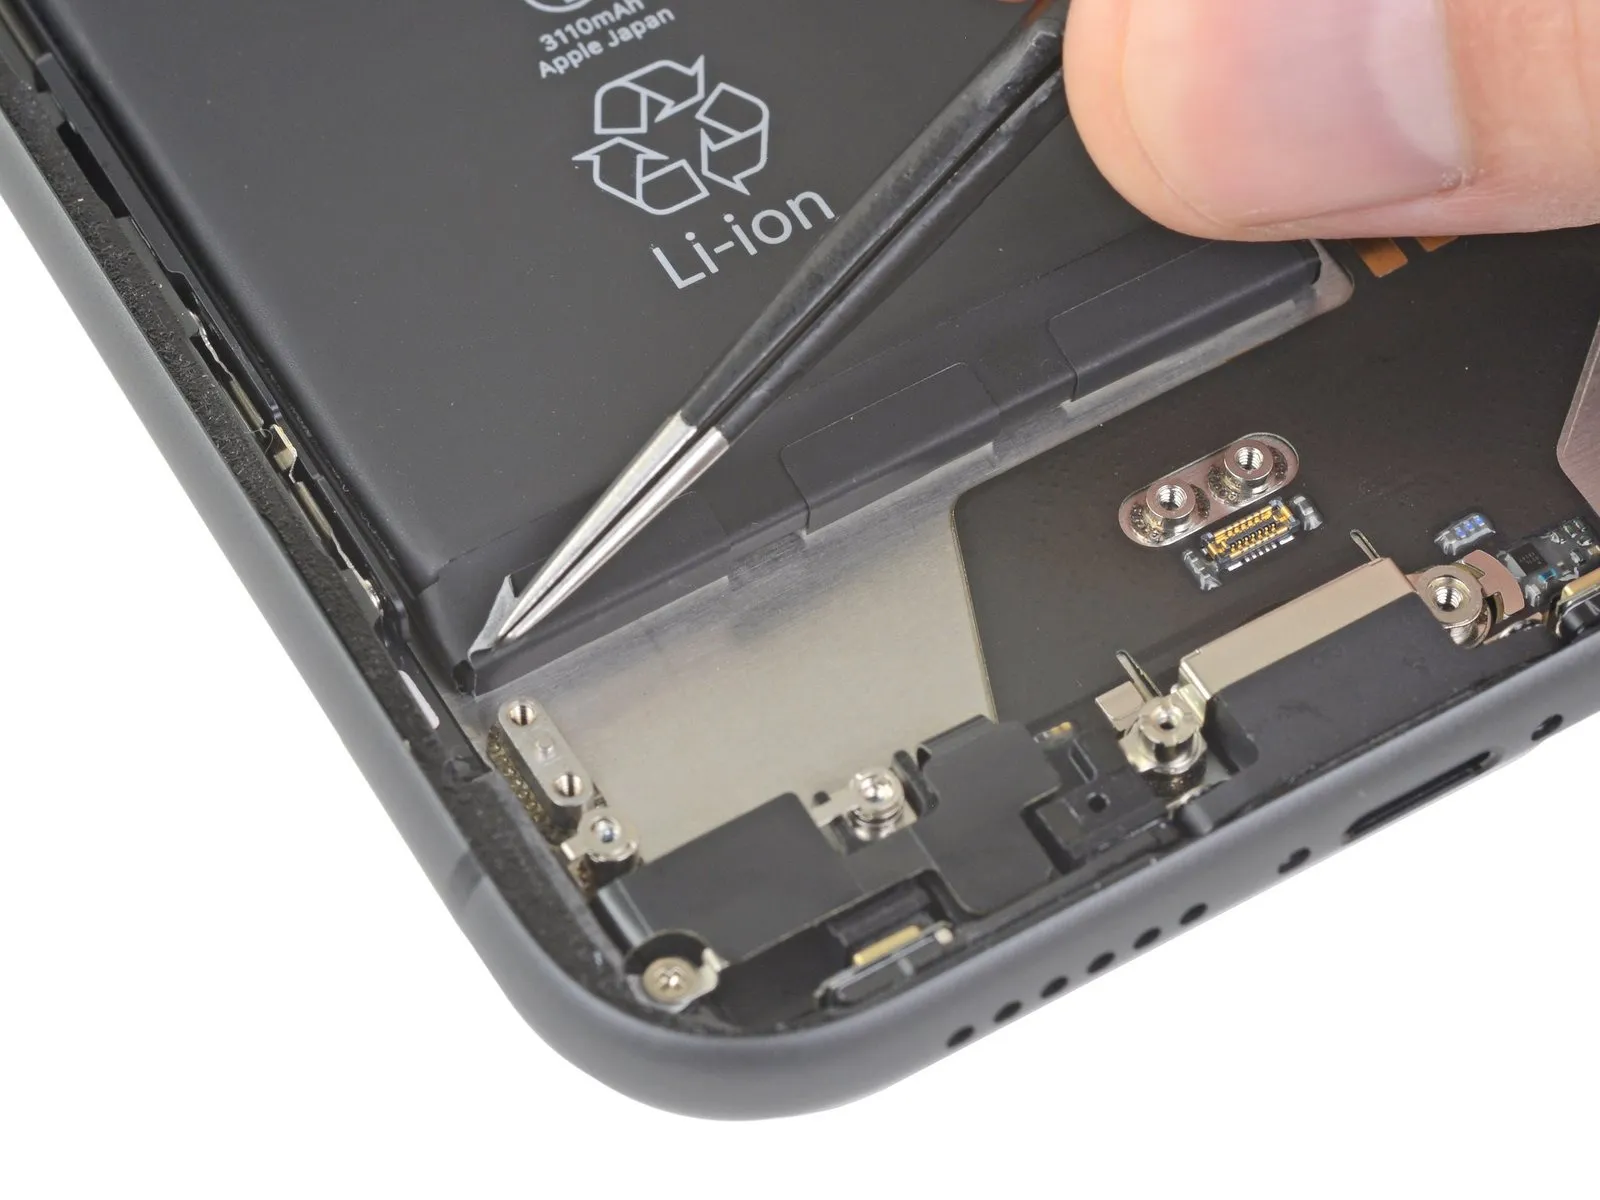
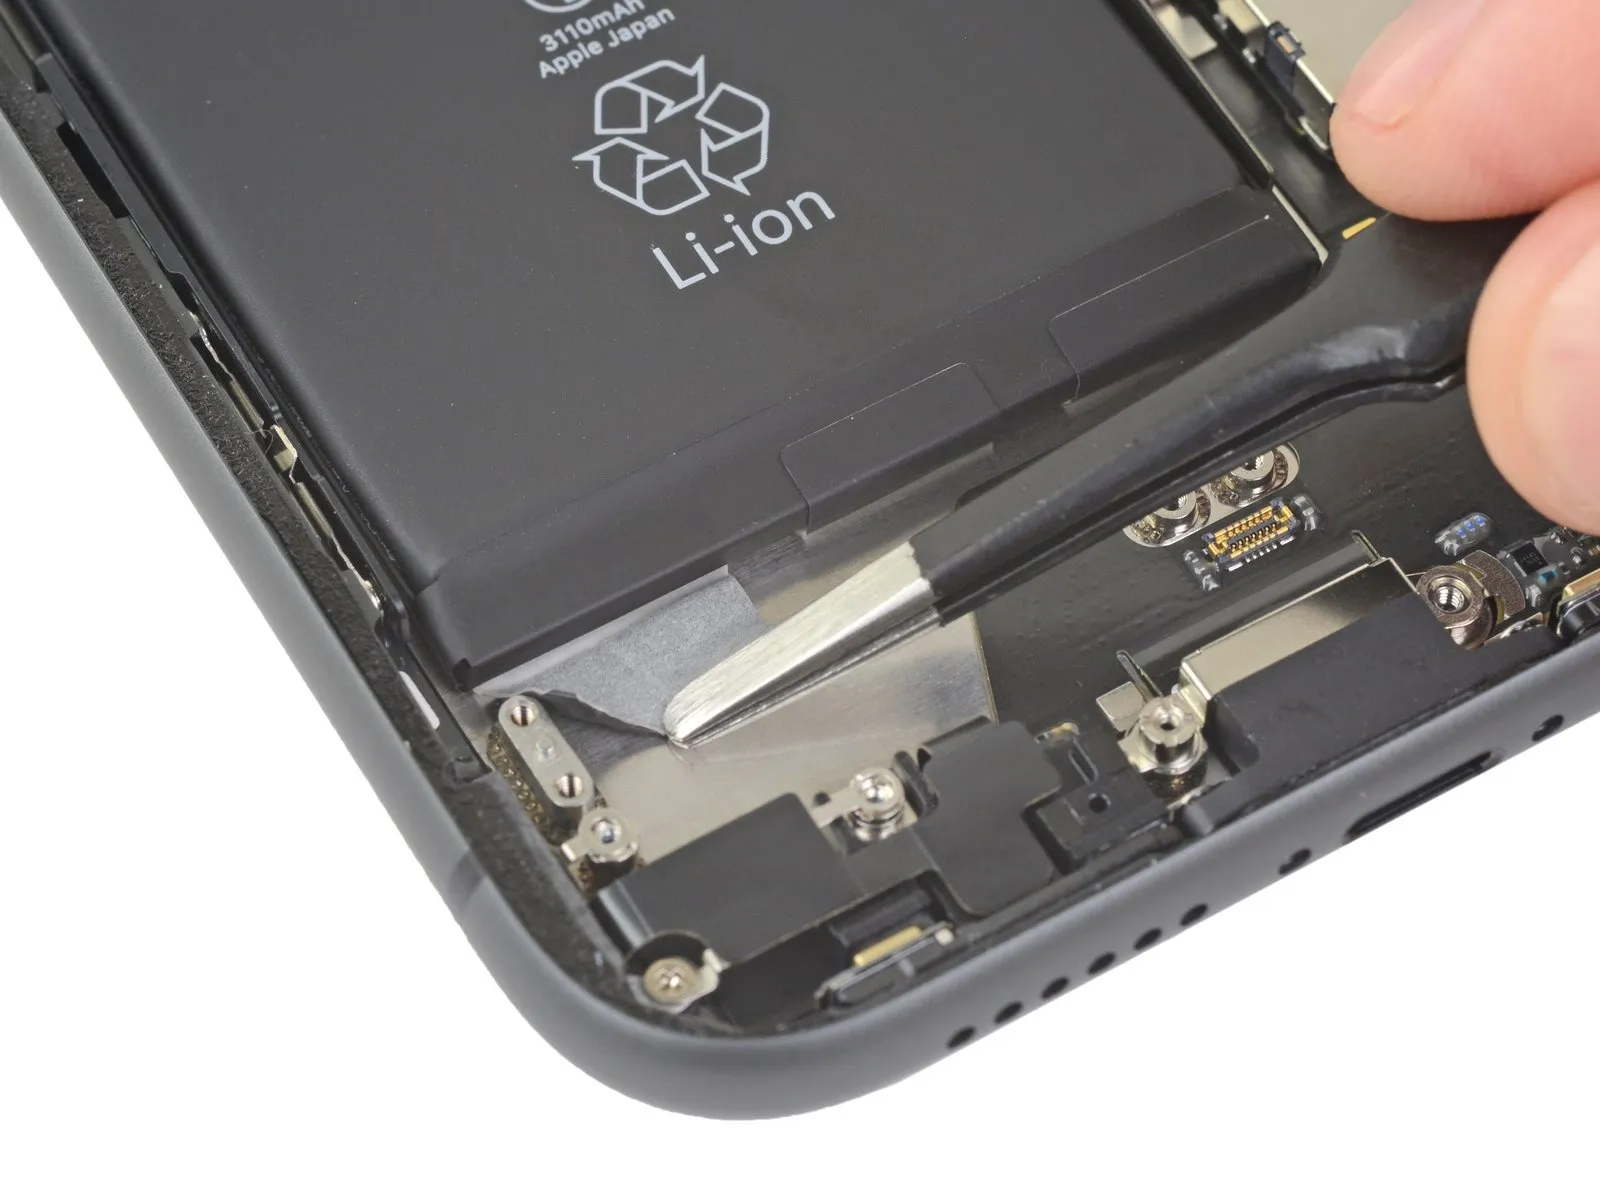
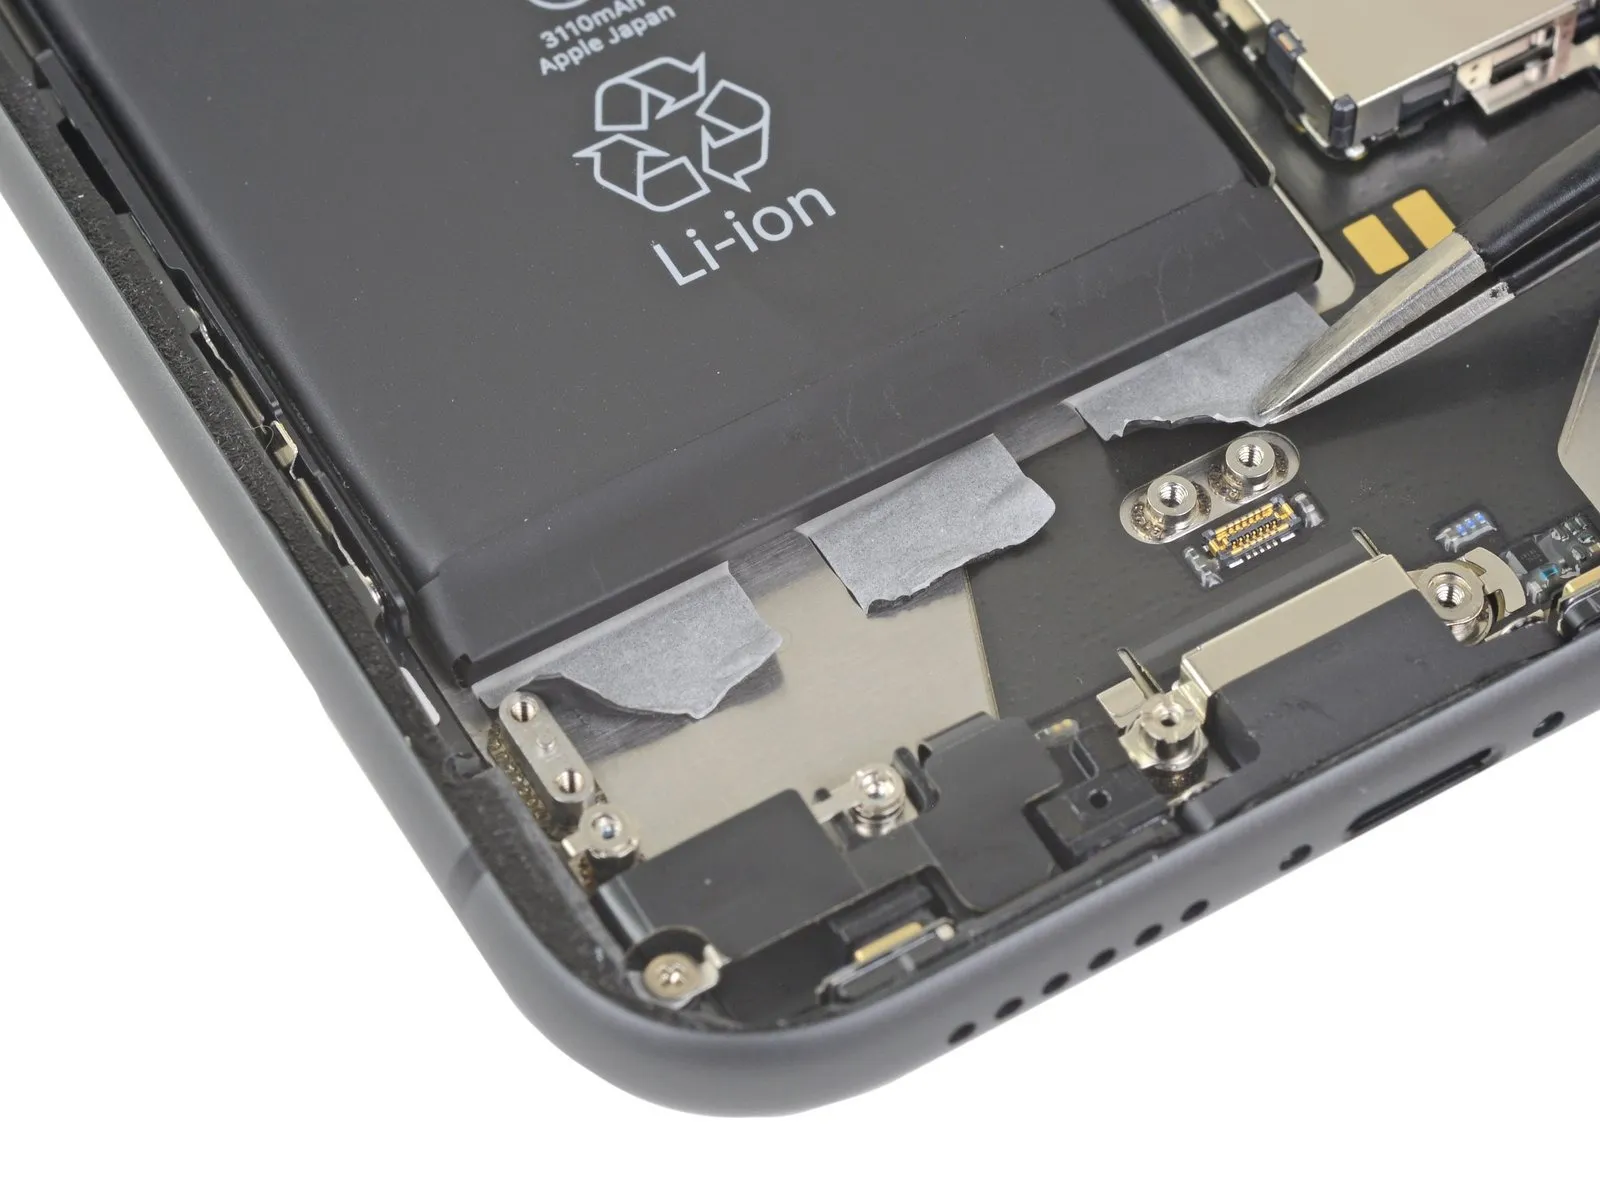
- To expose the battery, carefully remove the three adhesive strips located along the lower edge.
Exercise caution to prevent puncturing the battery with pointed instruments, as damage could result in the release of hazardous substances or ignition.
Step 41
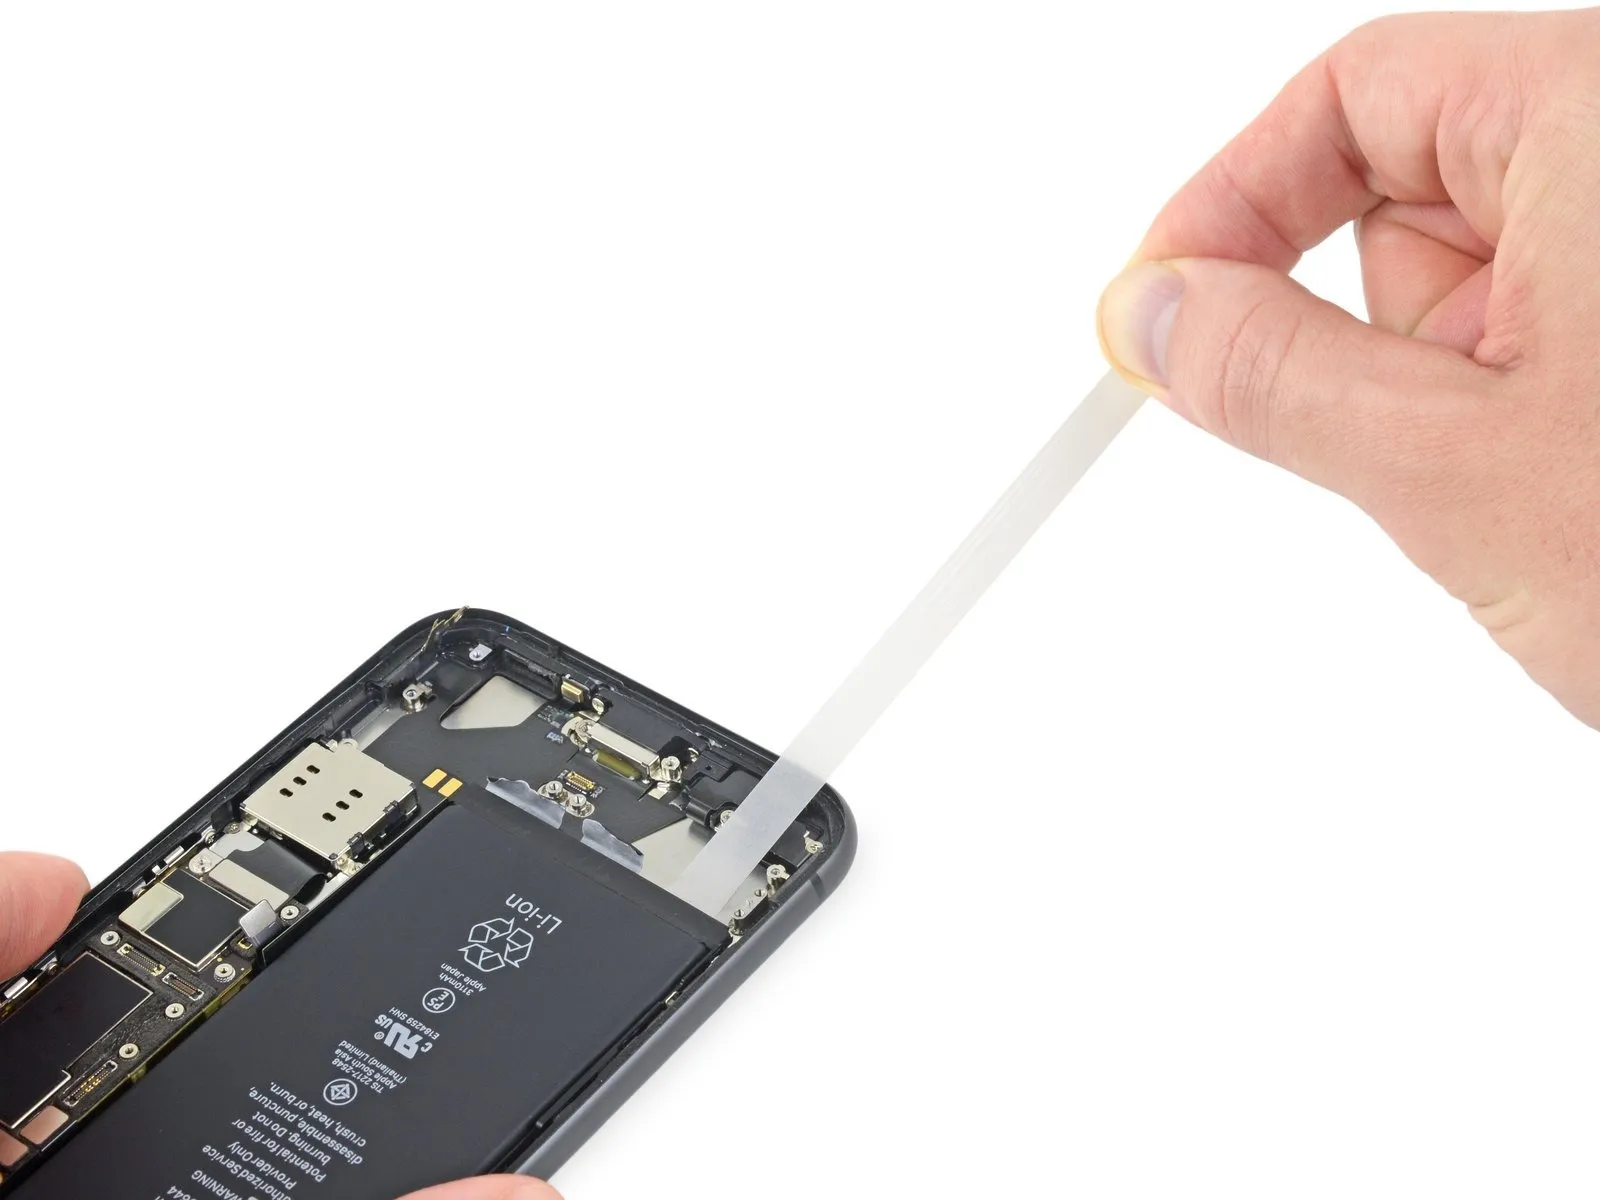
- Should any of the strips fracture during the process, remain calm and consult the supplementary instructions provided later for addressing broken strips.
- To maximize the likelihood of a successful repair:
Avoid applying pressure to the battery surface; instead, maintain a secure grip on the iPhone's lateral edges.
Ensure the strips remain smooth and without creases while you are pulling them.
Apply force with extreme slowness, allowing sufficient time for the strip to elongate and detach; each strip typically requires approximately 30 seconds of stretching to be removed.
Maintain a shallow pulling angle to prevent the strip from catching on the battery's lower perimeter. - Should a strip fragment detach and become inaccessible beneath the battery, proceed with the remaining strips and then follow the additional procedures outlined below.
Step 42 | Remove the first adhesive strip
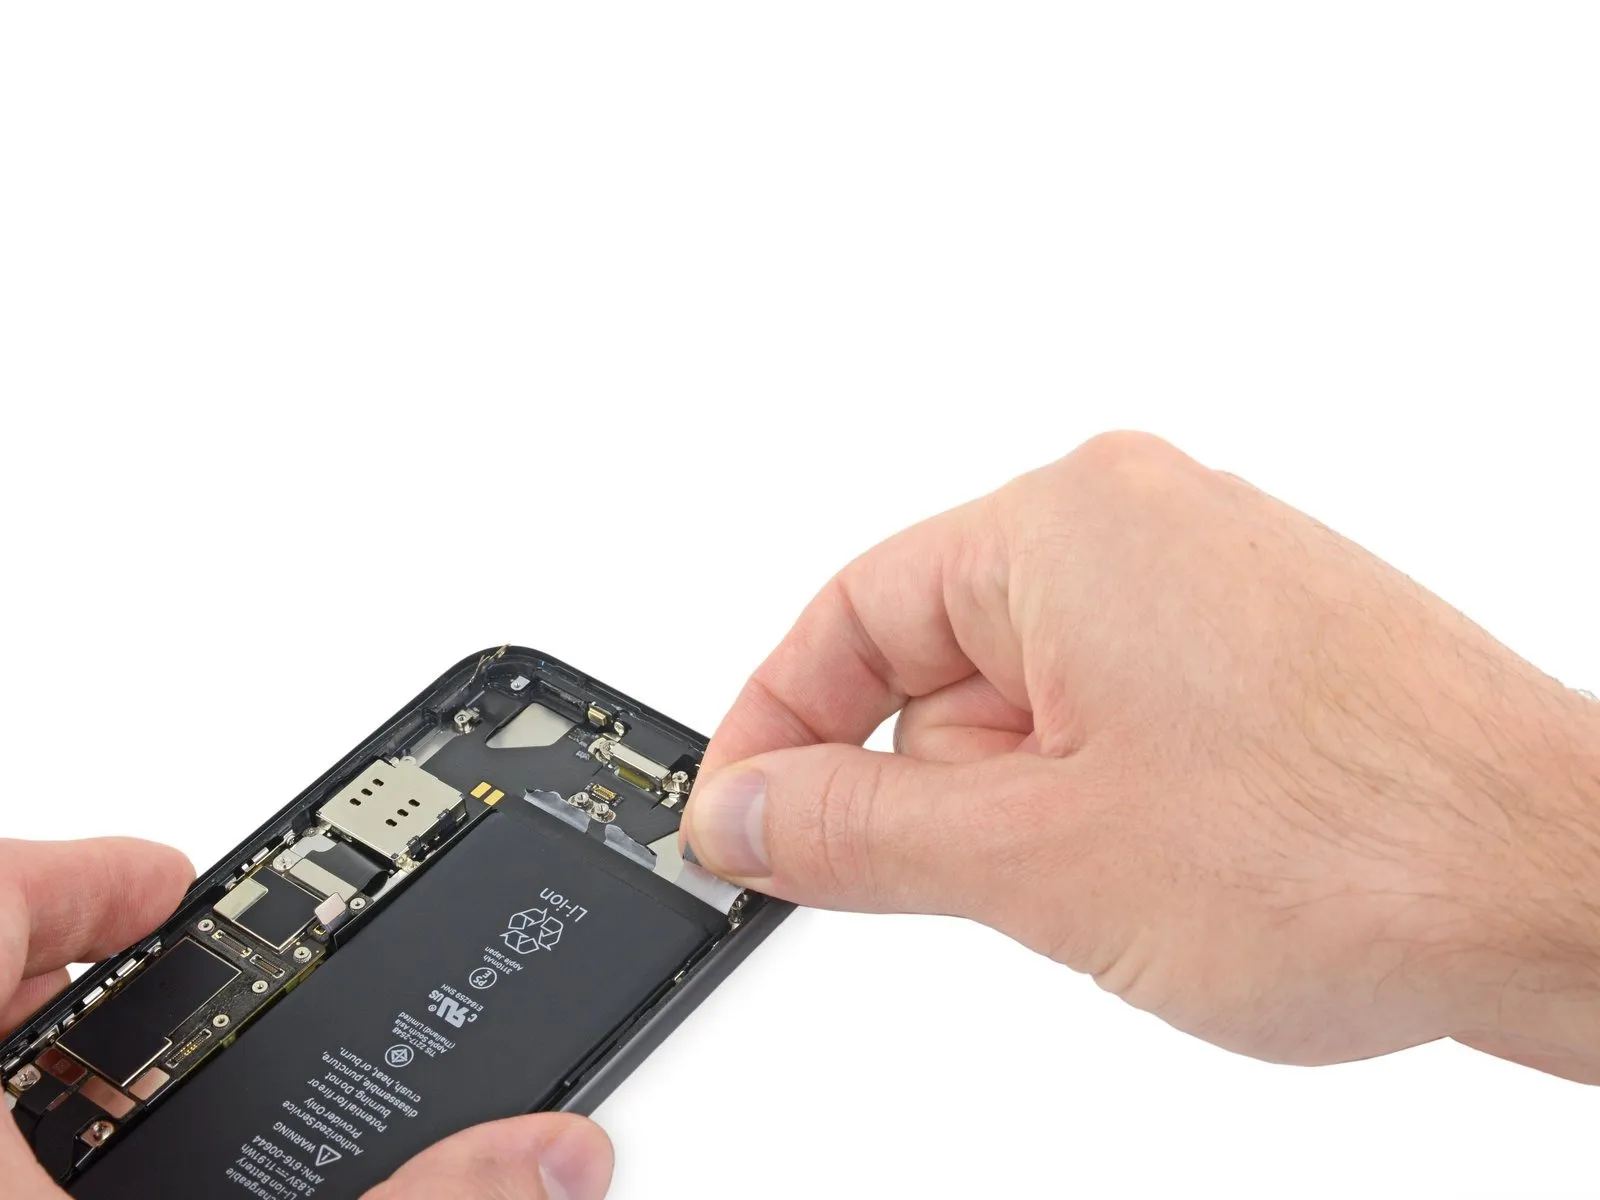
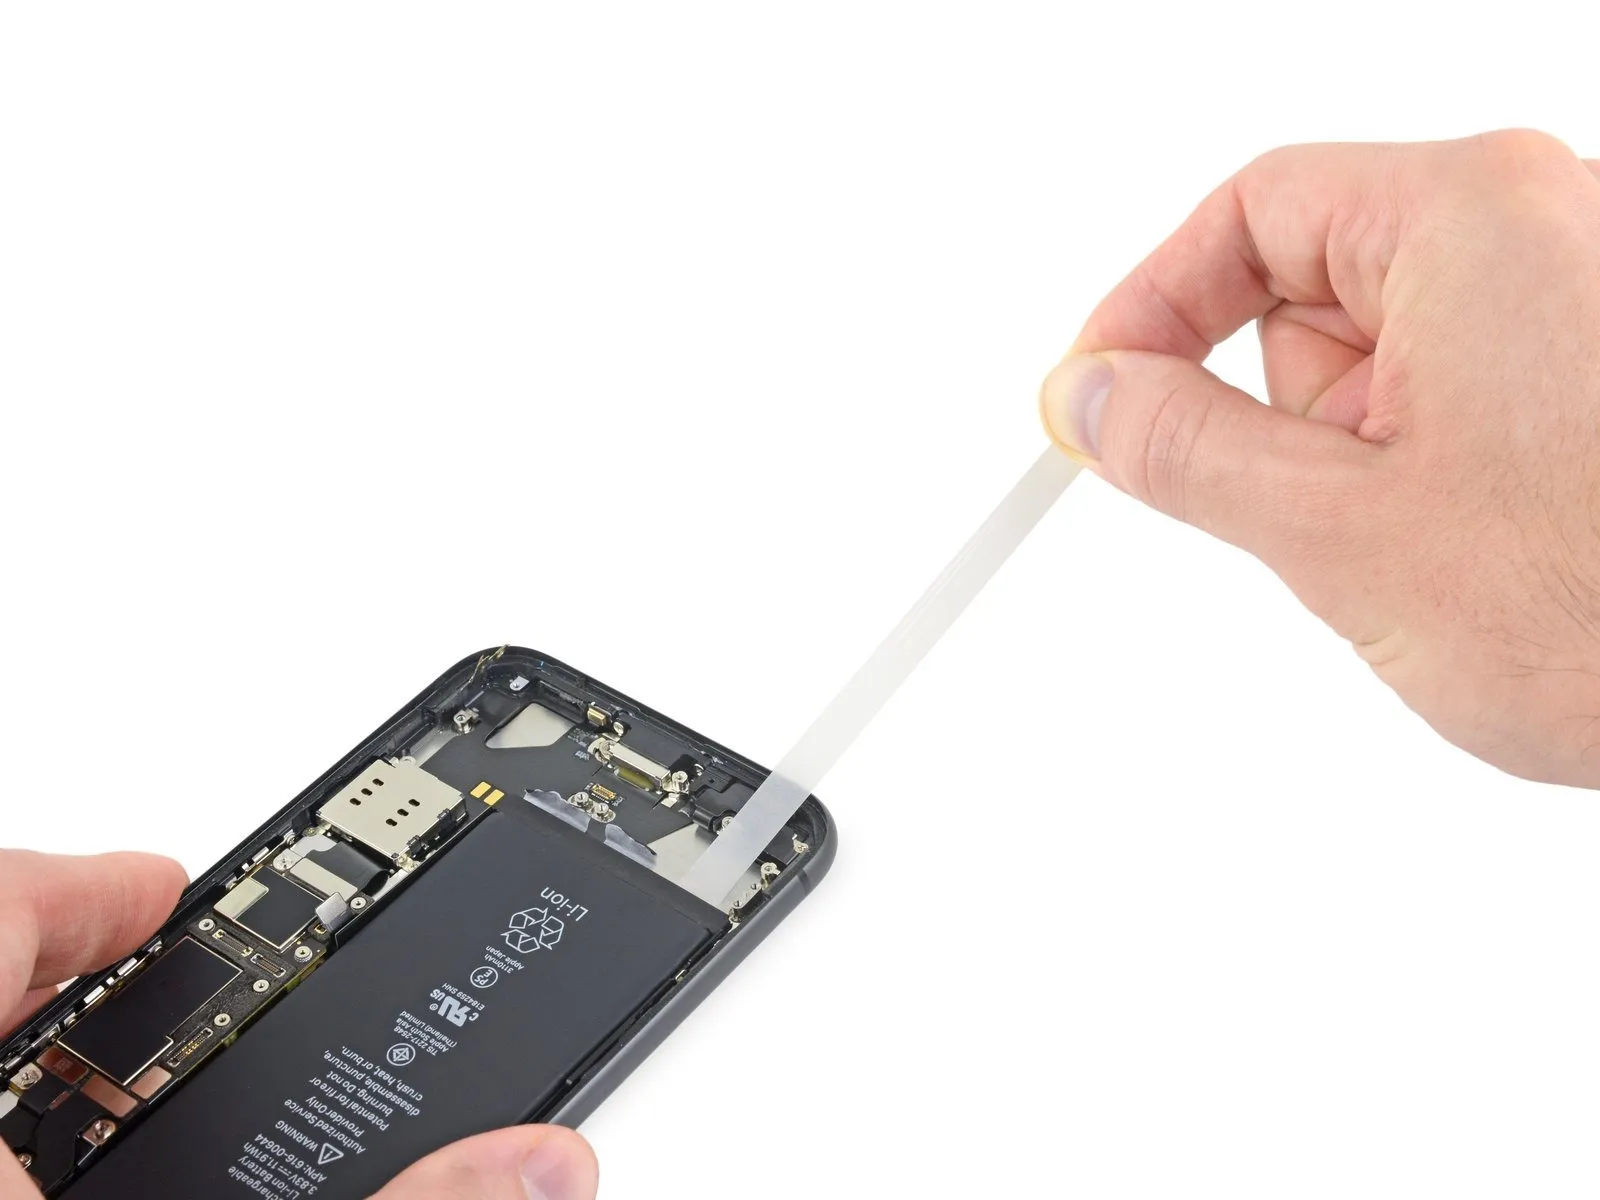
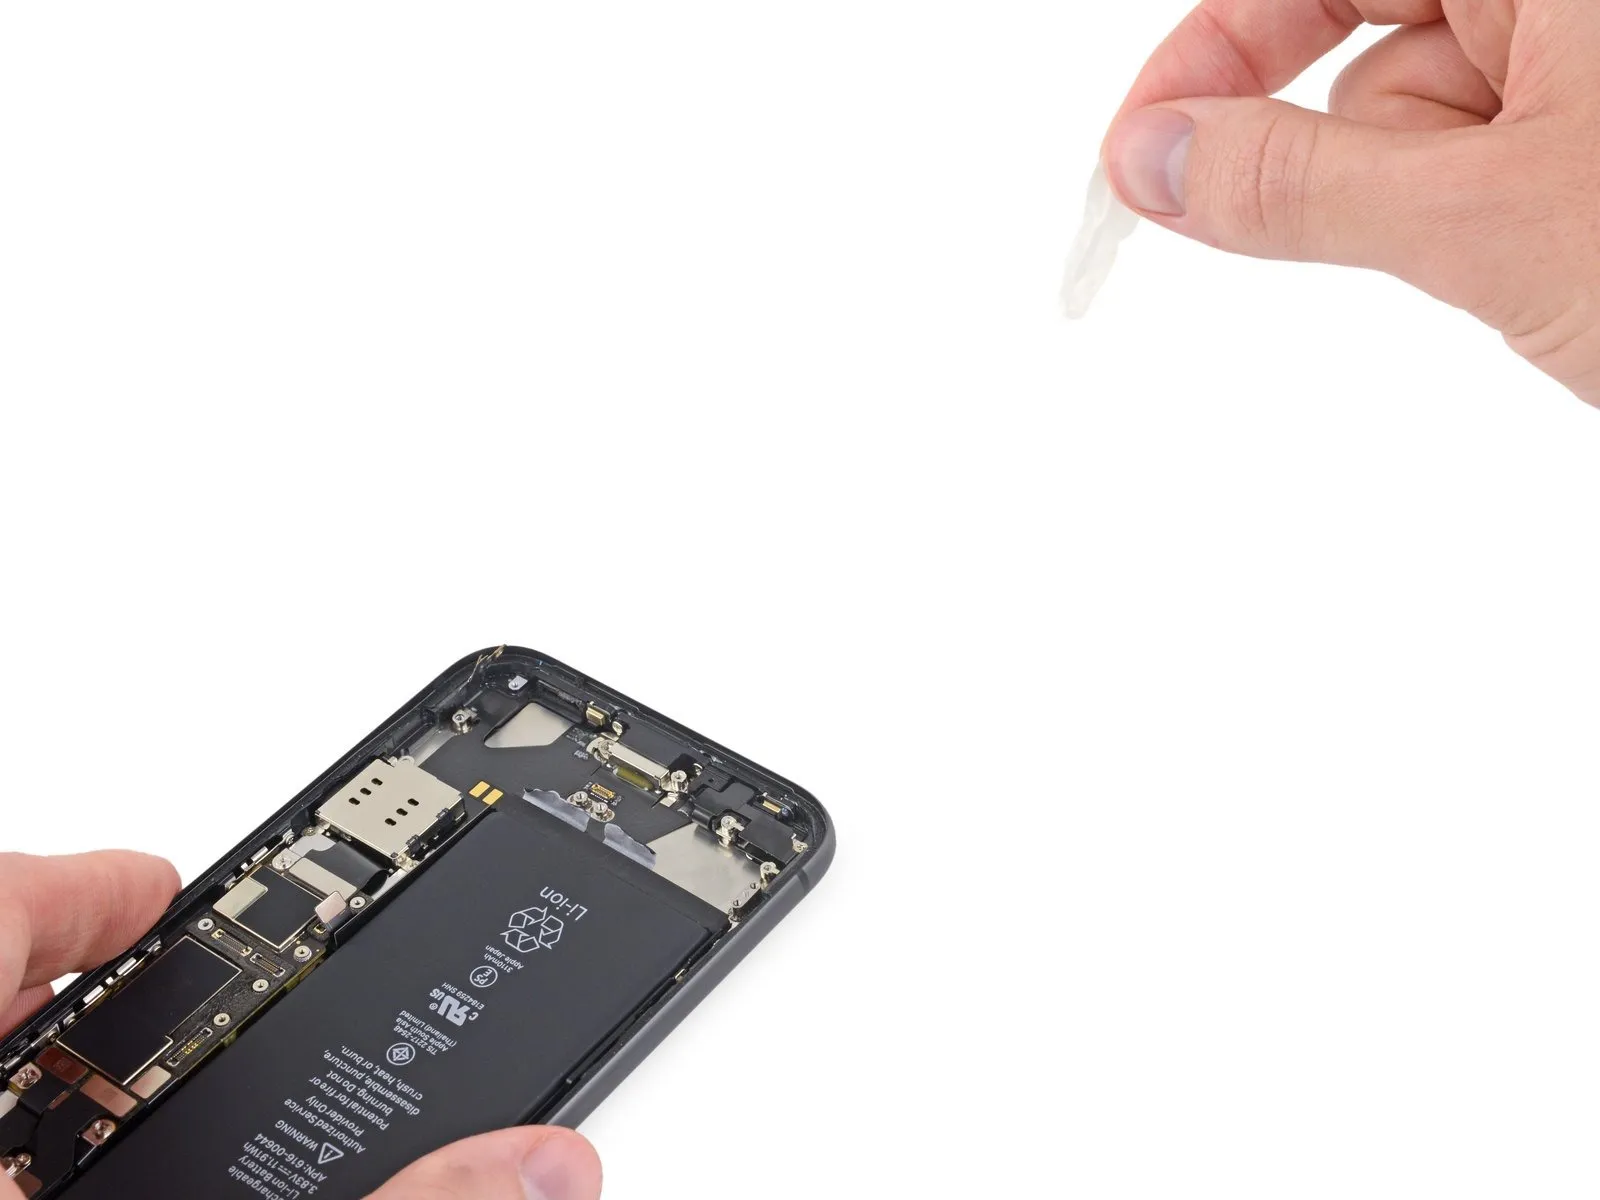
- Apply consistent, even force while pulling the strip, ensuring it remains taut until it disengages from the space between the battery and the iPhone's rear enclosure.
- Expect the adhesive strip to elongate significantly, extending to several multiples of its initial size; persist in pulling and reposition your grip along the strip's length close to the battery as needed.
- Should the battery adhesive strips fracture during removal, utilize your fingers or tweezers to recover any remaining adhesive portions and continue the pulling action.
- In the event that adhesive strips tear and become inaccessible beneath the battery, attempt to remove the remaining strips, then follow the subsequent instructions.
Step 43 | Remove two more adhesive strips
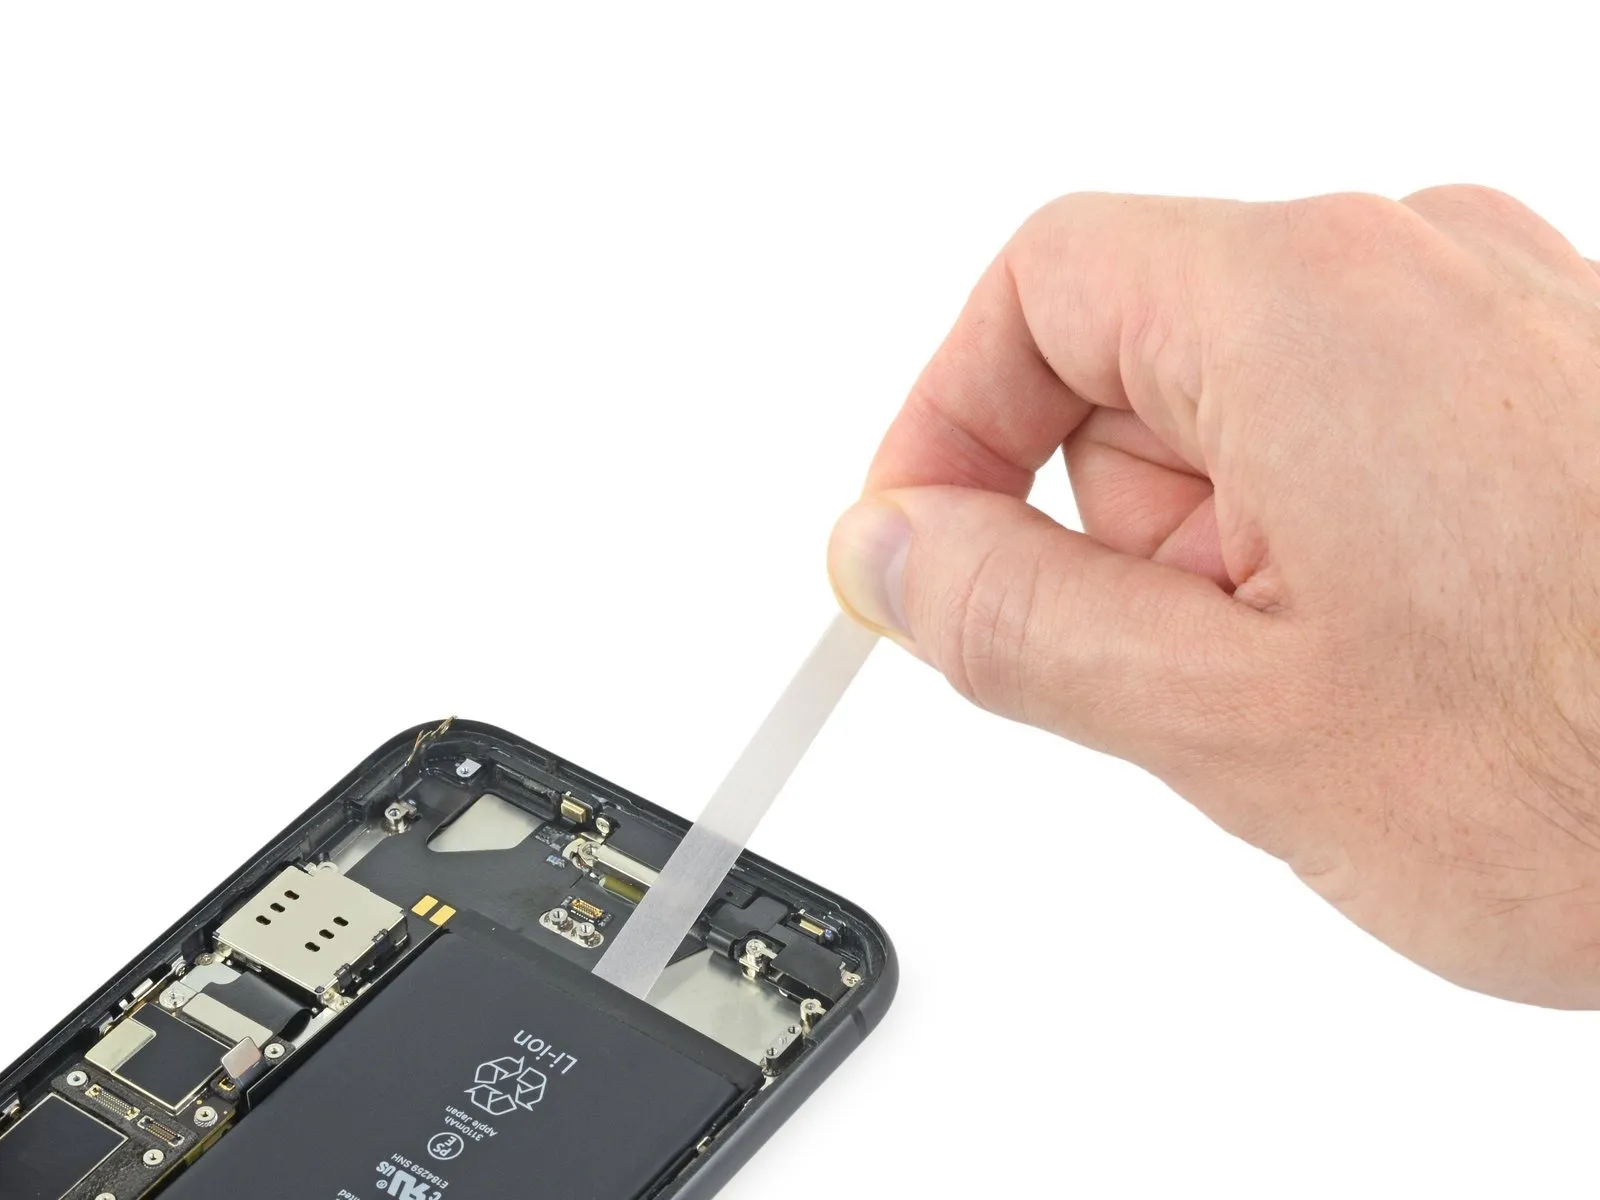
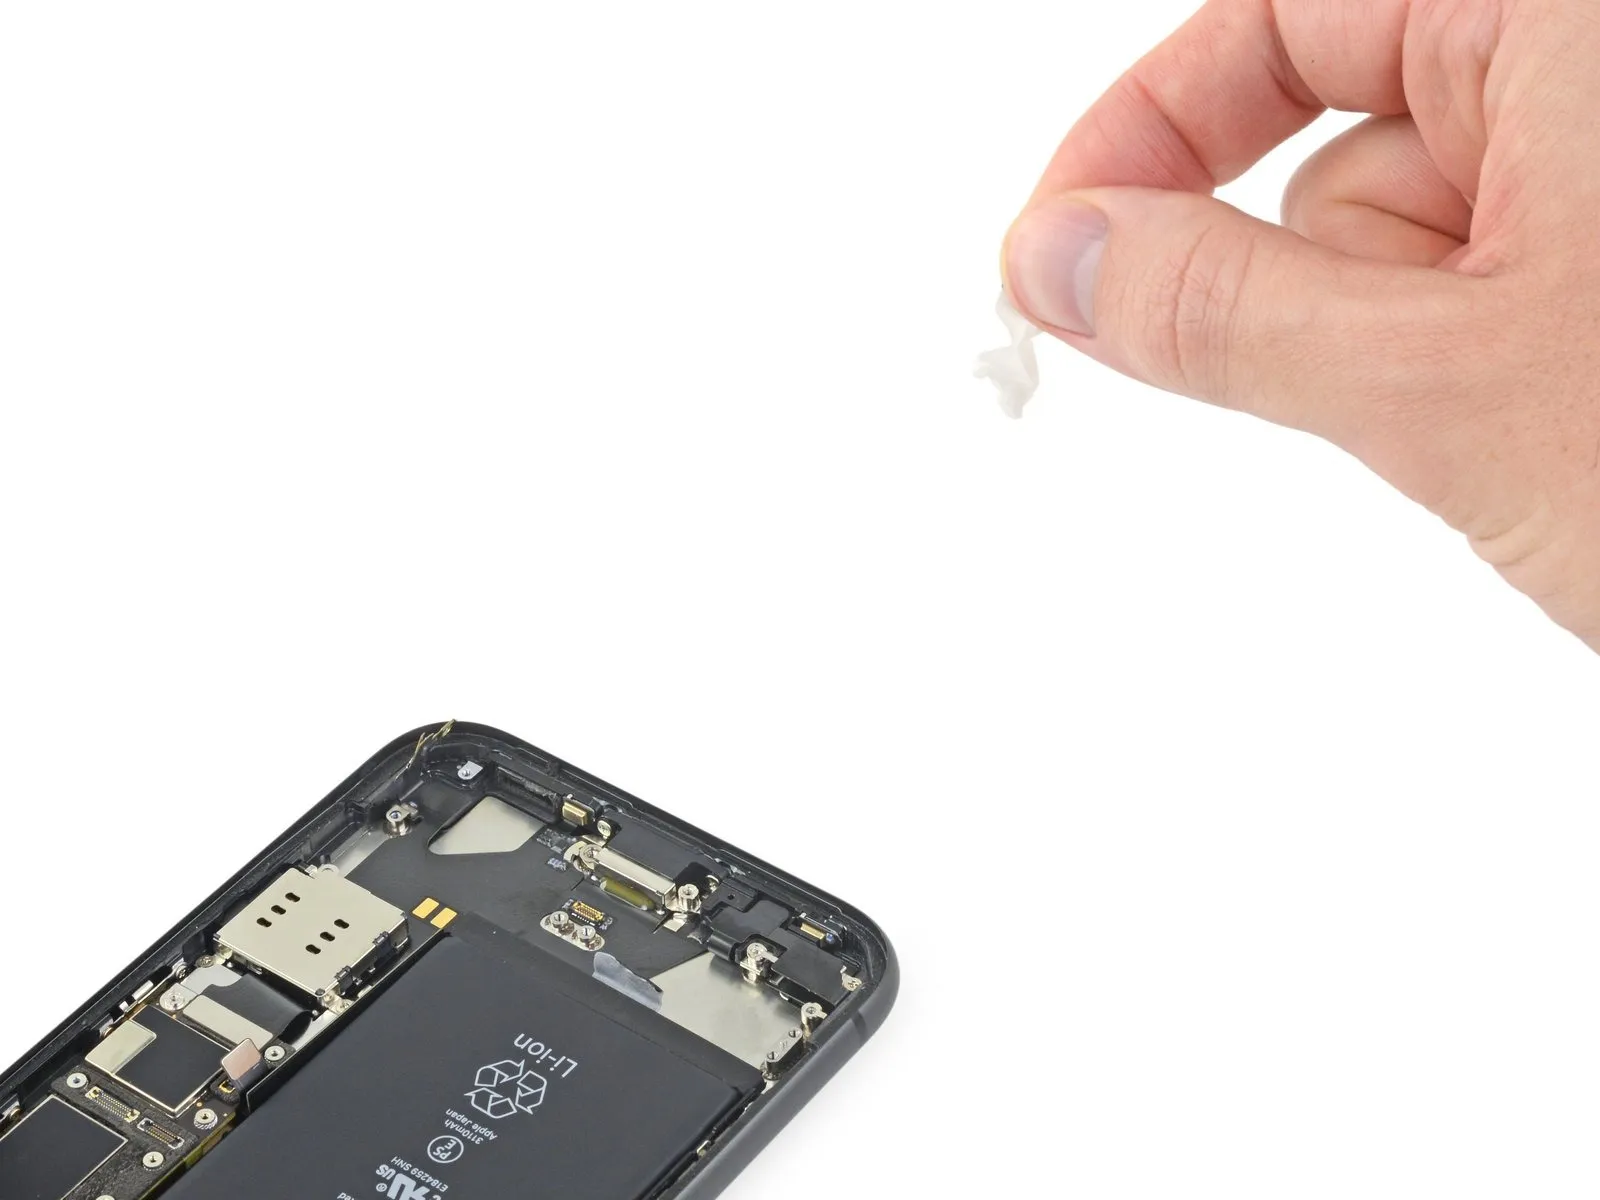
Step 44 | Peel away the top adhesive pull tabs
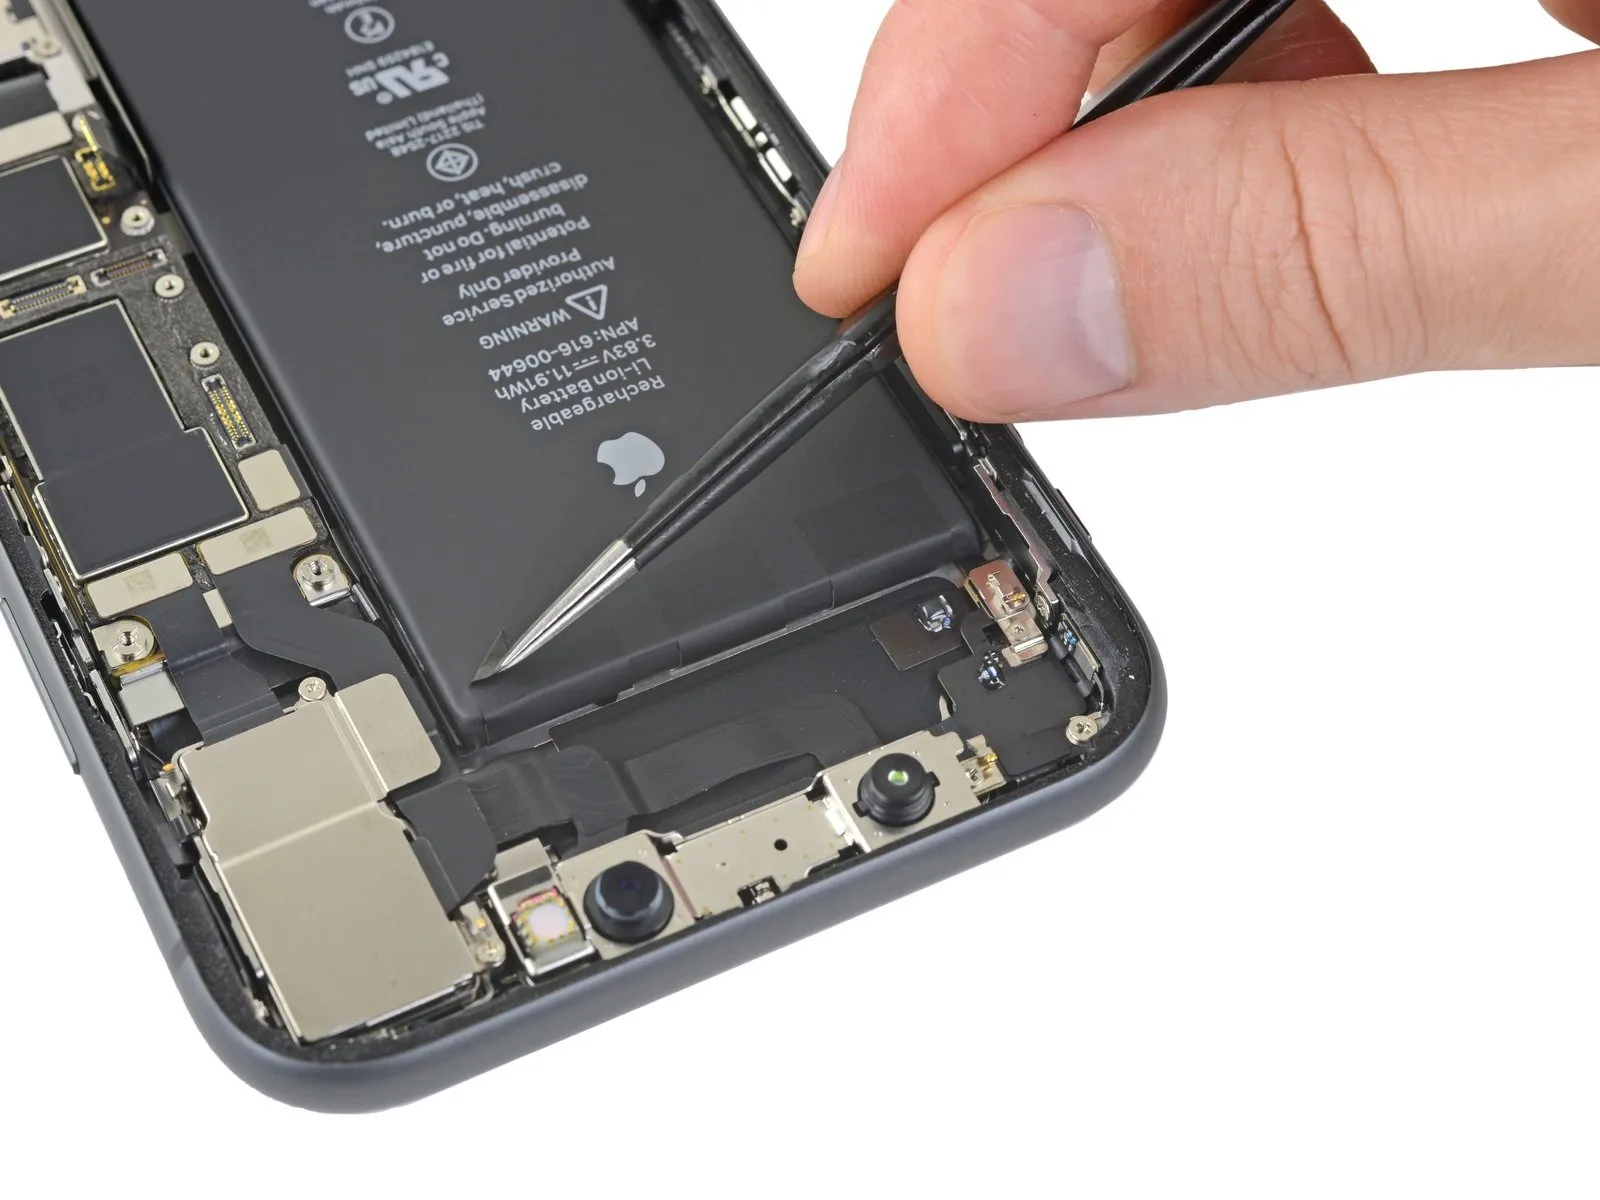
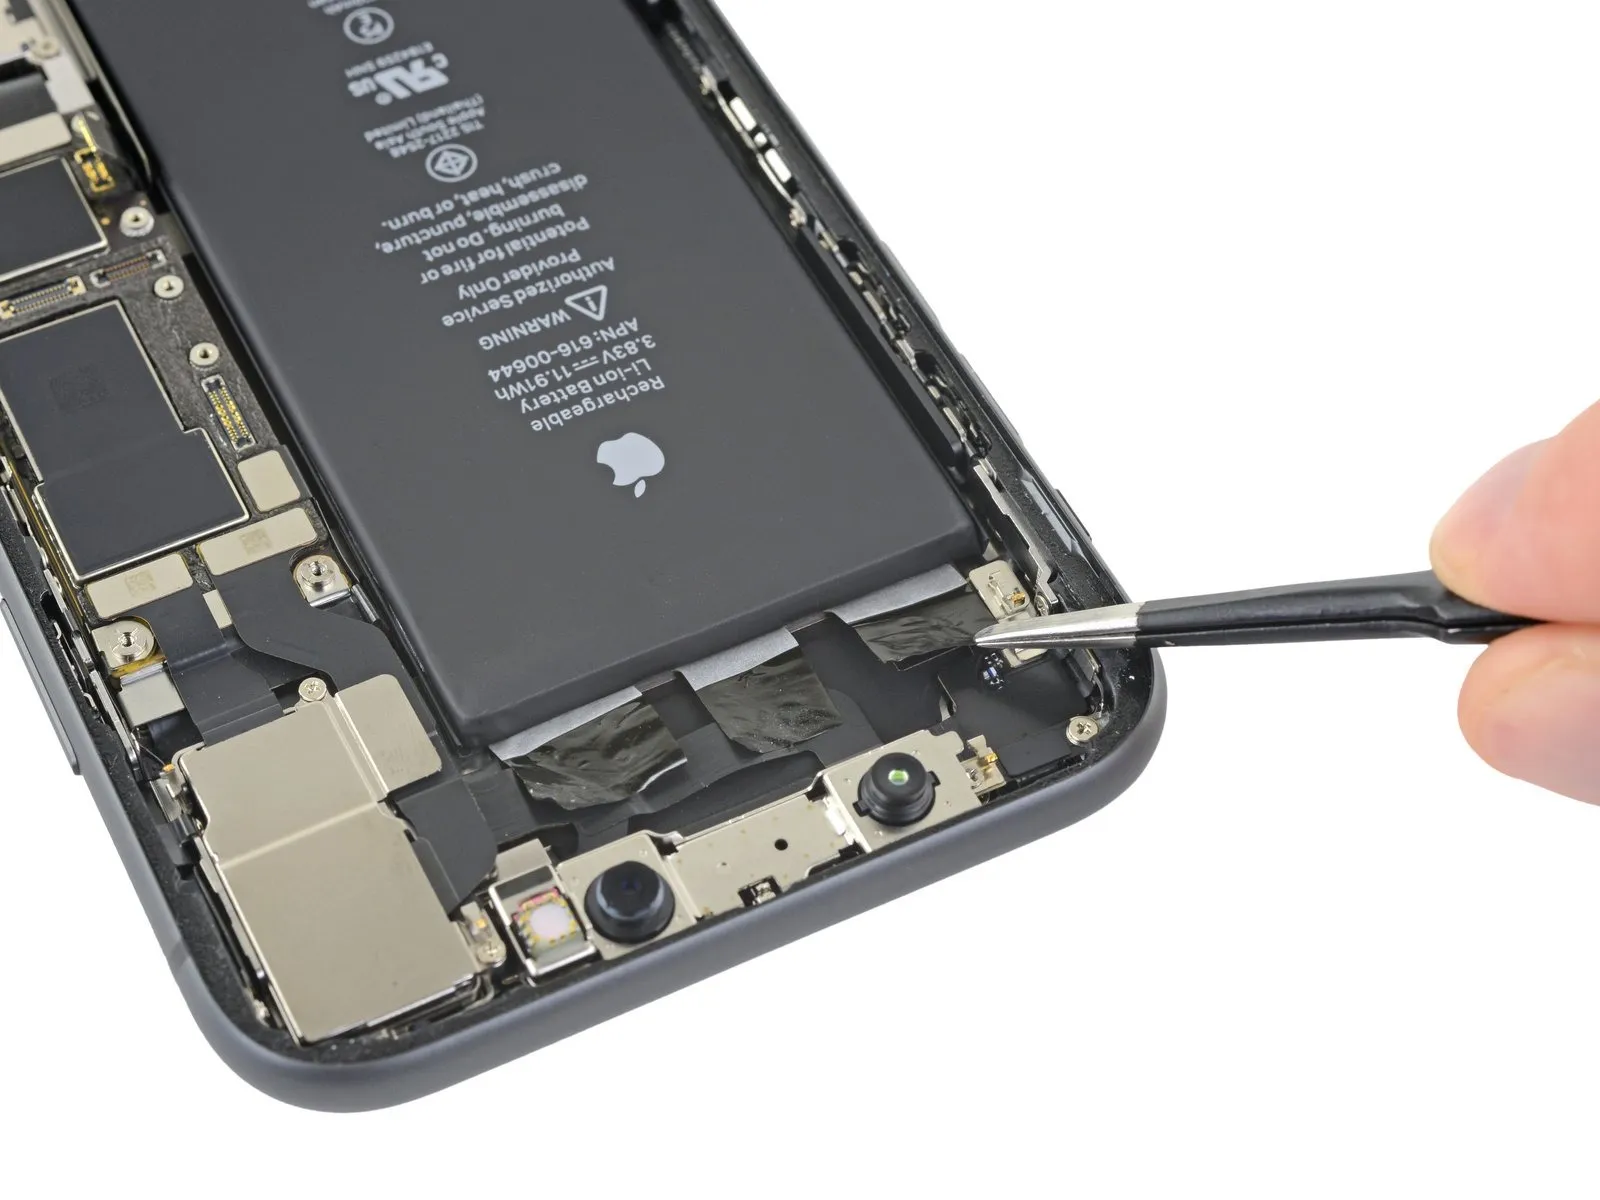
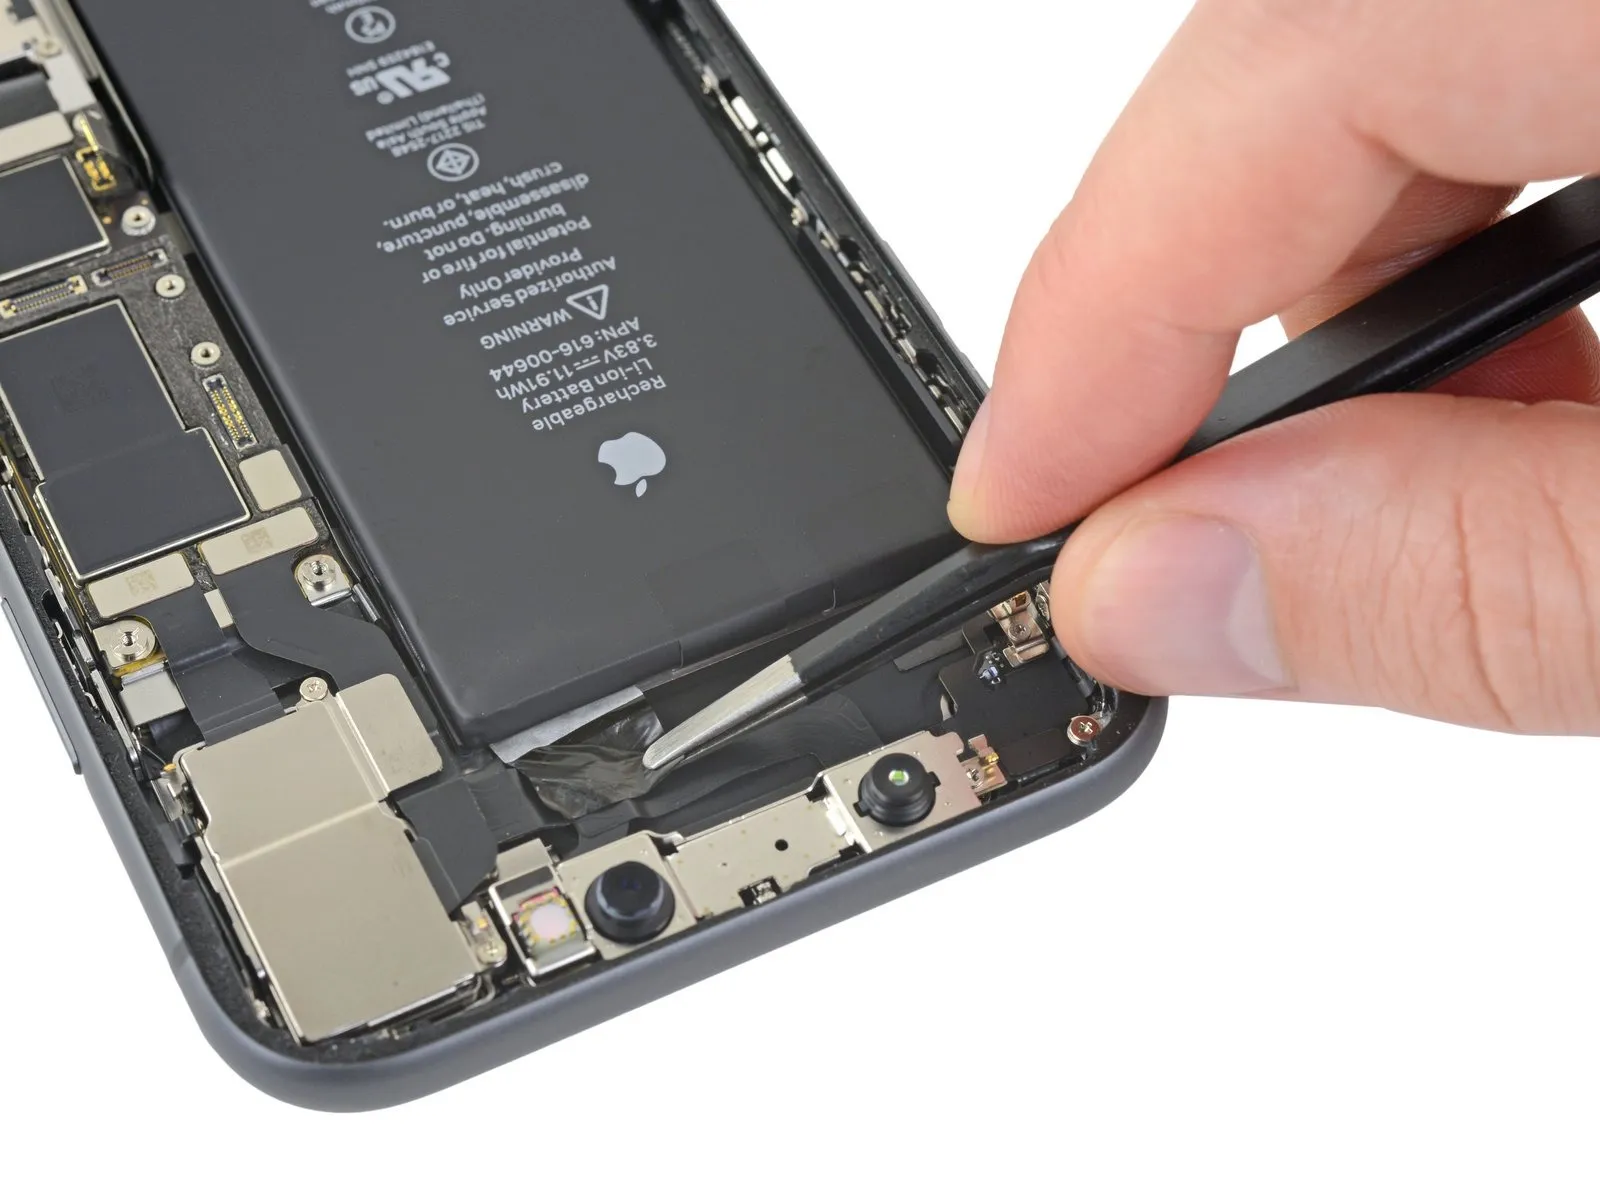
- Exercise caution to avoid contact with the Face ID sensor assemblies located at the iPhone's upper portion.
Step 45 | Remove the three top adhesive strips
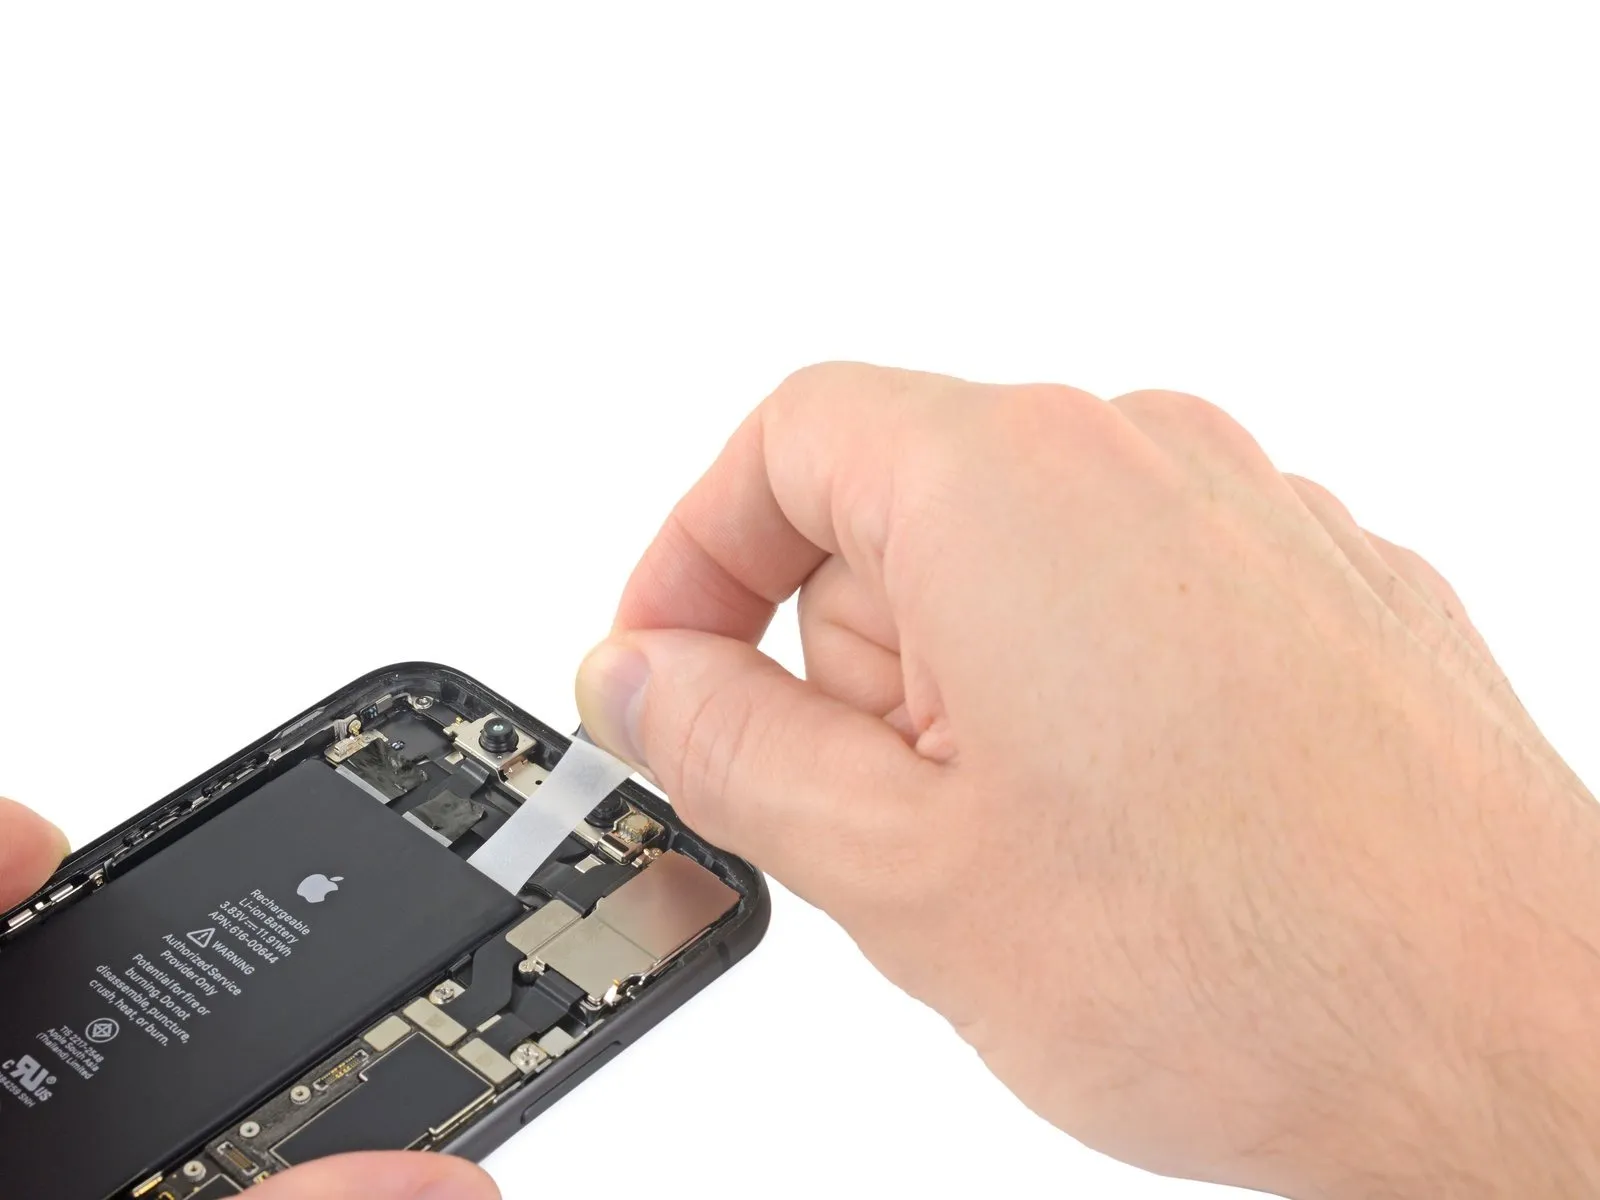
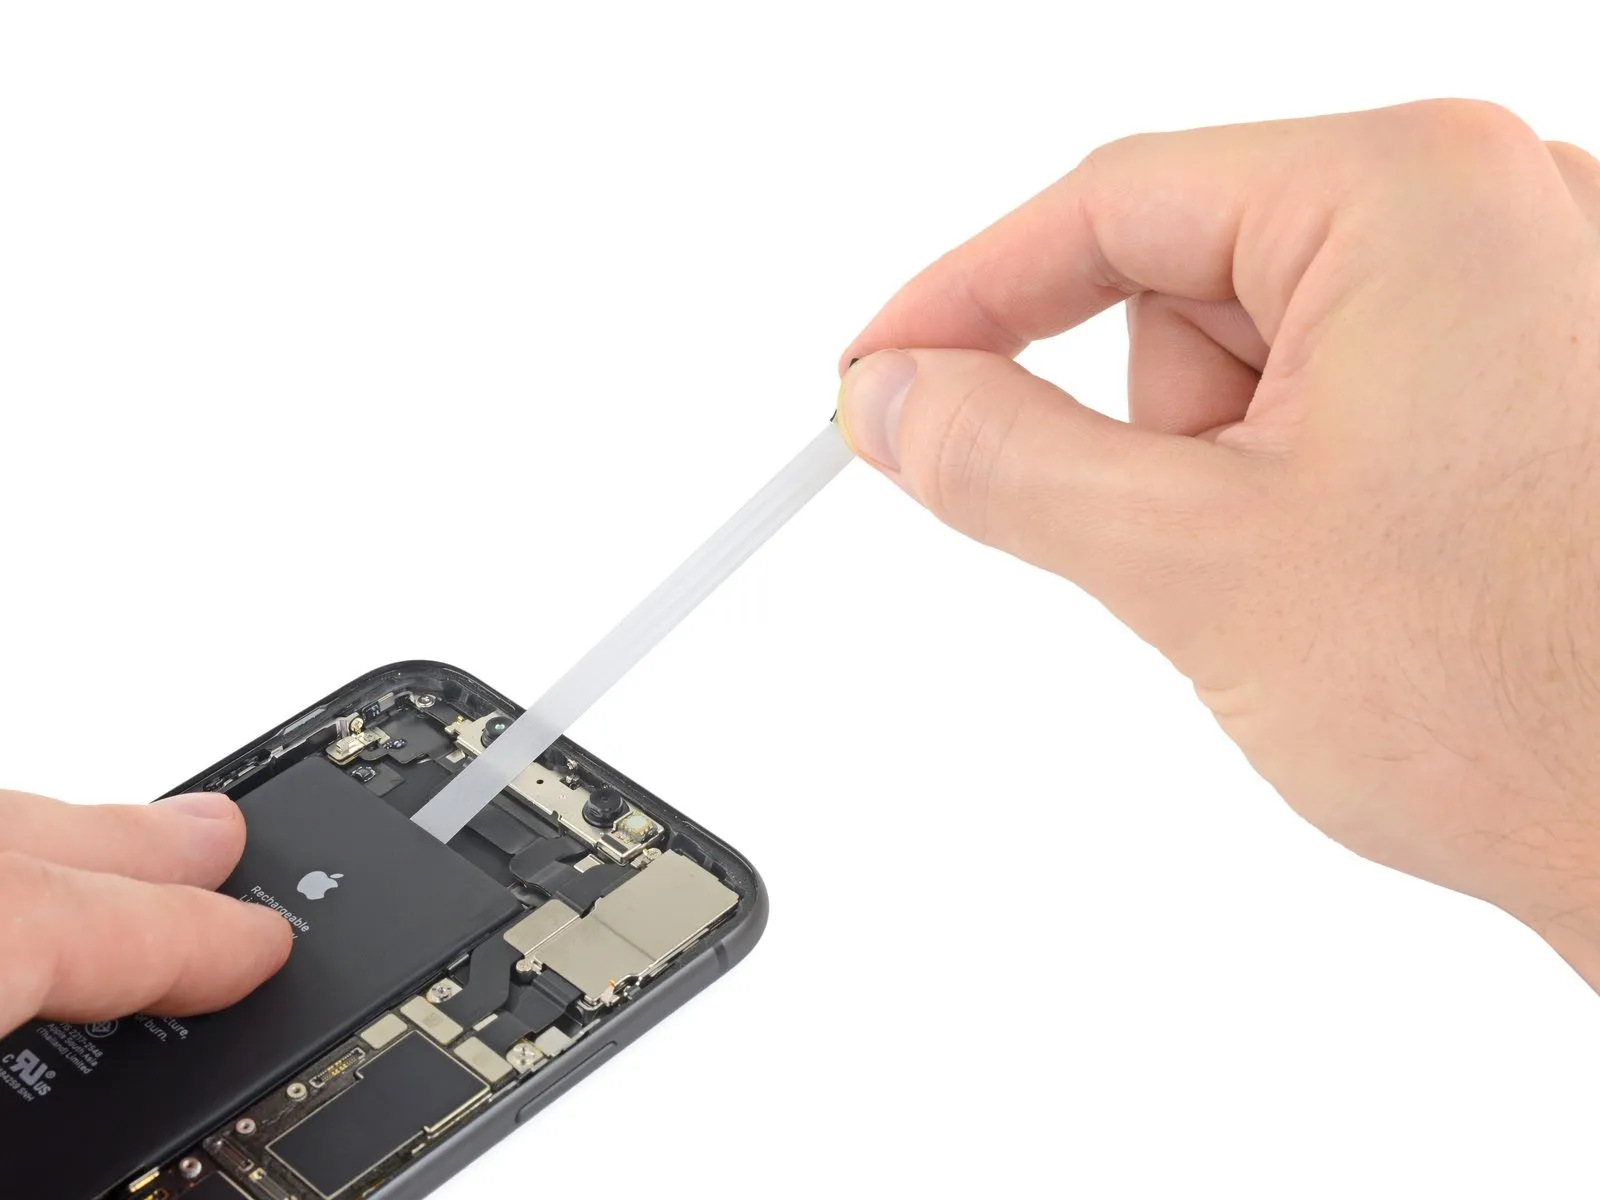
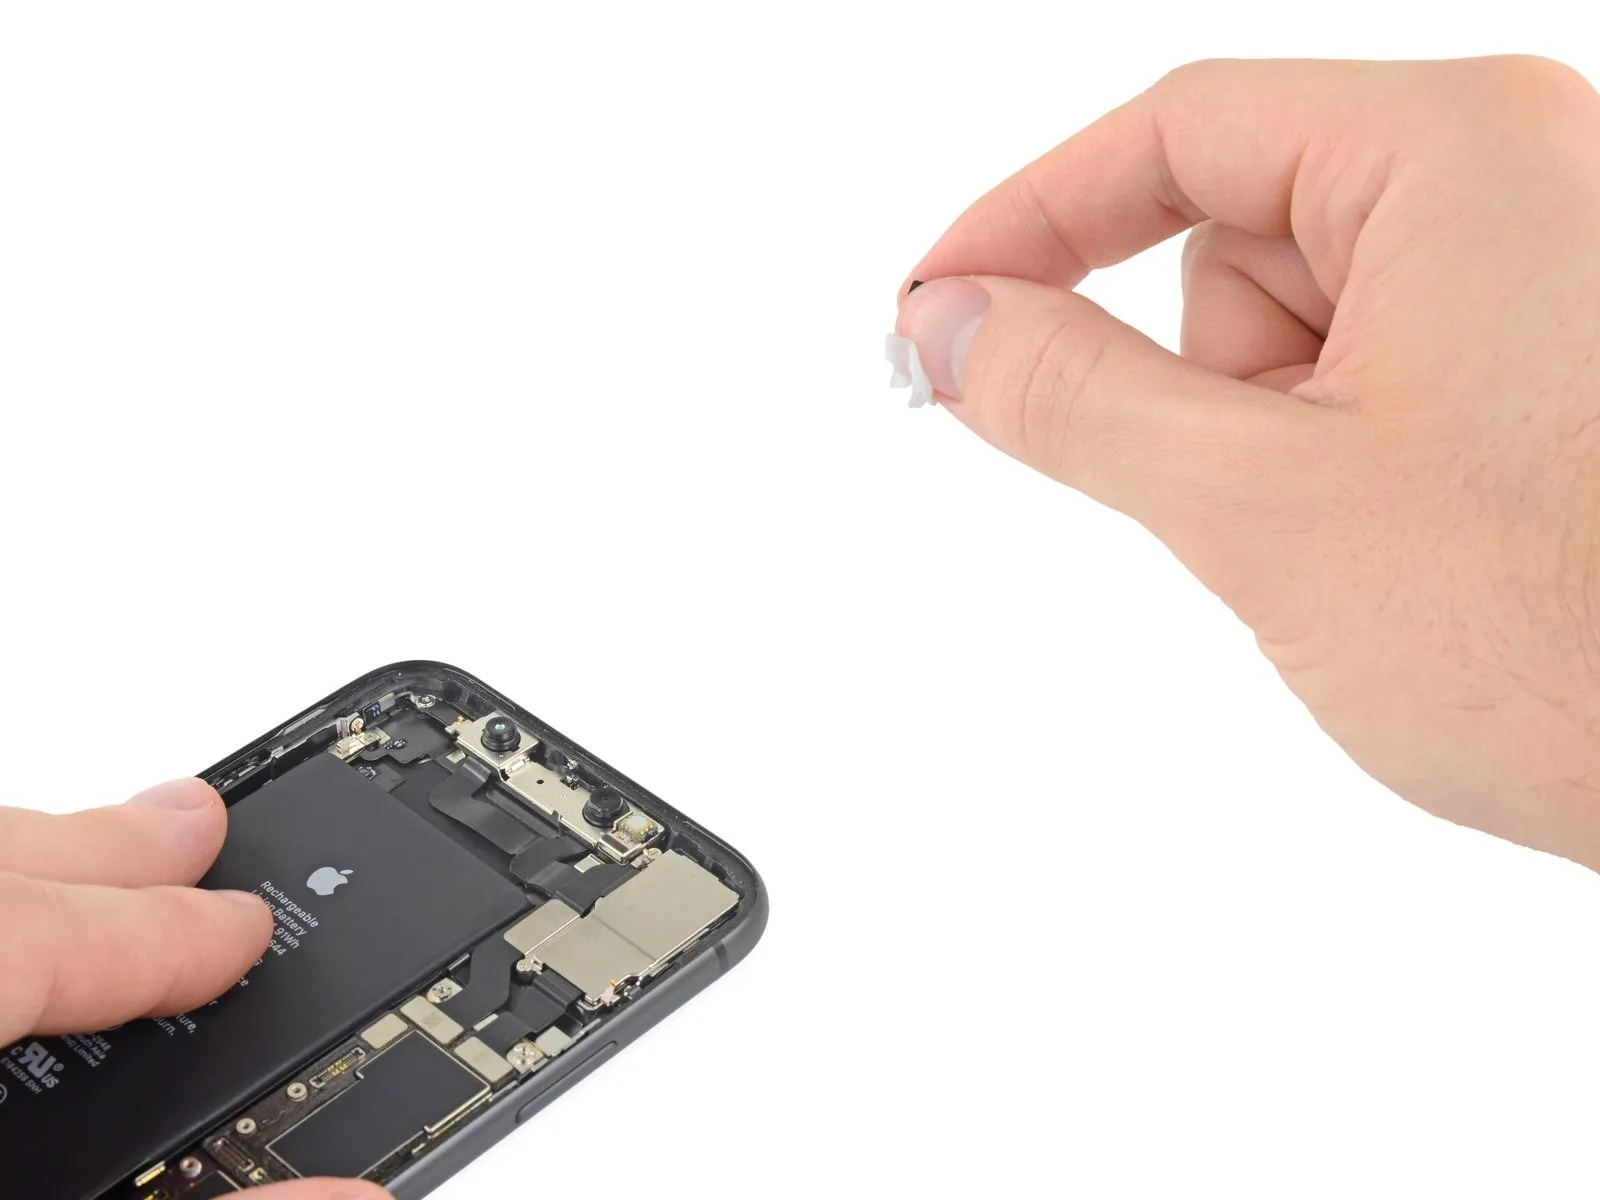
- Extract the upper adhesive strips individually, employing the identical technique utilized for the lower strips.
- Maintain a firm grip on the battery during the removal of the last strip to prevent it from being ejected from the iPhone with force.
- Should you manage to extract all adhesive strips without incident, proceed to bypass the subsequent instruction.
- Should any portion of the adhesive strips fracture and remain beneath the battery, making retrieval impossible, advance to the following procedure.
Step 46 | Removing a battery that's still stuck
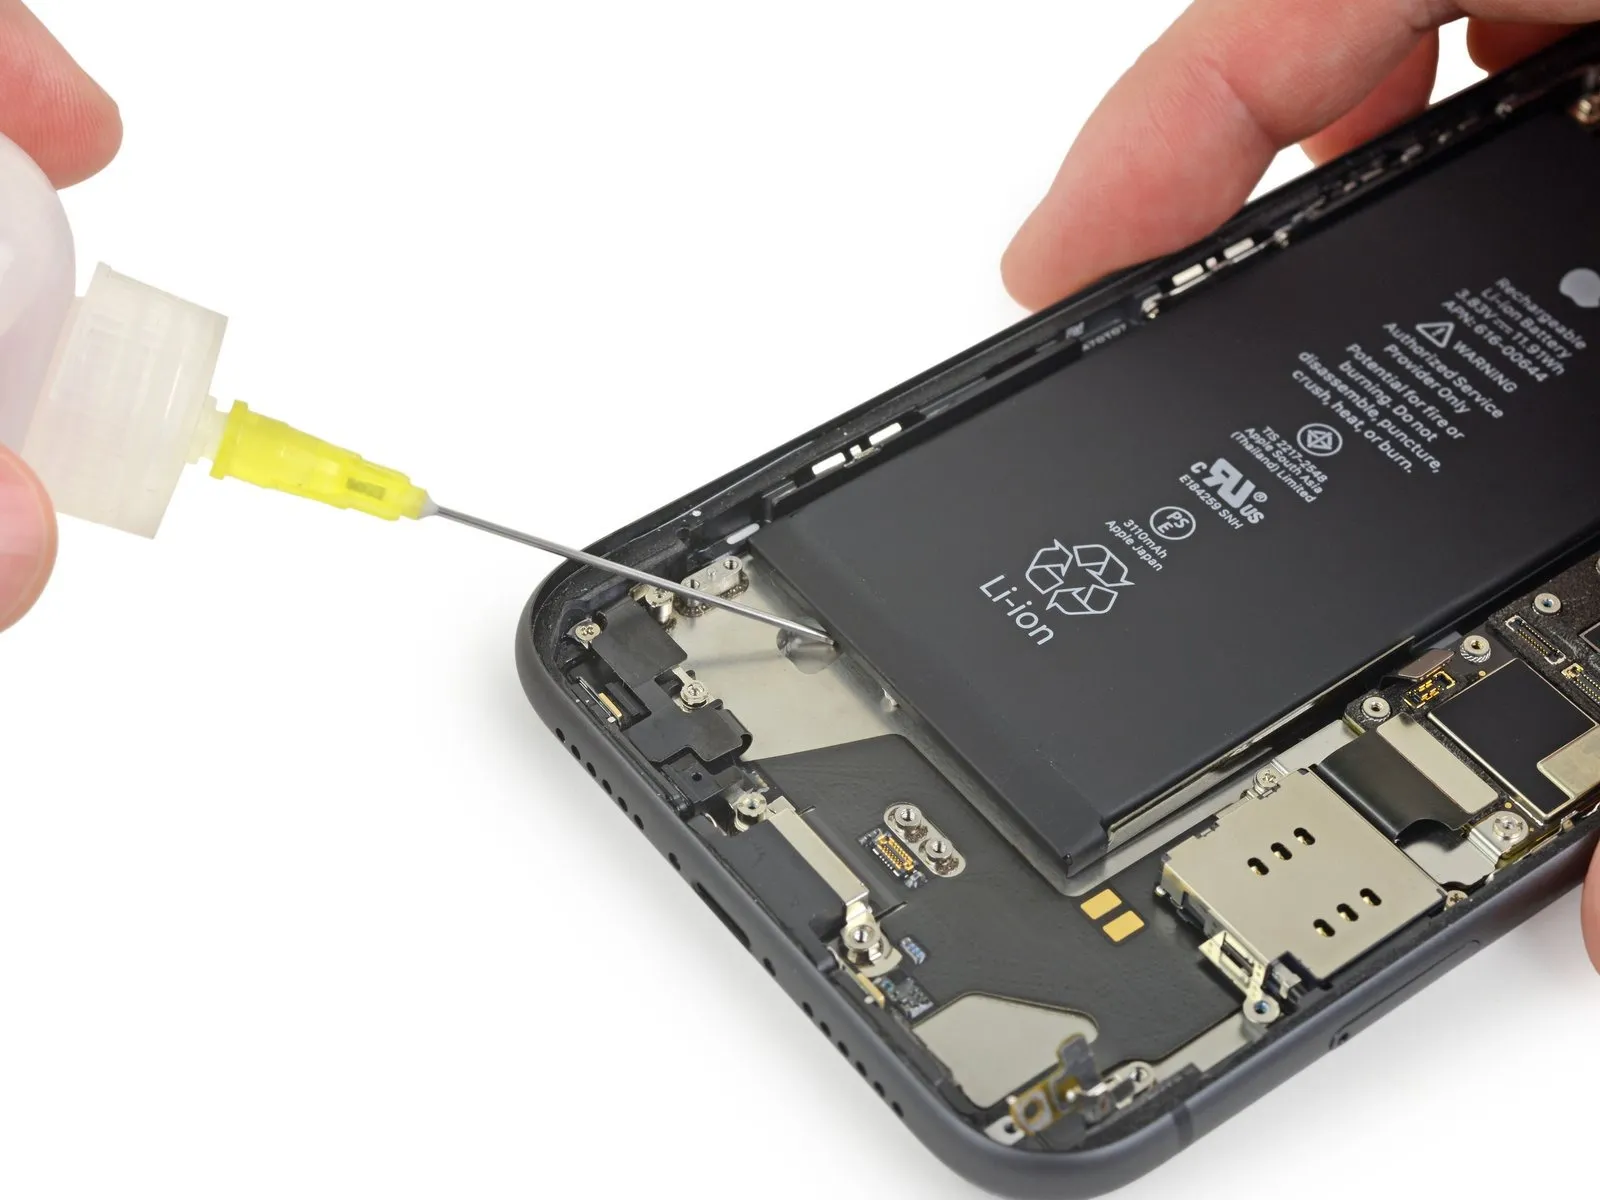
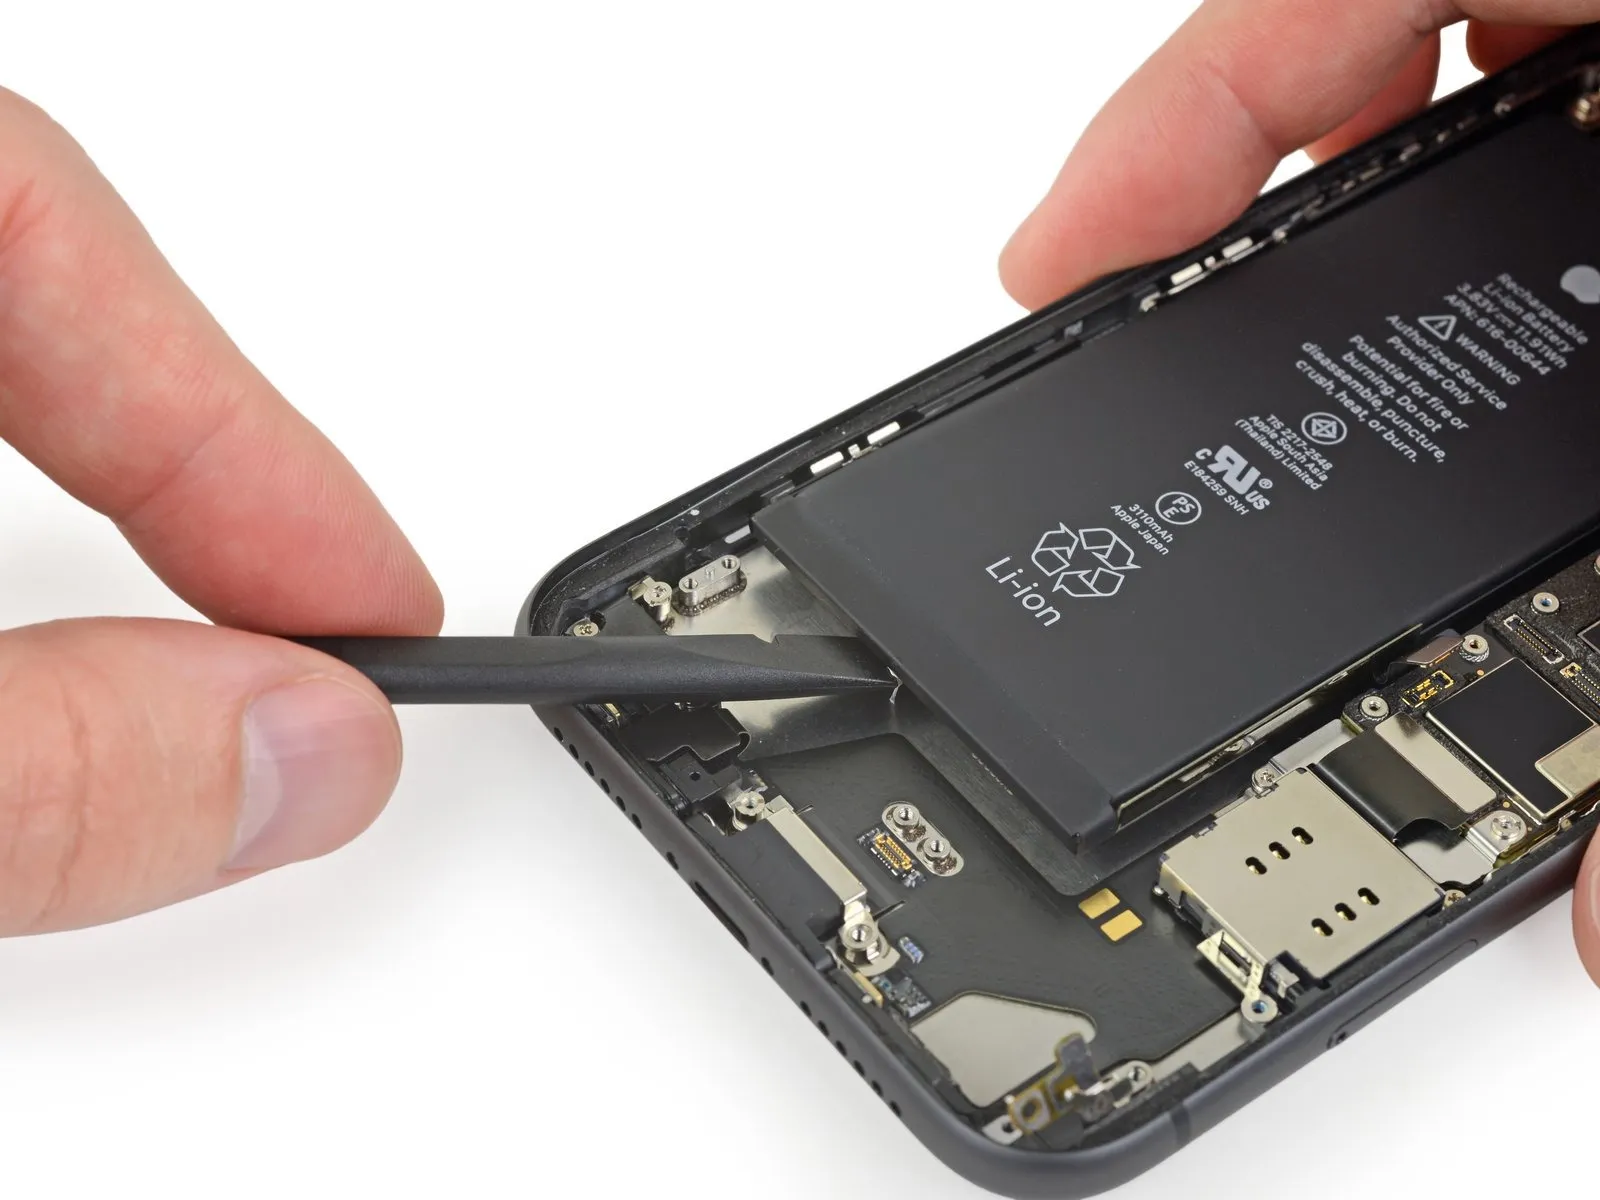
To detach the battery, introduce a small quantity of isopropyl alcohol, possessing a concentration of 90% or higher, beneath the battery, specifically targeting the area adjacent to the adhered strip(s). Allow approximately one minute for the alcohol to take effect, then carefully elevate the battery. The battery ought to separate with only slight pressure applied. Should it remain affixed, introduce a marginally greater amount of isopropyl alcohol and repeat the lifting process. Exercise caution to prevent any deformation or perforation of the battery during this procedure.
Step 47 | Removing a stuck battery (alternate method)
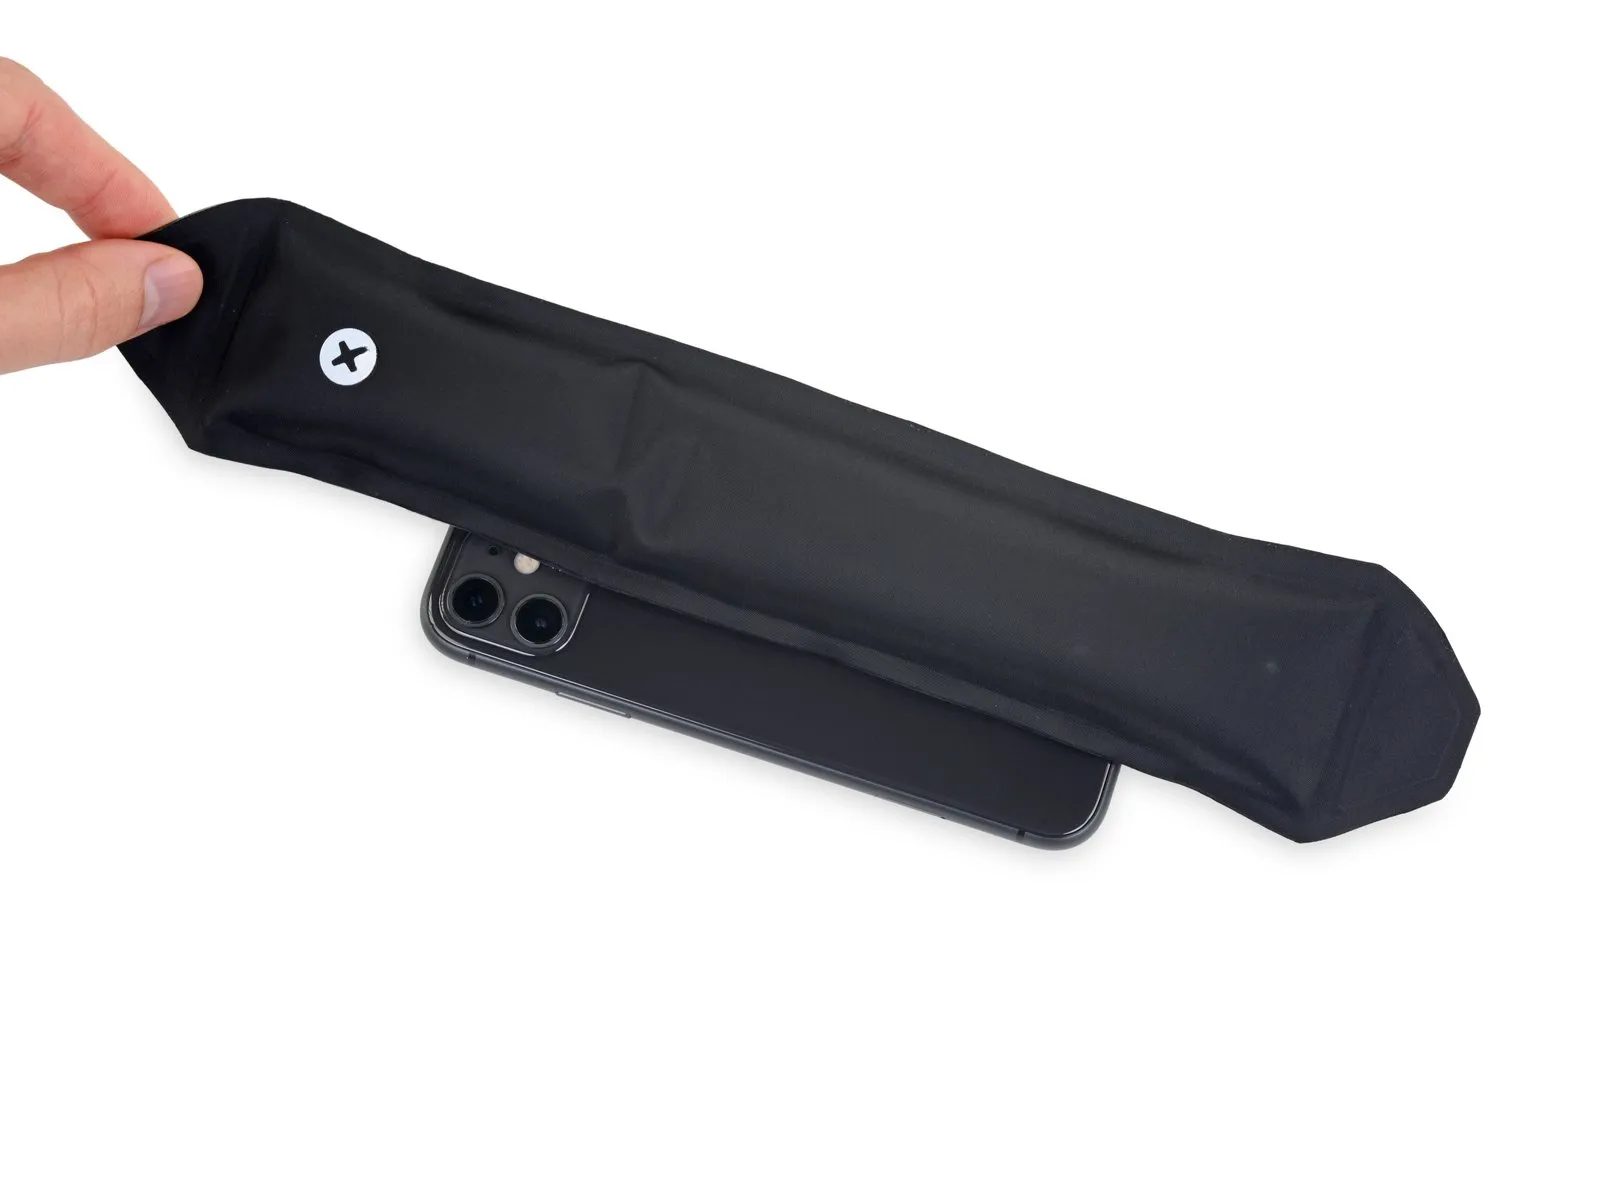
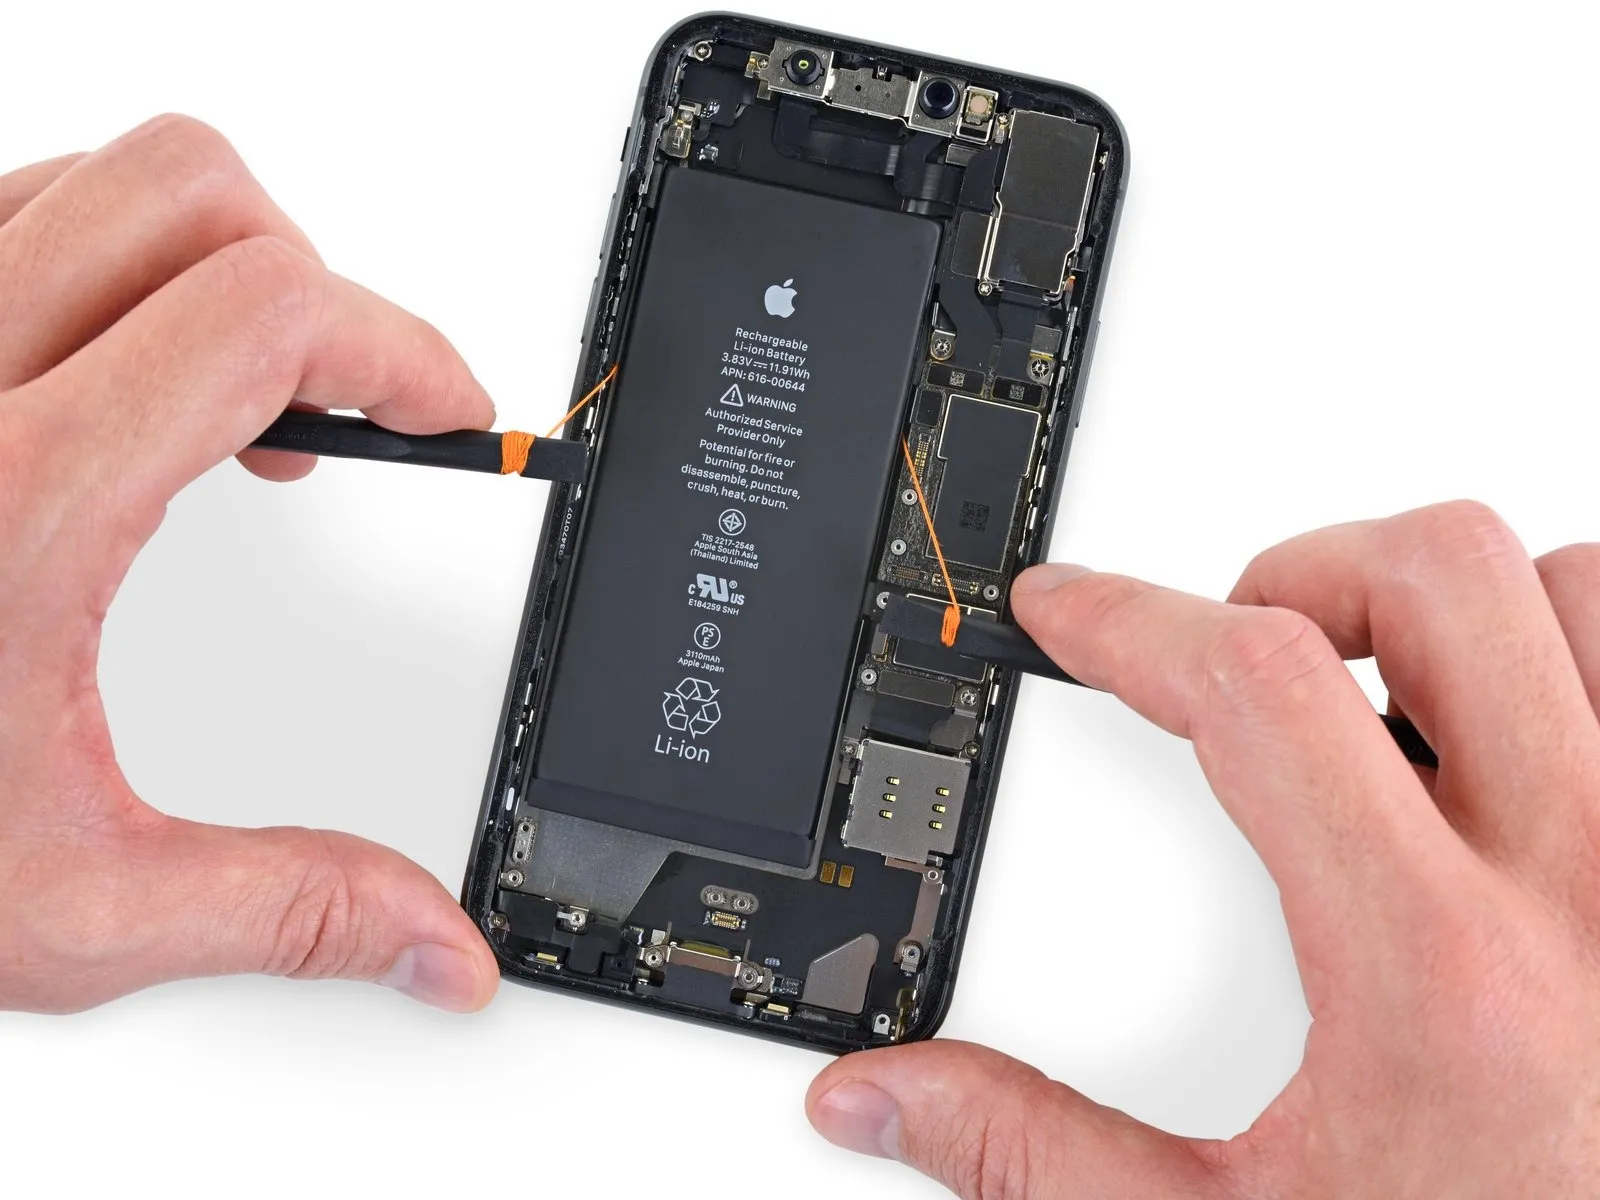
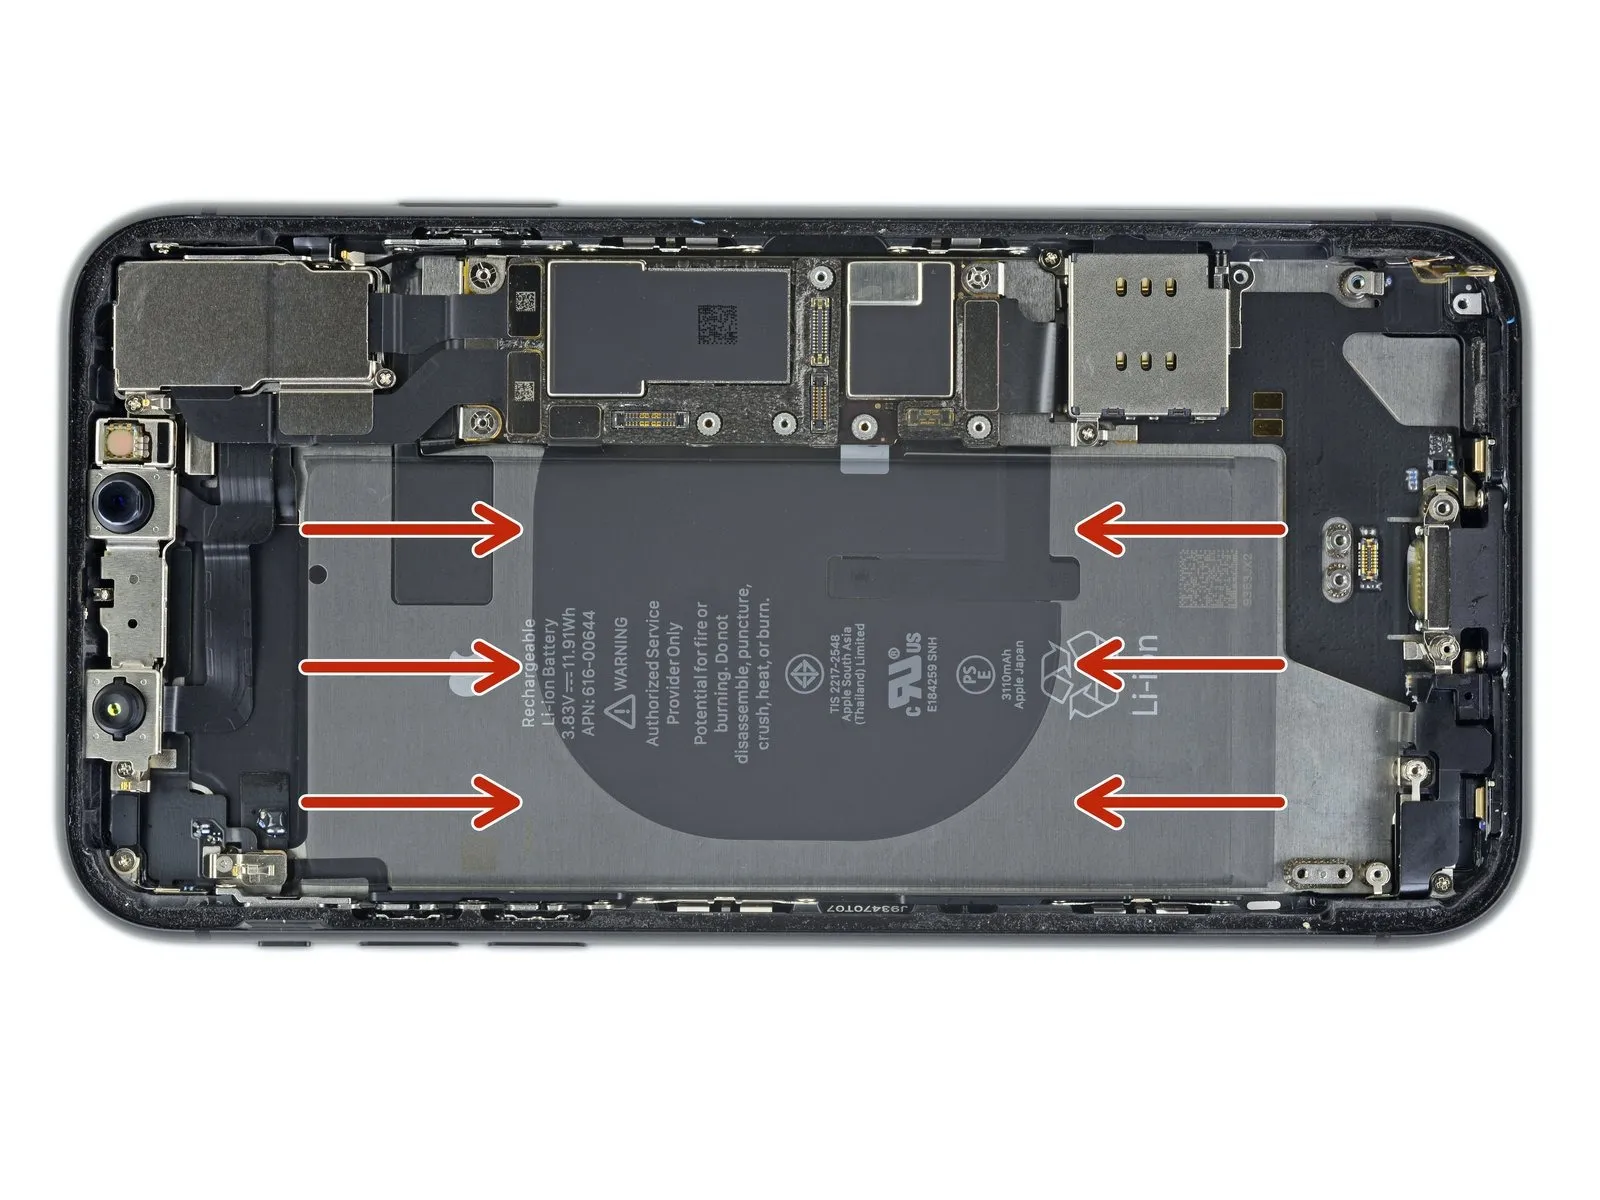
To initiate the repair, utilize an iOpener or apply heat with a hair dryer to the rear case, focusing on the area immediately behind the battery. Warm the iPhone's back casing to a temperature just beyond comfortable touch, ensuring you do not overheat it. After turning the device around, carefully insert a durable string—such as dental floss—beneath the battery. To safeguard your fingers from heat and potential cuts, wear protective gloves or secure the string's ends to a tool. Employ a back-and-forth, sawing action to disengage the adhesive, recognizing that this process requires persistence due to the adhesive's slow yielding nature. Exercise utmost care to prevent any deformation or damage to the battery itself. Begin the separation process from either the top or bottom edge of the battery, directing your pulling force towards the center. Avoid pulling the string through the central third of the battery's area, as this region houses delicate ribbon cables and the wireless charging coil, which are susceptible to damage. Should you opt to employ prying tools for battery removal, proceed with exceptional caution to mitigate the risk of damaging the aforementioned ribbon cables or the wireless charging coil located directly beneath the battery.
Step 48 | Remove the battery
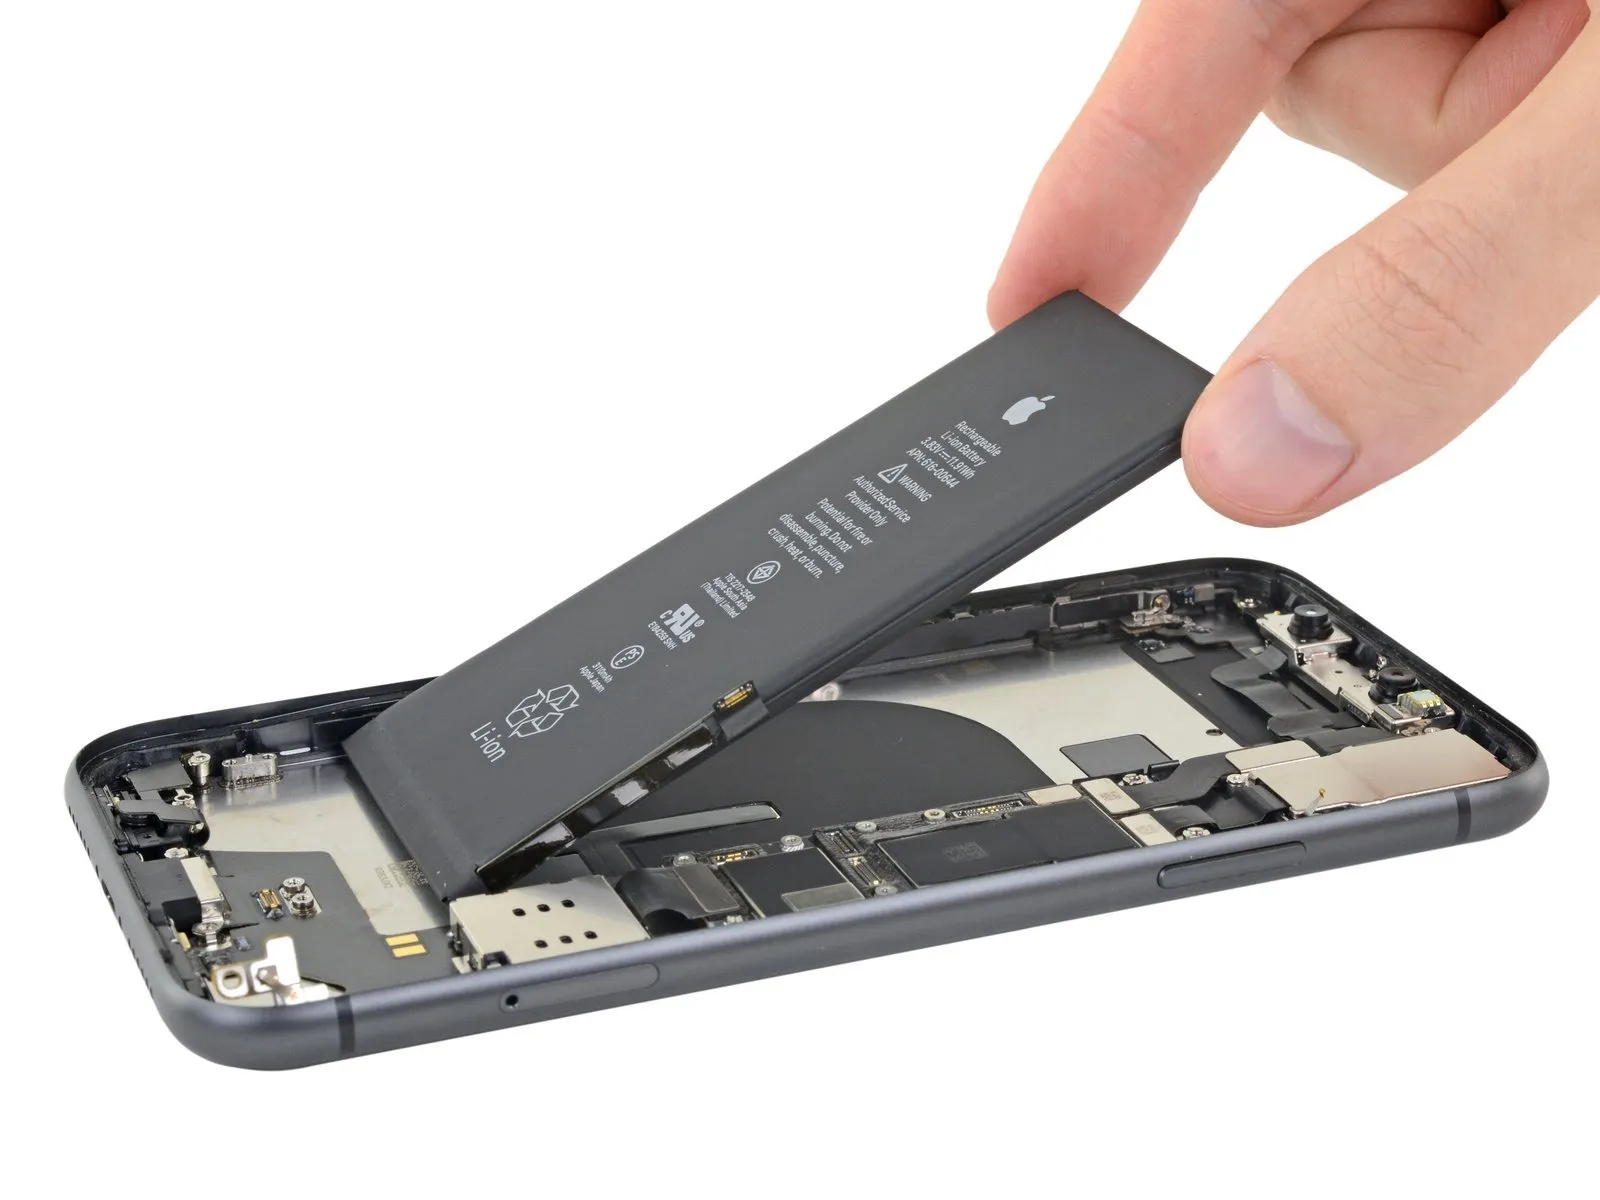
- Disconnect the battery to proceed.
- Prior to installing a replacement battery, reattach the Taptic Engine and speaker; this procedure maintains proper battery alignment throughout the installation process.
- To guarantee accurate positioning within its designated space, briefly reconnect the battery connector to the motherboard socket before securing the replacement battery.
- Secure the replacement battery with adhesive, then disconnect it, and continue with the device reassembly.
- Should your replacement battery lack pre-applied adhesive, consult this guide for instructions on replacing the adhesive strips.
- Following the reassembly, execute a force restart to proactively mitigate potential problems and streamline any necessary troubleshooting.