iPhone 11 Pro Teardown
Individuals unfamiliar with device repair often find the process perplexing, whereas experienced technicians seek to understand the underlying mechanisms.
- Apple's latest iPhone models have once more generated considerable attention within the device repair sector.
This updated aesthetic presents implications for the methods and techniques employed in servicing these devices.
Step 1 | iPhone 11 Pro Teardown
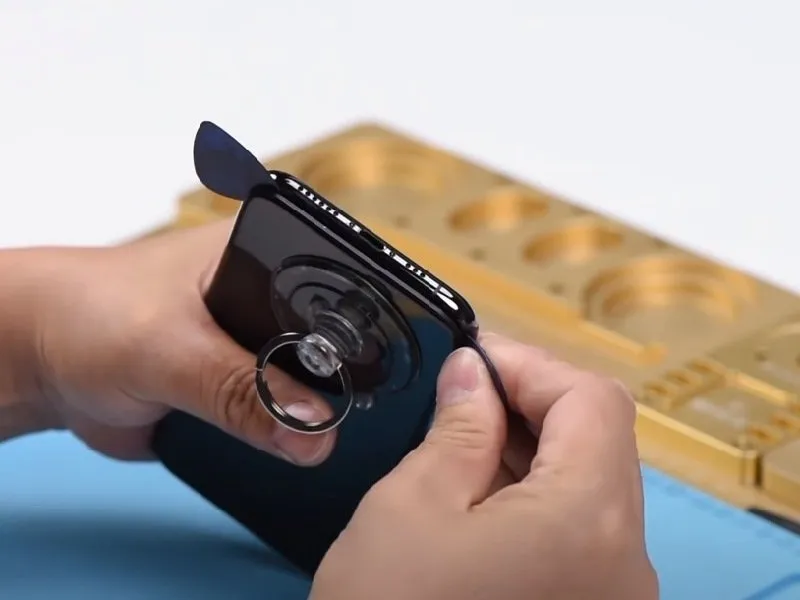
Begin the repair process by detaching the two pentalobe screws located along the phone's lower border.
- Apply heat uniformly around the screen's perimeter using a hot air gun for a duration of one minute, ensuring the waterproof adhesives become pliable.
- Securely affix the suction cup to the display surface, maintaining a firm grip on the device while leveraging the suction cup's ring to initiate separation.
- Upon lifting the screen, a small separation should appear; introduce a plastic pry tool into this space, securing it centrally before adding another and sliding both along the screen's edges to release it from the rear casing.
- Exercise caution to prevent the pry tool from penetrating too deeply, and prioritize lifting the screen upwards from the left side to mitigate potential damage to the display's flex cables.
To avoid harm to the delicate flex cables, ensure the pry tool remains shallow and the screen is raised primarily from the left-hand side during separation.
Step 2 | Battery
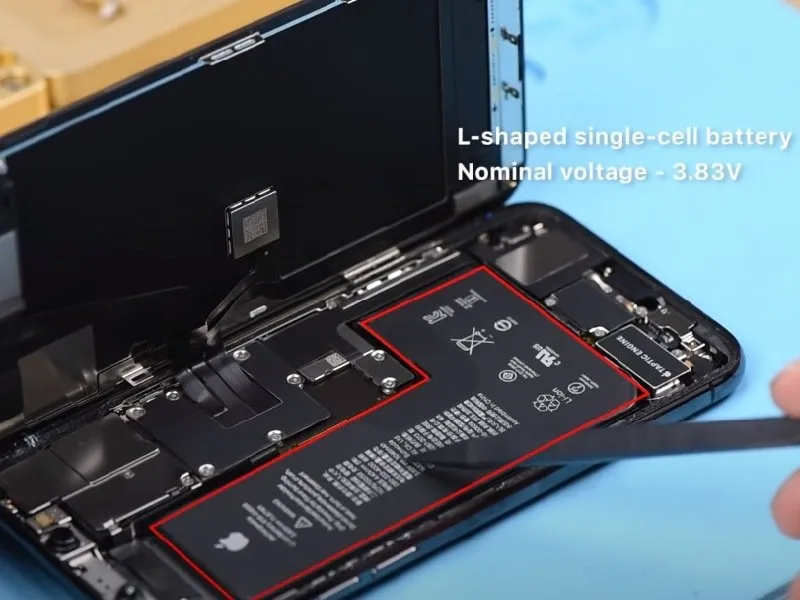
During the repair process, observe that the iPhone 11 Pro utilizes a battery with a greater capacity compared to models within the iPhone X series.
- A visual inspection confirms the battery exhibits a slightly increased thickness.
- Due to the incorporation of a supplementary module on the charging port flex cable, the Taptic Engine within the iPhone 11 Pro demonstrates a reduced size relative to its iPhone X series counterparts.
Step 3 | iPhone 11 Pro Teardown
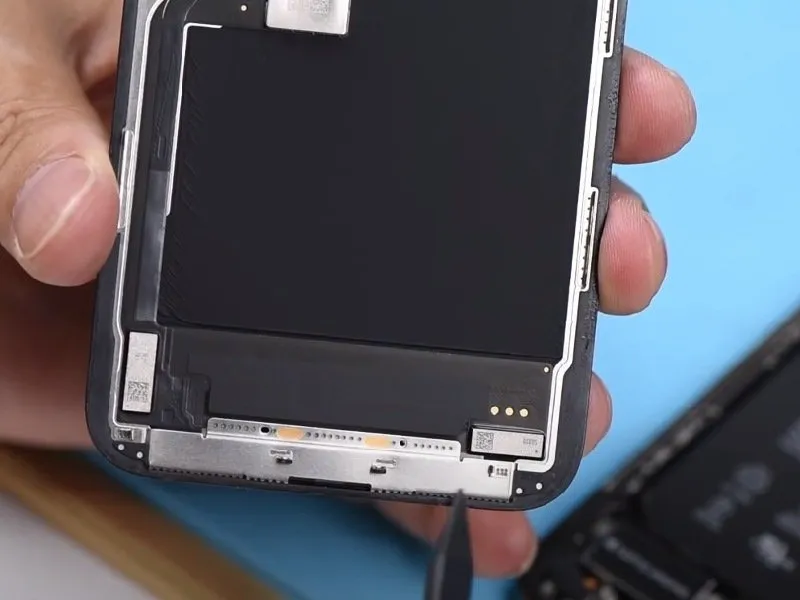
Proceed with the removal of the connector bracket, as indicated in this stage.
- To ensure safety and prevent electrical shorts, detach the battery before proceeding with screen removal; the absence of a 3D touch layer in the iPhone 11 Pro results in a marginally thinner display.
- The enhanced bracket shielding around the screen's bonding surface contributes to a more complex screen repair process.
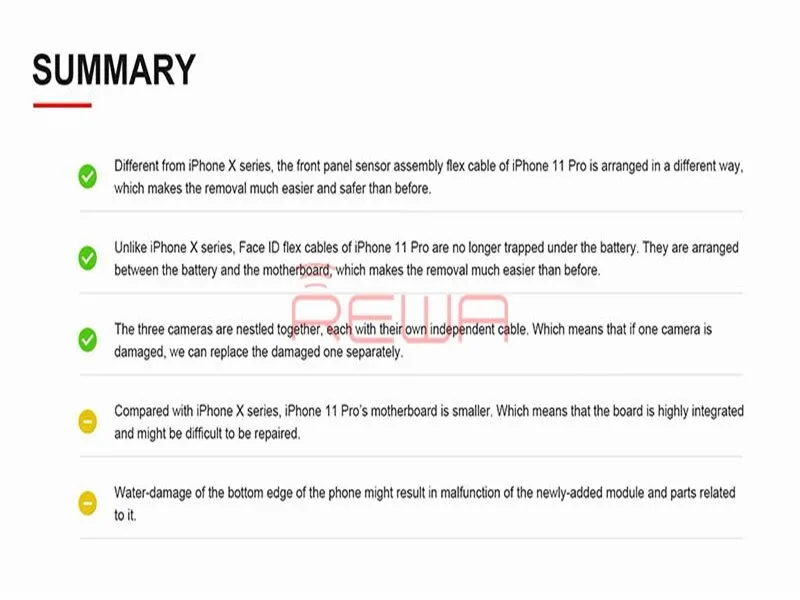
- In contrast to earlier iPhone X models, the Face ID flex cables in the iPhone 11 Pro are now positioned between the battery and the logic board, simplifying their disconnection.
Step 4 | Face ID Parts
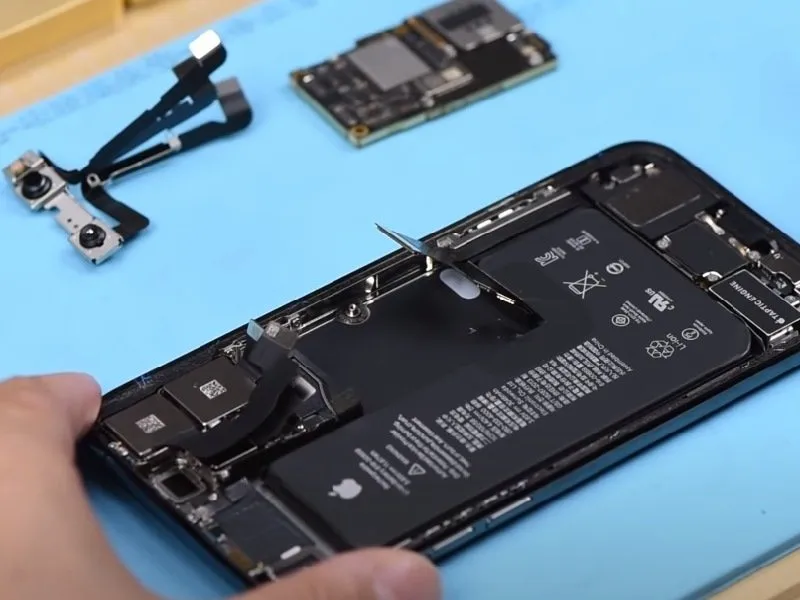
Proceed with detaching the remaining flexible cables and subsequently extract the main circuit board.
- Carefully extract the Face ID components; these parts within the iPhone 11 Pro mirror the design of those found in the iPhone X series, rendering them difficult to repair should they fail.
- Due to the intricate design of the Face ID assembly, any malfunction will likely result in a challenging repair process.
Step 5 | The newly added module
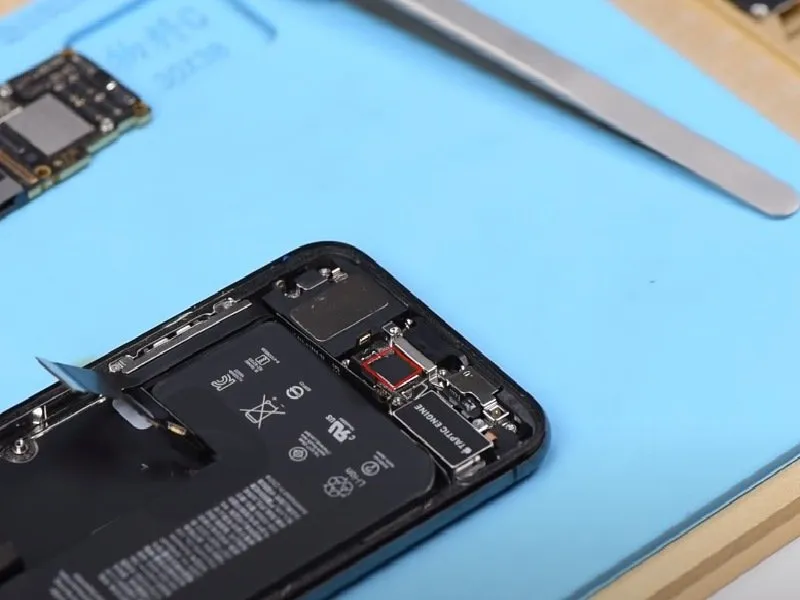
Proceed with the removal of the protective cover situated on the recently installed module.
- Observe that four flexible ribbon cables establish connections with the module.
- Among these connections, one cable is specifically linked to the Taptic Engine.
- Another cable provides power via a connection to the battery.A third flexible cable facilitates wireless charging through the coil.The fourth connection is a flex cable that interfaces with the speaker.
- Carefully detach the shielding to expose the cable connections.The Taptic Engine flex cable transmits signals for haptic feedback.The battery flex cable delivers electrical power to the module.
- The wireless charging coil flex cable enables inductive charging functionality.The speaker flex cable allows audio output from the module.Ensure proper alignment when disconnecting each flex cable.
- Avoid damaging the delicate flex cables during removal.Note the precise location of each flex cable for reassembly.Document the cable arrangement for reference during reinstallation.
Step 6

A complete comprehension of Face ID functionality necessitates reviewing the Face ID Teardown guide, specifically addressing scenarios where Face ID malfunctions following a repair.The diagnostic procedure involves examining the Face ID Teardown documentation.This resource provides insight into the causes of Face ID failure after repair attempts.Referencing the Face ID Teardown guide is essential for troubleshooting and resolving post-repair Face ID issues.