iPhone 3GS Proximity Sensor Ribbon Replacement
Consult the detailed disassembly instructions available online to learn the procedure for separating the screen assembly from an iPhone 3GS.To replace the iPhone 3GS display assembly, proceed with the installation..
Carefully detach the existing ribbon; this process requires precision, and an automotive pick tool is recommended for removing the ribbon bracket. Further instructions follow.
- Due to the prevalence of faulty ribbons sold by some online retailers, handle them with care as they are prone to damage. It's advisable to purchase multiple ribbons—typically 3 to 4—to account for the possibility of receiving defective replacements until a functional one is obtained.
Additional details regarding my experience and repair processes can be found on my blog, which frequently features content related to microsoldering and similar intricate work.
This is a resource for do-it-yourself iPhone repairs and modifications.
Upon completion of this repair, please select the "I Did It" button to assist in improving future guides.
Step 1 | Proximity Sensor Ribbon

Carefully detach the screw securing the bracket, ensuring it's stored safely to prevent loss or damage.
Step 2

Carefully raise the bracket located adjacent to the speaker using an automotive pick tool, applying gentle upward force; avoid excessive pressure or prying.
Step 3

Repeat the process for the remaining bracket side and its lower portion, noting that these components are secured by finger-like clips that engage with the screen midframe and require manual finger pressure for release.
Step 4
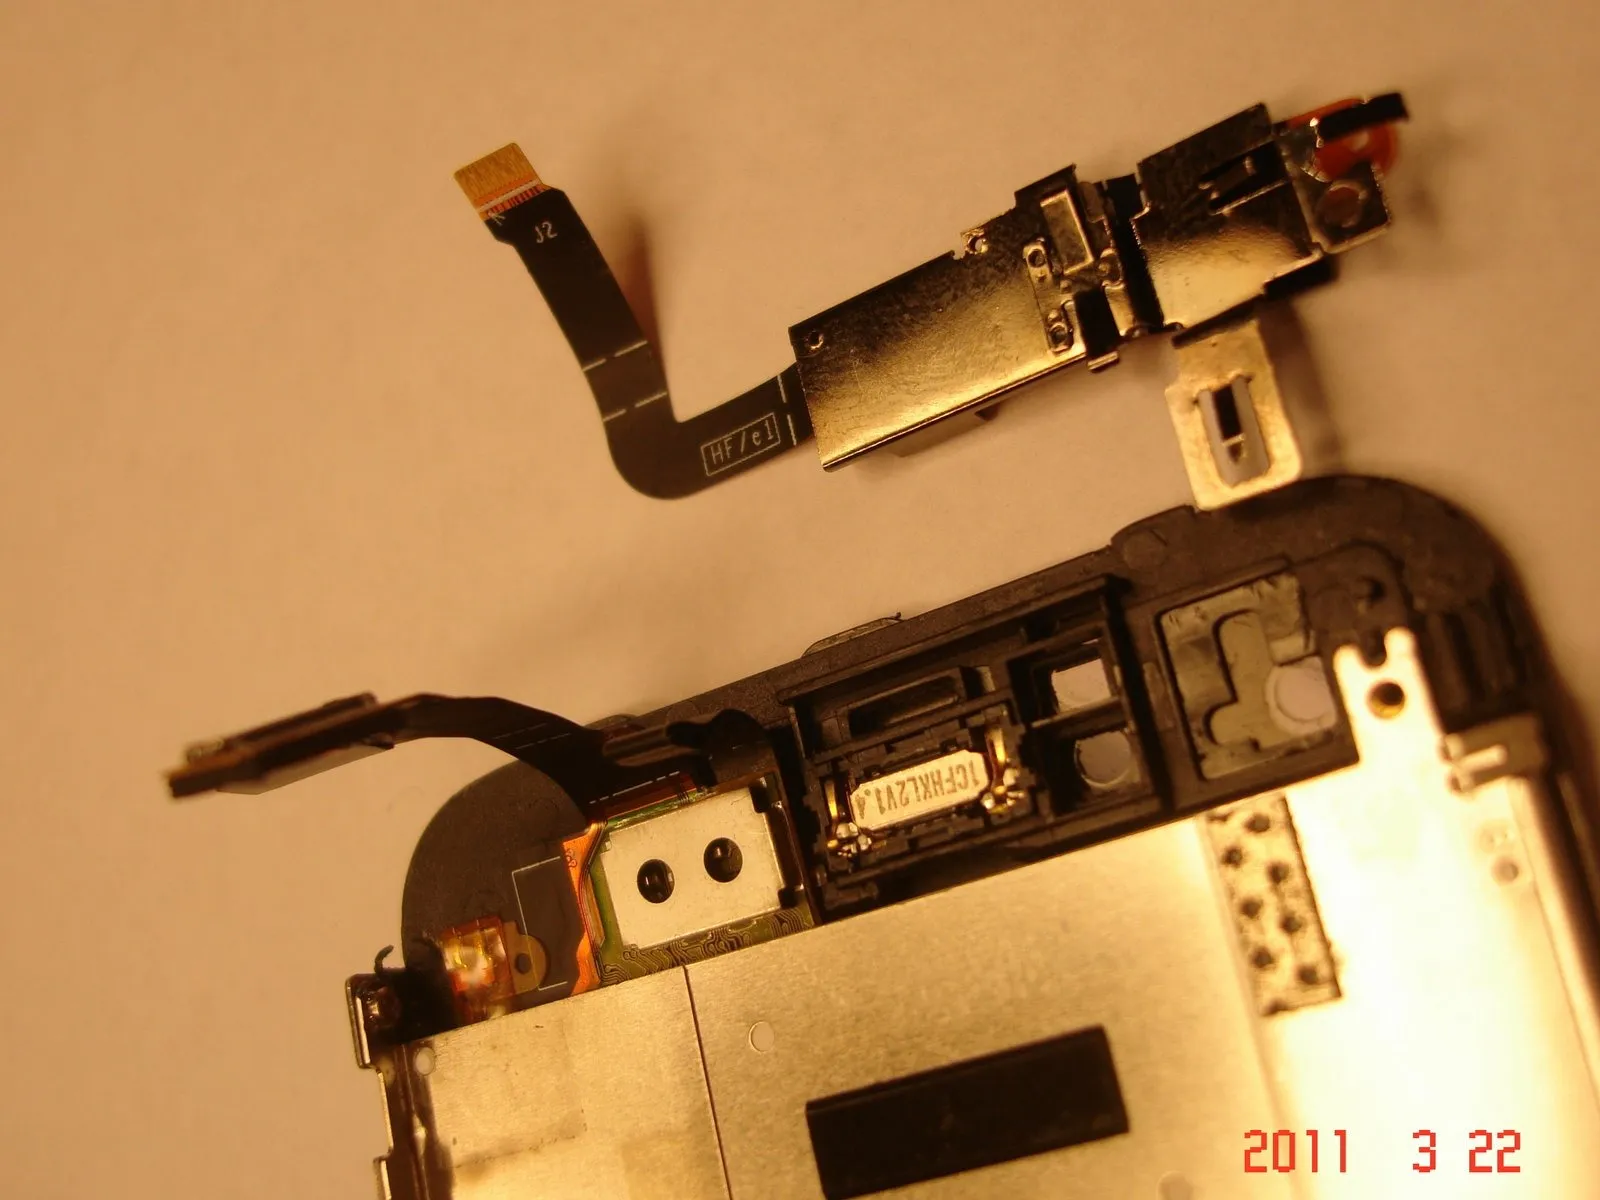
After loosening the bracket, gently lift it, guiding its upward movement while avoiding damage to the LCD and digitizer connectors.
Step 5

Carefully remove the existing ribbon from the bracket, paying close attention to how it was originally positioned.
Step 6

Remove the protective layer from the adhesive on the new ribbon, then carefully position the ribbon so that its holes align precisely with the corresponding holes on the bracket, referencing the provided illustration.
Step 7

Gently shape the replacement ribbon to match the bracket's profile using the shaft of a small screwdriver, applying minimal force.
Carefully position the ribbon so the two small holes located at the top edge match the corresponding holes in the metal piece, ensuring accurate alignment.
Carefully position the ribbon so the two small holes located at the top edge match the corresponding holes in the metal piece, ensuring accurate alignment.
Step 8

Secure the bracket/ribbon assembly by disconnecting the digitizer and LCD connectors, then firmly engaging the bracket.