iPhone 4 Dock Connector Replacement
Follow these instructions to substitute the dock connector assembly, encompassing both the dock connector and the lower microphone.
Step 1 | Rear Panel
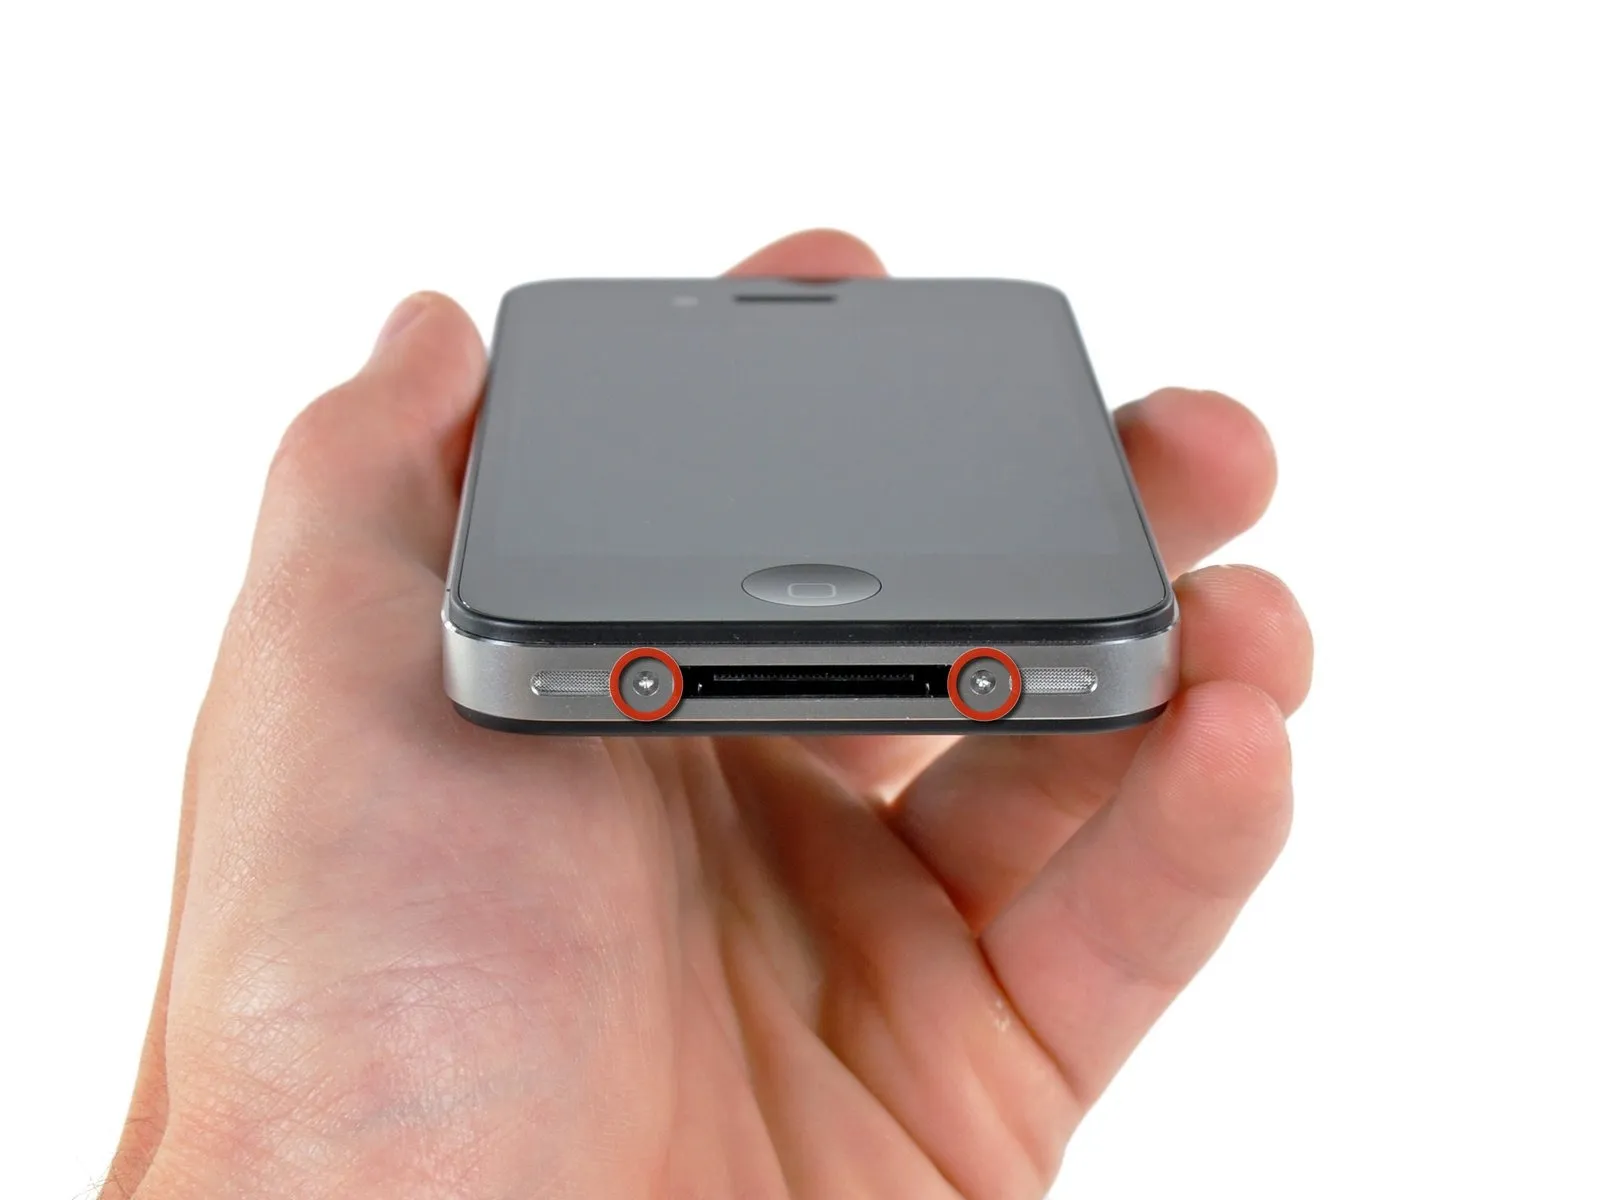

To ensure safety, fully deplete the iPhone's battery until it registers below 25% charge prior to commencing repairs; a lithium-ion battery that is fully charged poses a fire and/or explosion risk if damaged.
To prevent electrical shock or damage to components, ensure the iPhone is completely de-energized prior to starting the repair process.
Determine if your iPhone 4's back cover uses two #000 Phillips screws or Apple's 5-Point 'Pentalobe' screws, referencing the second image for identification. Confirm you possess the corresponding screwdriver to properly remove the screws.
Using either a Pentalobe driver or a Phillips #000 screwdriver, detach the two screws measuring 3.6 mm located adjacent to the dock connector.
To prevent damage, ensure the Pentalobe driver is fully engaged before turning when removing those screws.
To prevent electrical shock or damage to components, ensure the iPhone is completely de-energized prior to starting the repair process.
Determine if your iPhone 4's back cover uses two #000 Phillips screws or Apple's 5-Point 'Pentalobe' screws, referencing the second image for identification. Confirm you possess the corresponding screwdriver to properly remove the screws.
Using either a Pentalobe driver or a Phillips #000 screwdriver, detach the two screws measuring 3.6 mm located adjacent to the dock connector.
To prevent damage, ensure the Pentalobe driver is fully engaged before turning when removing those screws.
Step 2
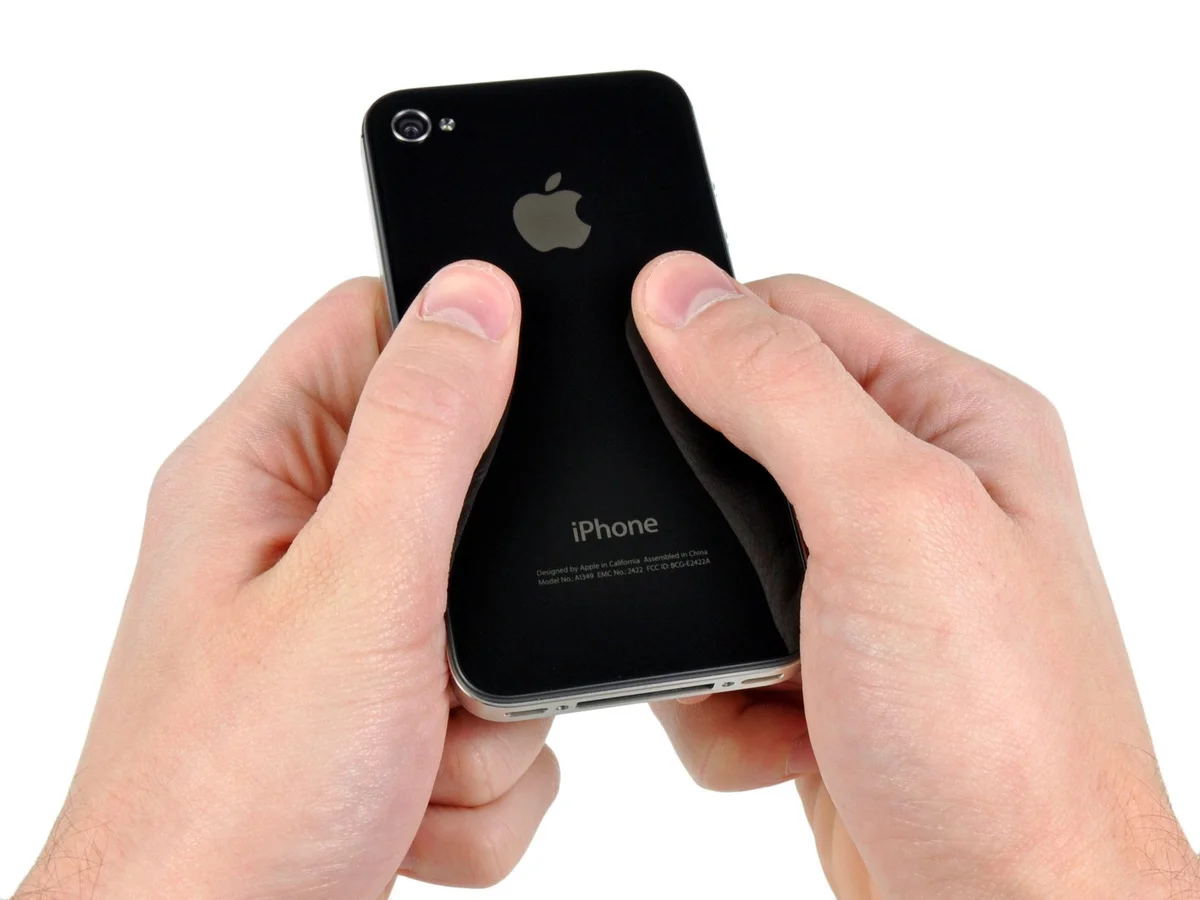
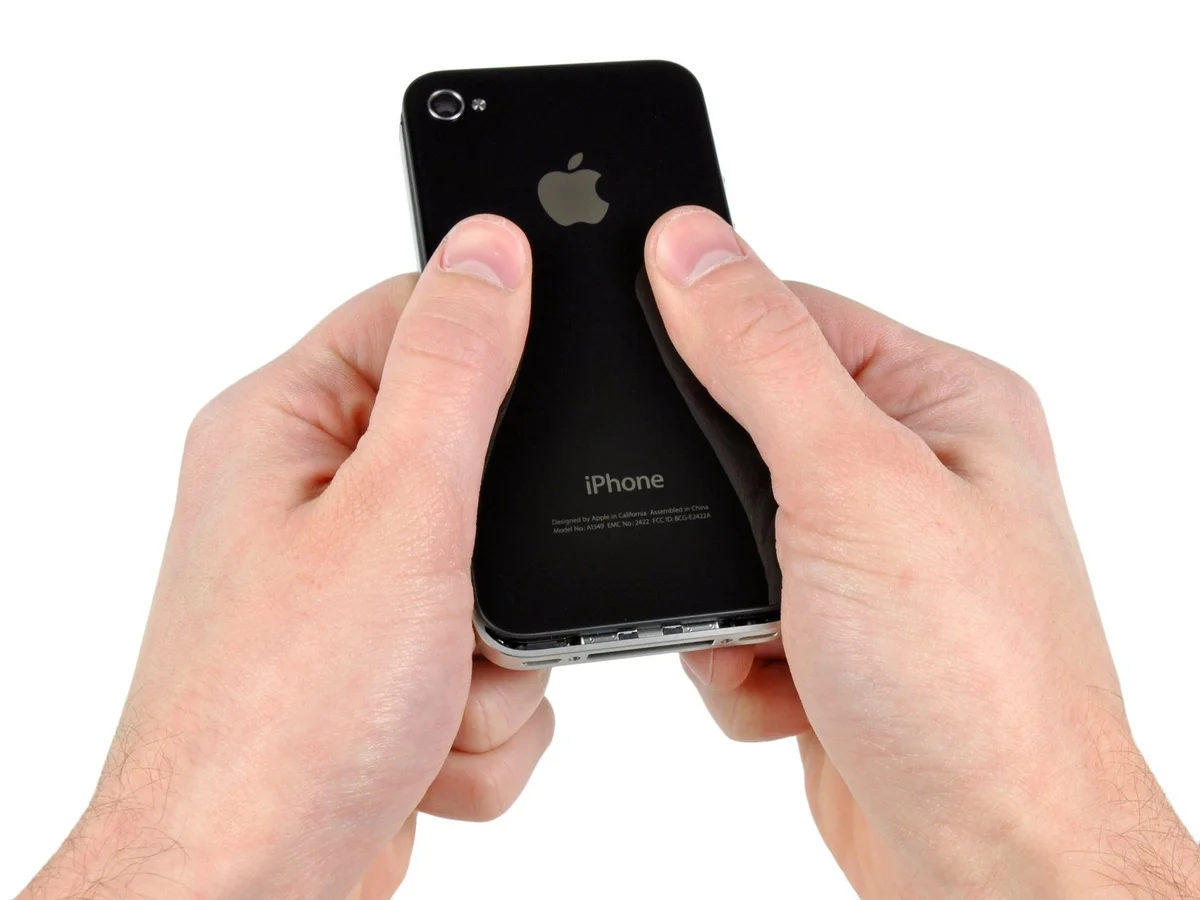
Apply pressure to the back cover, directing it upwards against the device's upper boundary.
Expect a displacement of approximately 2 millimeters.
Expect a displacement of approximately 2 millimeters.
Step 3
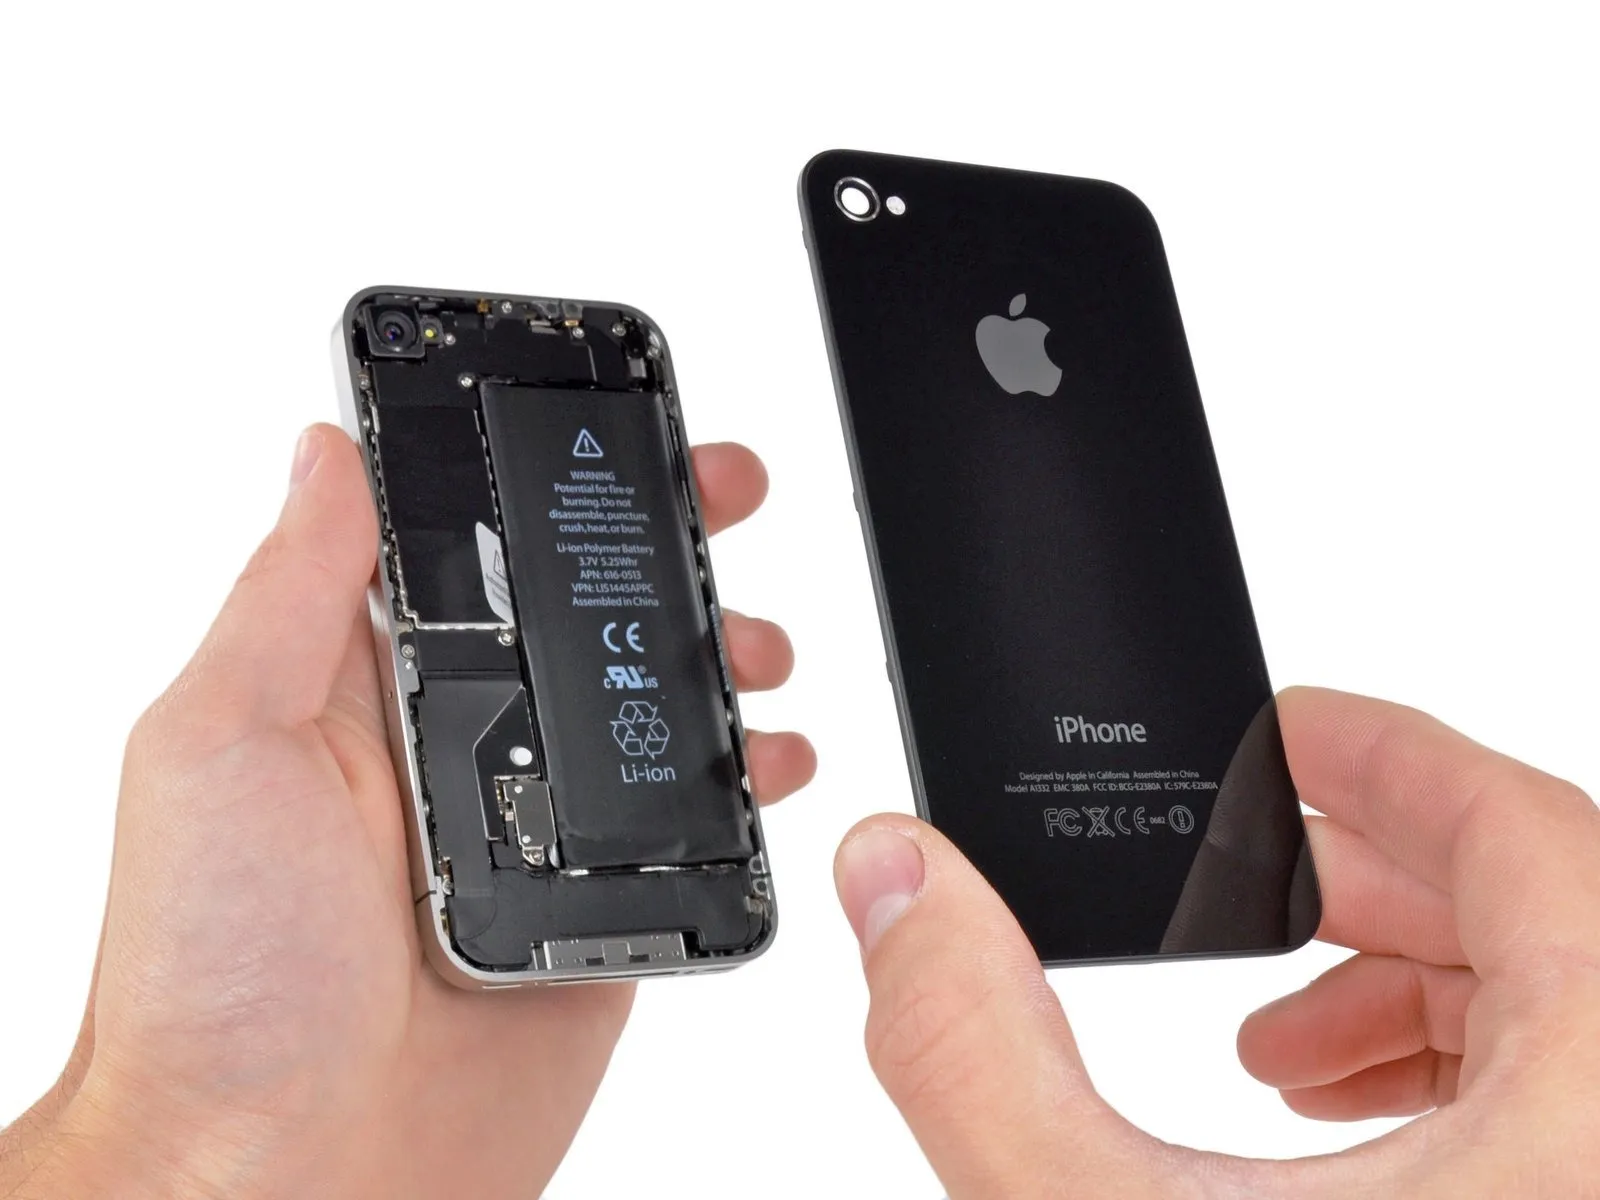
To detach the rear panel, either gently raise it by applying upward pressure with your fingers or secure a Small Suction Cup to the panel and lift.
Exercise caution to prevent harm to the plastic clips affixed to the rear panel.
Before securing the new rear panel, peel away the adhesive backing from the interior surface of the camera lens and also remove the protective sticker covering the adjacent large black area.
Exercise caution to prevent harm to the plastic clips affixed to the rear panel.
Before securing the new rear panel, peel away the adhesive backing from the interior surface of the camera lens and also remove the protective sticker covering the adjacent large black area.
Step 4 | Battery
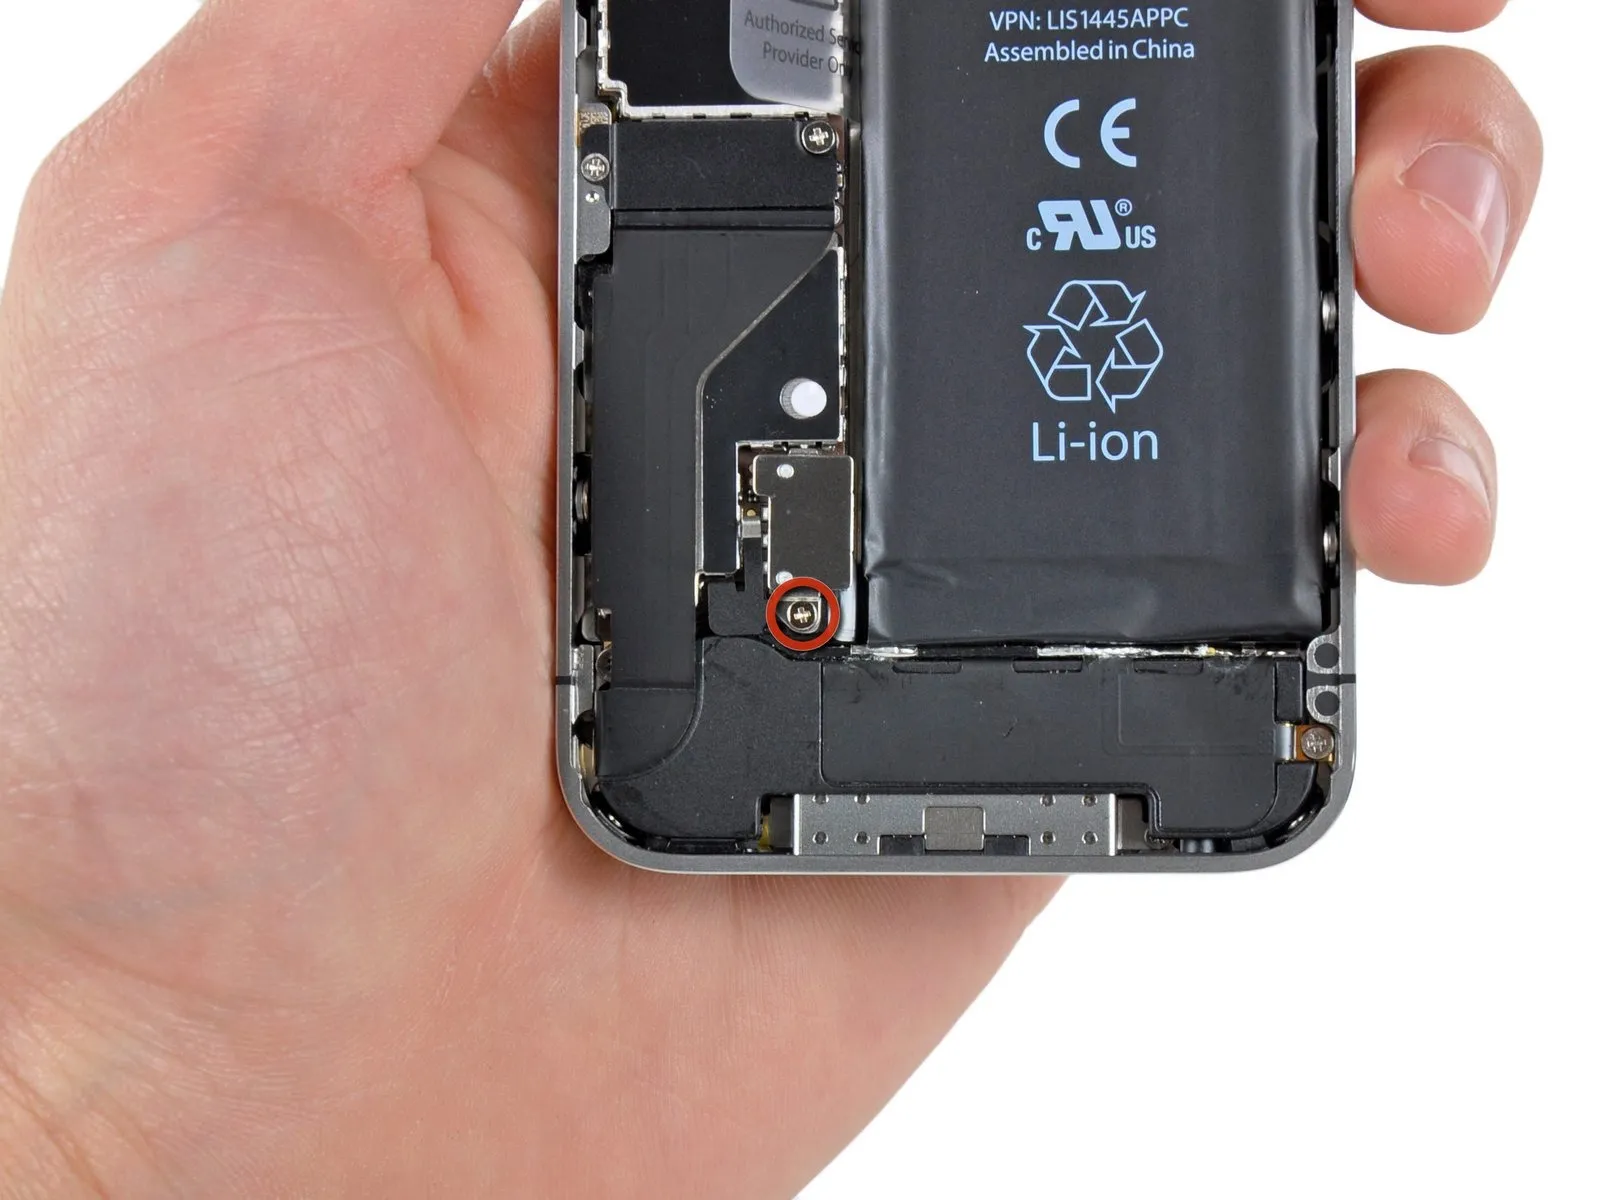
Using a Phillips screwdriver, detach the battery connector from the logic board by unscrewing the single 2.5 mm screw that holds it in place.
Certain models incorporate two screws; one secures the contact pad situated directly above the screw highlighted in red within the provided image.
Certain models incorporate two screws; one secures the contact pad situated directly above the screw highlighted in red within the provided image.
Step 5
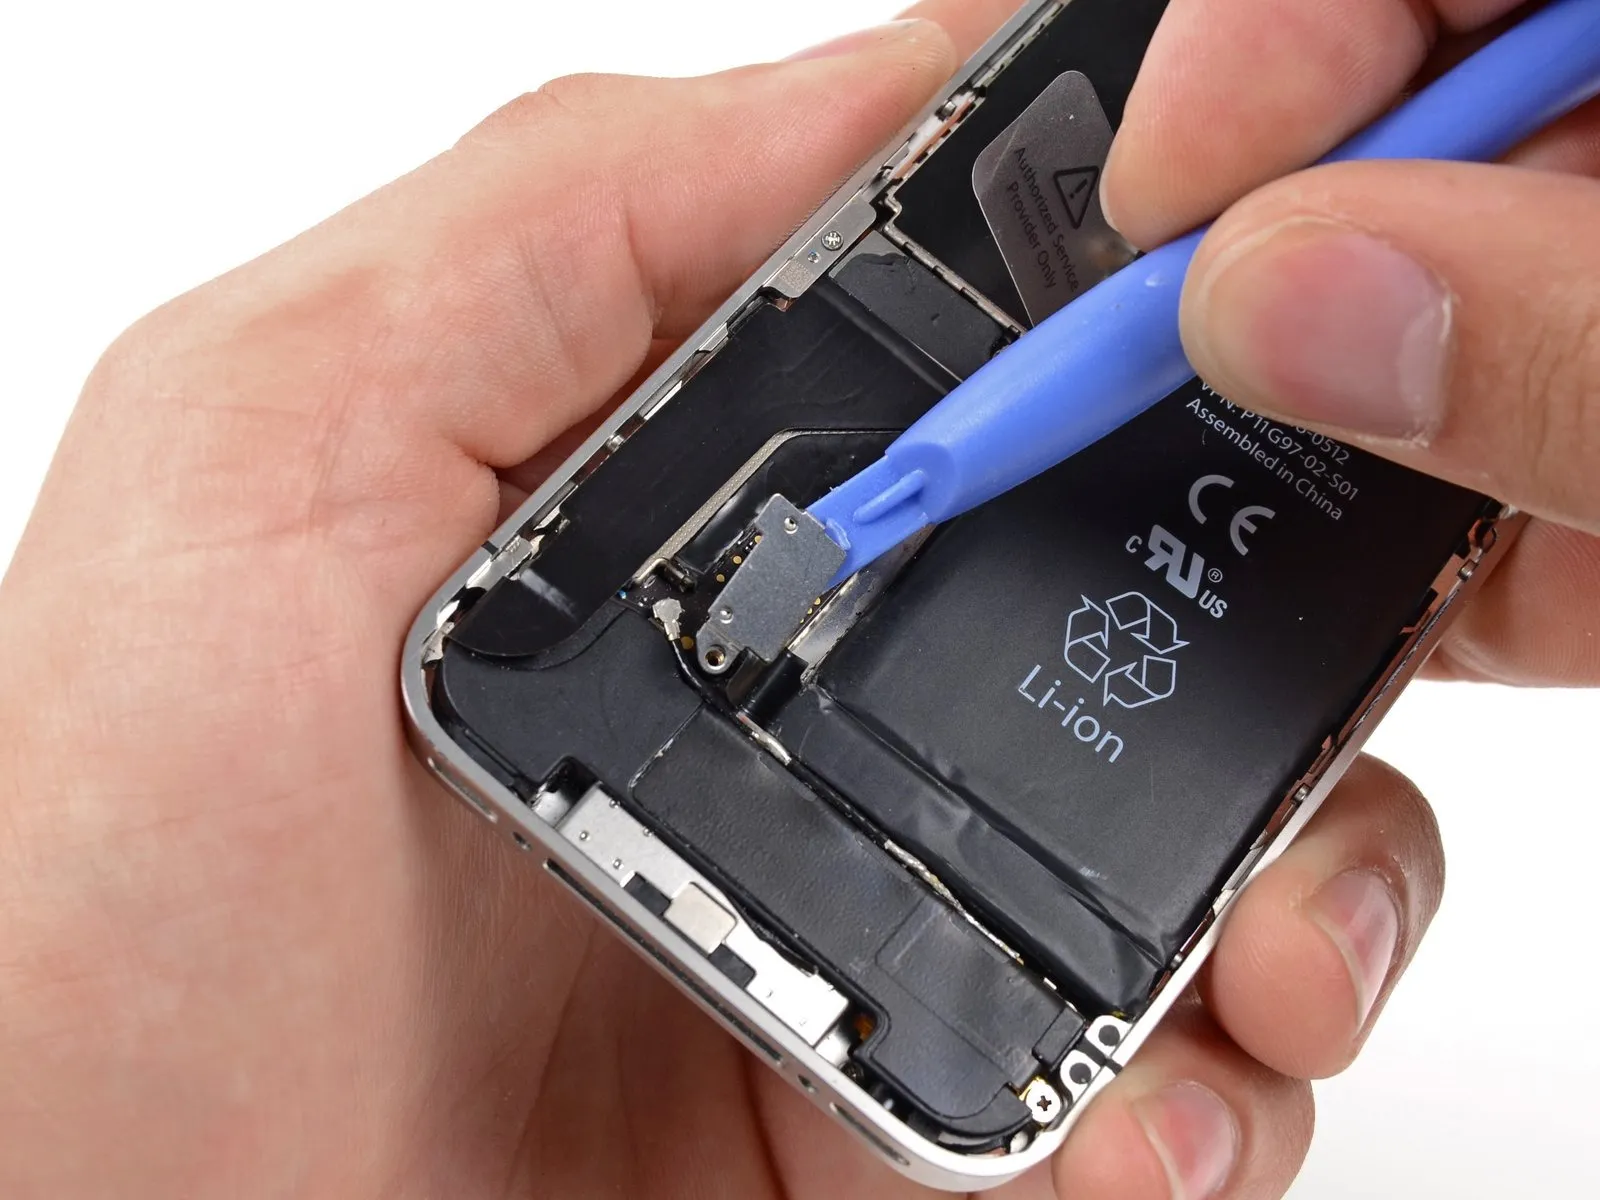
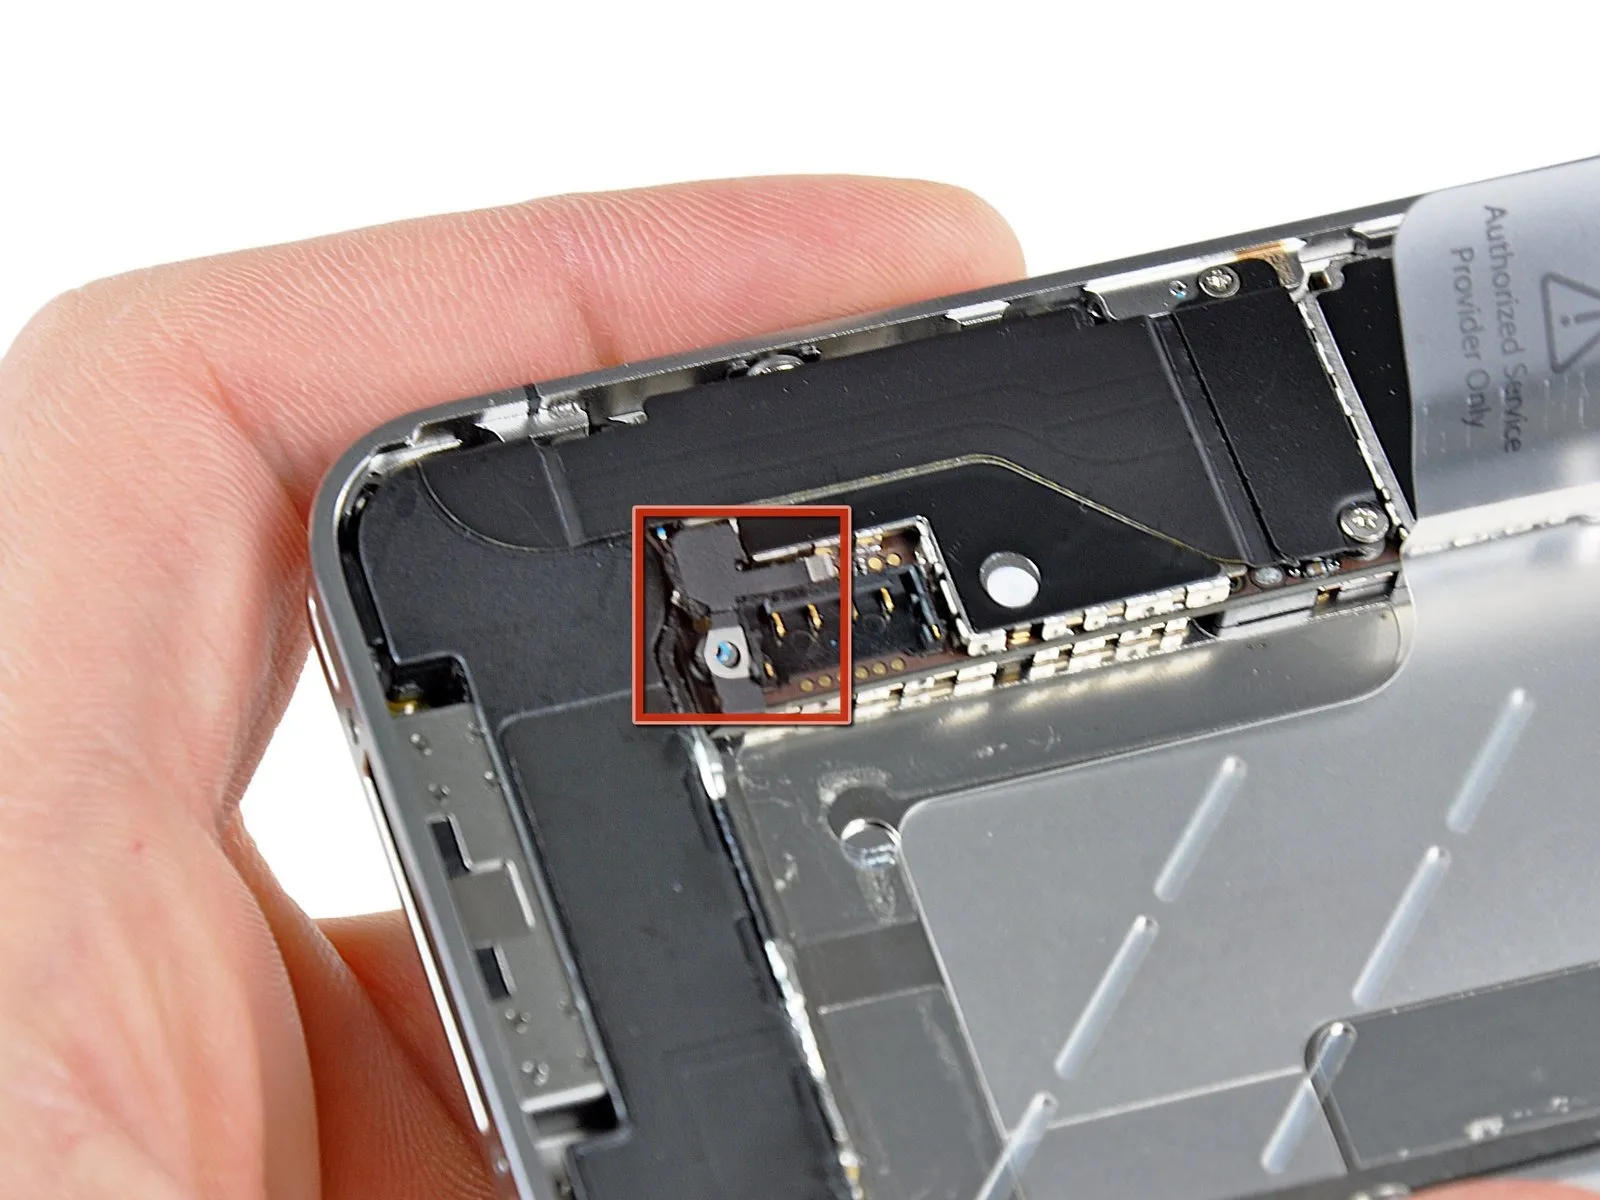
Carefully lift the battery connector away from its connection on the logic board using a plastic opening tool, ensuring no force is applied.
To avoid connector damage, apply separation force to the upper and lower portions of the bracket, as side access is limited.
Exercise extreme caution when releasing the battery connector, ensuring you apply force only to the connector itself, as applying pressure to the logic board socket risks irreparable damage.
Carefully detach the metal clip, which secures the antenna connector.
To avoid connector damage, apply separation force to the upper and lower portions of the bracket, as side access is limited.
Exercise extreme caution when releasing the battery connector, ensuring you apply force only to the connector itself, as applying pressure to the logic board socket risks irreparable damage.
Carefully detach the metal clip, which secures the antenna connector.
Step 6
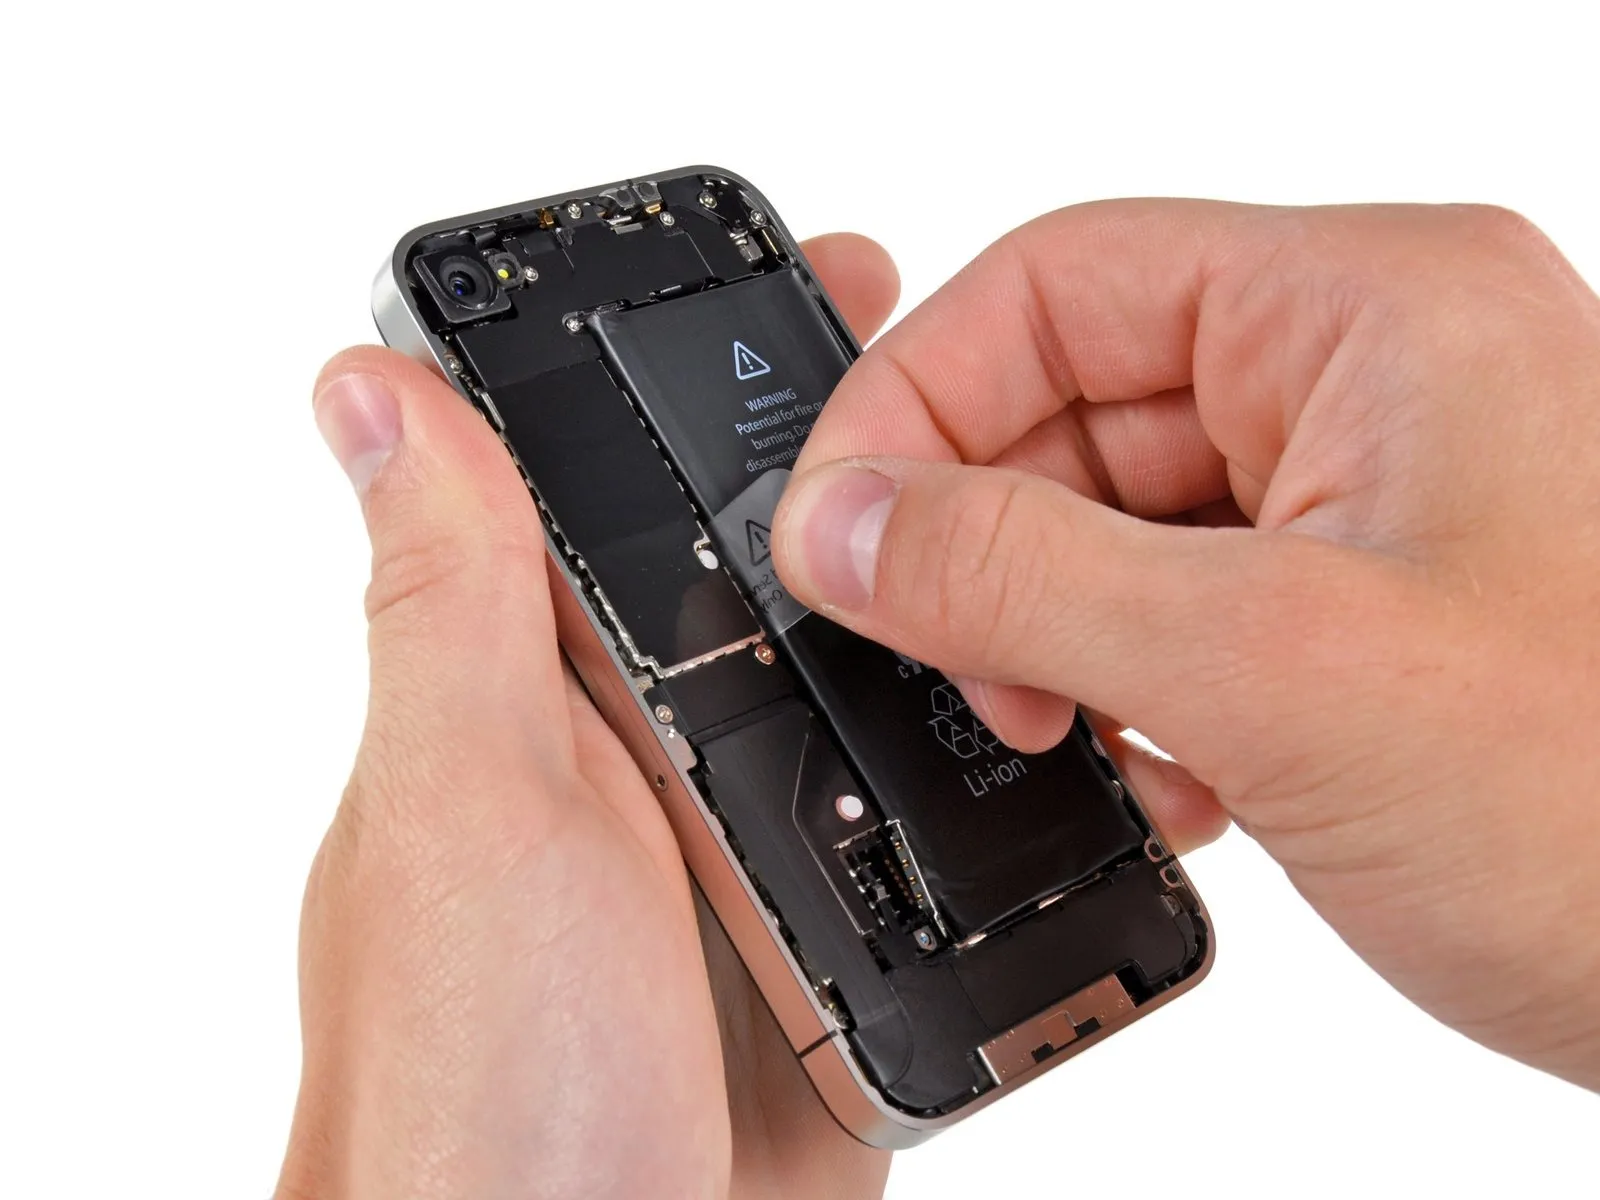
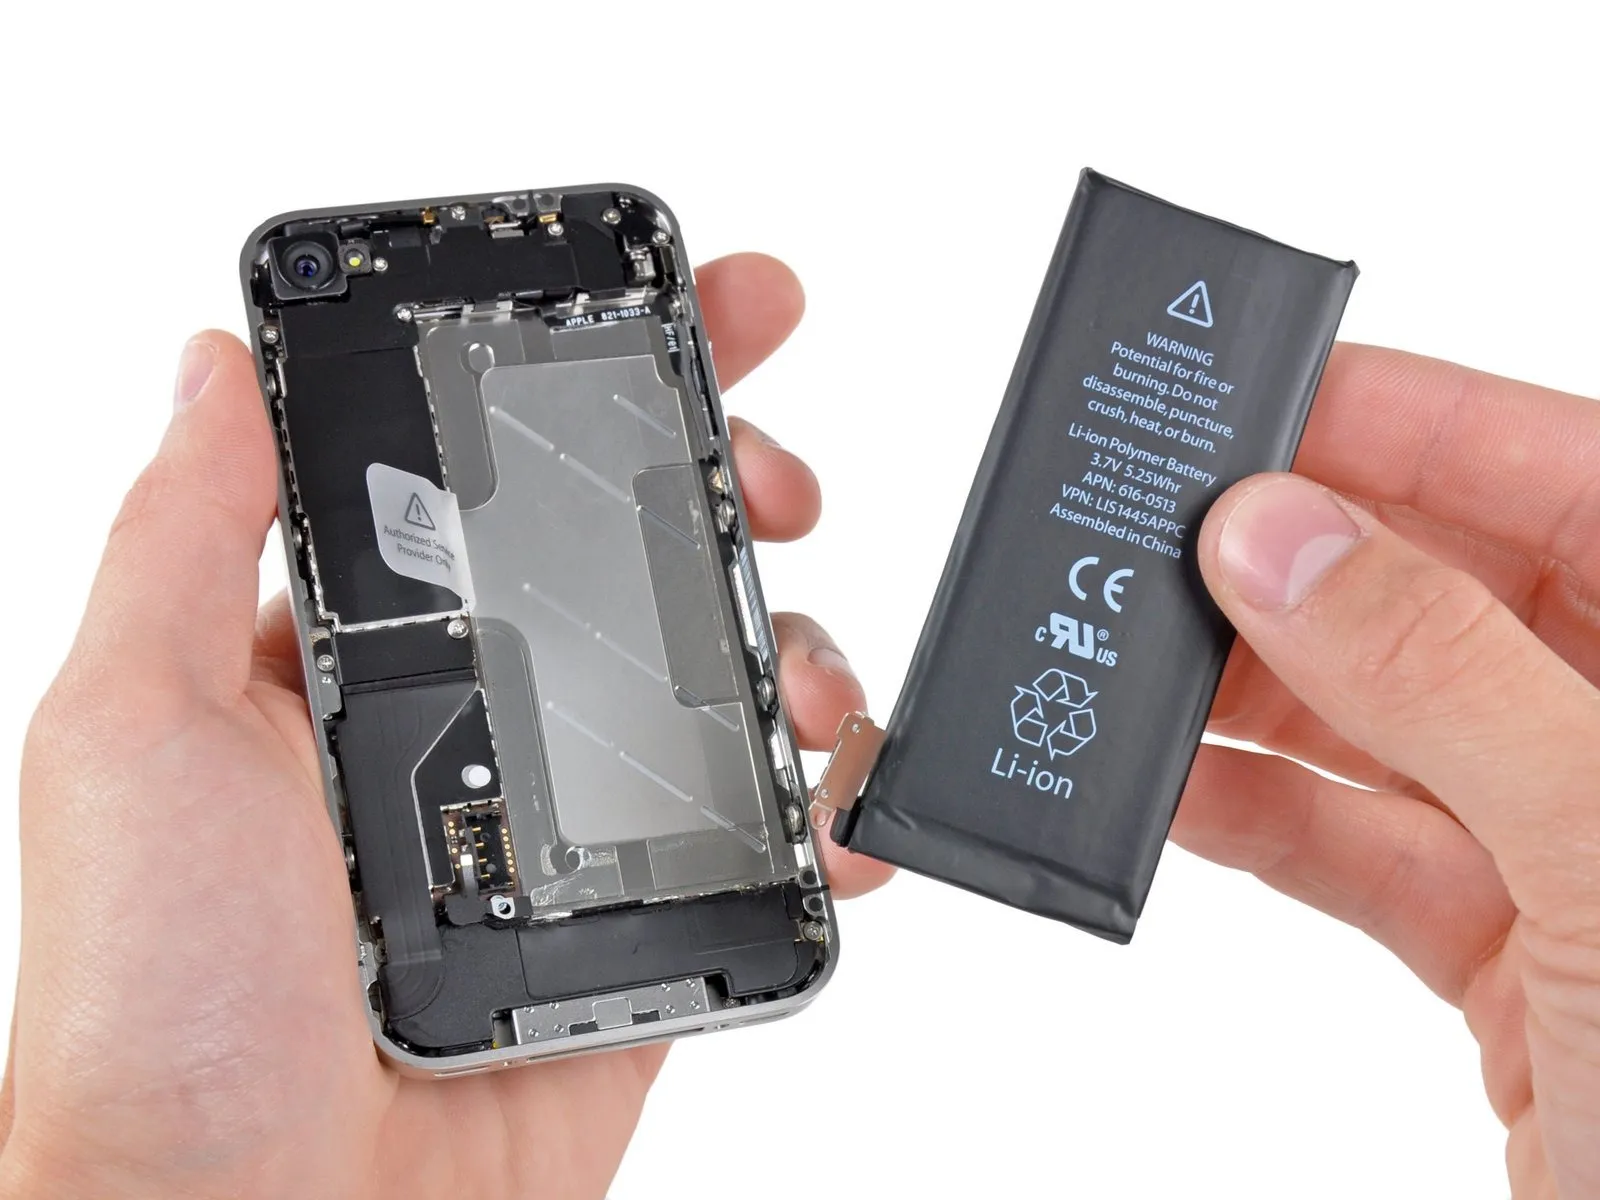
Using a 5/32-inch hex key, carefully tighten the three retaining screws on the motor assembly to a torque of 3.5 inch-pounds, ensuring not to overtighten and potentially damage the threads.Carefully extract the battery from the iPhone by utilizing the provided transparent plastic tab to apply gentle upward force.
Should the retaining tab fracture prior to battery separation, introduce a small amount of isopropyl alcohol with a concentration exceeding 90% beneath the battery's edge. Allow approximately one minute for the alcohol to dissolve the adhesive bond. Subsequently, gently insert a spudger beneath the battery tab to detach the adhesive.
To avoid damage, do not attempt to force the battery free using leverage elsewhere. If the adhesive remains strong, add additional drops of alcohol to soften it. Ensure the pry tool does not puncture or warp the battery's structure.
To prevent damage, ensure any residual alcohol solution is completely removed by wiping with a clean cloth or by permitting full evaporation before proceeding with the new battery installation.
Carefully detach the protective plastic packaging from the new battery by gently separating it from the ribbon cable.
Ensure the red contact clip aligns correctly adjacent to the battery connector prior to reattaching the battery connector.
To prevent wireless interference, thoroughly remove any residue from surfaces that will contact each other during reassembly, using a solvent like Windex.
Following reassembly, execute a factory reset to proactively avoid potential problems and streamline any subsequent diagnostic procedures.
Should the retaining tab fracture prior to battery separation, introduce a small amount of isopropyl alcohol with a concentration exceeding 90% beneath the battery's edge. Allow approximately one minute for the alcohol to dissolve the adhesive bond. Subsequently, gently insert a spudger beneath the battery tab to detach the adhesive.
To avoid damage, do not attempt to force the battery free using leverage elsewhere. If the adhesive remains strong, add additional drops of alcohol to soften it. Ensure the pry tool does not puncture or warp the battery's structure.
To prevent damage, ensure any residual alcohol solution is completely removed by wiping with a clean cloth or by permitting full evaporation before proceeding with the new battery installation.
Carefully detach the protective plastic packaging from the new battery by gently separating it from the ribbon cable.
Ensure the red contact clip aligns correctly adjacent to the battery connector prior to reattaching the battery connector.
To prevent wireless interference, thoroughly remove any residue from surfaces that will contact each other during reassembly, using a solvent like Windex.
Following reassembly, execute a factory reset to proactively avoid potential problems and streamline any subsequent diagnostic procedures.
Step 7 | Speaker Enclosure Assembly


Using a 5/32-inch hex key, carefully tighten the four retaining screws on the motor assembly to a torque of 3.5 inch-pounds, ensuring not to overtighten and potentially strip the threads; observe caution to prevent damage to the motor windings.Using the appropriate screwdriver, detach the two screws.
Use a Phillips screwdriver, size 1.2 millimeters.
Use a Phillips screwdriver with a 1.6 mm tip.
Carefully detach the flexible steel cover protecting the dock connector cable inside the iPhone.
To prevent potential wireless interference, thoroughly remove any oils or residue from all metal surfaces that will make contact during reassembly of the dock connector cable cover, using a cleaning agent like Windex.
Use a Phillips screwdriver, size 1.2 millimeters.
Use a Phillips screwdriver with a 1.6 mm tip.
Carefully detach the flexible steel cover protecting the dock connector cable inside the iPhone.
To prevent potential wireless interference, thoroughly remove any oils or residue from all metal surfaces that will make contact during reassembly of the dock connector cable cover, using a cleaning agent like Windex.
Step 8


Using a 5/32-inch hex key, carefully tighten the four retaining screws securing the motor assembly to the housing, ensuring each is snug but not over-torqued to prevent damage; observe polarity markings during reinstallation.Carefully lift the dock cable connector's two short ends away from the logic board using a plastic opening tool, applying gentle force.
Step 9
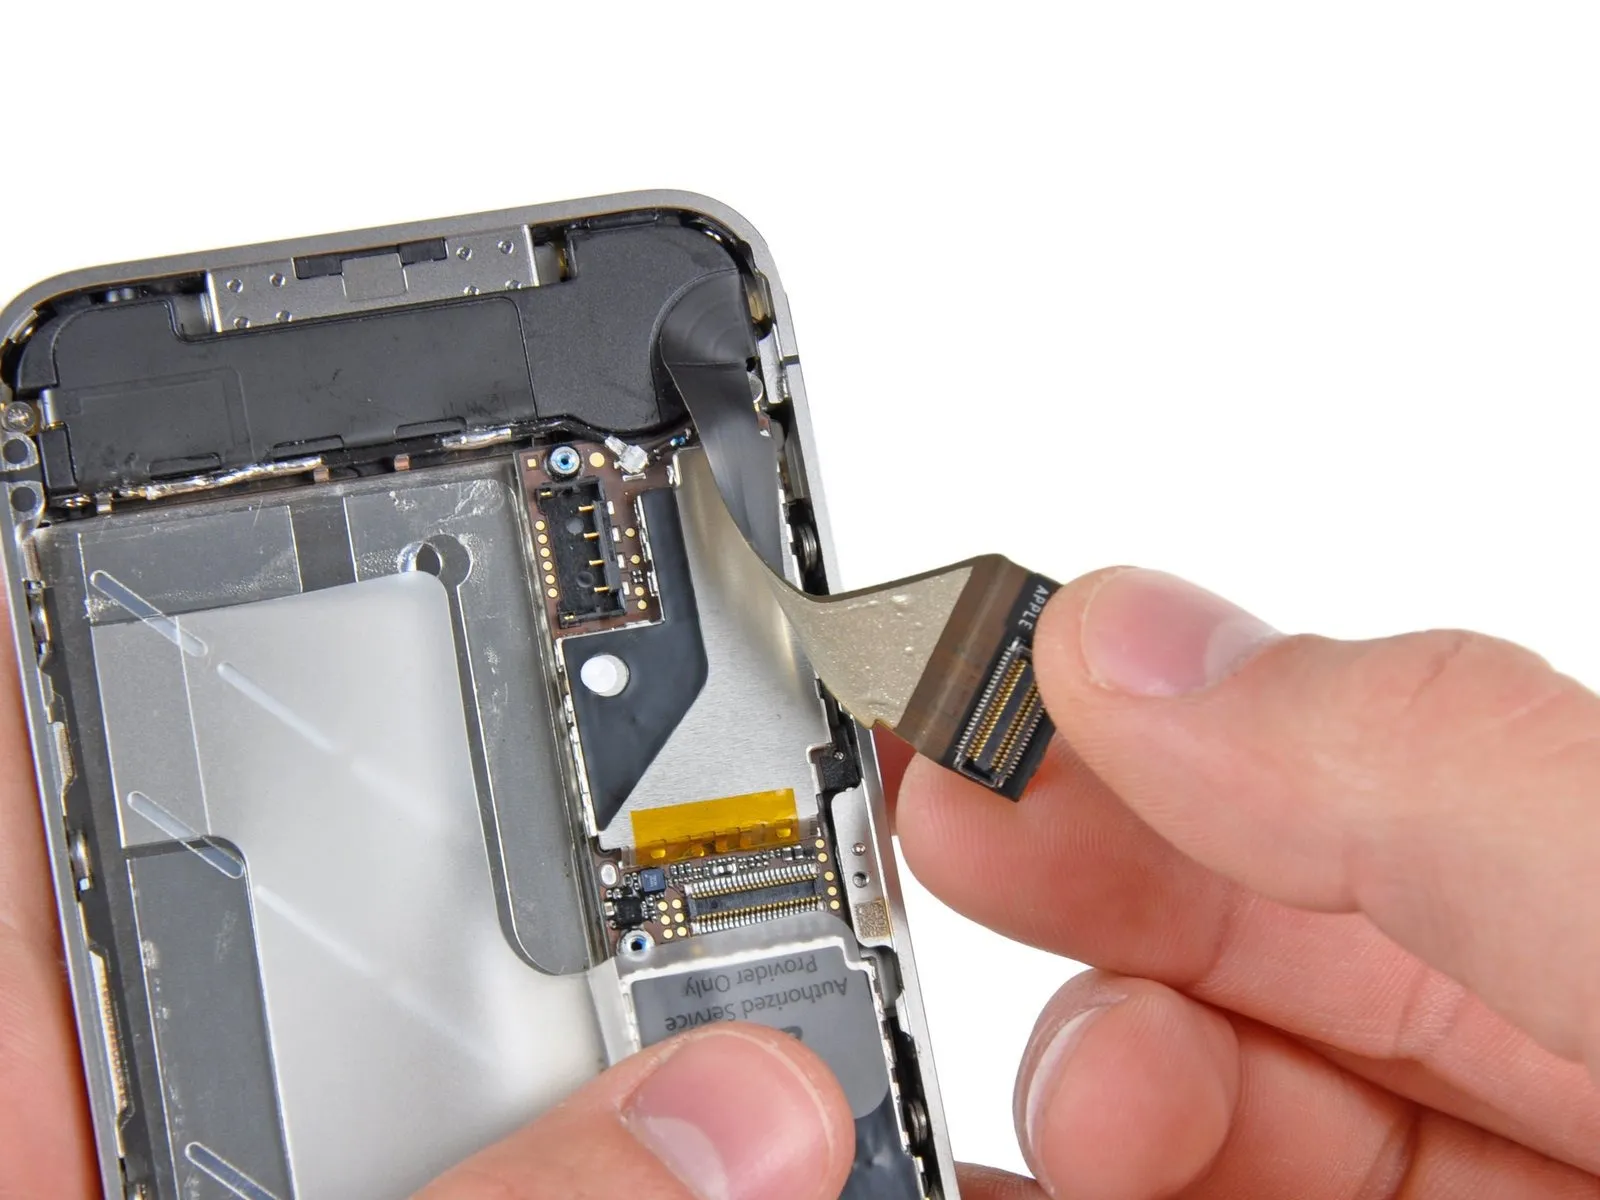

Carefully tighten the M6 x 12mm screw to a torque of 4.5 Nm using a 5mm hex key, ensuring the sensor is securely mounted and avoiding over-tightening which could damage the threads.Detach the dock ribbon cable from both the logic board and the lower speaker enclosure, exercising caution to avoid damage.
Handle with care when detaching the dock ribbon cable from the logic board; applying too much pressure risks damage to the cable.
Handle with care when detaching the dock ribbon cable from the logic board; applying too much pressure risks damage to the cable.
Step 10
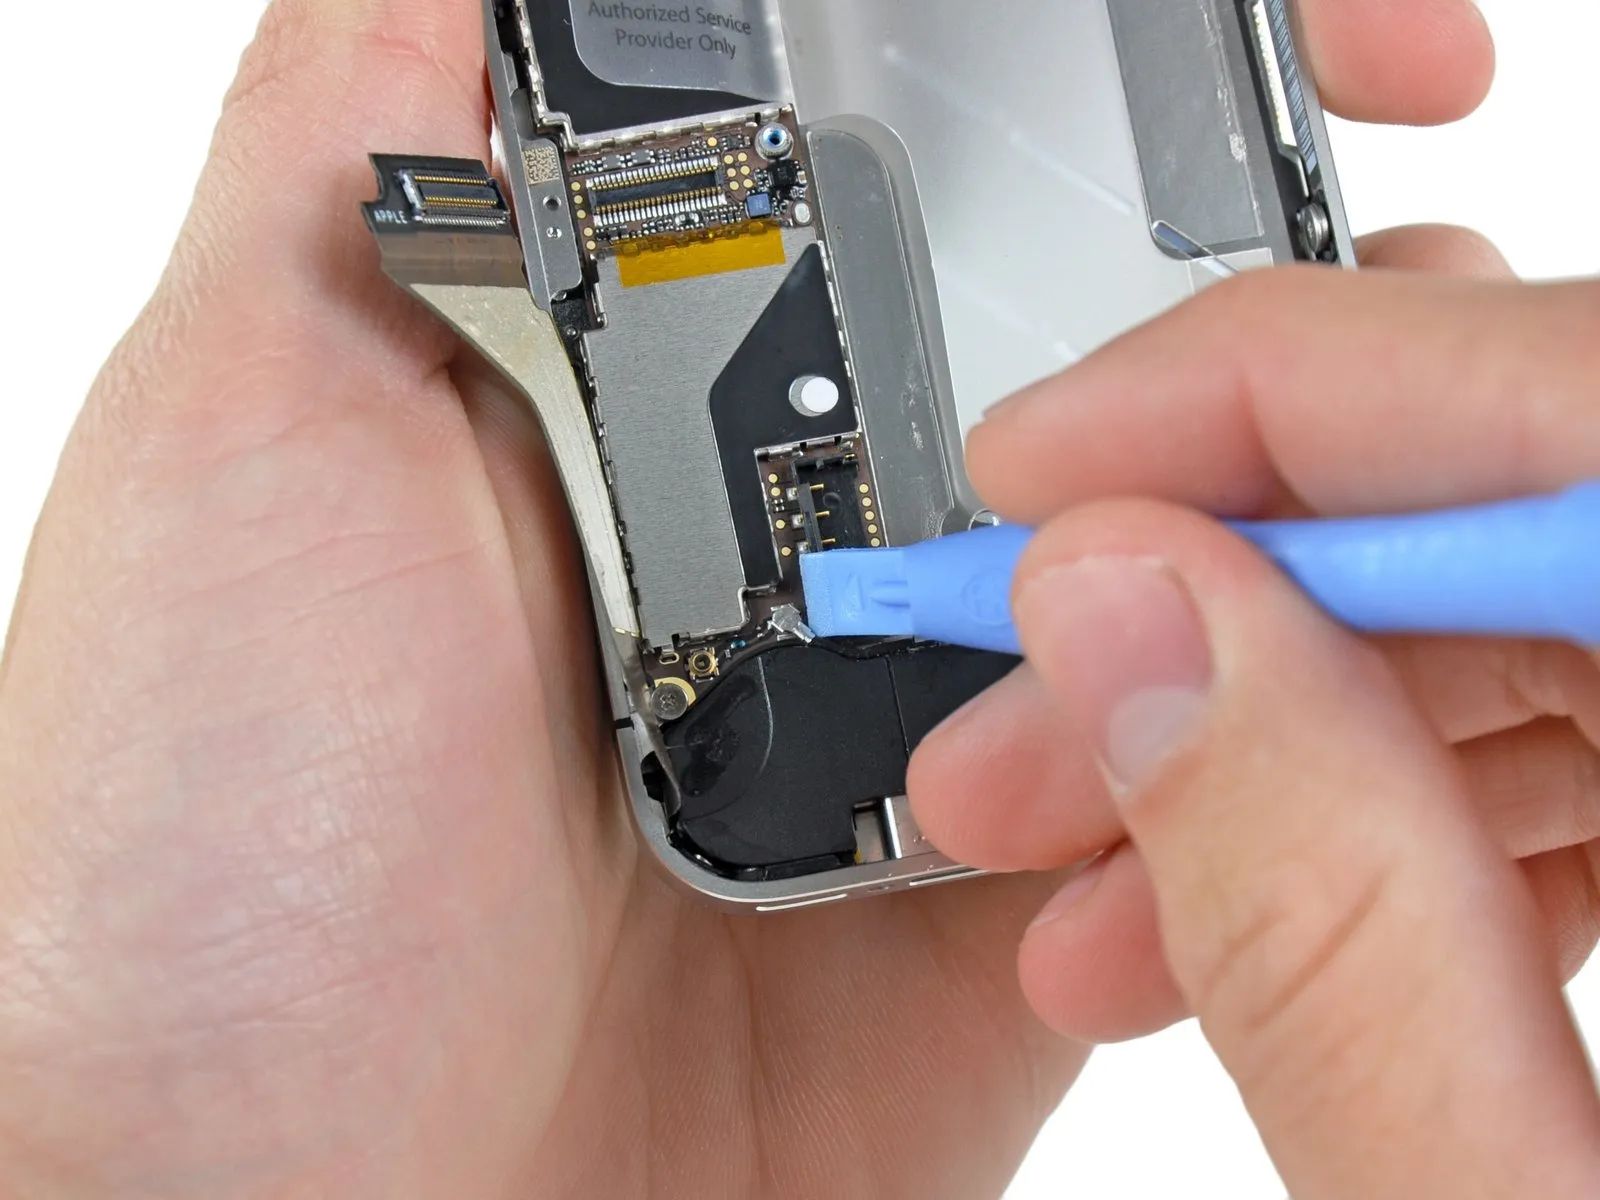
Using a 5/32-inch hex key, carefully tighten the three retaining screws on the motor assembly to a torque of 3.5 inch-pounds; ensure the motor shaft remains aligned during this process to prevent damage.Carefully lift the lower antenna connector from its socket on the logic board using a plastic opening tool.
Step 11

Using a Phillips screwdriver, detach the speaker enclosure assembly from the outer case by unscrewing a 1.9 mm Phillips screw and a 2.4 mm Phillips screw.
Step 12
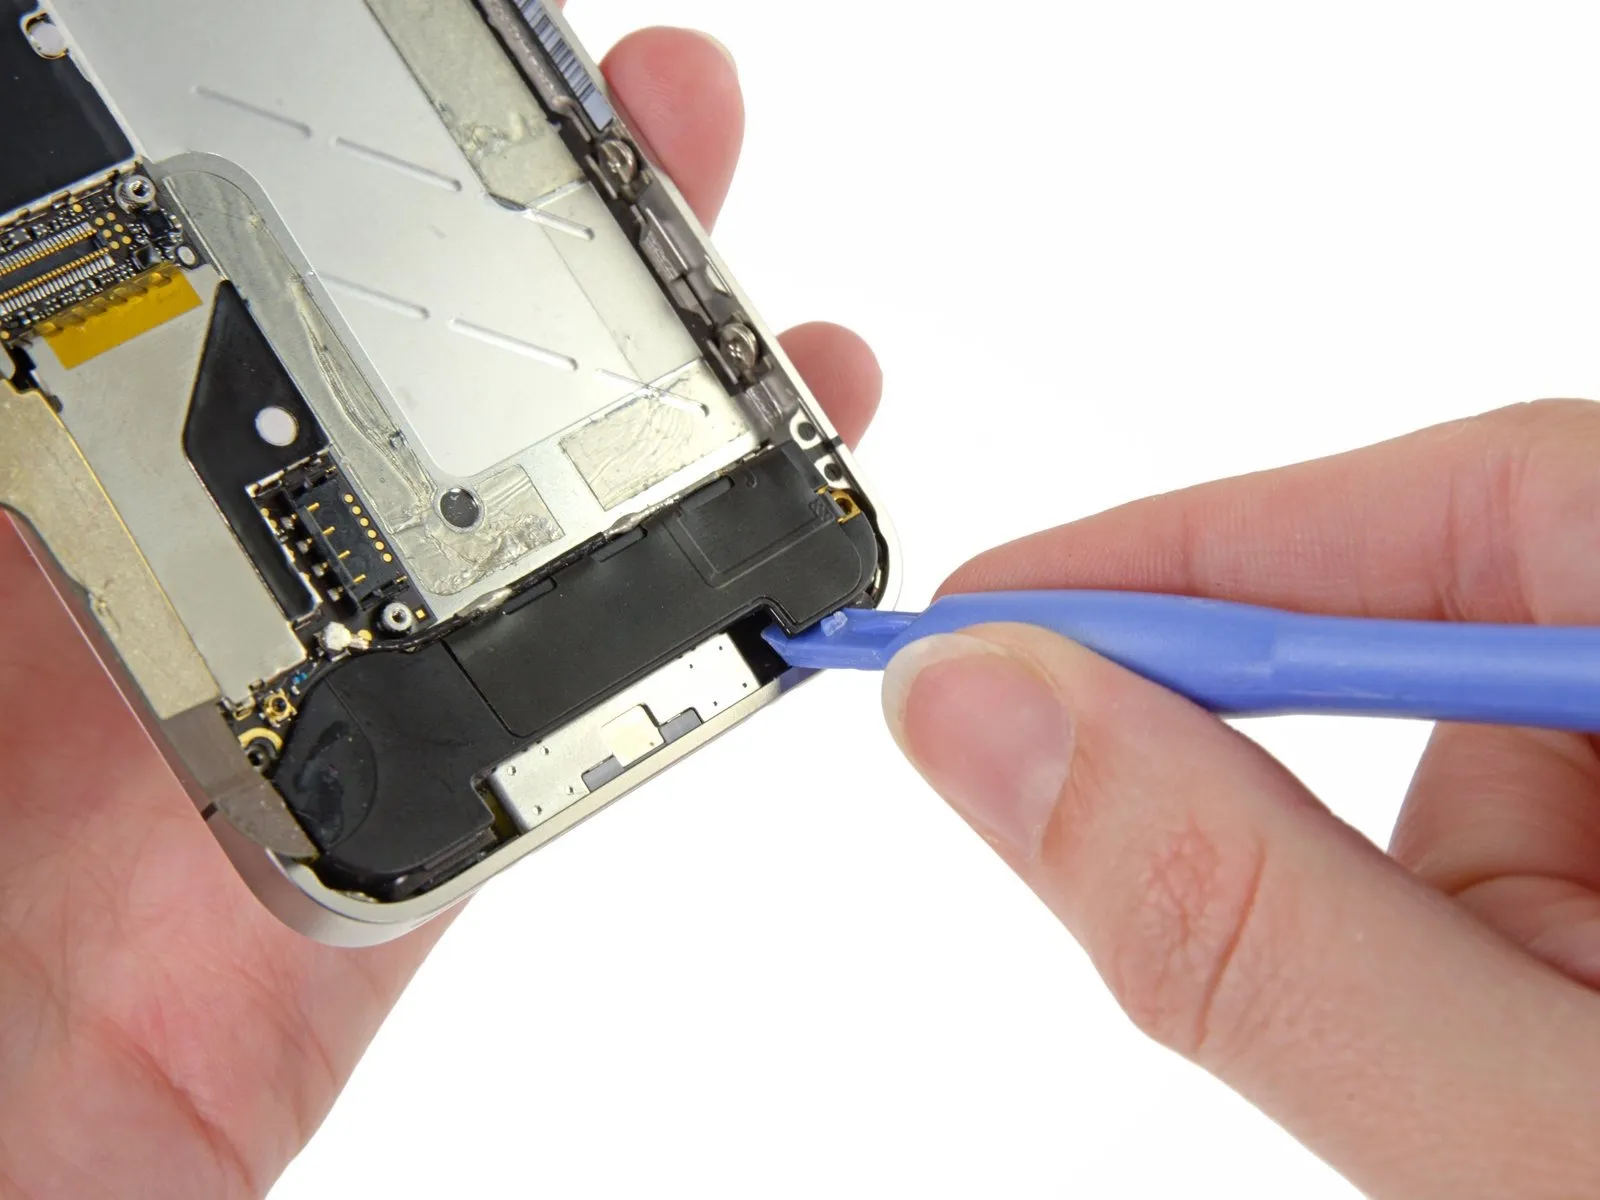


Carefully pry the speaker enclosure assembly from the device's casing using a plastic opening tool, exercising caution to avoid damaging the Wi-Fi antenna's EMI fingers. After removing the speaker enclosure assembly, ensure the Wi-Fi antenna’s grounding fingers are positioned beneath the lip of the iPhone’s metal case, referencing the third image for correct placement prior to securing the enclosure screws. To prevent potential wireless interference, thoroughly clean all metal contact areas between the Wi-Fi antenna’s grounding fingers and the iPhone’s case with a degreaser like Windex or isopropyl alcohol, as oils from handling can impact wireless performance.
Step 13 | Dock Connector

Gently separate the dock connector assembly from the rear case by working a plastic opening tool along its lower edge, releasing the adhesive holding it in place.
Step 14

Using a Phillips screwdriver, detach the dock connector from the rear case by unscrewing the two fasteners, each measuring 1.3 mm.
Step 15


Carefully lift the small retaining flap, located on the charging port side of the cable retainer, using a spudger tip or fingernail, ensuring you raise the flap itself and avoid stressing the socket. This flap should rotate upward 90 degrees. Then, with tweezers, delicately extract the home button ribbon cable from its connector, observing its original orientation for proper replacement. Exercise caution during removal, as the cable is thin and easily damaged.
Step 16


- Employing a spudger's flat side, gently separate the dock connector assembly and its attached ribbon cable from the adhesive holding them in place on the rear case.
- Using a prying tool, carefully disengage the right side of the dock connector from the rear case.
Step 17

- Carefully leverage the lower microphone from the iPhone's bottom edge using the flat surface of a spudger.
- Before reassembling, observe how the cable is folded and the placement of the rubber microphone cover to ensure proper alignment.
Step 18
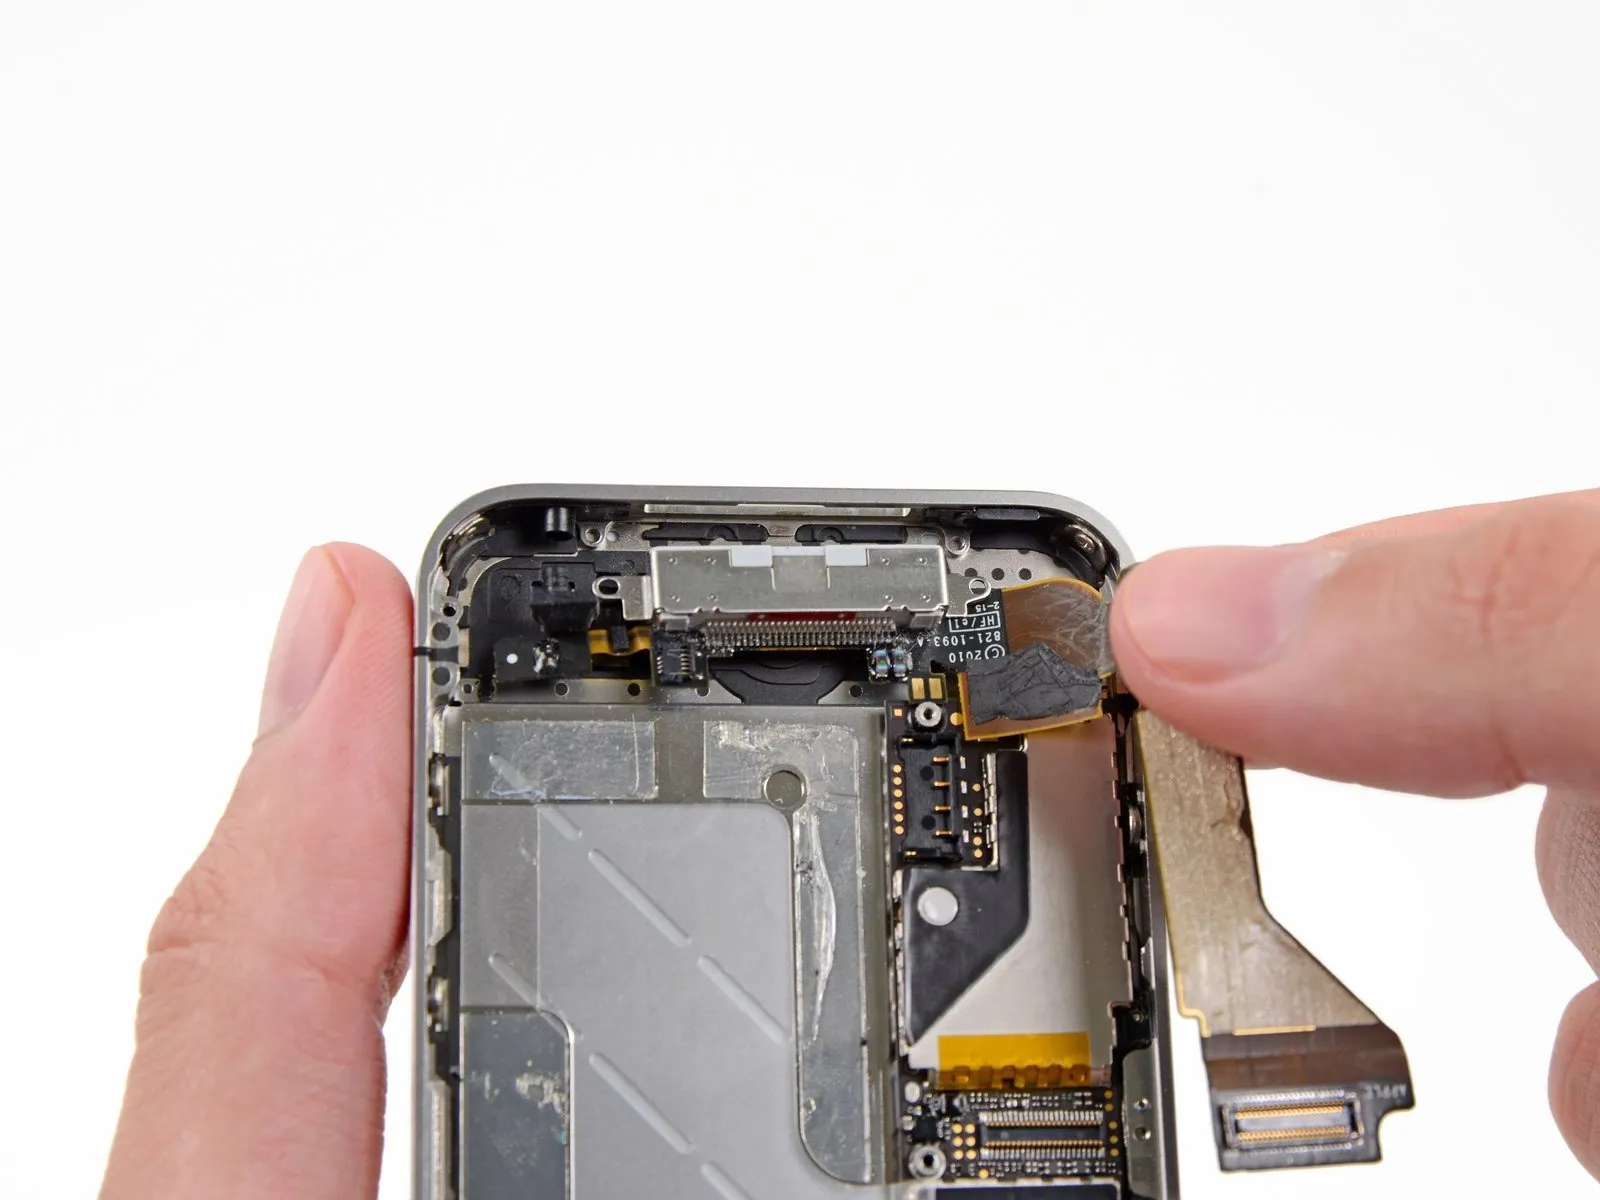
Carefully detach the dock connector assembly from the iPhone, being cautious to avoid snagging any connected cables.
Step 19

- Carefully remove the rubber cover from the microphone on the existing dock connector, then securely attach it to the microphone on the replacement dock connector.
Exercise caution when positioning the rubber cover, as the ribbon is delicate and susceptible to tearing.
Ensure the microphone functions correctly following dock connector replacement; if not, carefully reposition the rubber cover along the mic cable to guarantee proper placement.