iPhone 4S Rear Panel Replacement
To gain access to the iPhone’s internal parts, detach the rear panel.
Step 1 | Rear Panel

To start, ensure the iPhone's battery has depleted to less than 25% capacity; a fully charged lithium-ion battery presents a fire and/or explosion hazard if damaged.
To prevent electrical hazards and ensure safe component handling, completely shut down the iPhone prior to starting the repair process.
Using a Pentalobe P2 screwdriver, unscrew and detach the two screws measuring 3.6 mm located adjacent to the dock connector.
To prevent damage, ensure the driver is fully engaged with the Pentalobe screws before turning, as these screws are prone to stripping.
To prevent electrical hazards and ensure safe component handling, completely shut down the iPhone prior to starting the repair process.
Using a Pentalobe P2 screwdriver, unscrew and detach the two screws measuring 3.6 mm located adjacent to the dock connector.
To prevent damage, ensure the driver is fully engaged with the Pentalobe screws before turning, as these screws are prone to stripping.
Step 2


Apply pressure to the back cover, directing it upwards against the device's upper boundary.
Expect a displacement of approximately 2 millimeters.
Expect a displacement of approximately 2 millimeters.
Step 3
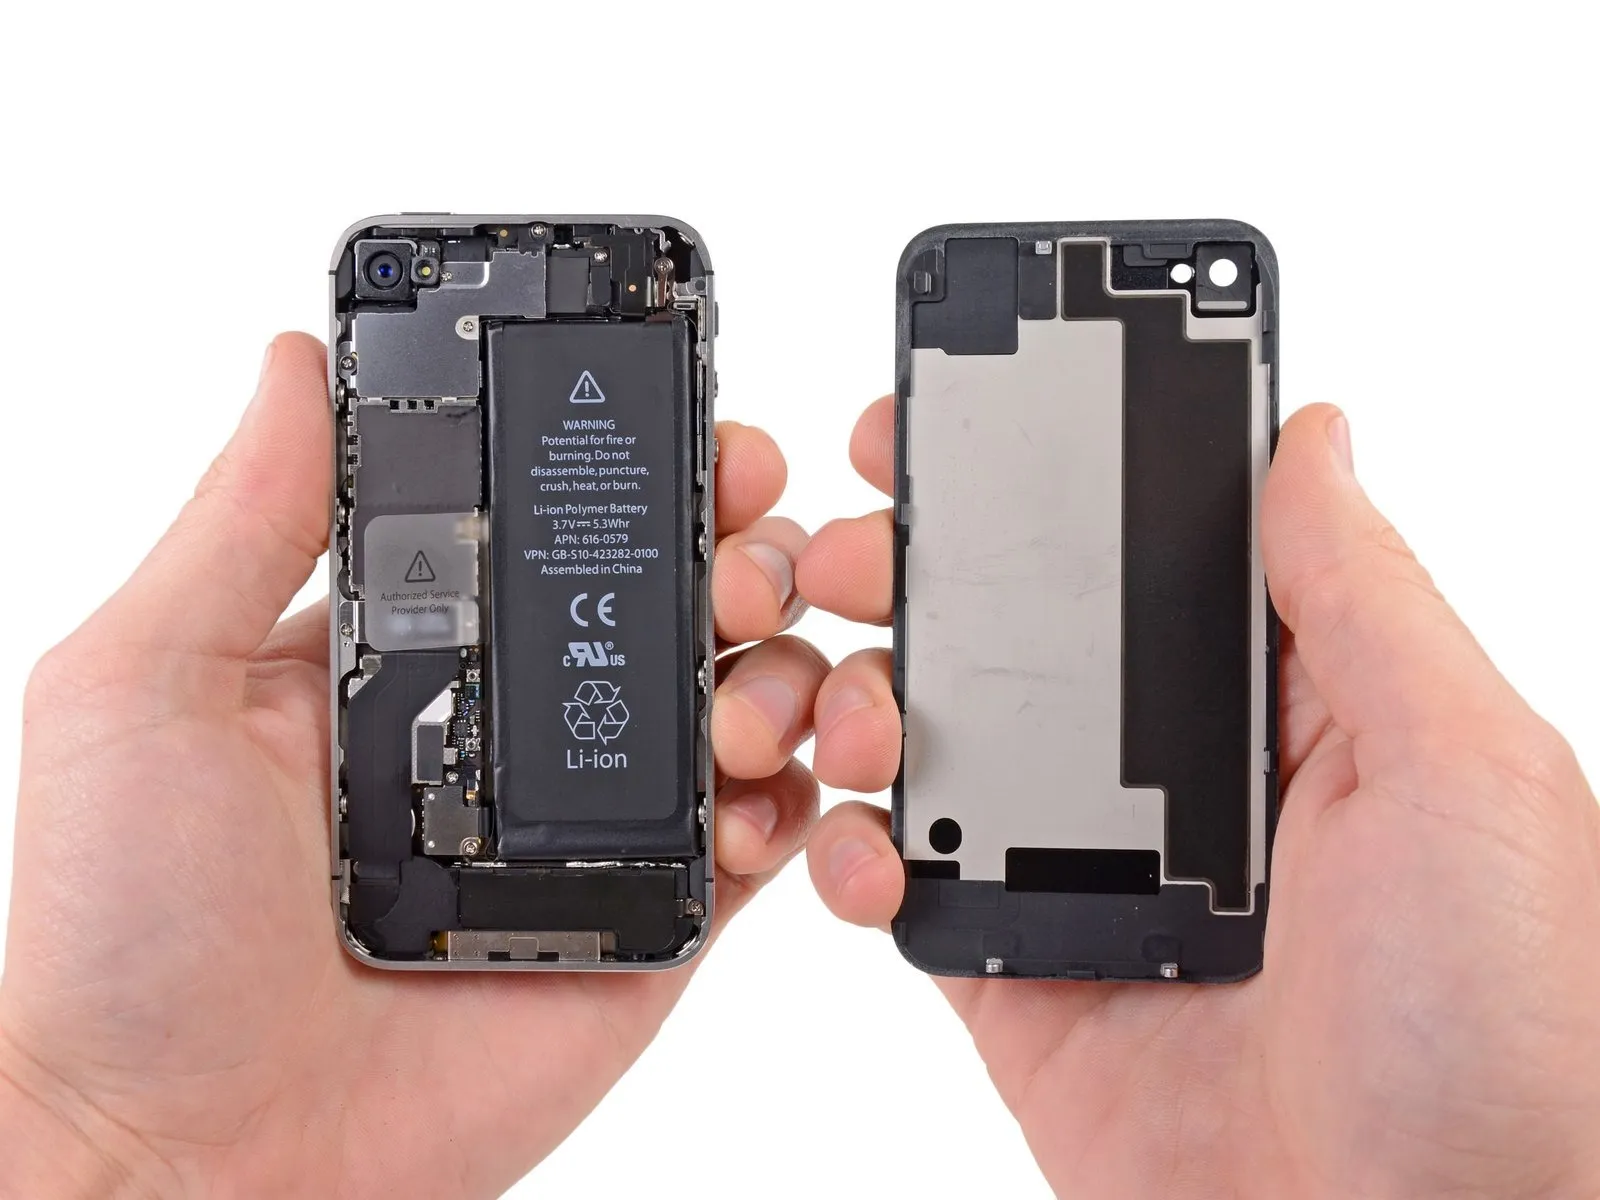
Carefully detach the rear panel from the iPhone's back casing, taking precautions to avoid breakage of the plastic clips affixed to the panel.
Carefully detach the iPhone's back cover.
Carefully detach the iPhone's back cover.