iPhone 6s Teardown
Following a previous disassembly of the iPhone 6 one year prior, we are now examining the iPhone 6s, which incorporates numerous technological advancements within a design only marginally thicker, a few grams heavier, and exhibiting a subtly pinker hue. This analysis will determine the impact of these changes on the device’s repairability; tune in live for the teardown.
If the 6s disassembly isn't sufficiently complex, consider this alternative procedure.Disassemble an iPhone 6s Plus for repair purposes..
We extend our sincere gratitude to Chipworks for their invaluable assistance in identifying the components used in this device; their expertise was essential to this project.Carefully disassemble the blog, ensuring all technical specifications, numerical values, required tools, safety precautions, and component names are maintained throughout the process..
A detailed analysis of the product's internal components is available from Chipworks; registration is required to access it.Please provide the original text ("here") you want me to rewrite. I need the sentence or instruction to be able to fulfill your request.Acquire it without charge.
Stay informed about upcoming disassembly projects by connecting with us on Facebook, Instagram, or Twitter to receive updates.
Step 1 | iPhone 6s Teardown

- Using appropriate safety precautions, carefully inspect the Apple device for any visible damage before proceeding with any repair procedures.The device utilizes an A9 processor.Carefully position the 12mm wrench on the fastener, ensuring a secure grip, and rotate counterclockwise to loosen, observing all safety precautions regarding potential spring tension and the risk of component damage.The M9 motion coprocessor
- Storage capacity options include 16 gigabytes, 64 gigabytes, or 128 gigabytes.
- The screen features a Retina HD display, measuring 4.7 inches diagonally and offering a resolution of 1334 by 750 pixels, resulting in a pixel density of 326 pixels per inch, and incorporates 3D Touch functionality.
- The device incorporates a 12-megapixel iSight camera capable of recording 4K video, utilizing 1.22-micrometer pixels, alongside a 5-megapixel FaceTime HD camera.
- The device's housing is constructed from 7000 Series aluminum and features a cover of Ion-X Glass.
- The device incorporates 802.11a, 802.11b, 802.11g, 802.11n, and 802.11ac Wi-Fi connectivity, utilizing MIMO technology, alongside Bluetooth version 4.2, NFC functionality, and 23-band LTE capabilities.
Step 2
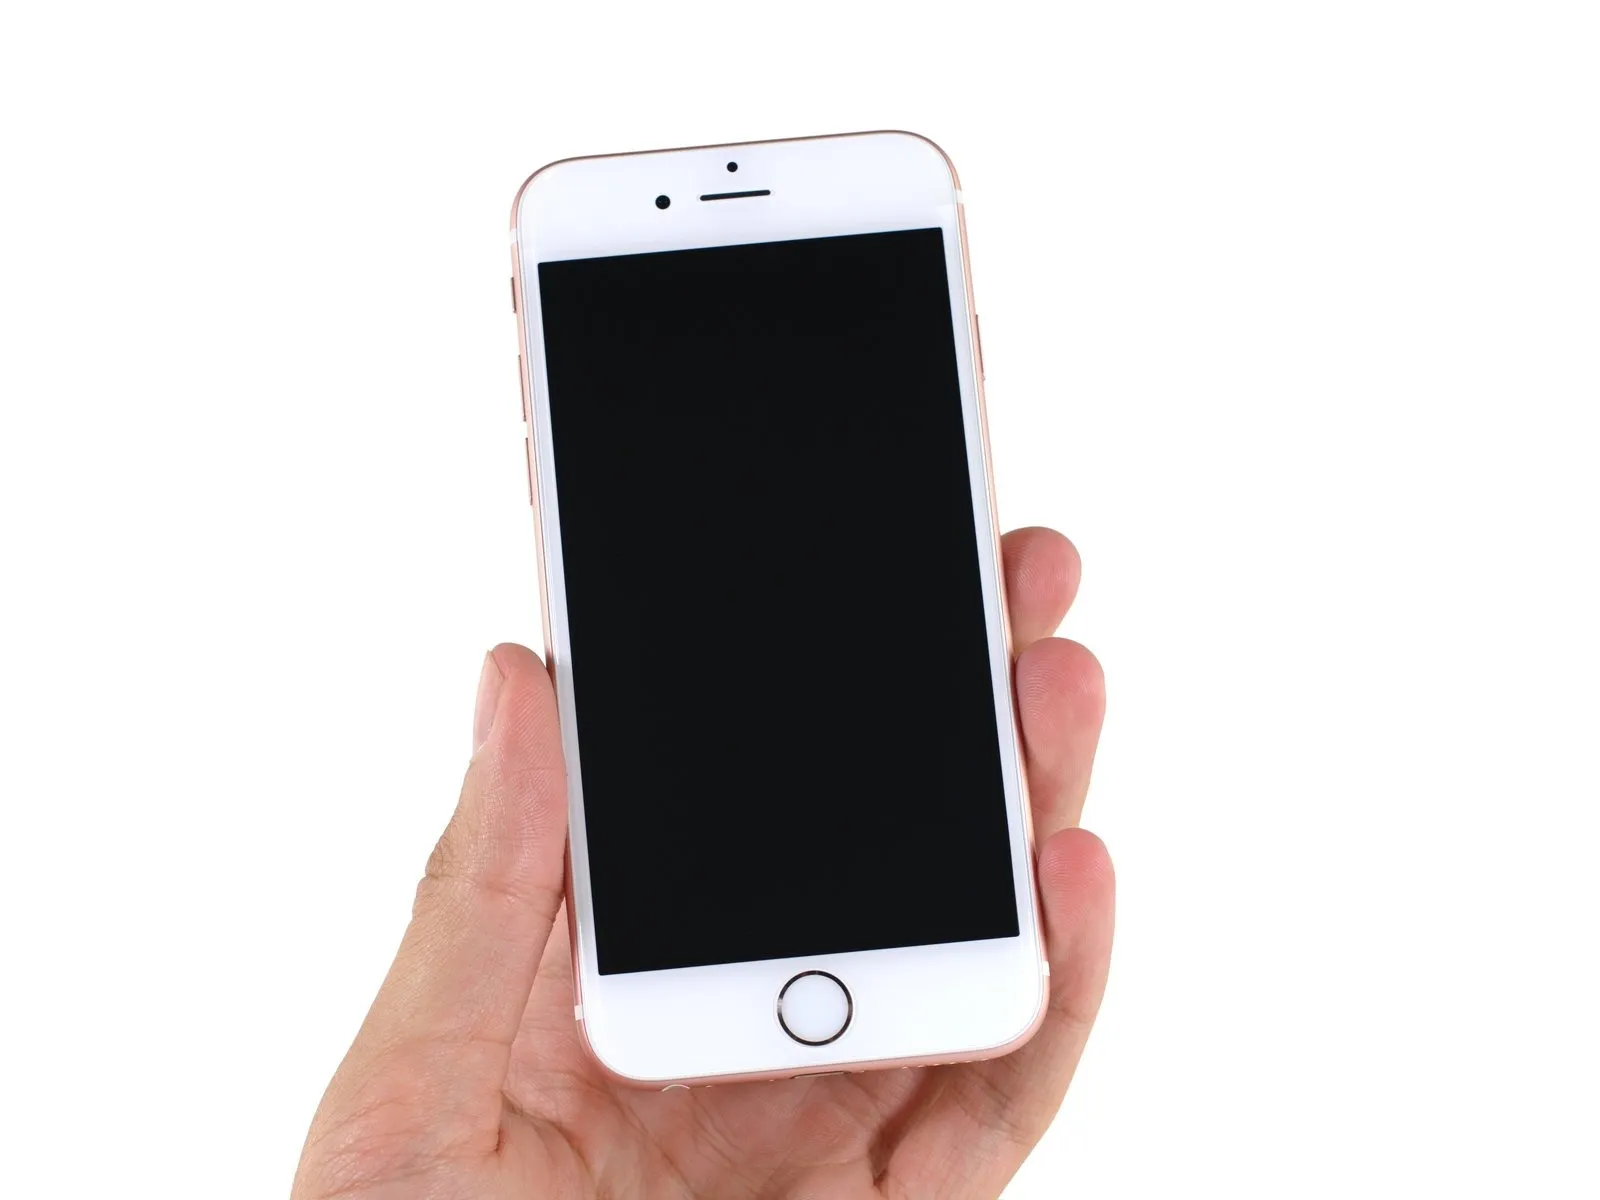
Begin the assessment of the iPhone's capabilities and features.
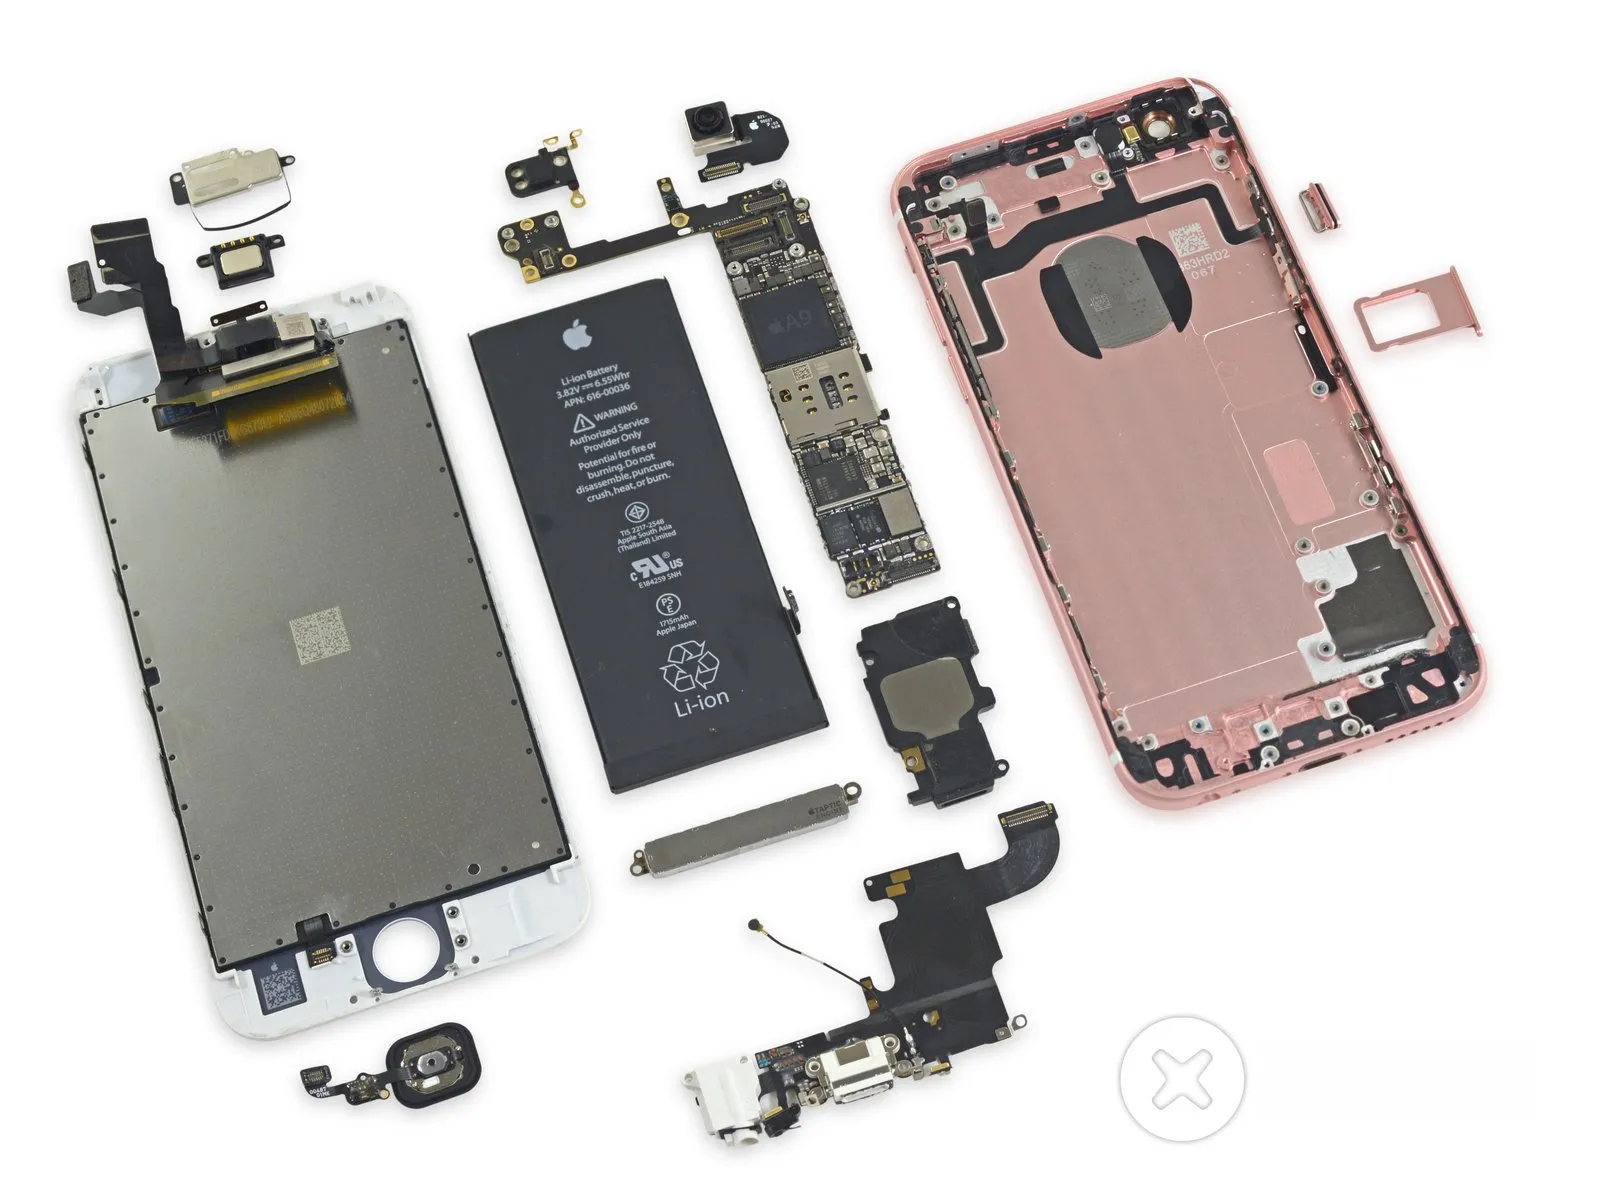
Despite its visual similarity to previous models, the iPhone 6s incorporates numerous internal changes; a detailed examination reveals significant differences.
- Replace the existing home button with the upgraded Touch ID component.
- A 5-megapixel FaceTime high-definition camera.
- The screen assembly incorporates a Retina HD display featuring 3D Touch functionality.
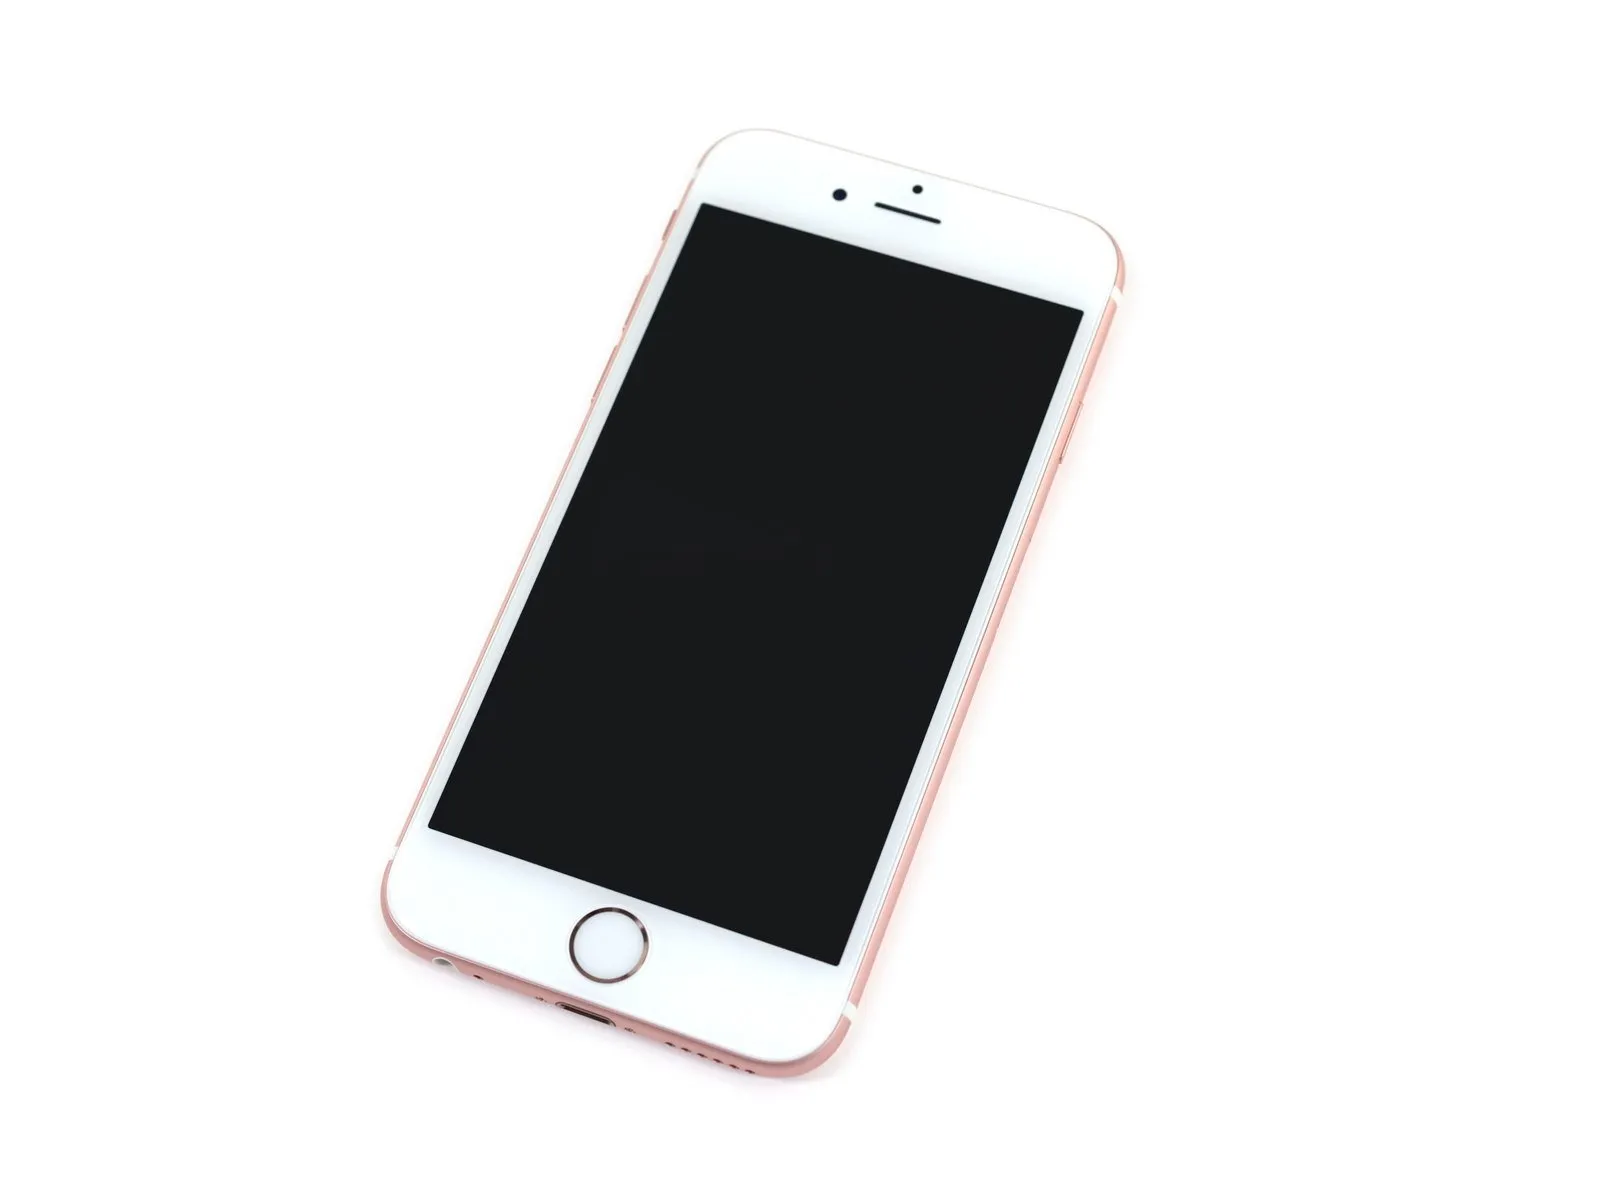
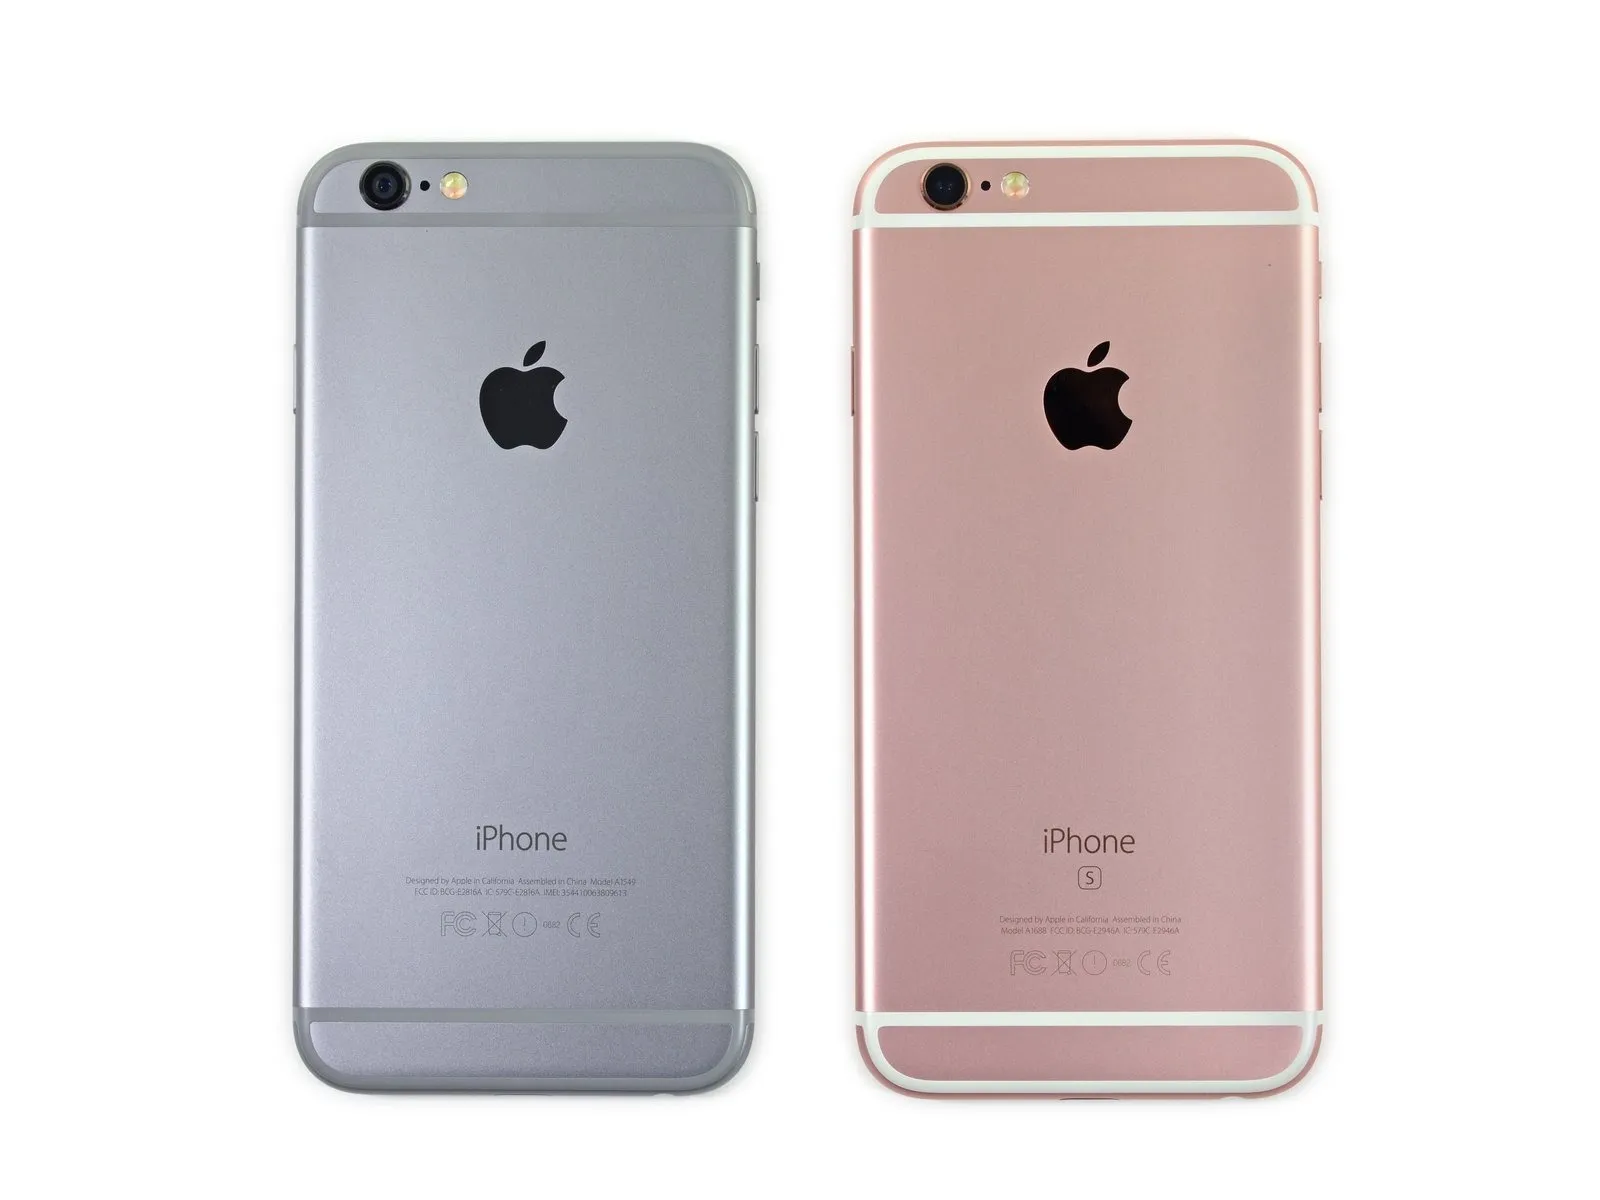
Visually comparing the models reveals minimal distinctions beyond the introduction of a Rose Gold finish for the enclosure.
The iPhone 6s exhibits slight dimensional differences compared to the iPhone 6, measuring 138.3 x 67.1 x 7.1 mm, while the iPhone 6 measures 138.1 x 67.0 x 6.9 mm; additionally, the 6s features a revised model identifier.Refer to part number A1688..
Compared to the iPhone 6, the iPhone 6s is heavier, tipping the scales at 143 grams, whereas the earlier model weighs 129 grams.
Step 3

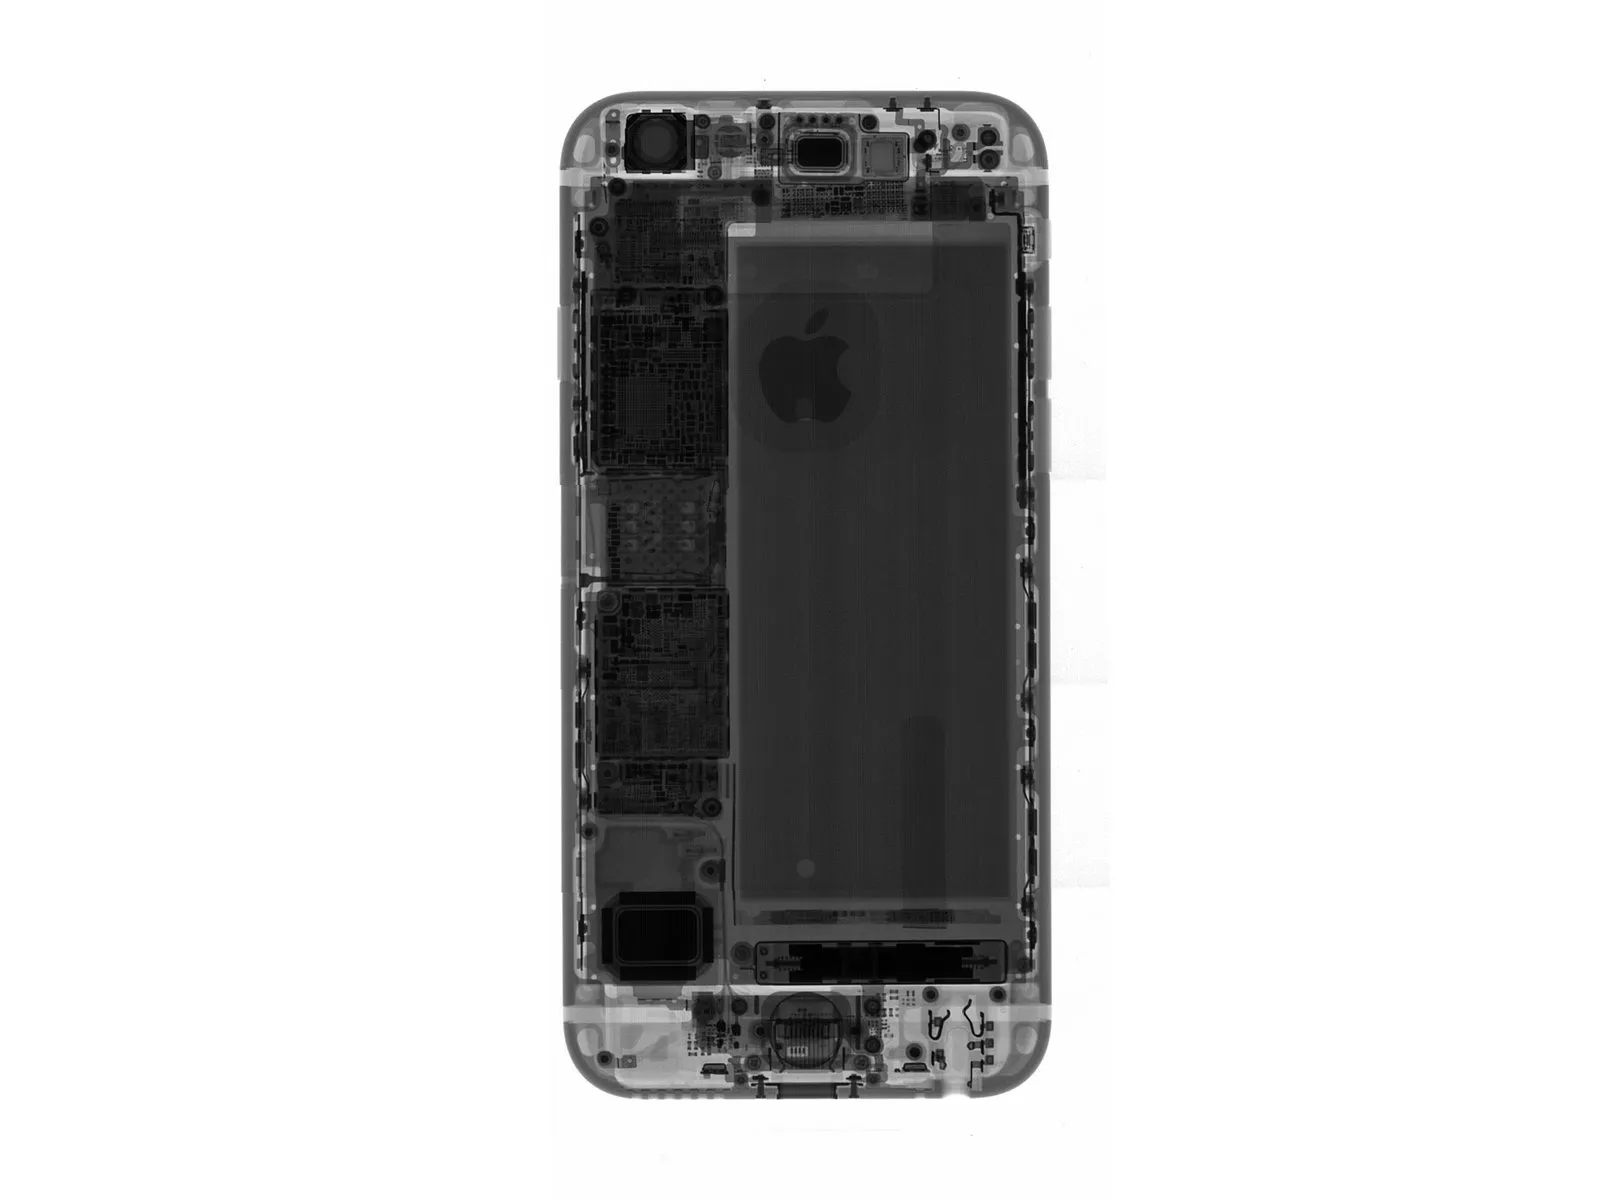

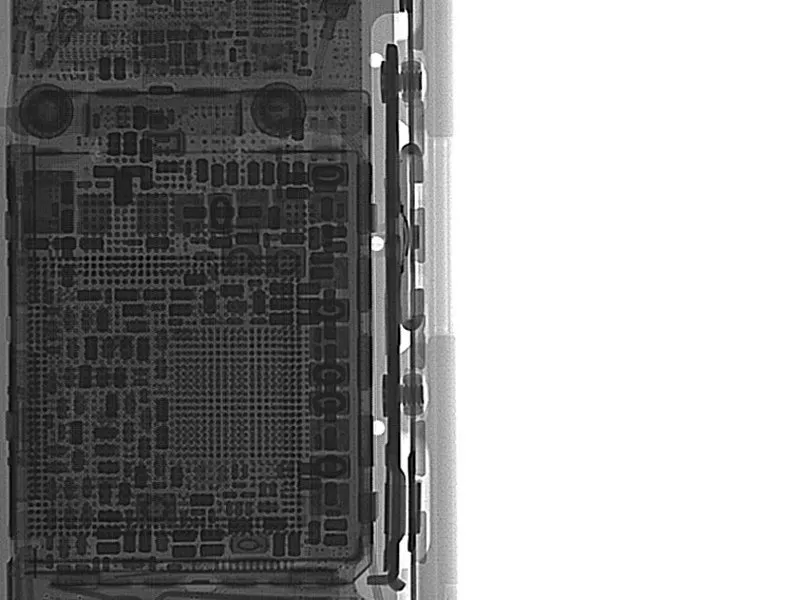
Utilizing the mouse, activate the X-ray imaging functionality, a feature provided through collaboration with Creative Electron.
Our team traveled to Australia to provide an exclusive look at the internal components of the newest iPhone model.
This disassembly is presented thanks to Macfixit and Circuitwise, whose support and assistance were invaluable, particularly given the 17-hour time difference.
Commence disassembly to proceed with the repair process.
Step 4
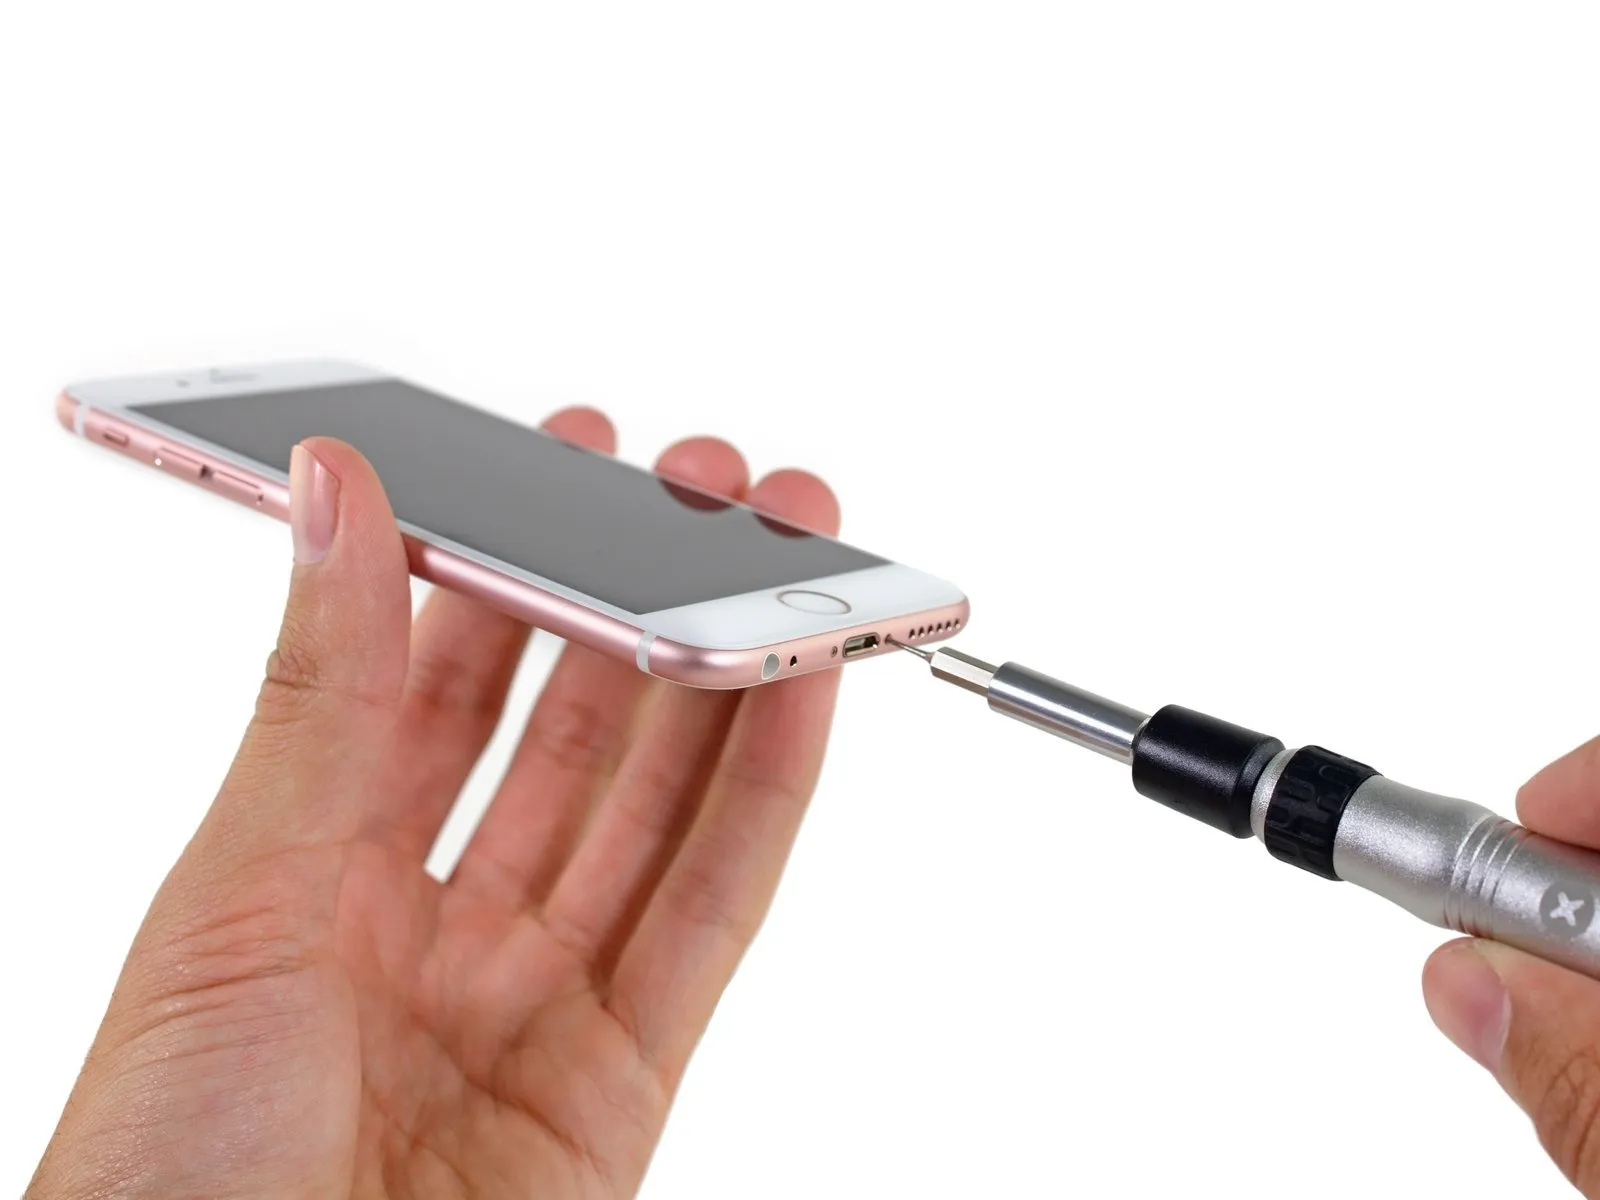
Pay close attention to detail; the Pentalobe screws securing the device casing are color-matched to the case itself, a characteristic design element from Apple.
The iPhone display assembly now incorporates four adhesive strips along its entire edge, a change from previous designs.
The iSclack tool effectively separates components bonded with this robust adhesive.
Carefully observe that the adhesive strip is precisely color-coordinated with the display panel; a white display requires a white adhesive strip, while a black display necessitates a black adhesive strip.
Historically, iPhone screens were securely fitted and did not present a risk of detachment.Considering the existing seal, the presence of adhesive raises questions about its purpose—perhaps it functions as a waterproof gasket.
Step 5
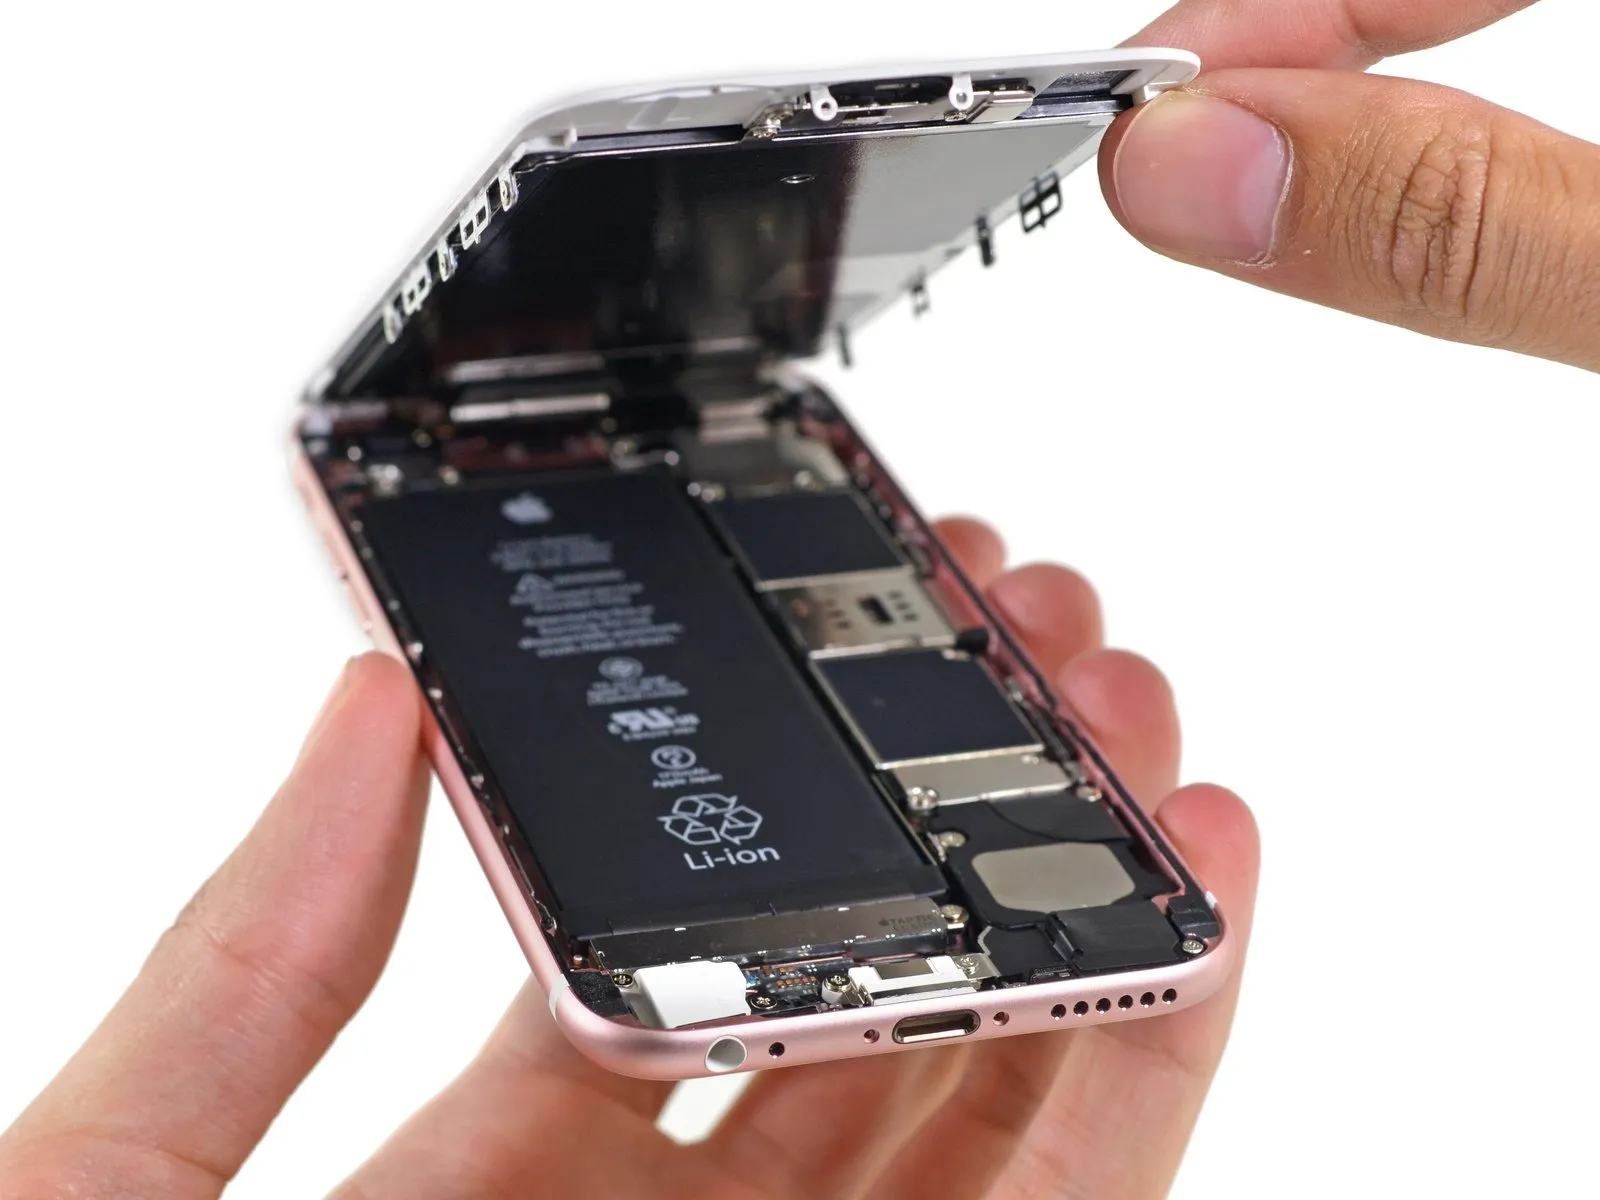

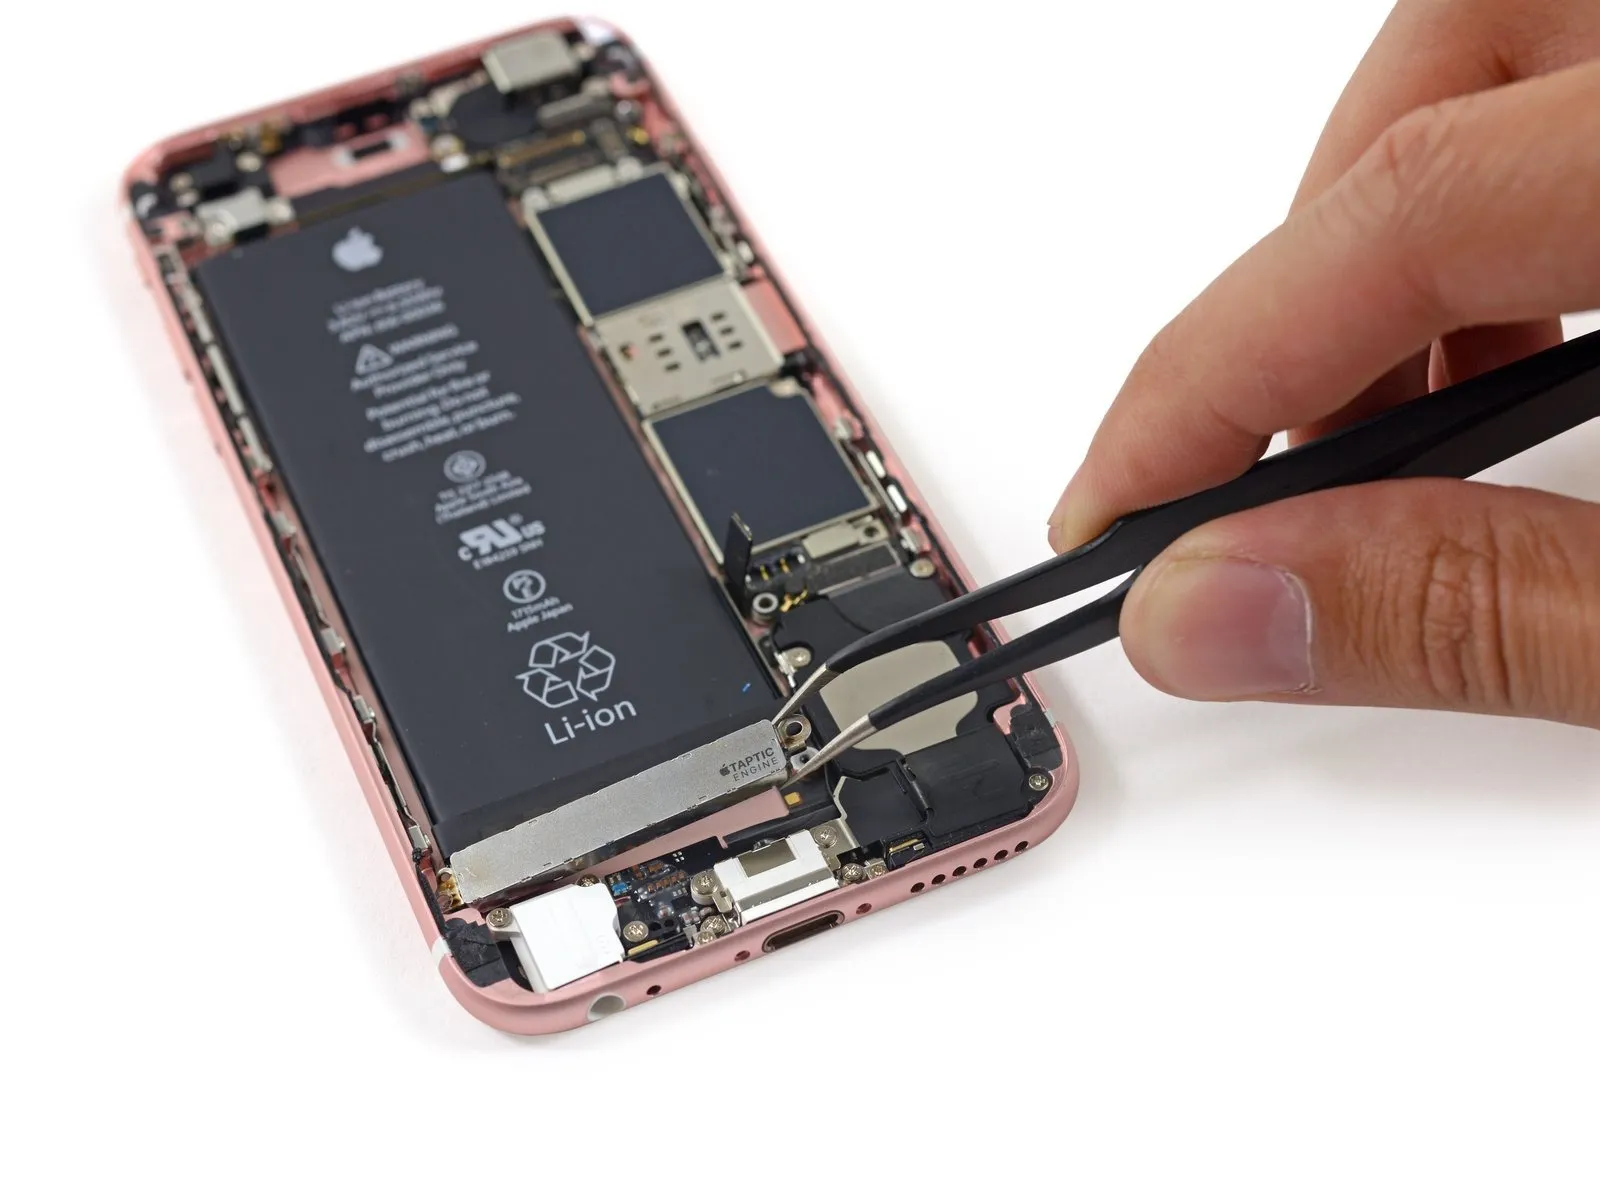
The battery compartment's volume is somewhat smaller than previous models, likely due to the substantial space occupied by the new Taptic Engine located beneath it.
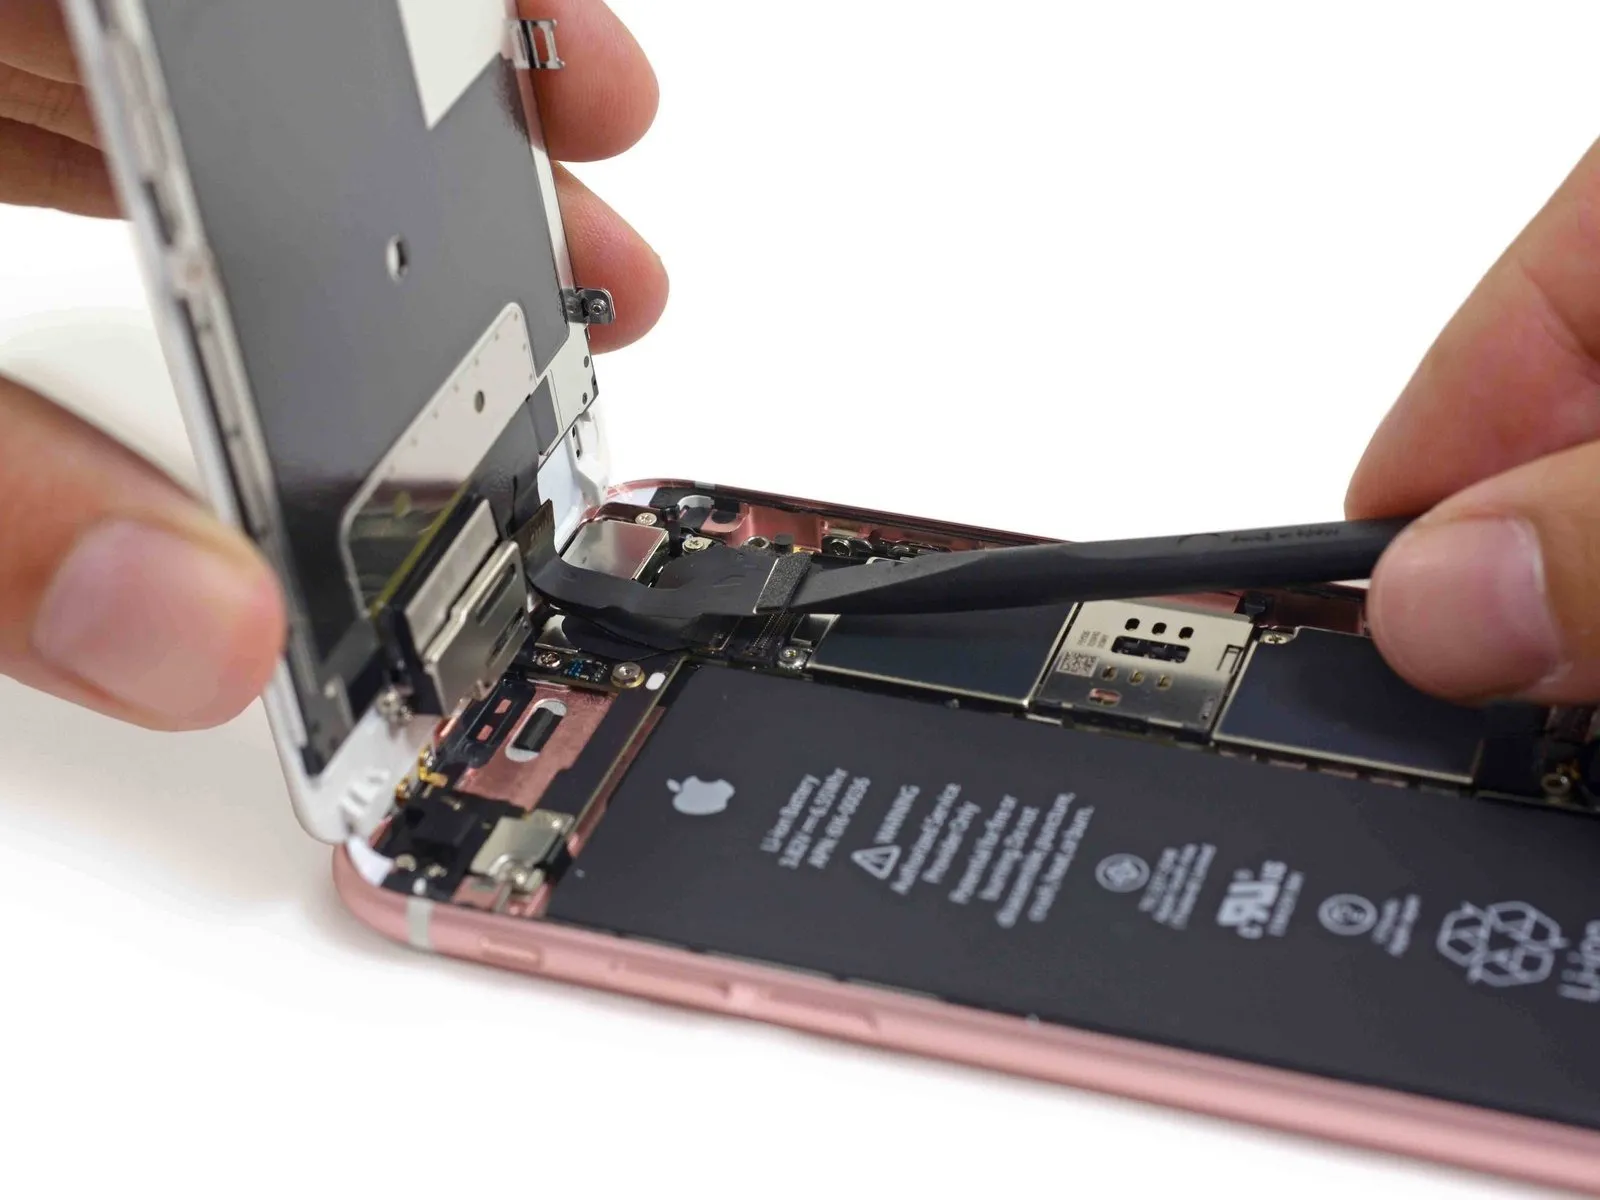
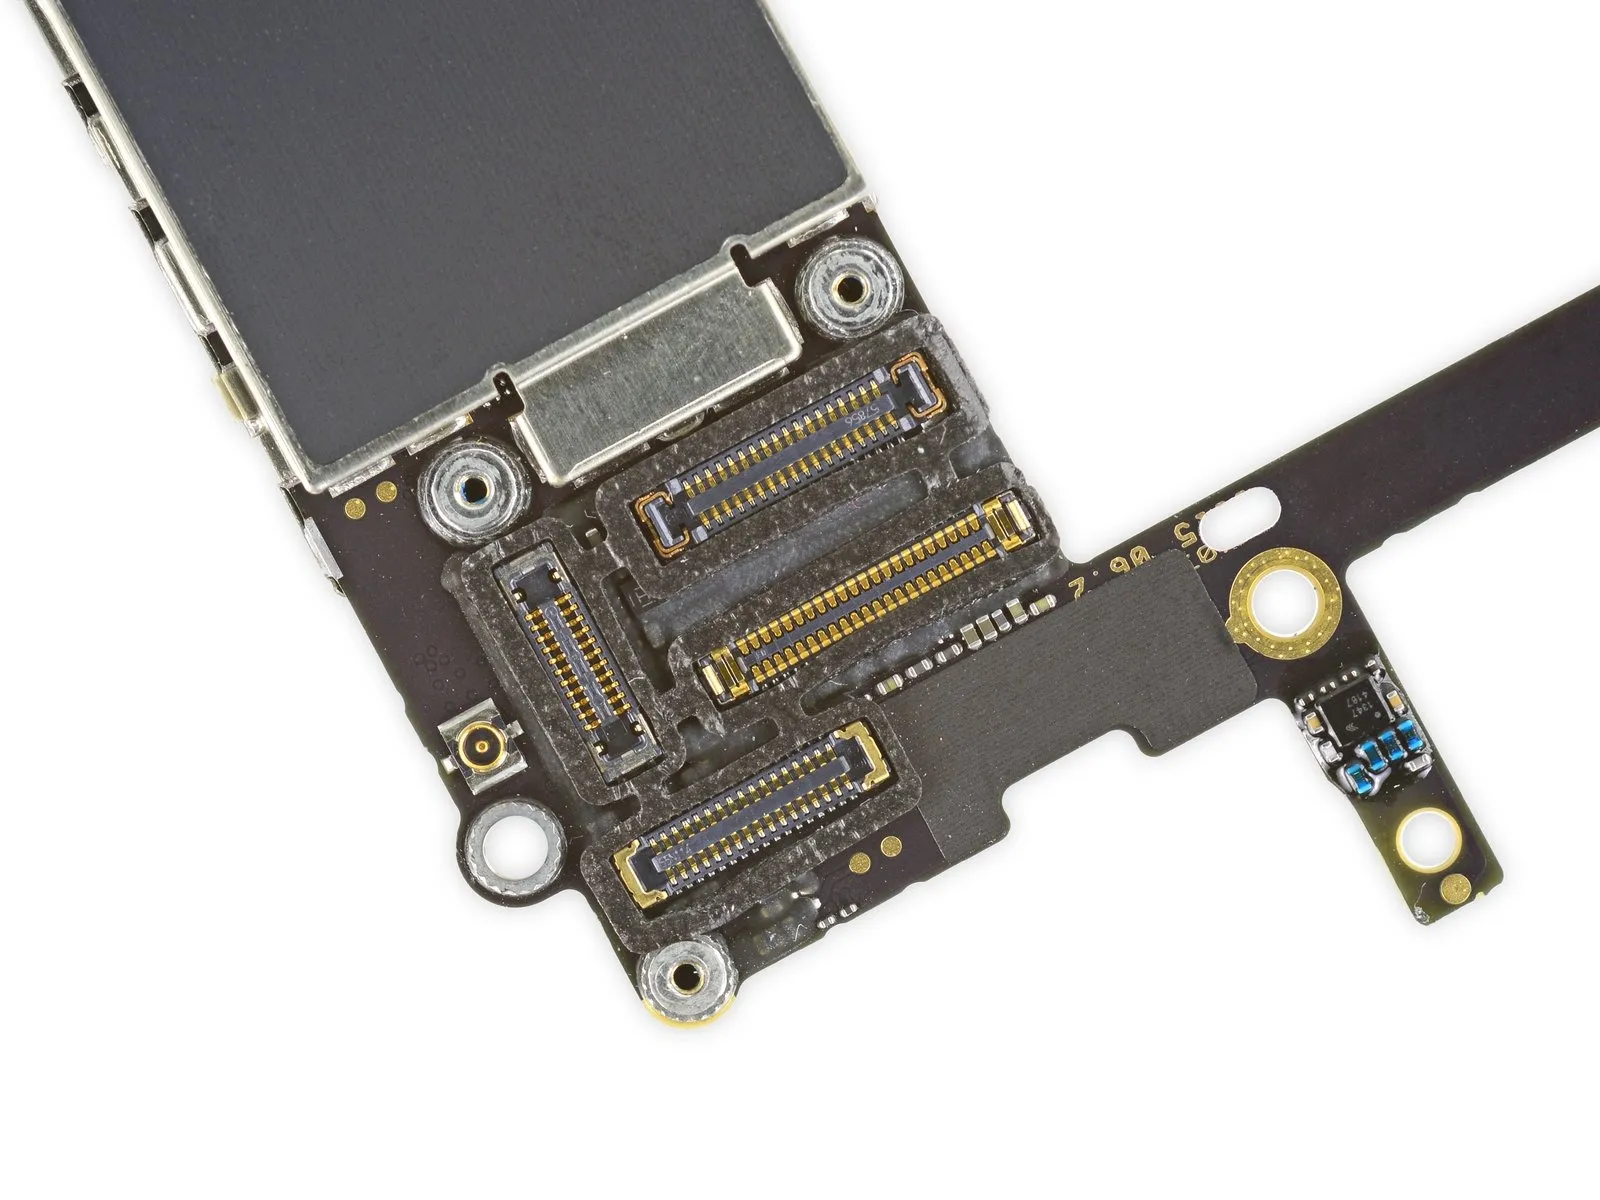
Compared to the iPhone 6, the iPhone’s display assembly now uses only three cables to connect all components.
Step 6
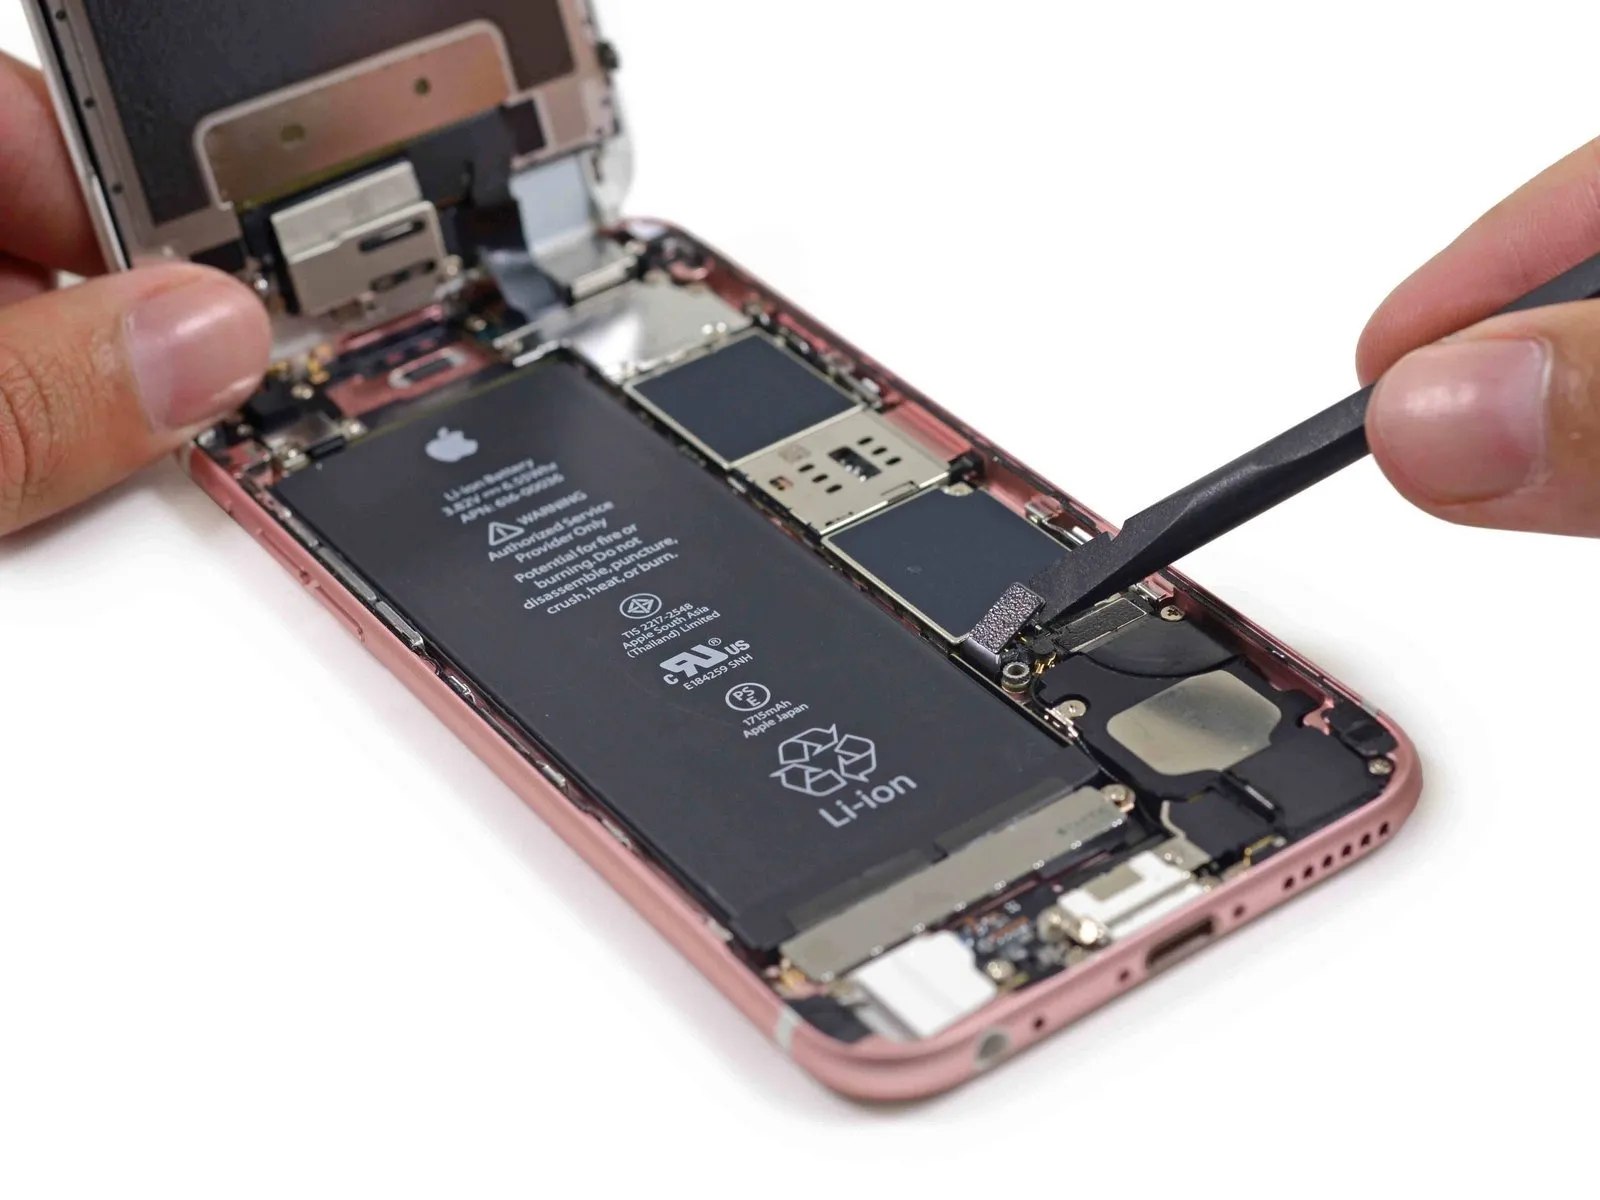
- Rotate the connector to release its hold and separate it from the battery.
- Regardless of the Coriolis force's influence, the standard clockwise tightening and counterclockwise loosening applies to screw operation, including in regions where the Coriolis effect is more pronounced. Therefore, leftward rotation is required to loosen screws.
- Upon accessing the interior, you will observe Phillips screws, confirming our expectation. The design choice by Apple to restrict Pentalobe screws to the lower portion of the rear case is a welcome simplification.
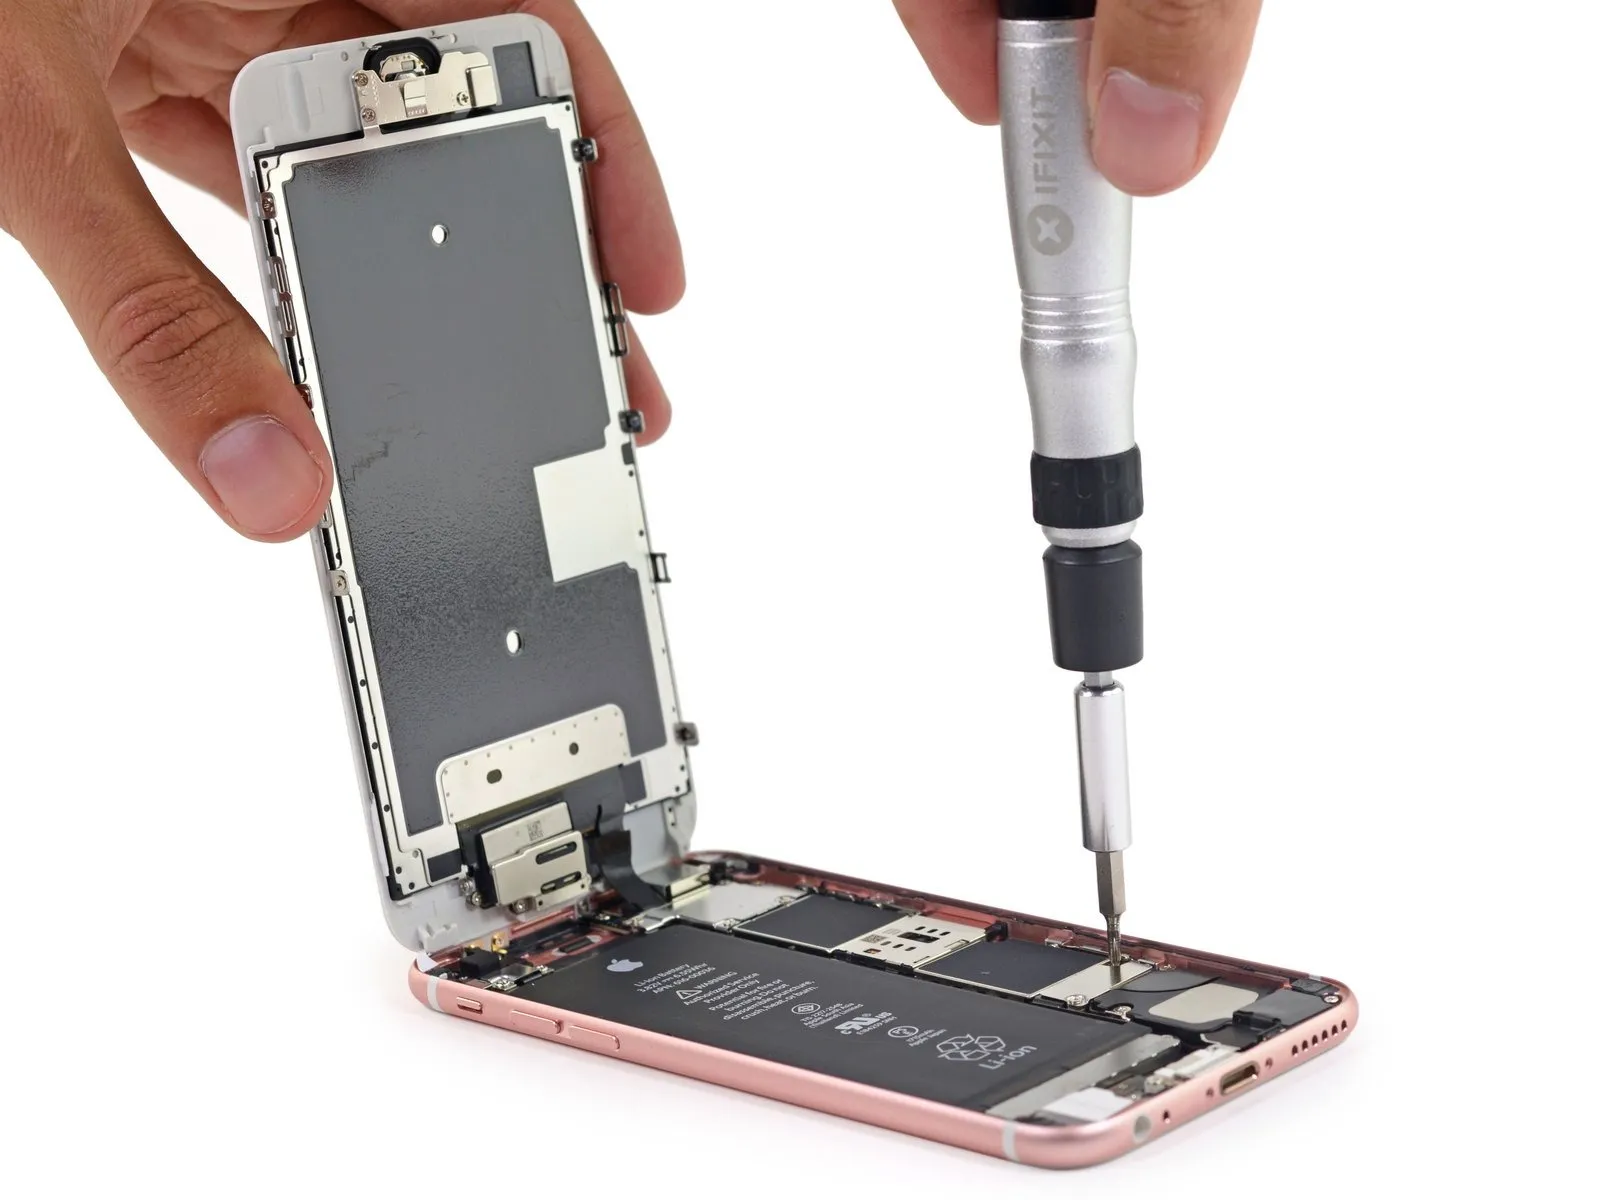
Step 7
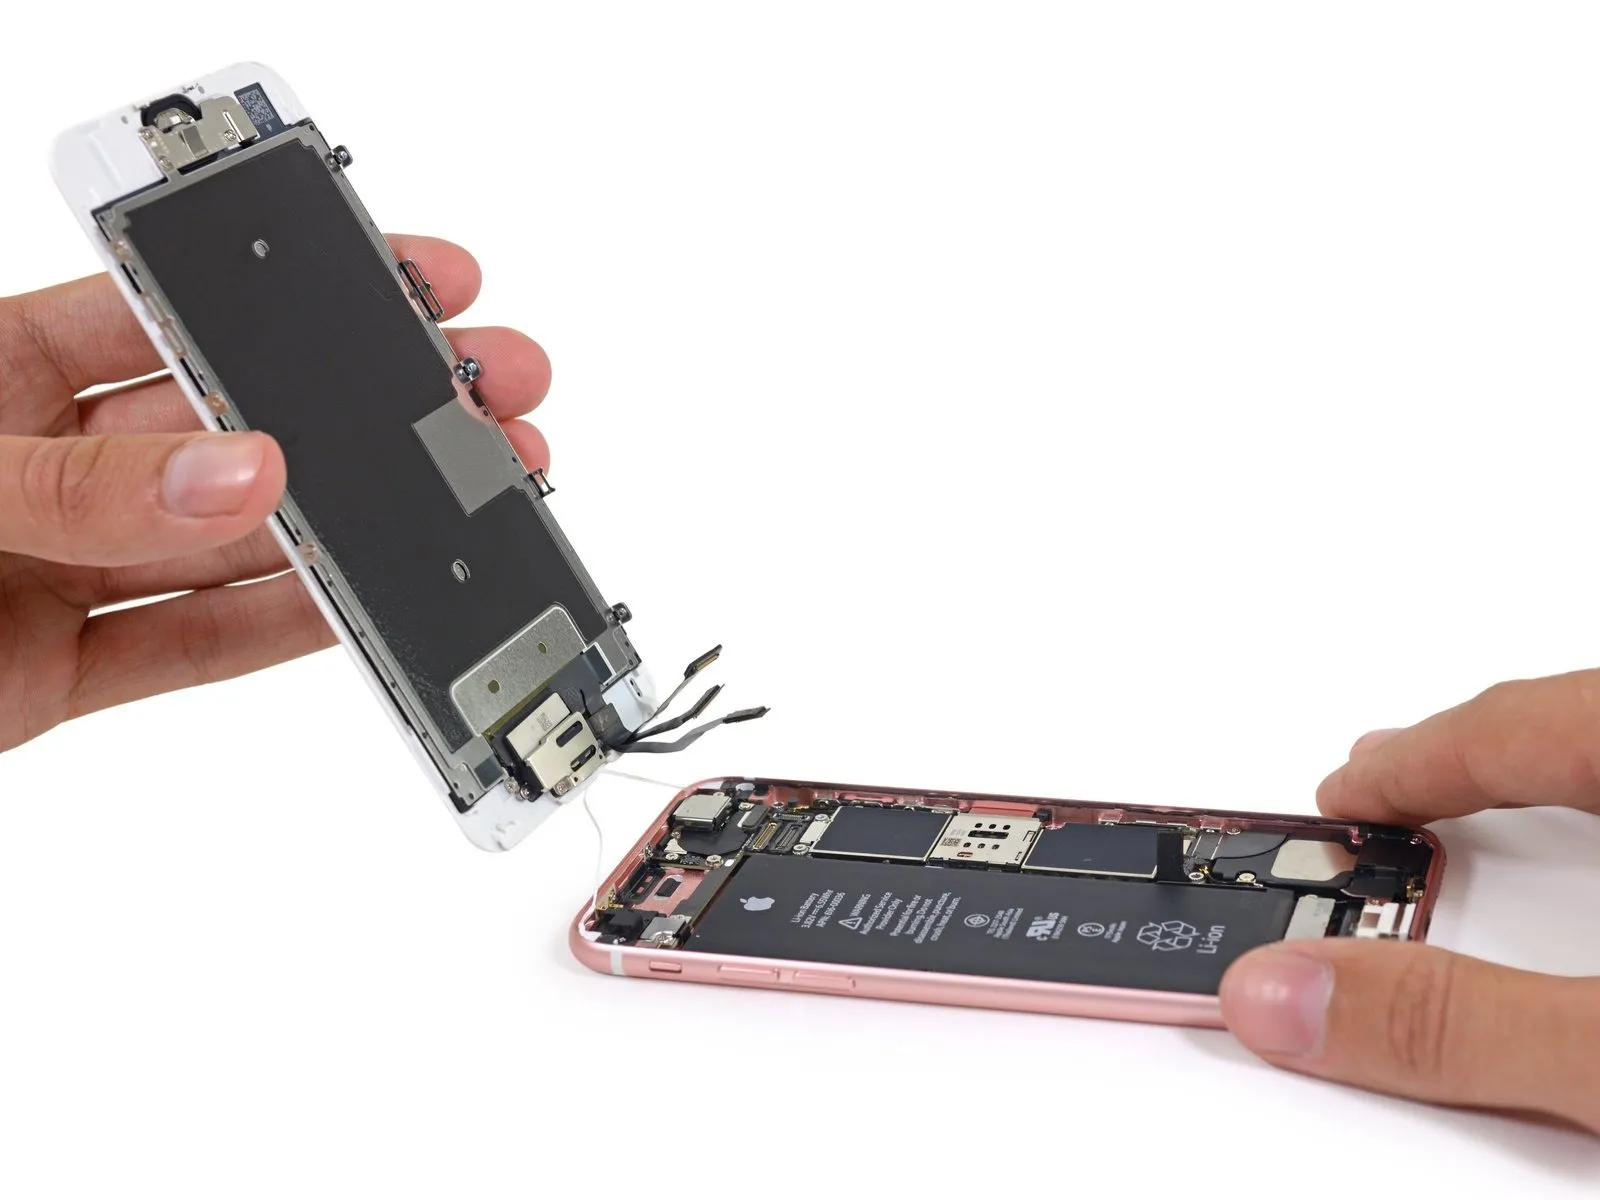
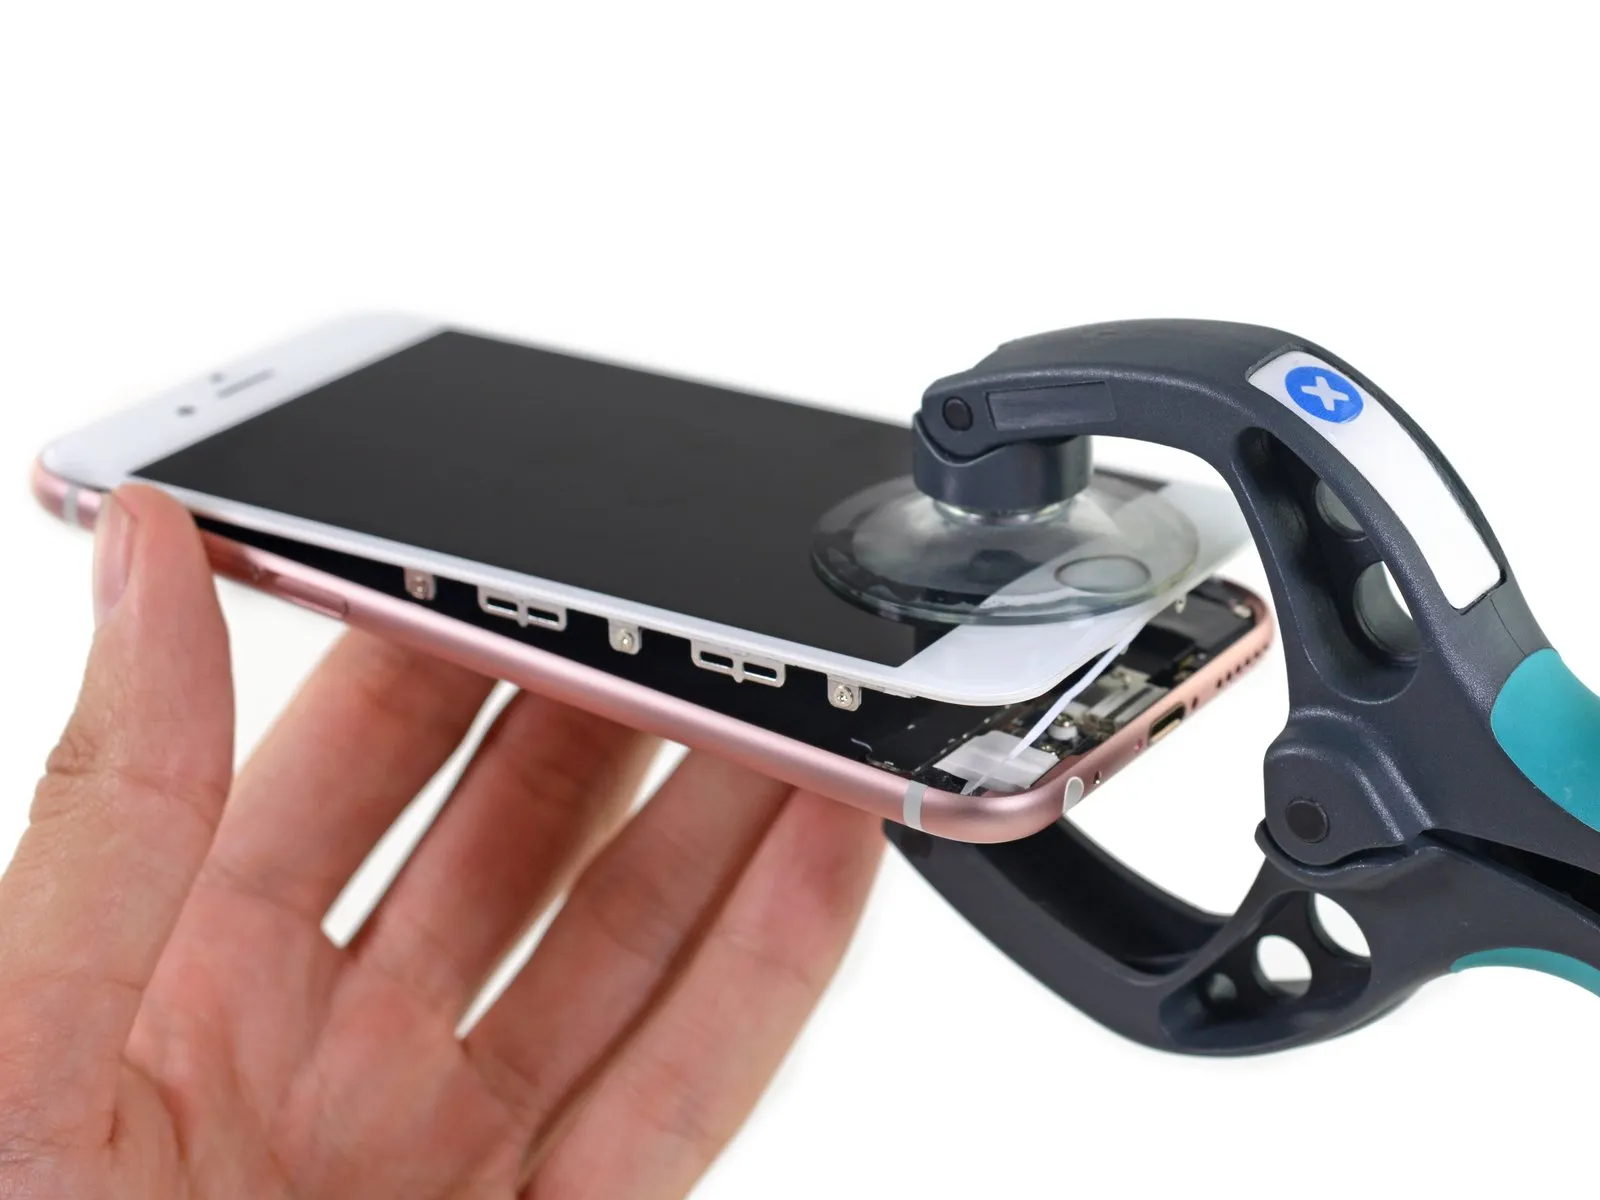
- Using a spudger, gently separate the display assembly from the device casing, as it should release easily.
- Due to the inclusion of additional capacitive sensors within the display backlight, the display assembly's mass is 60 grams, representing a 15-gram increase compared to the iPhone 6 display and matching the weight of the larger screen found in the iPhone 6 Plus.
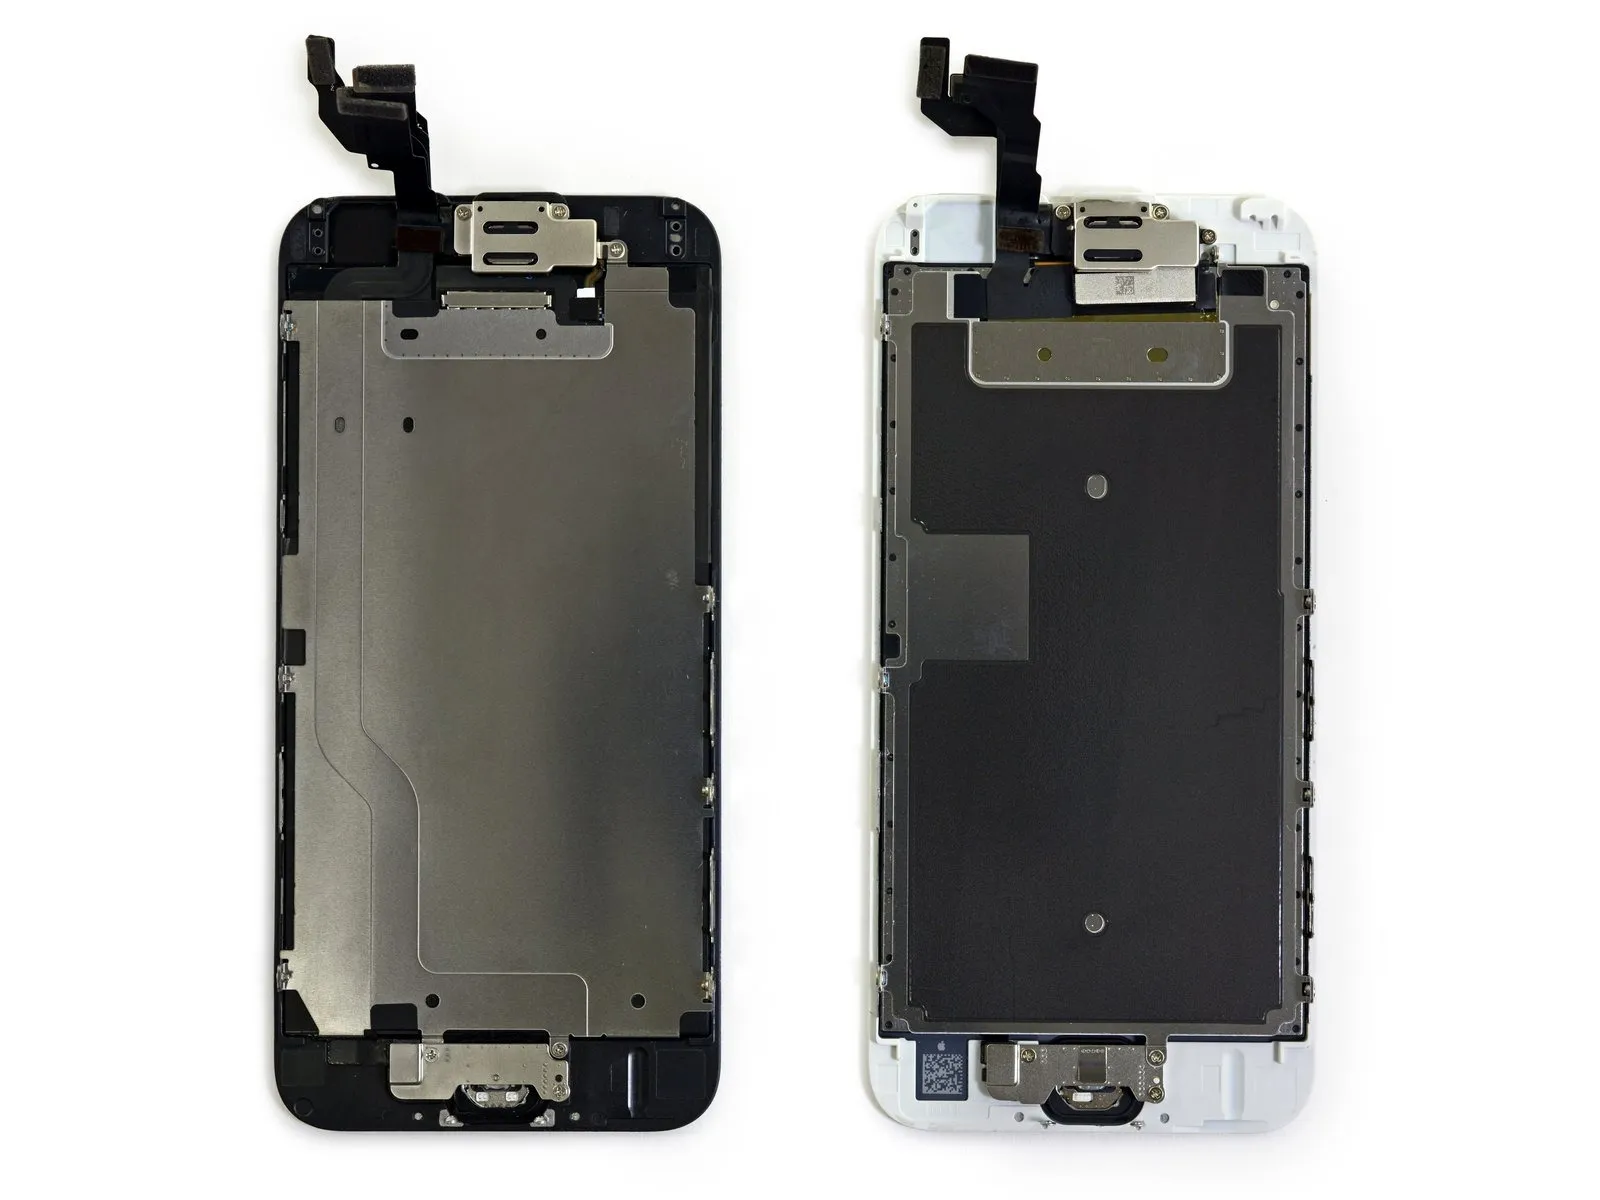
- Visually, the display assemblies appear nearly identical, with the primary difference being a reduced number of connecting cables and a modified LCD shield plate design.
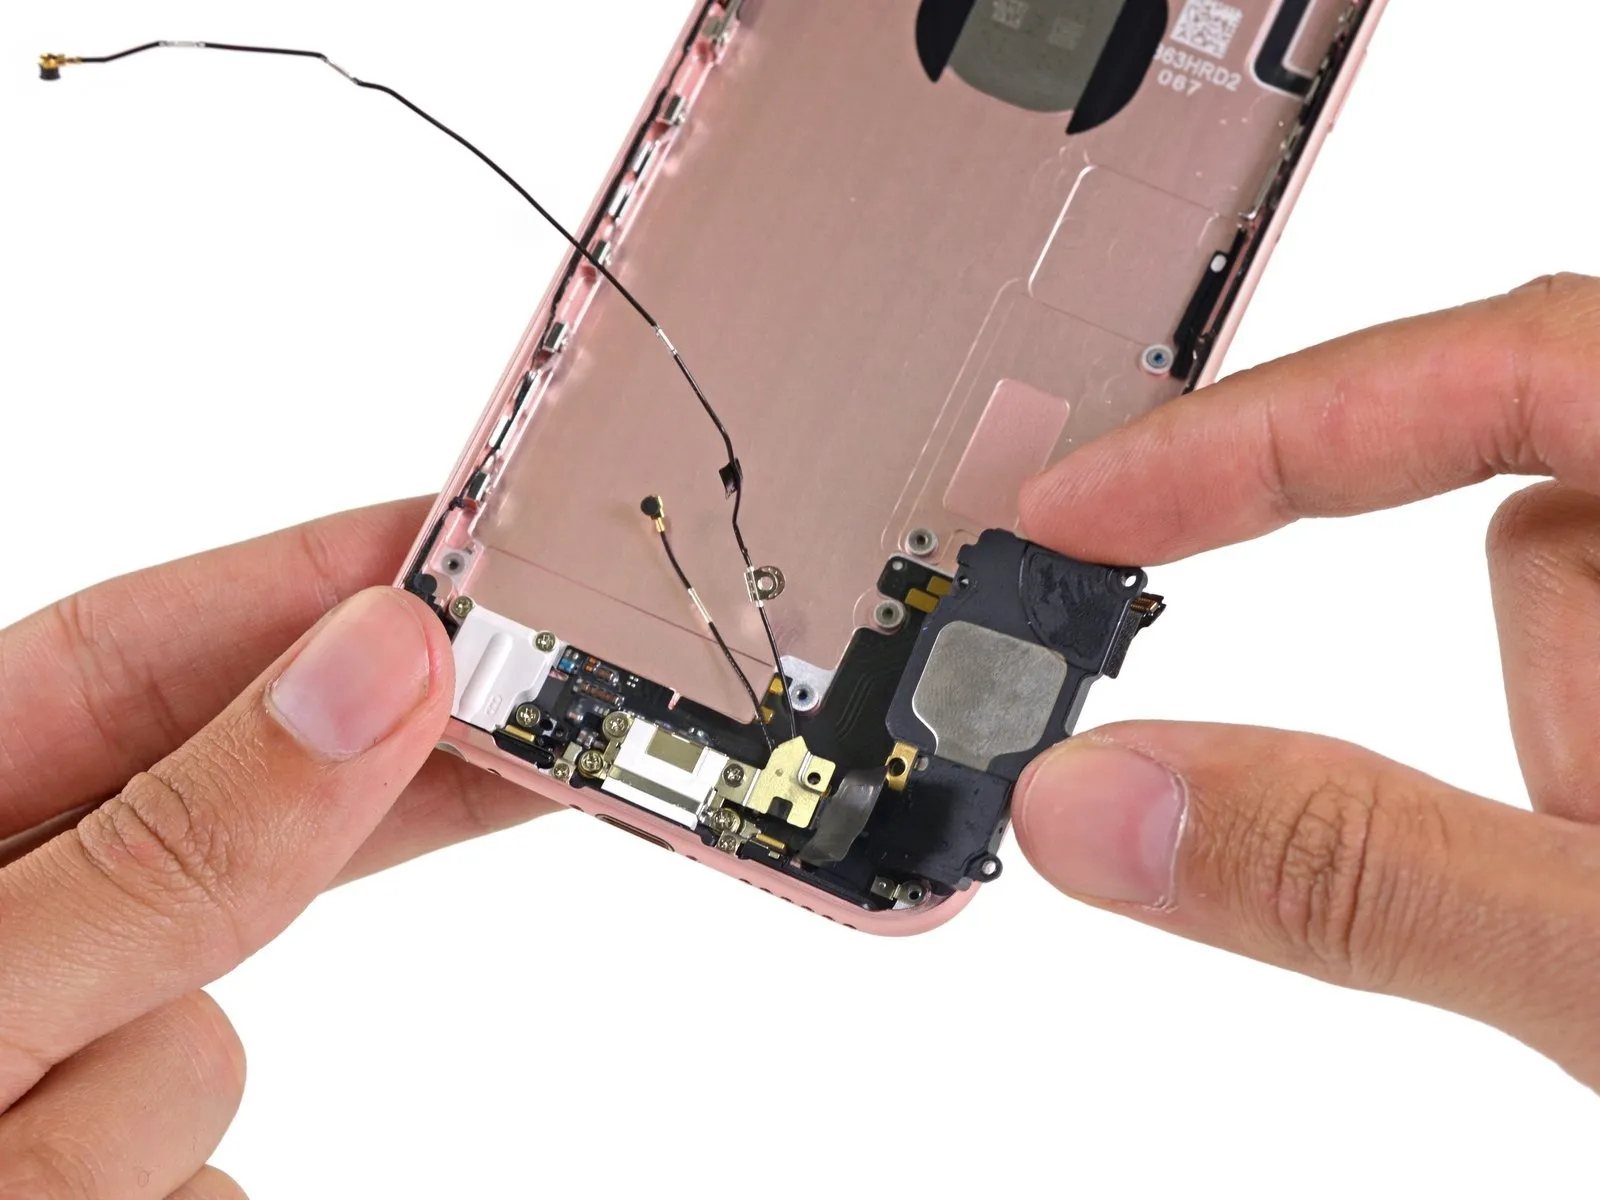
Step 8

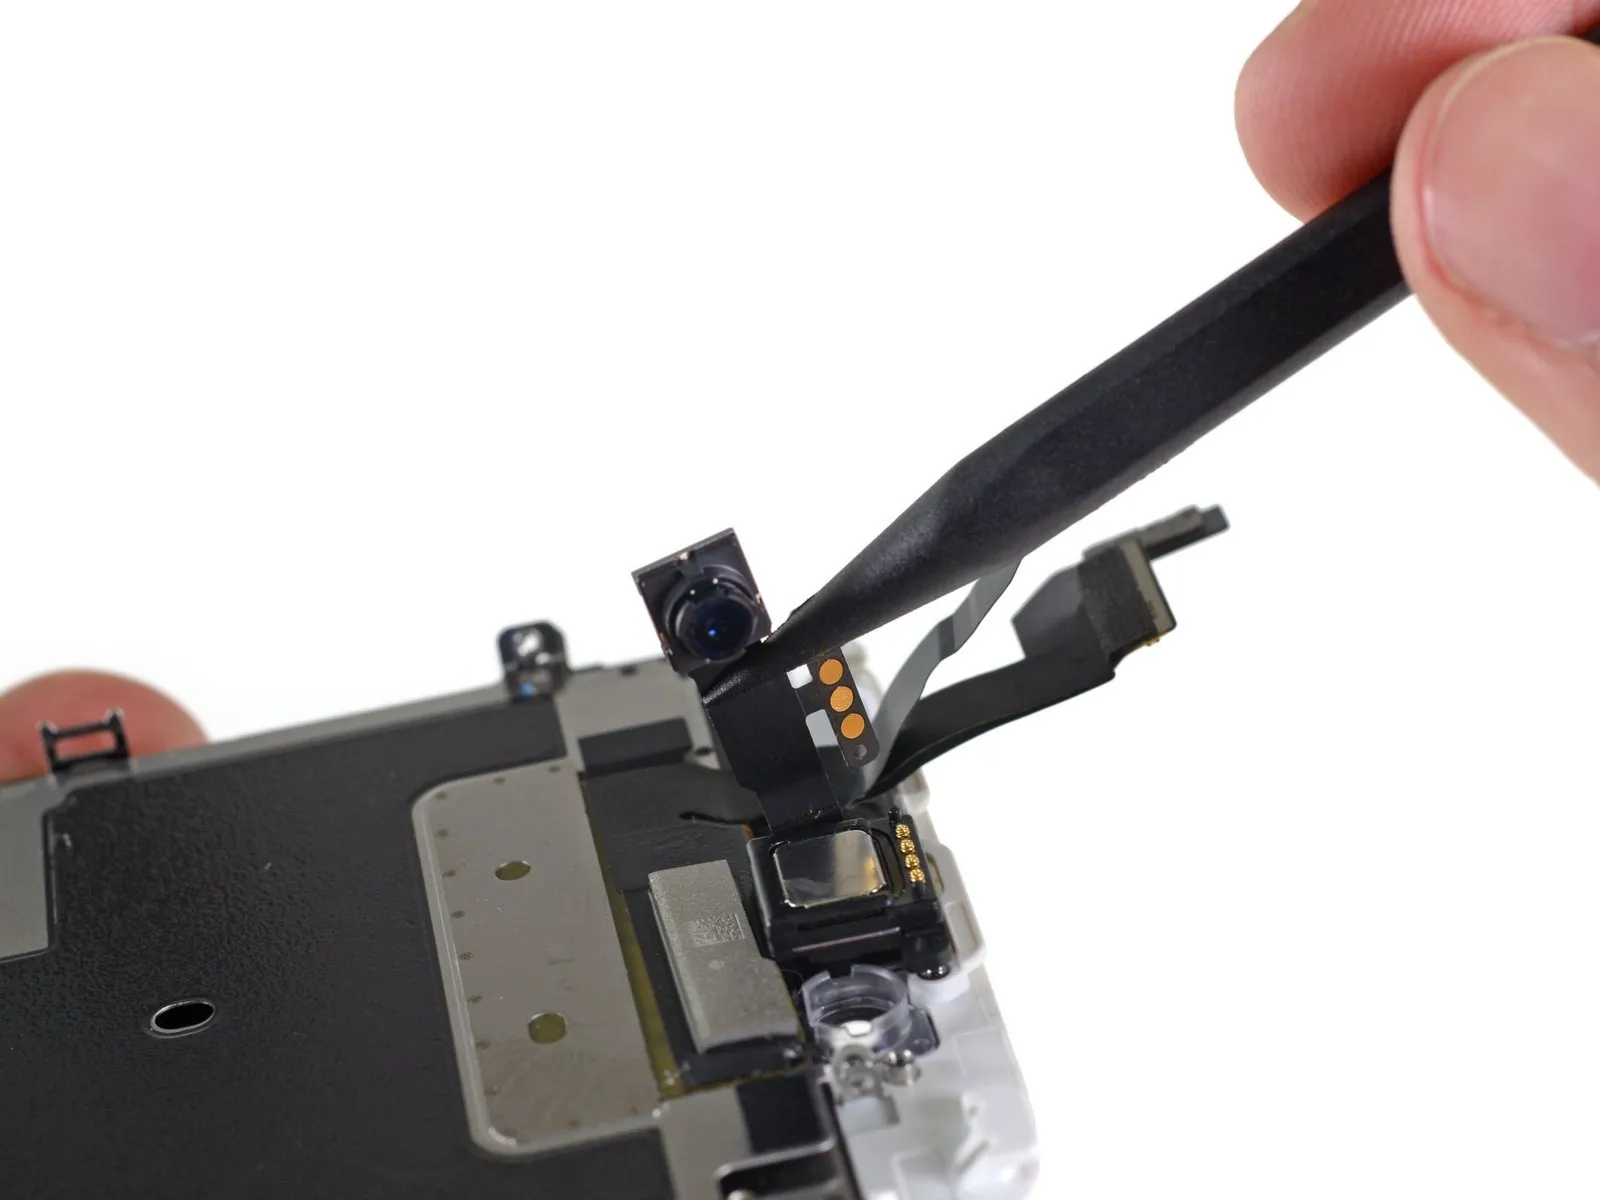
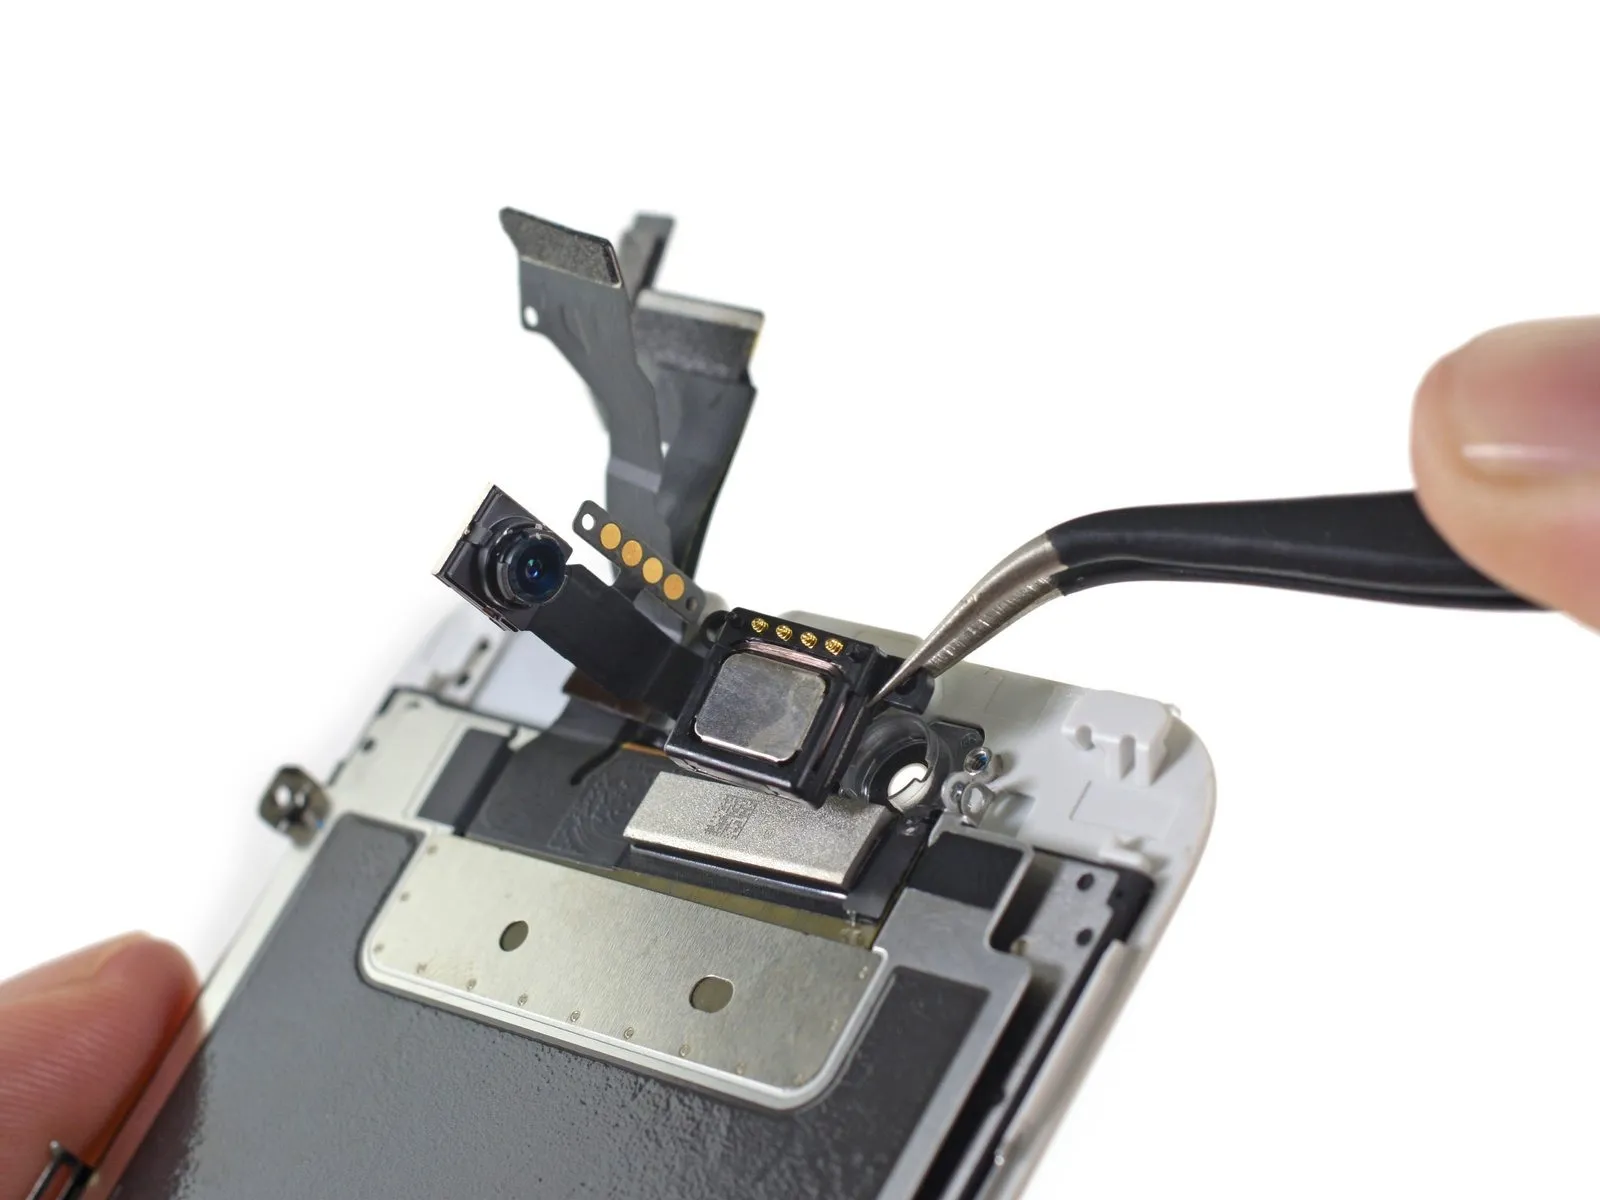
- Before the shield plate can be detached, it's necessary to first disconnect and remove a bracket, a speaker component, and the FaceTime camera assembly.
- Despite increases in FaceTime camera resolution, from 1.2 megapixels to 5 megapixels, the physical design has changed very little.
- Proceed cautiously, as the subsequent steps involve handling the delicate new 3D Touch display assembly.
Step 9


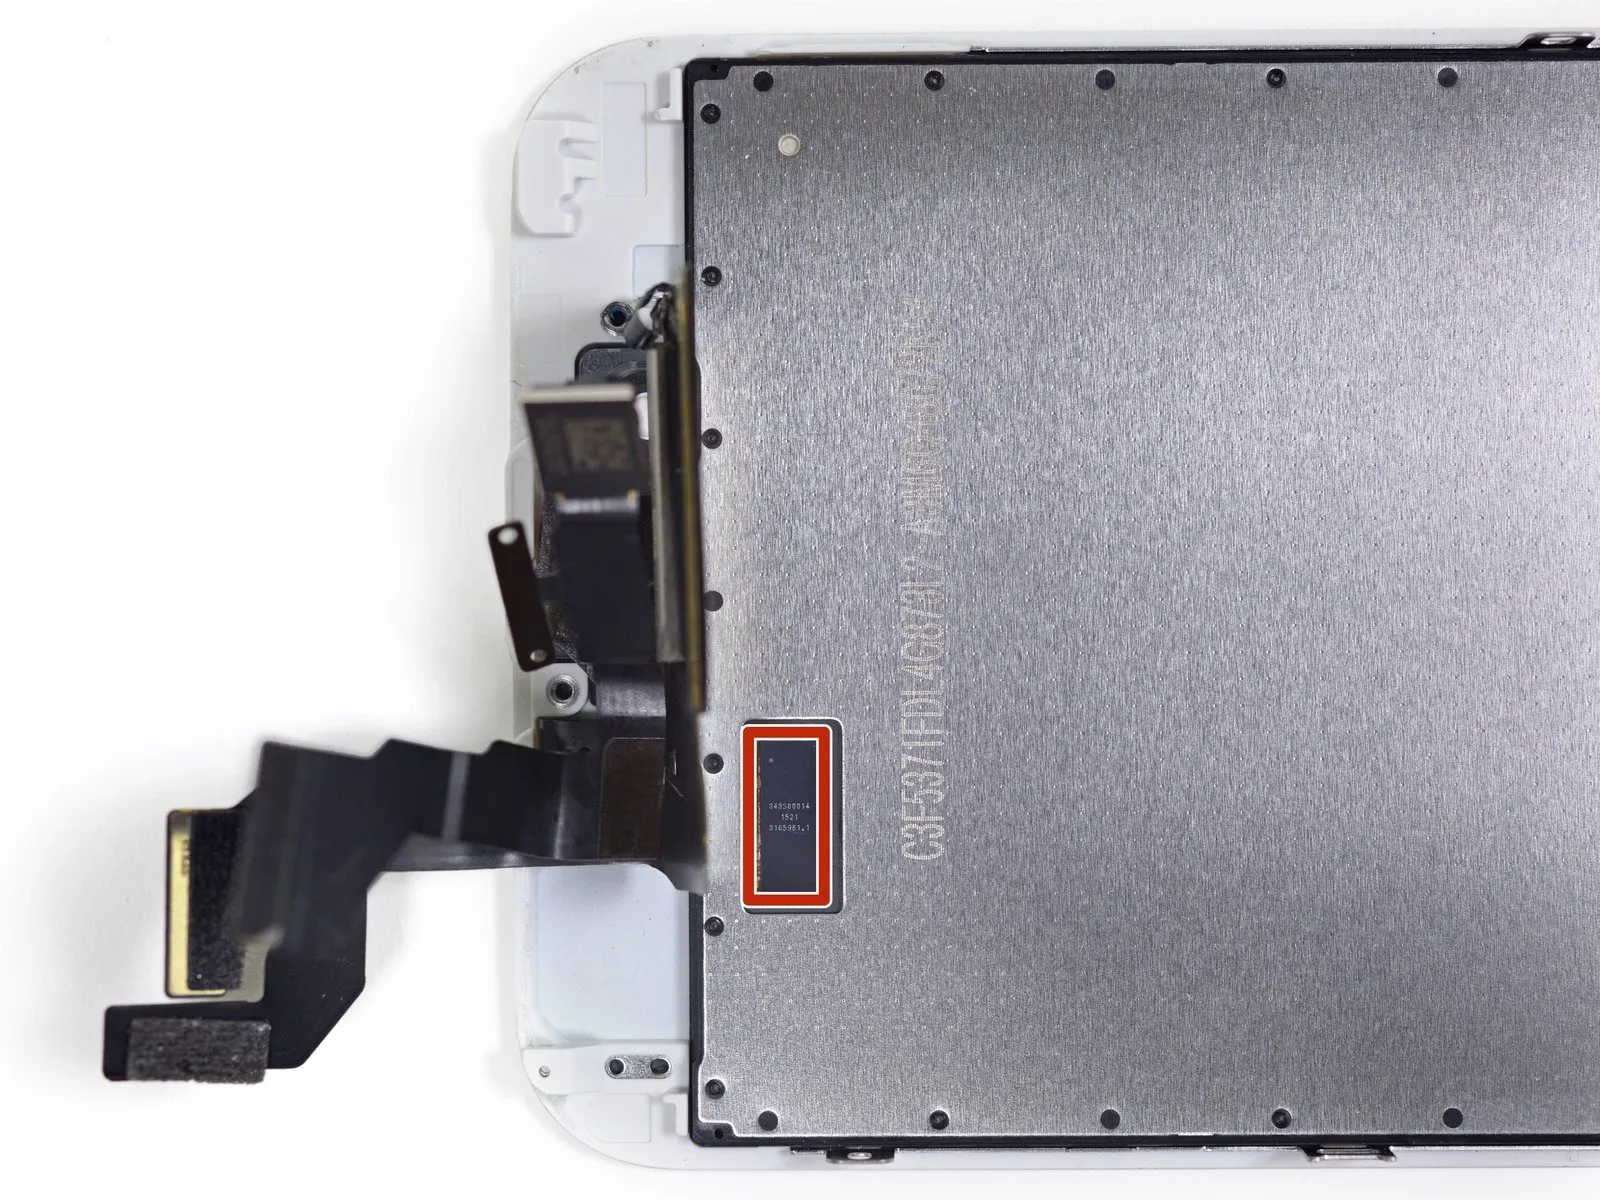
- The component designated 343S00014 exhibits a naming convention consistent with other Apple integrated circuits, although its specific manufacturer remains unconfirmed.
Step 10

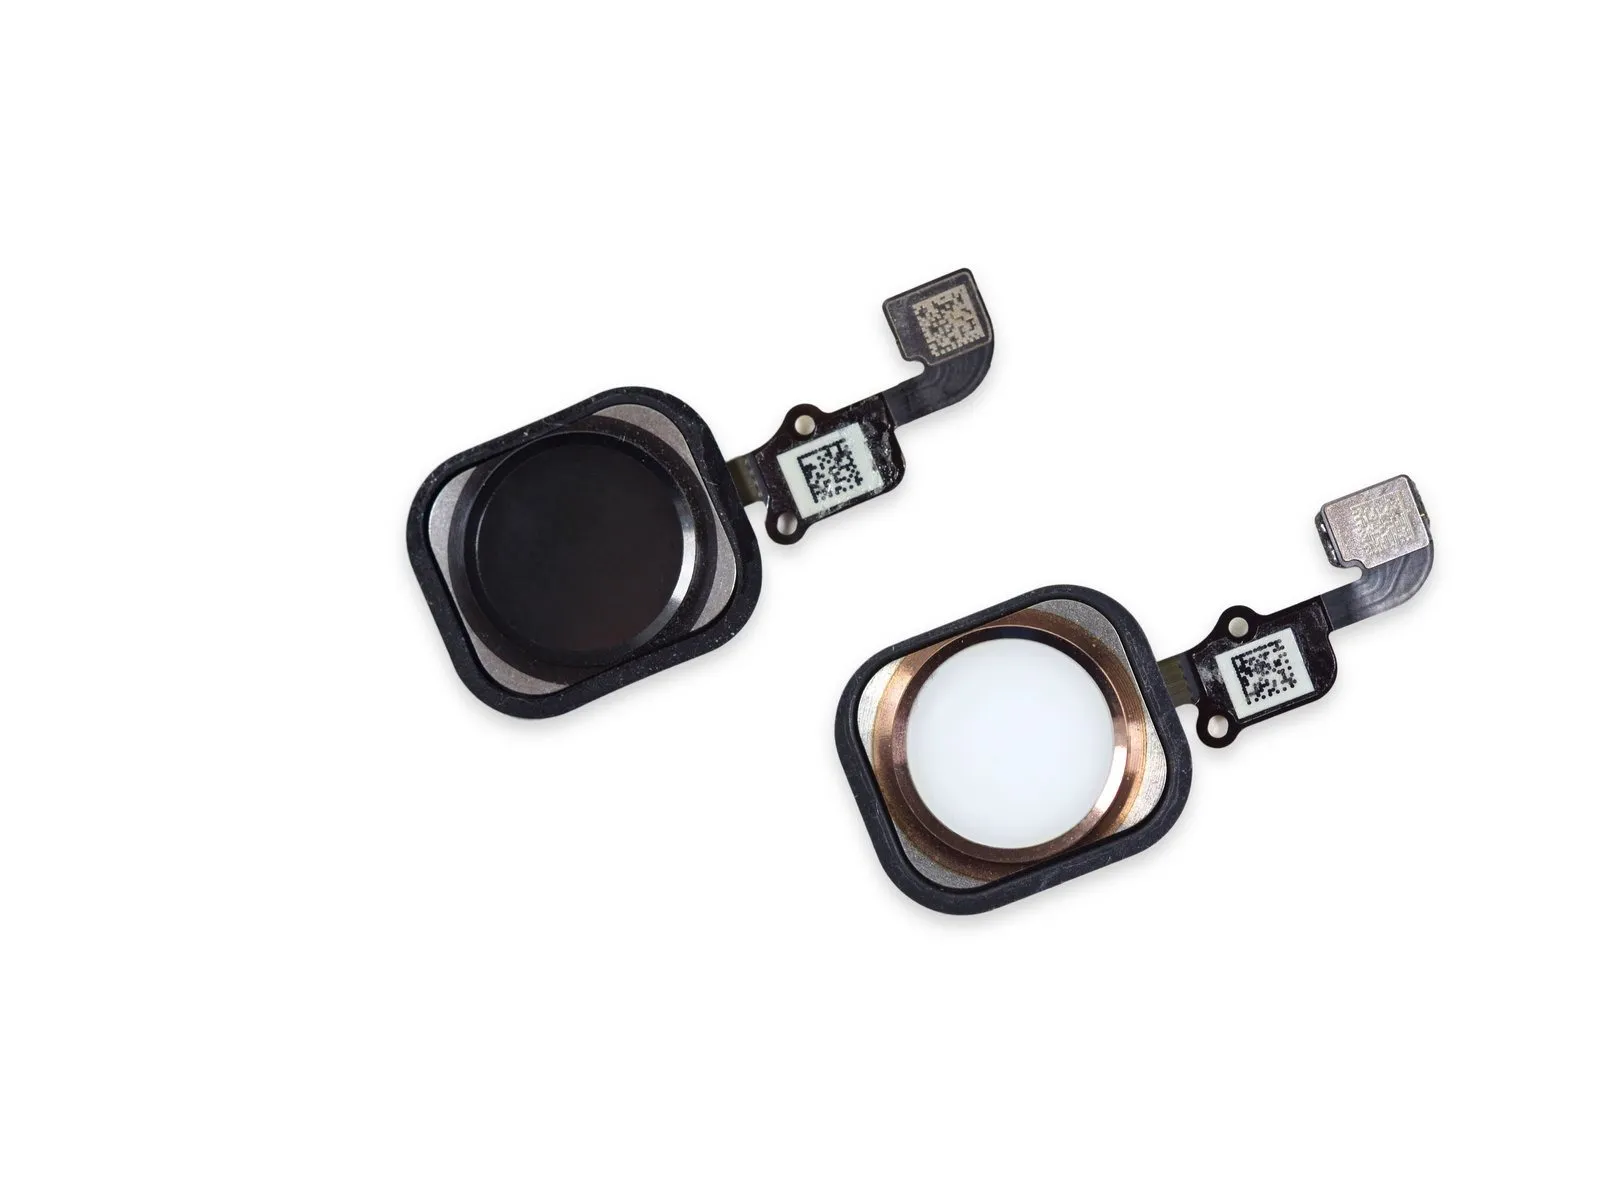
- The home button can be removed from its recess without difficulty; its design, lacking solder or adhesive, simplifies replacement if problems arise.
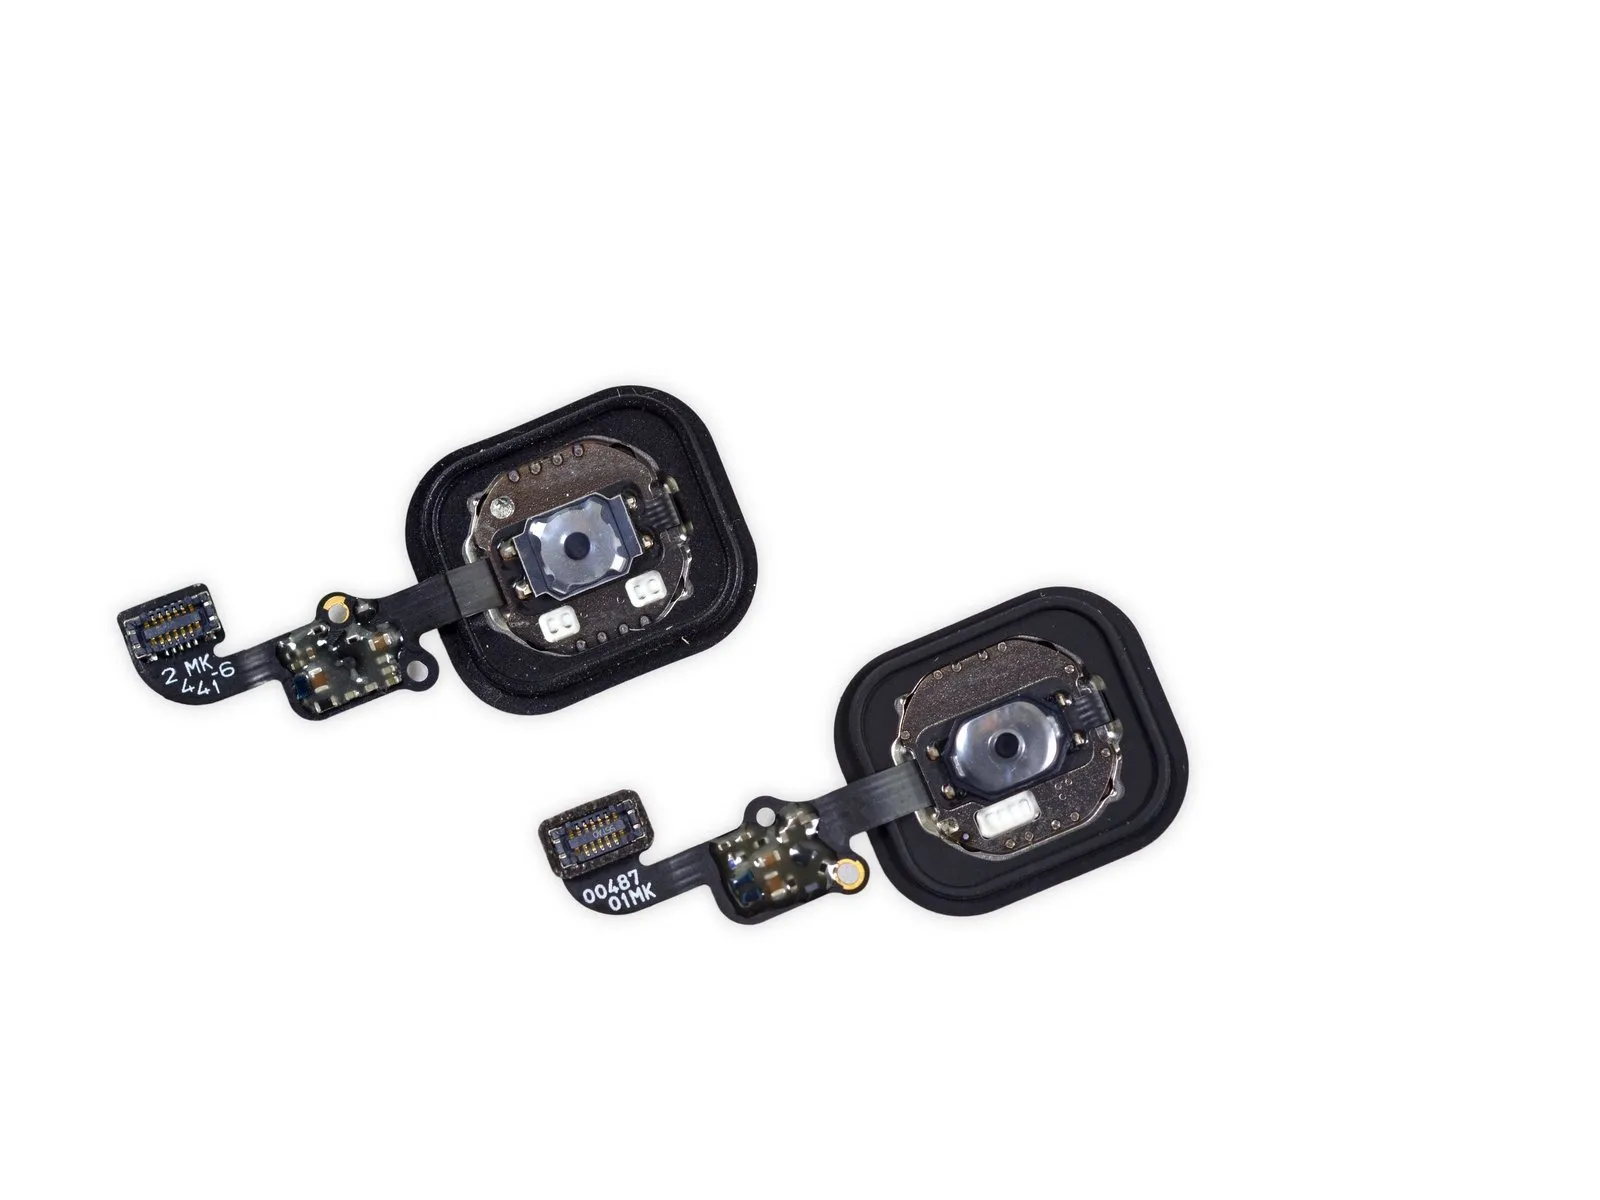
Step 11
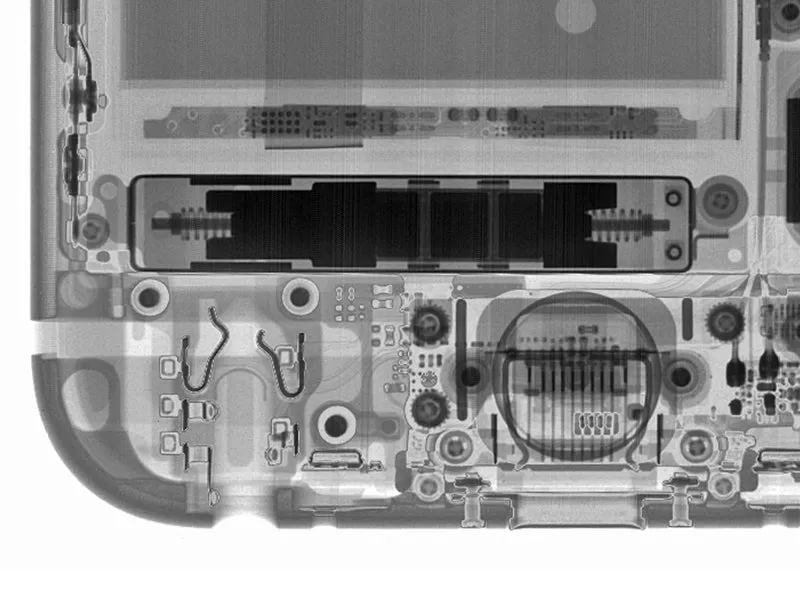
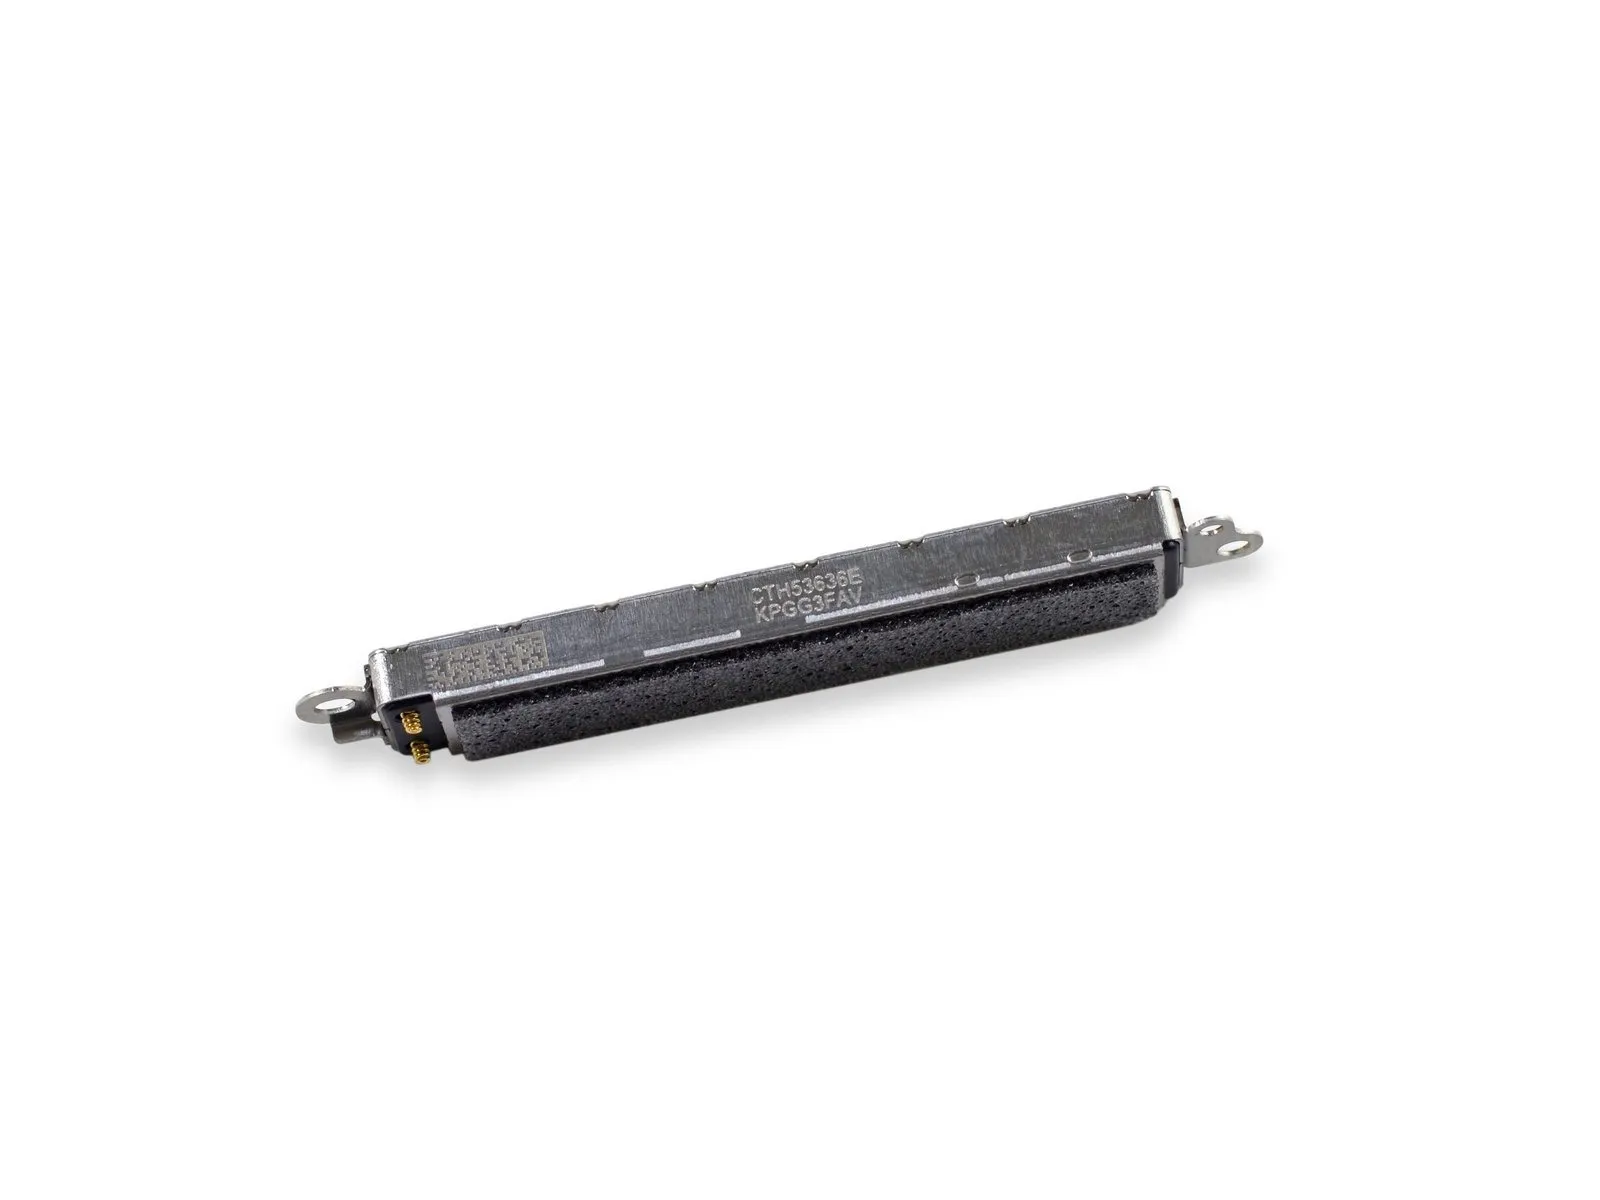
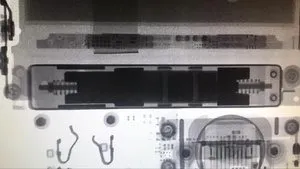
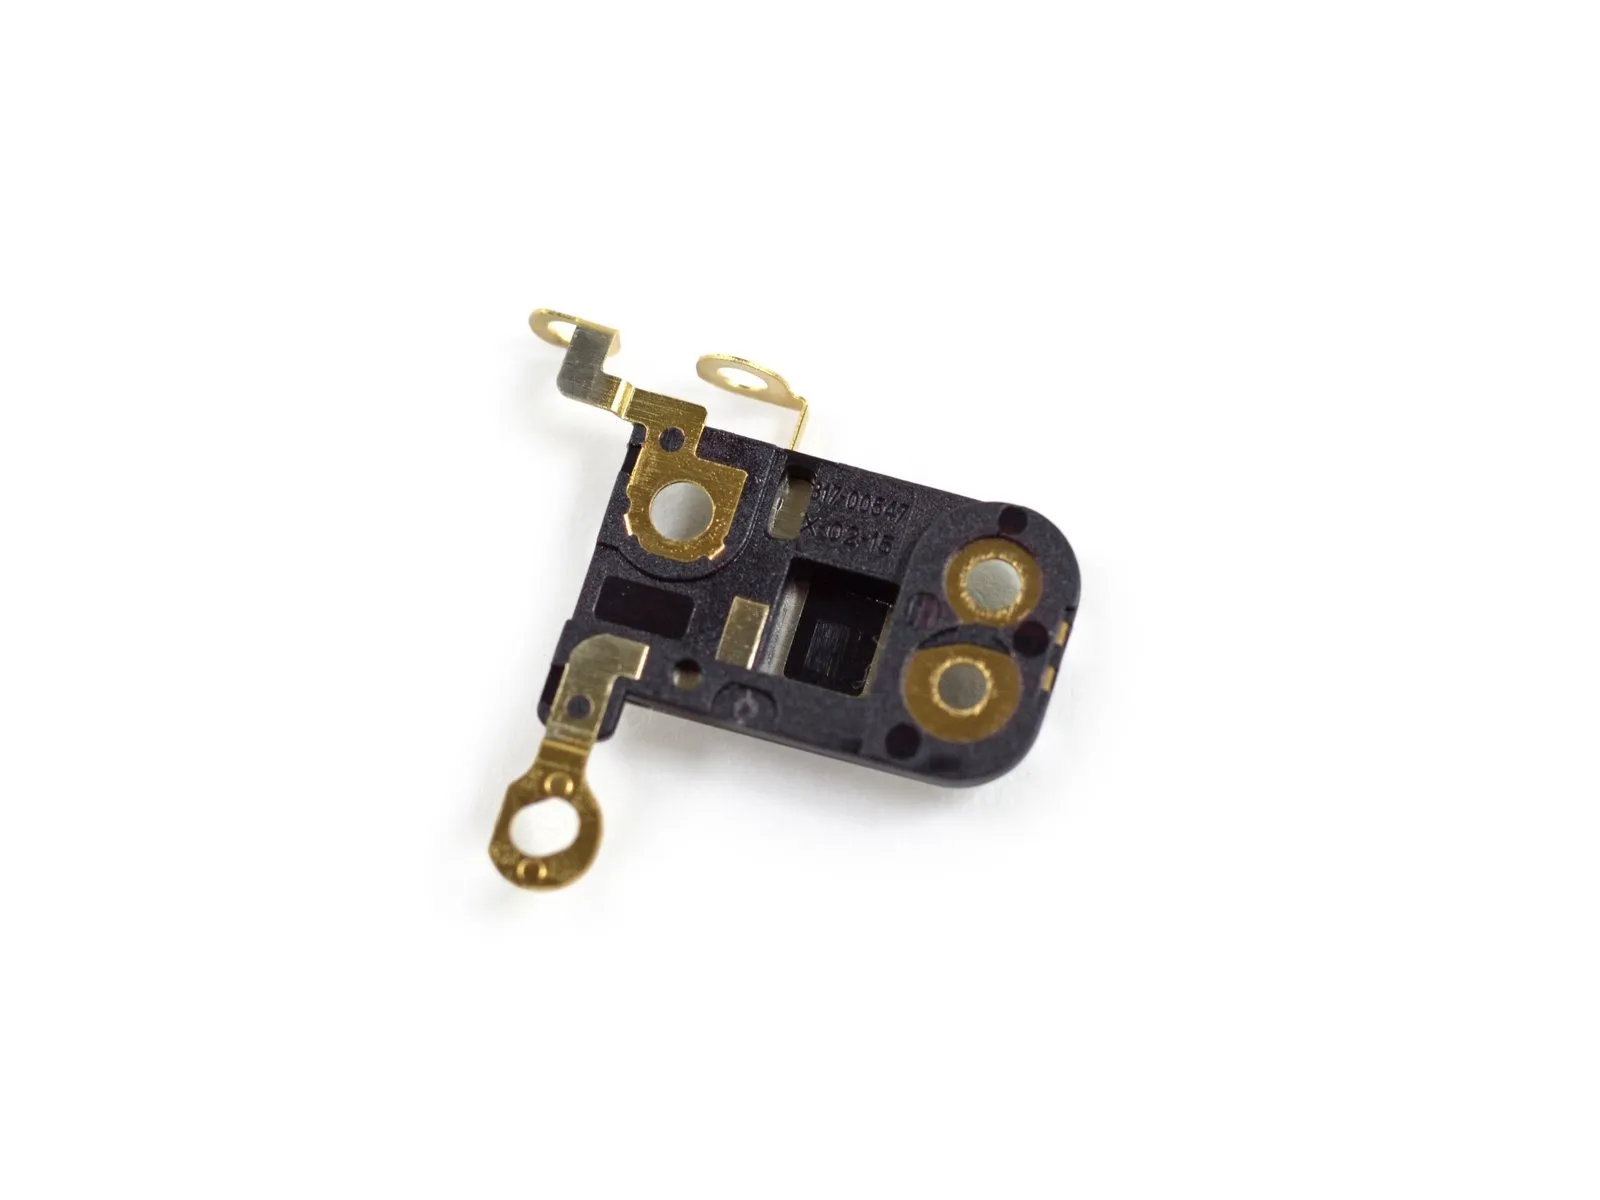
- Using X-ray imaging, observe the linear oscillating mechanism within the device; this mechanism achieves maximum output following a single oscillation.
After disassembly, the internal components visible include a few spring contacts, indecipherable markings, and a large label displaying the Apple logo.
Step 12
Step 13
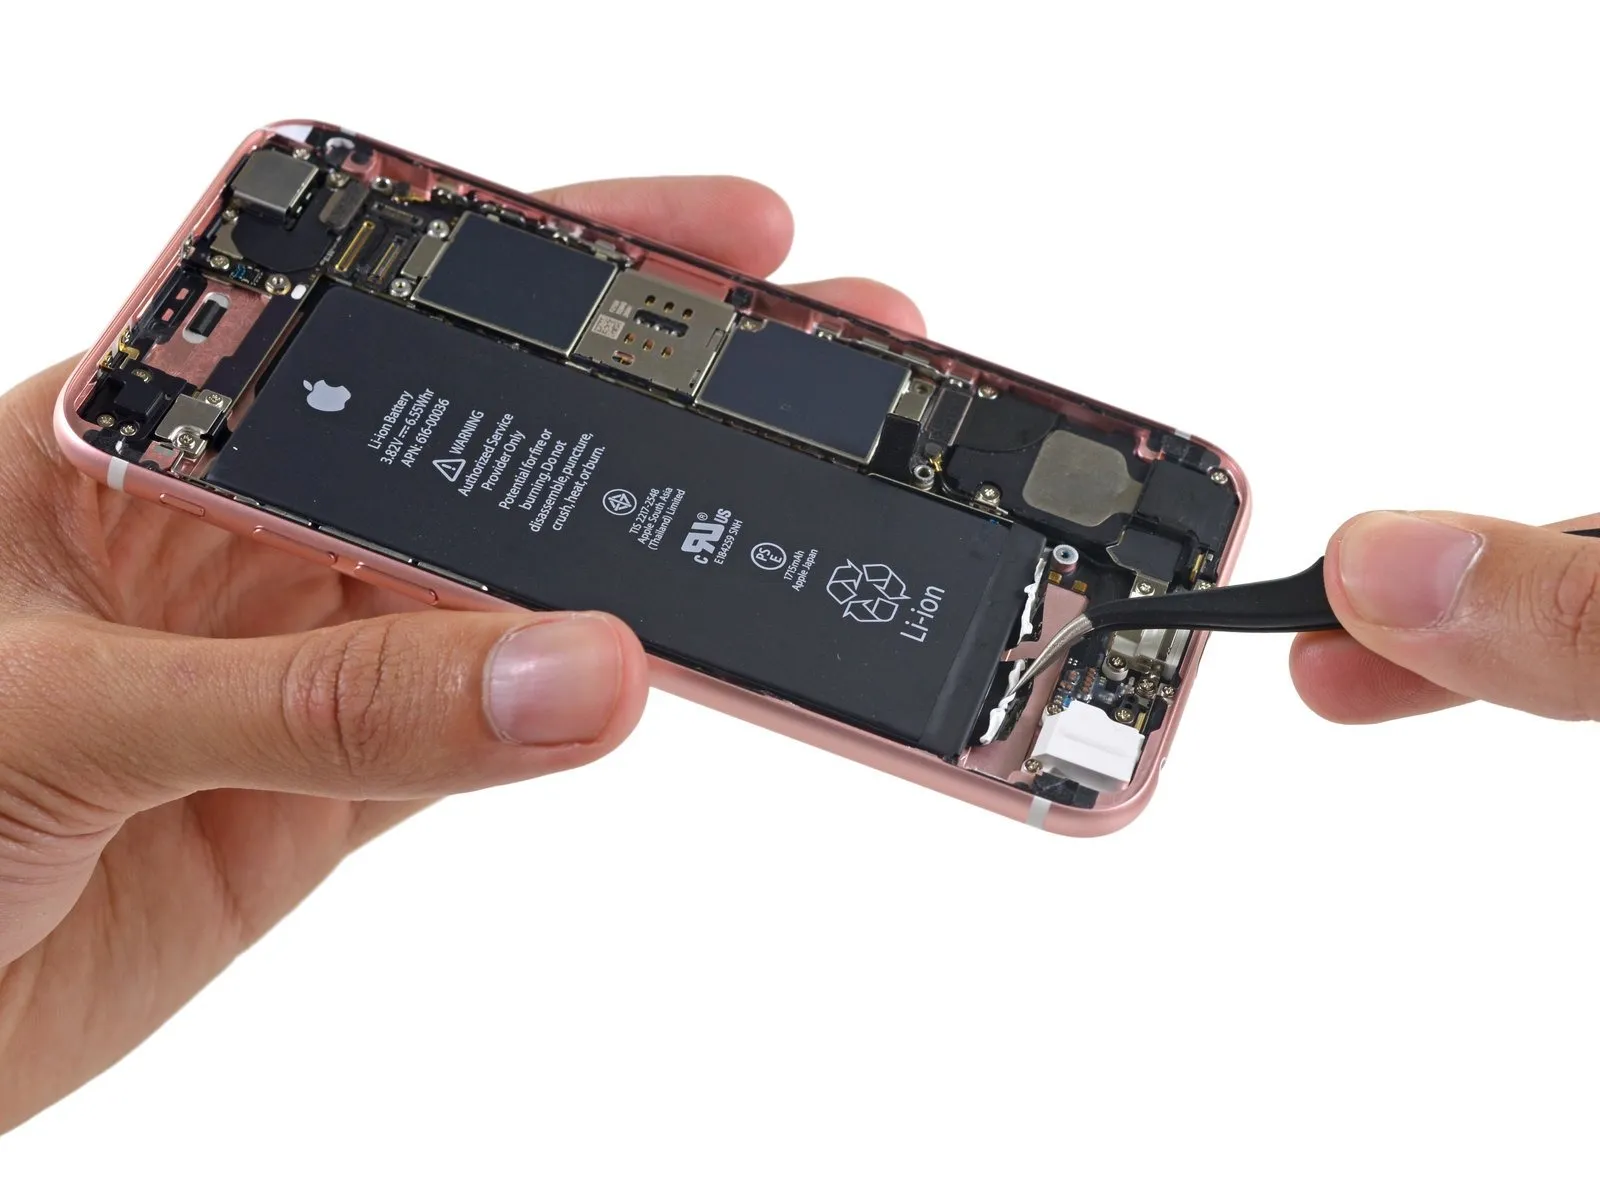
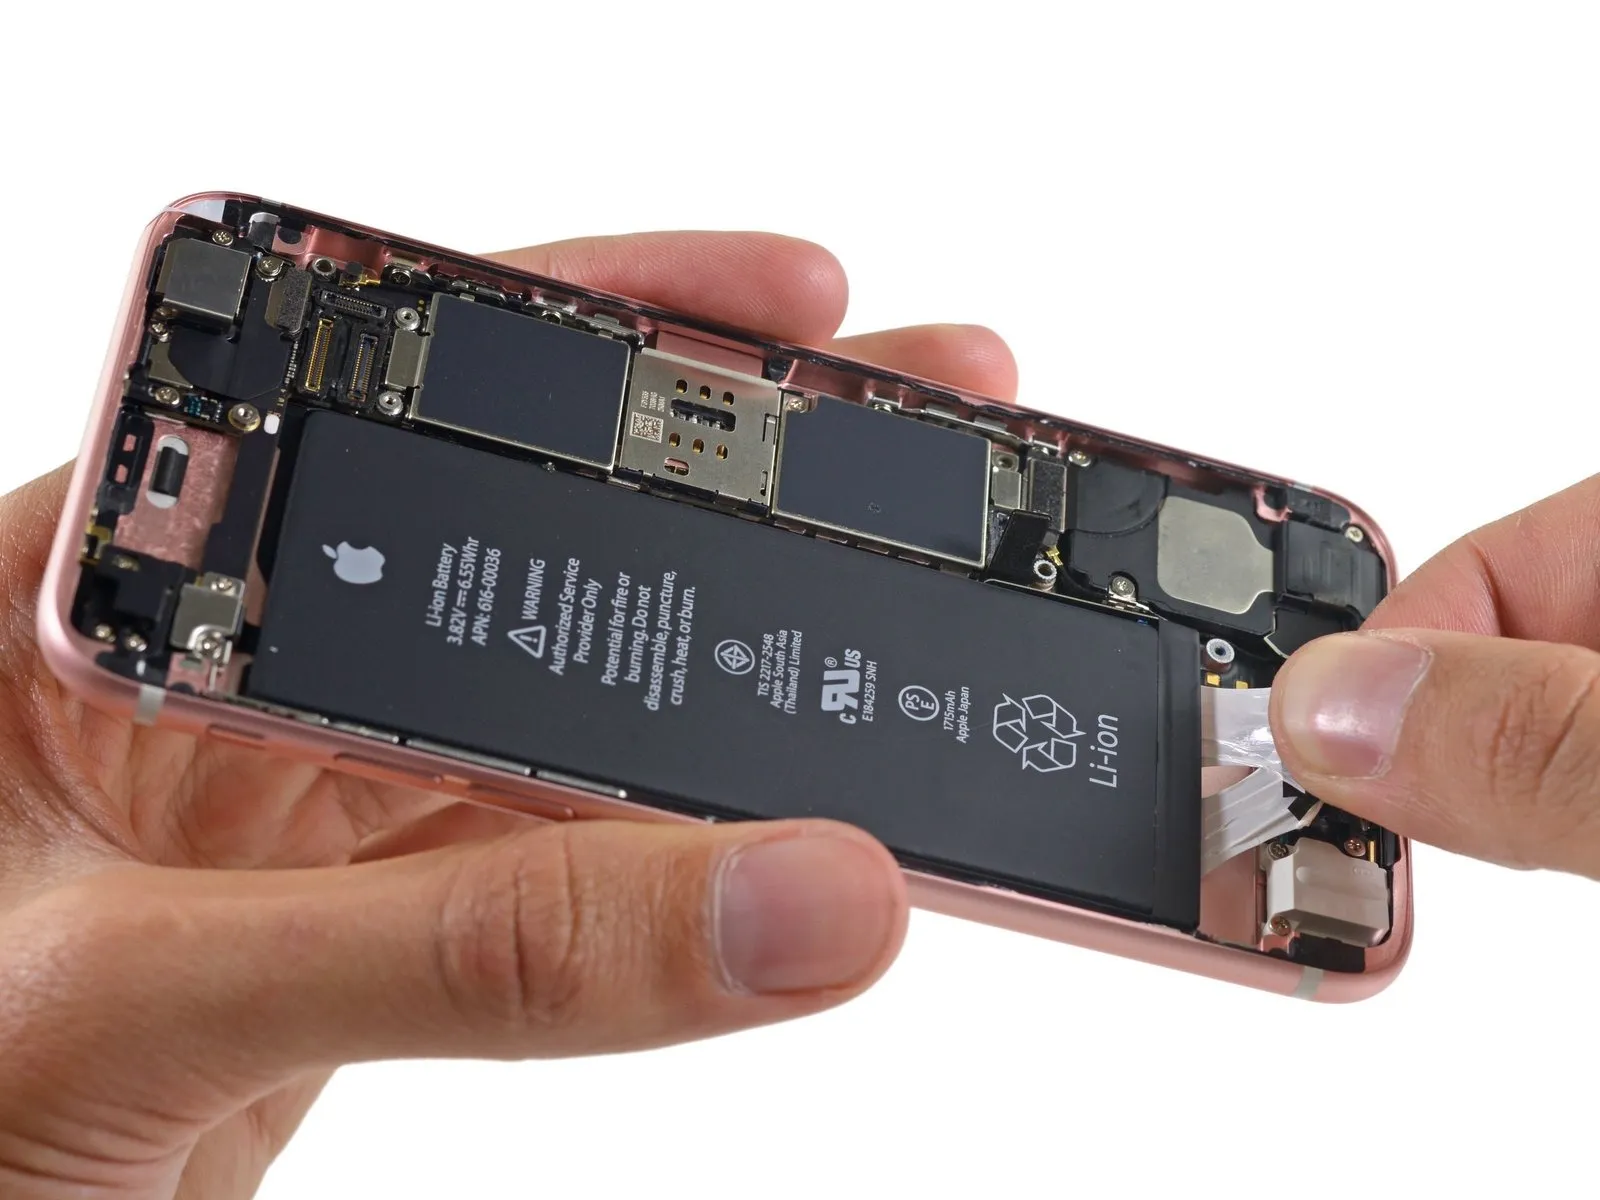
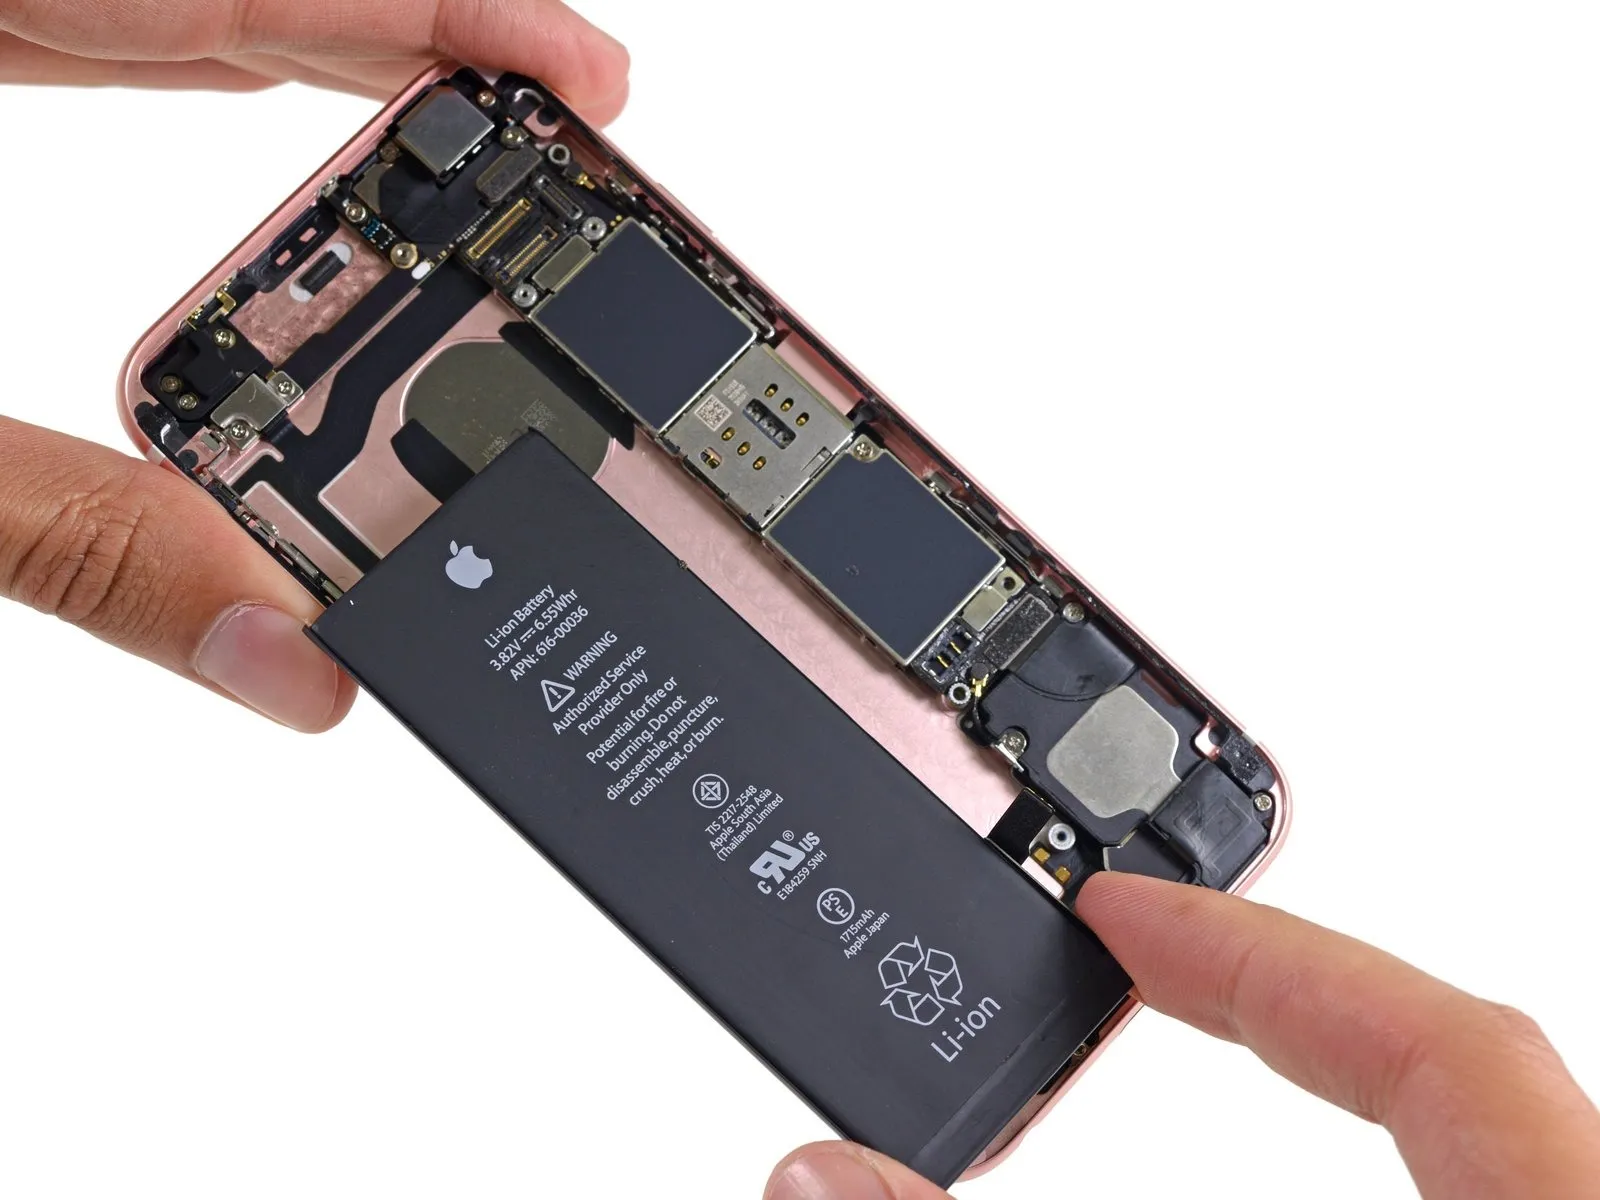
- The presence of battery adhesive pull tabs is beneficial for ease of removal, and their continued availability is desirable.
- Gently disengage the battery from its compartment with a firm, swift motion to allow for examination.
Step 14
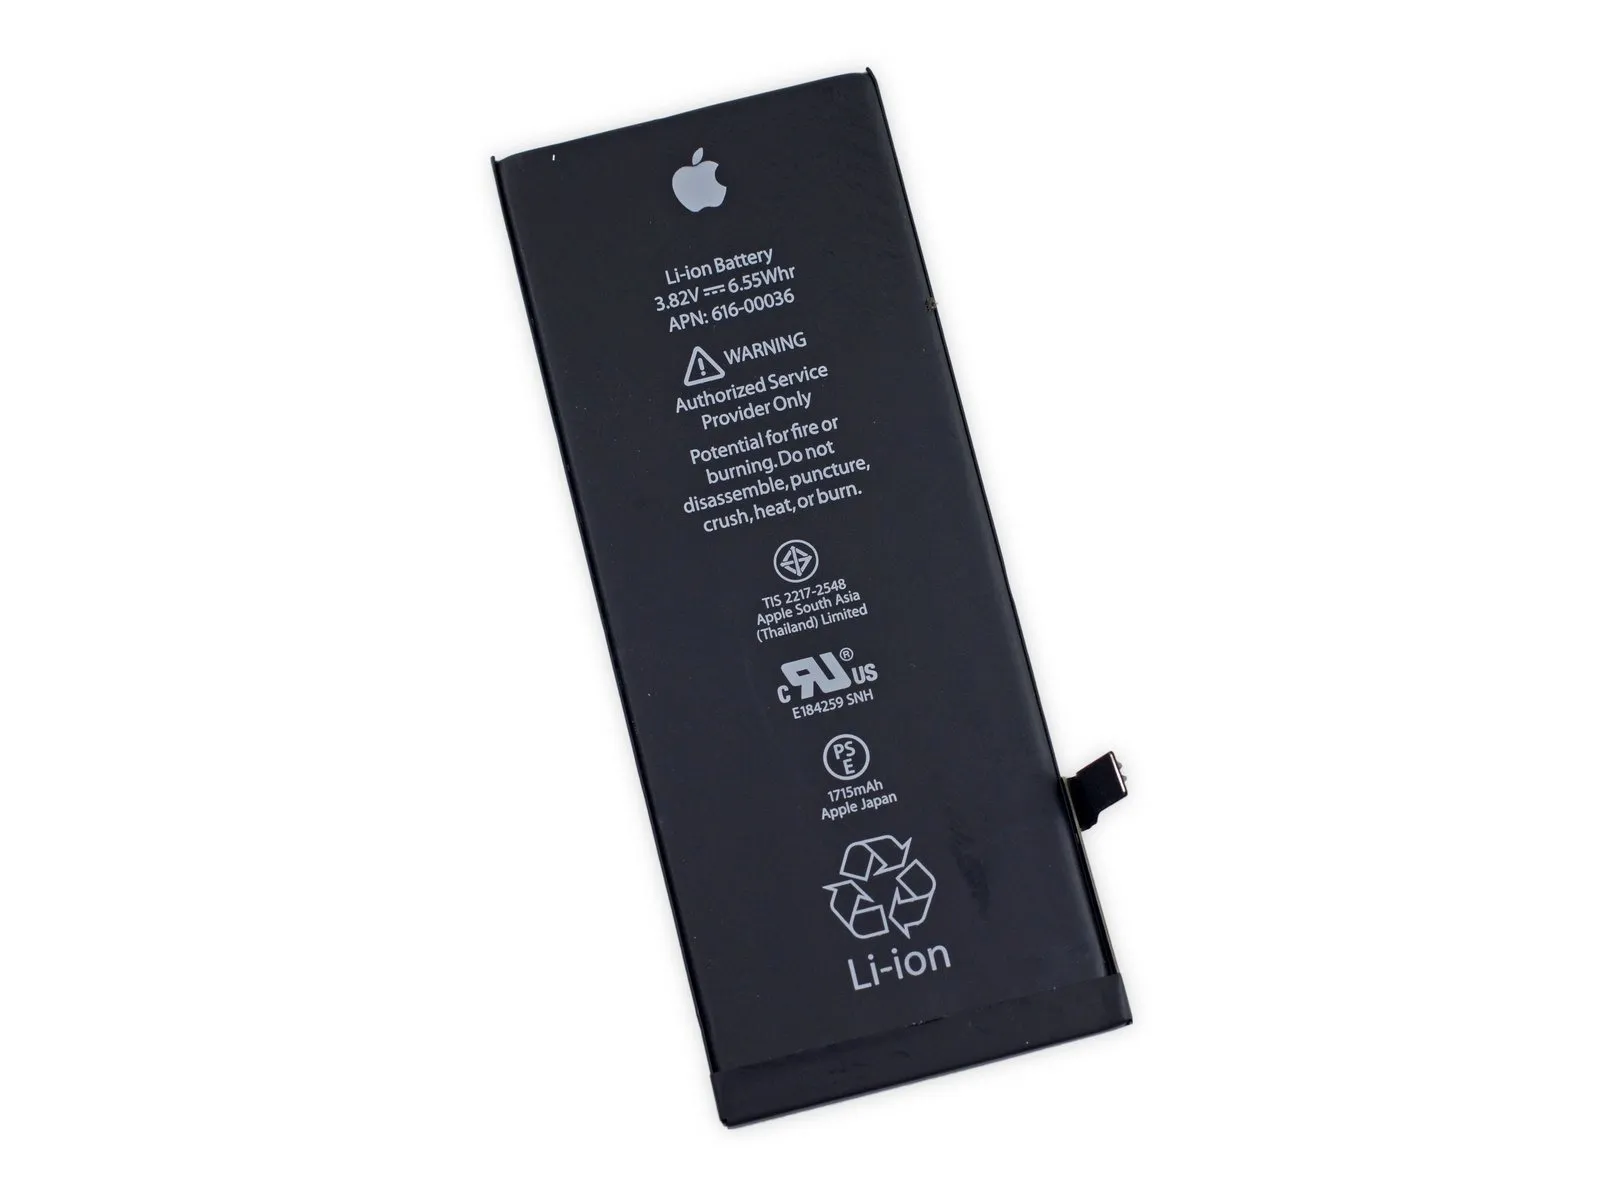
- Due to the integration of components such as the Taptic Engine and a marginally increased display thickness, the battery's capacity has been reduced.
- The battery assembly's dimensions are 12.5 x 8.2 x 3.1 inches.The required voltage is 3.8 volts.,Energy consumption is 6.55 watt-hours.Using a 5/32-inch hex key, carefully tighten the retaining screw to a torque of 6 in-lbs, ensuring the spindle aligns properly and avoiding over-tightening which could damage the threads.The battery capacity is 1715 milliampere-hours.The reduction is slight, but still significant.The battery capacity is 1810 milliampere-hours.Replace the battery in the iPhone 6 model released one year ago.
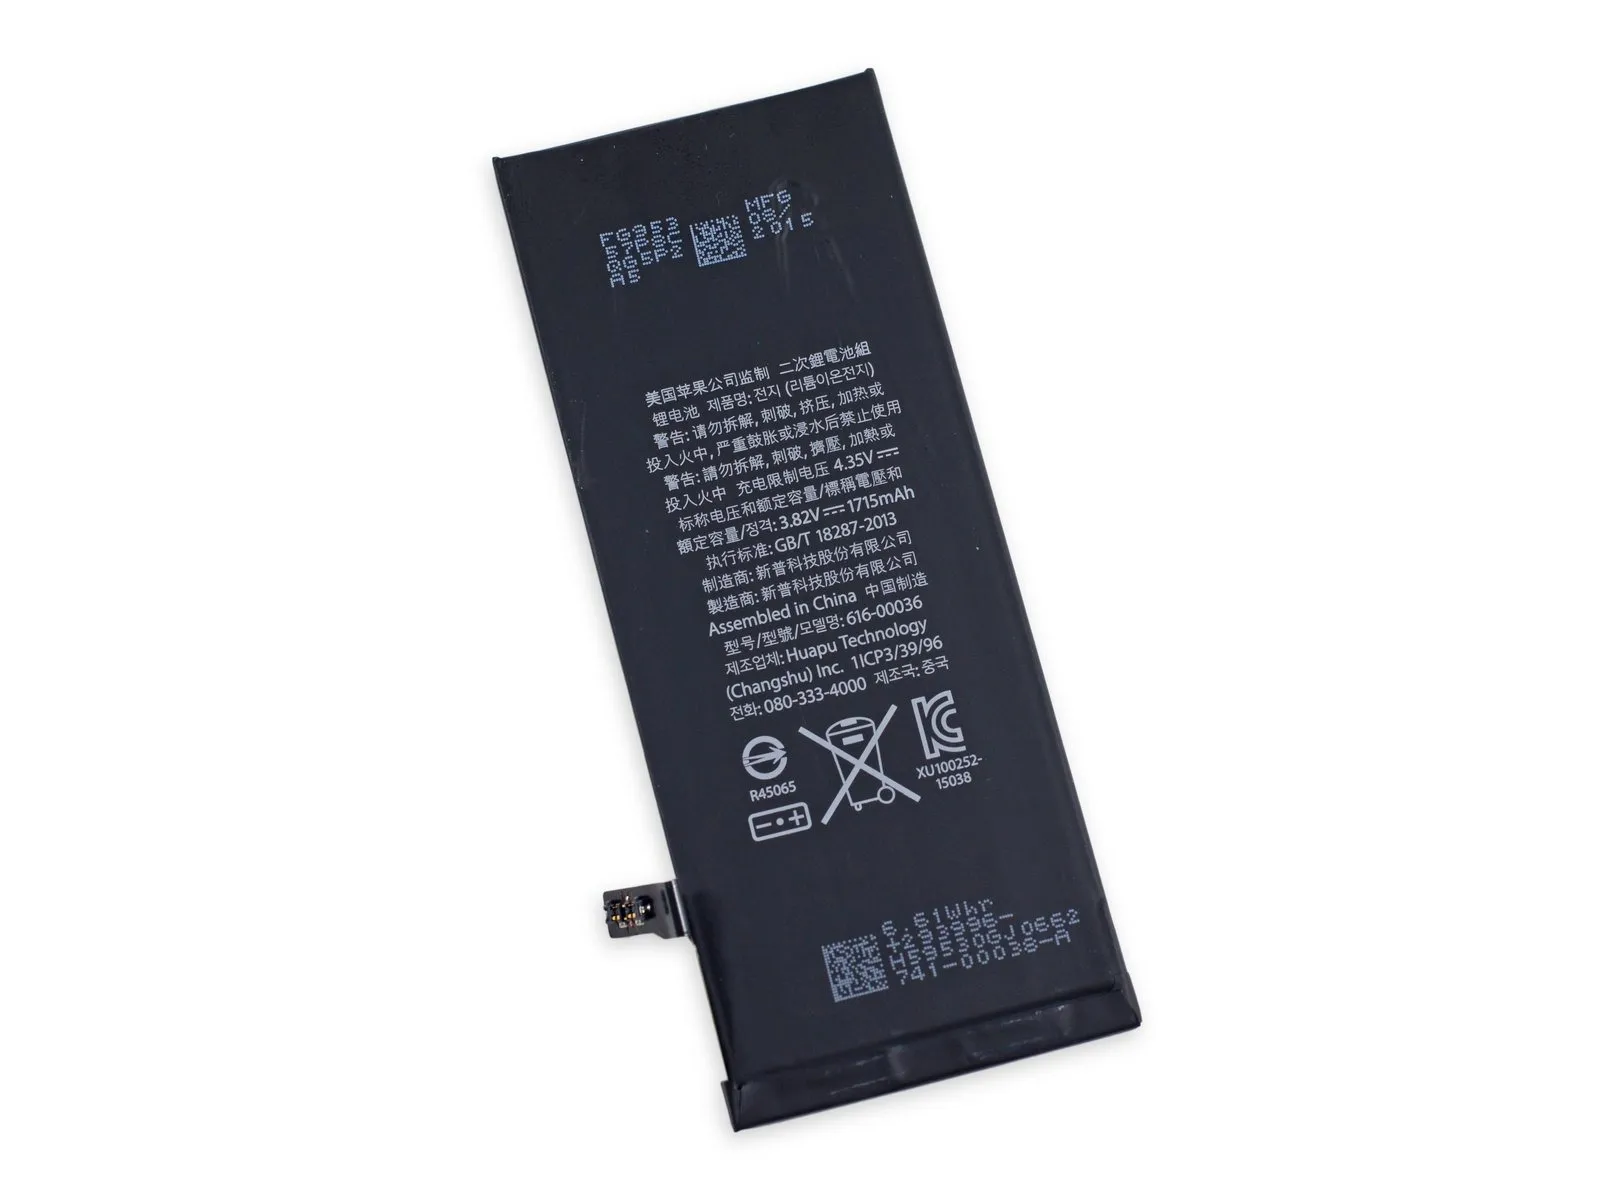
- The iPhone's battery incorrectly reports its origin as Apple South Asia (Thailand) Limited, Apple Japan, and indicates a manufacturing location of Changsu, China, mirroring the identification problems observed in previous models.
- According to Apple's specifications, the device maintains a maximum battery runtime of up to the stated duration.The device offers up to 14 hours of operational time when used for 3G cellular calls.Employ a suitable wrench to tighten the fastener to a torque of 15 Nm, ensuring the use of appropriate safety glasses and gloves while handling the component.The device can remain in a low-power, inactive state for up to 10 days.The design closely mirrors that of the iPhone 6, a change likely attributable to advancements in the underlying semiconductor technology, which warrants further examination.
Step 15
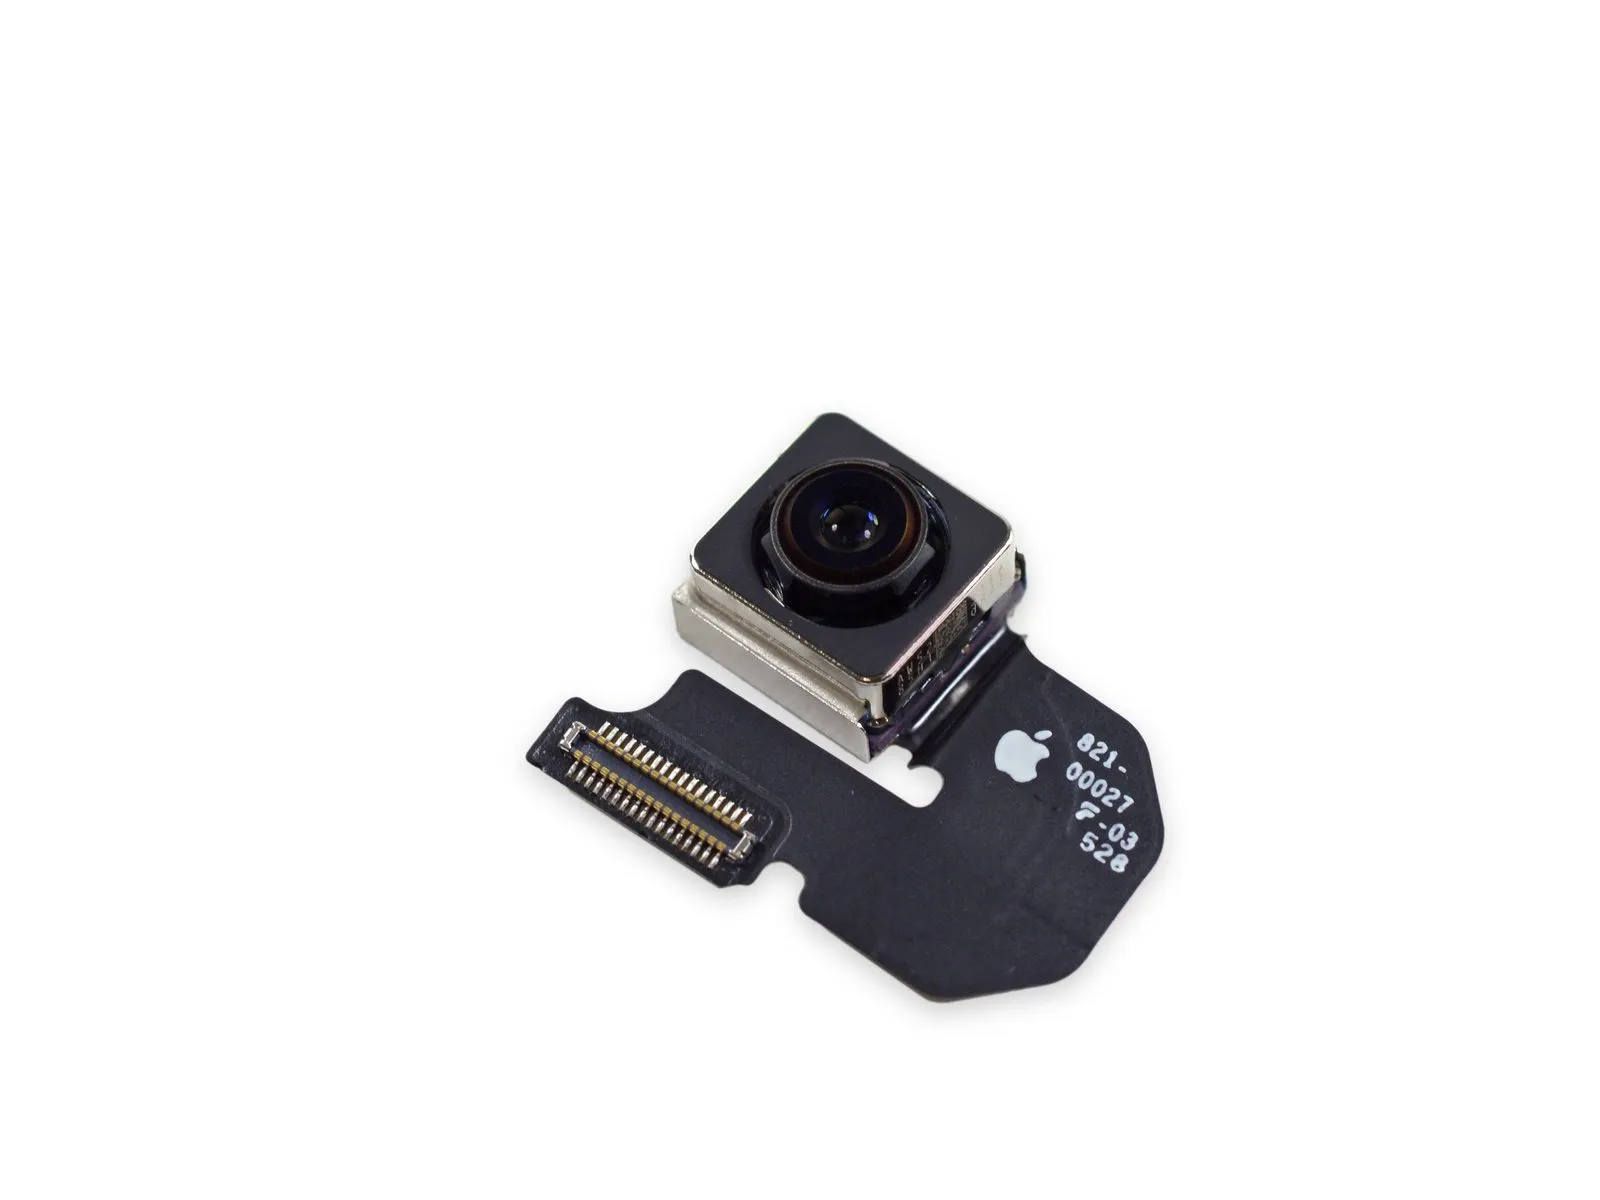
- Carefully remove the iPhone'sA 12-megapixel camera module.!
- The latest camera model features significantly improved technical specifications compared to its predecessor.6The display boasts a significant upgrade, marking the first time resolution has been improved since the iPhone 4s.
- Employing a 50% increase in focus pixels yields quicker and more precise autofocus performance while maintaining the existing image quality standards.
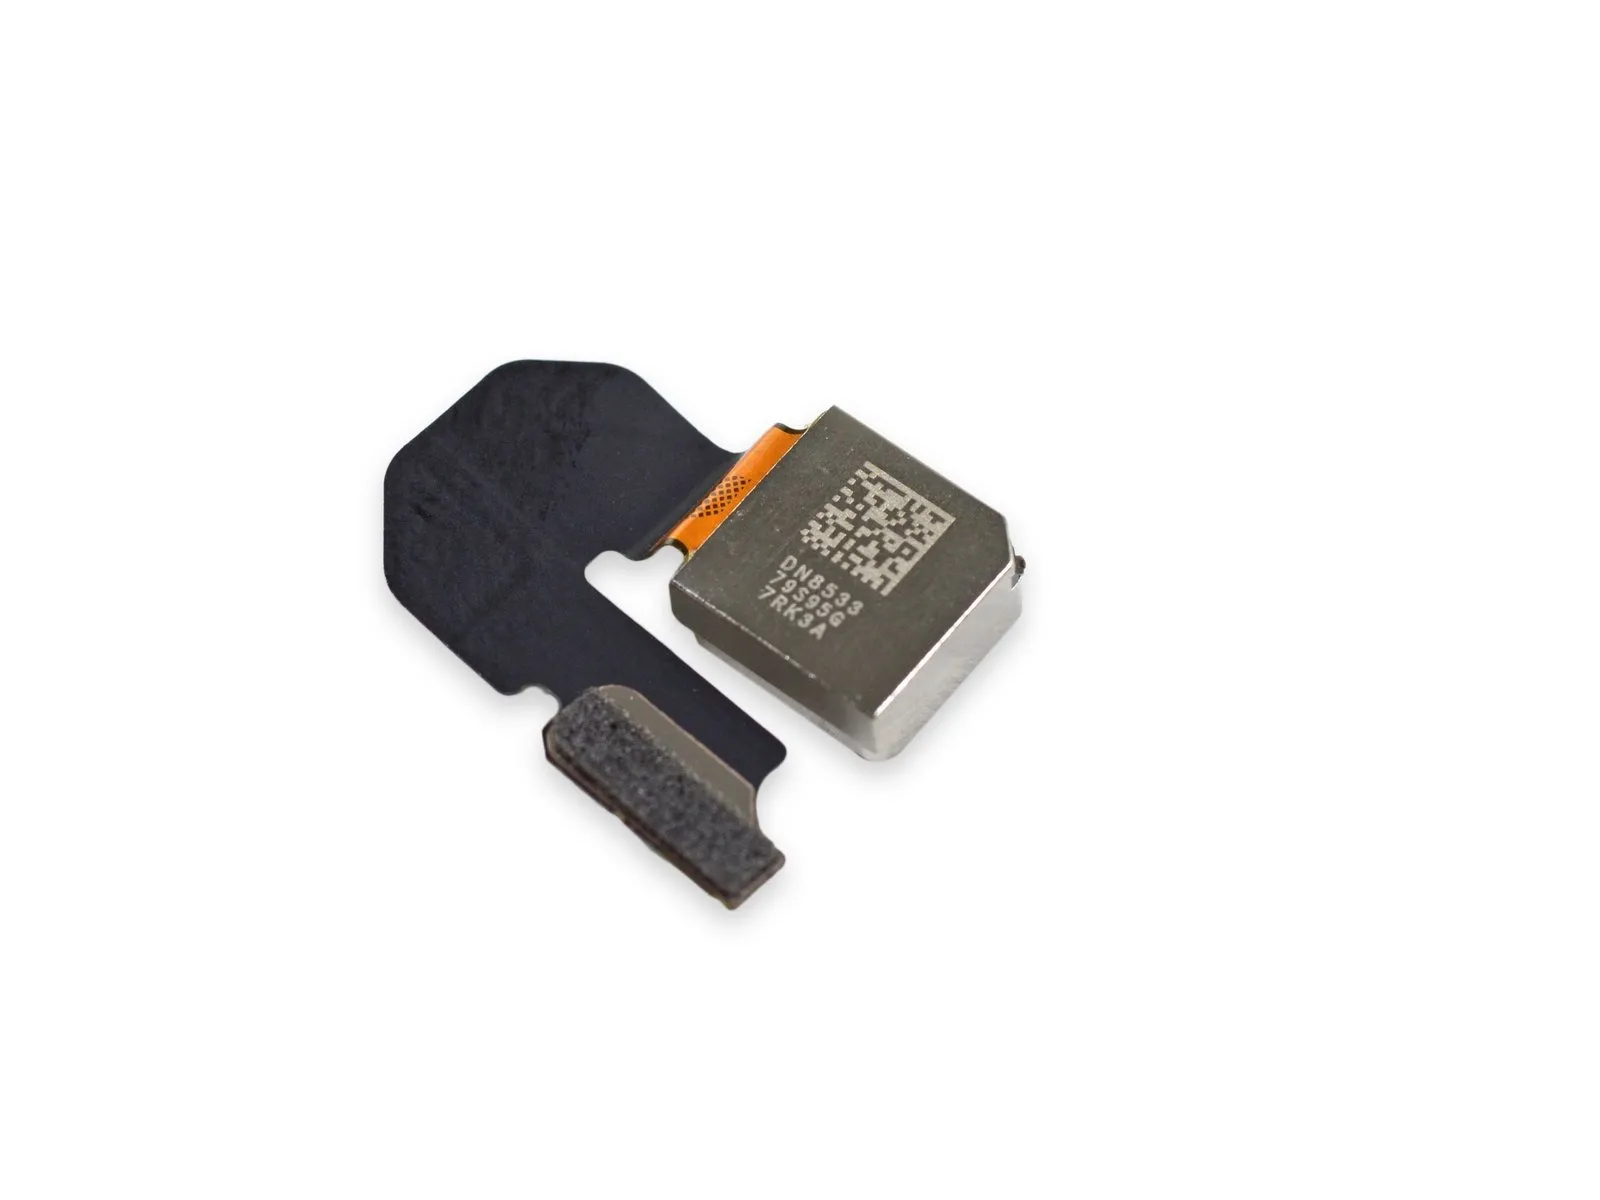
- The iPhone now features an iSight camera, enabling its use in photography.Capture video footage at a resolution of 3840 x 2160 pixels.Previously, this market was largely controlled by devices running the Android operating system.
- Although a higher pixel count can sometimes reduce the clarity of each pixel because of interference between adjacent photodiodes, the updated iSight camera incorporates advanced techniques to lessen this effect.
- To prevent current leakage between closely spaced photodiodes, Deep Trench Isolation—the creation of electrically insulating grooves—is incorporated into the sensor's design.
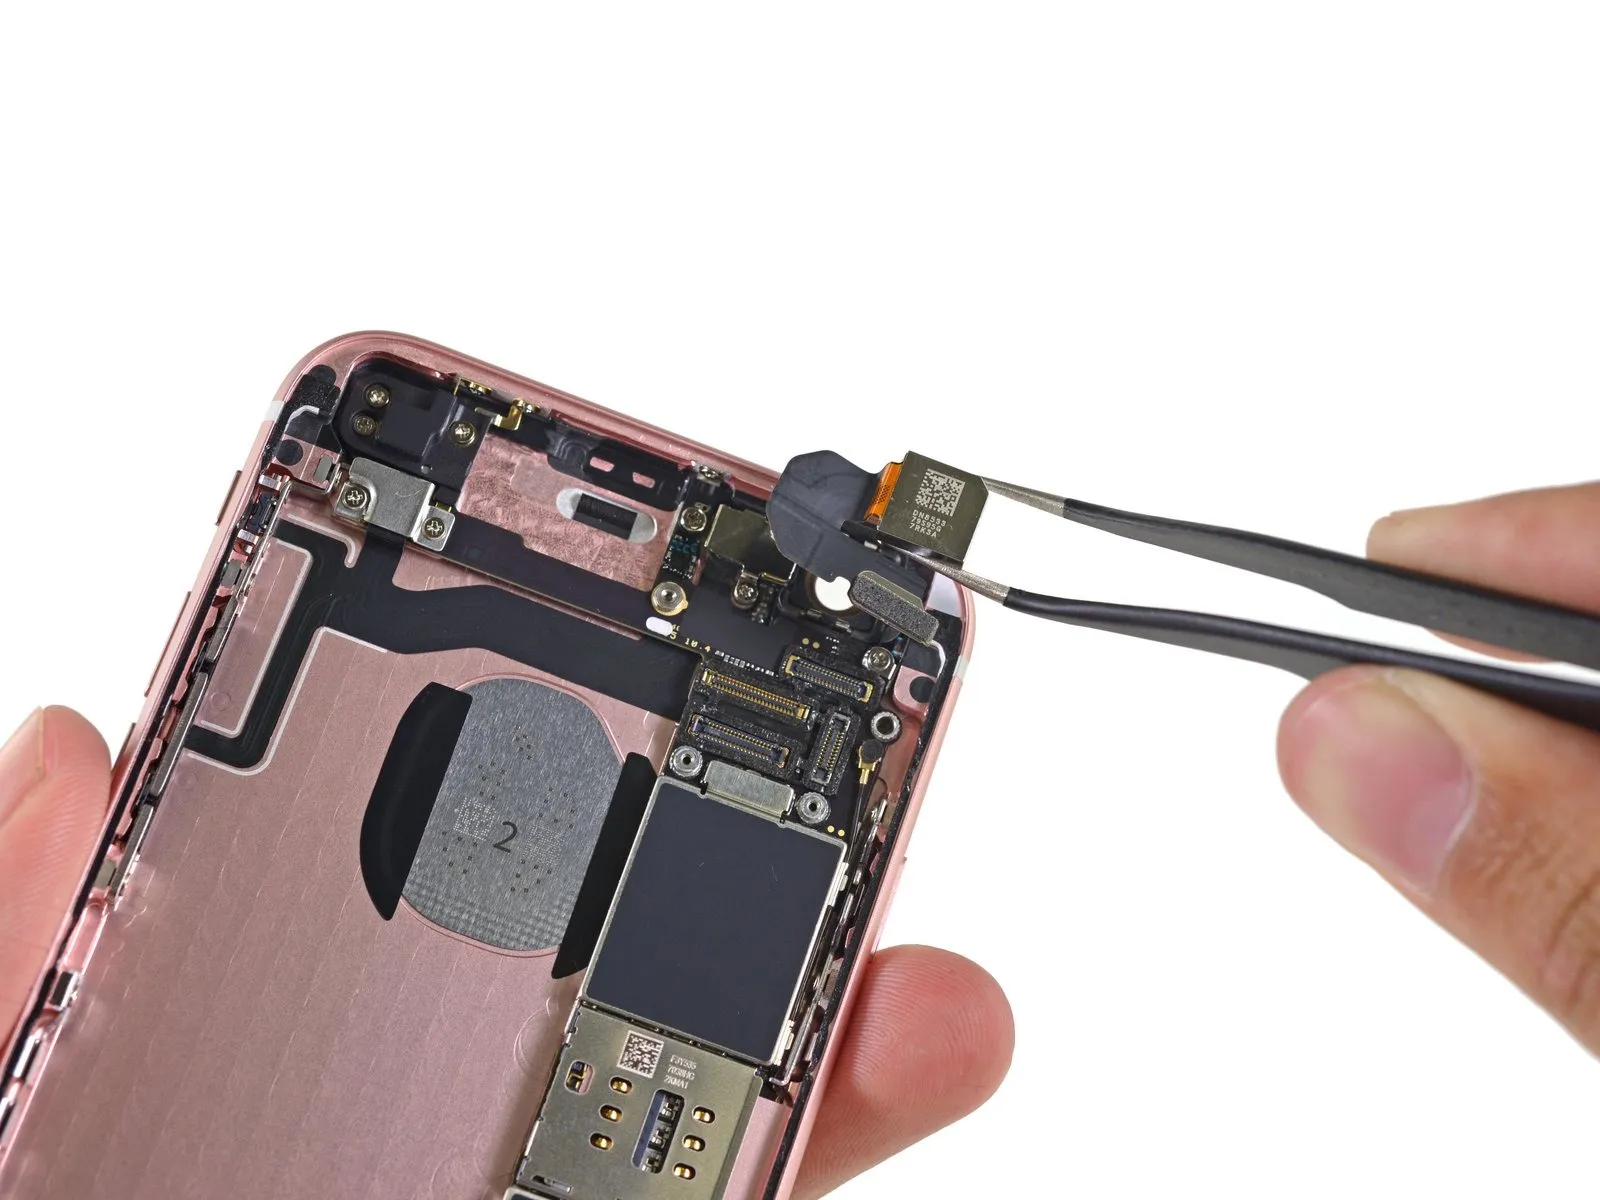
Step 16
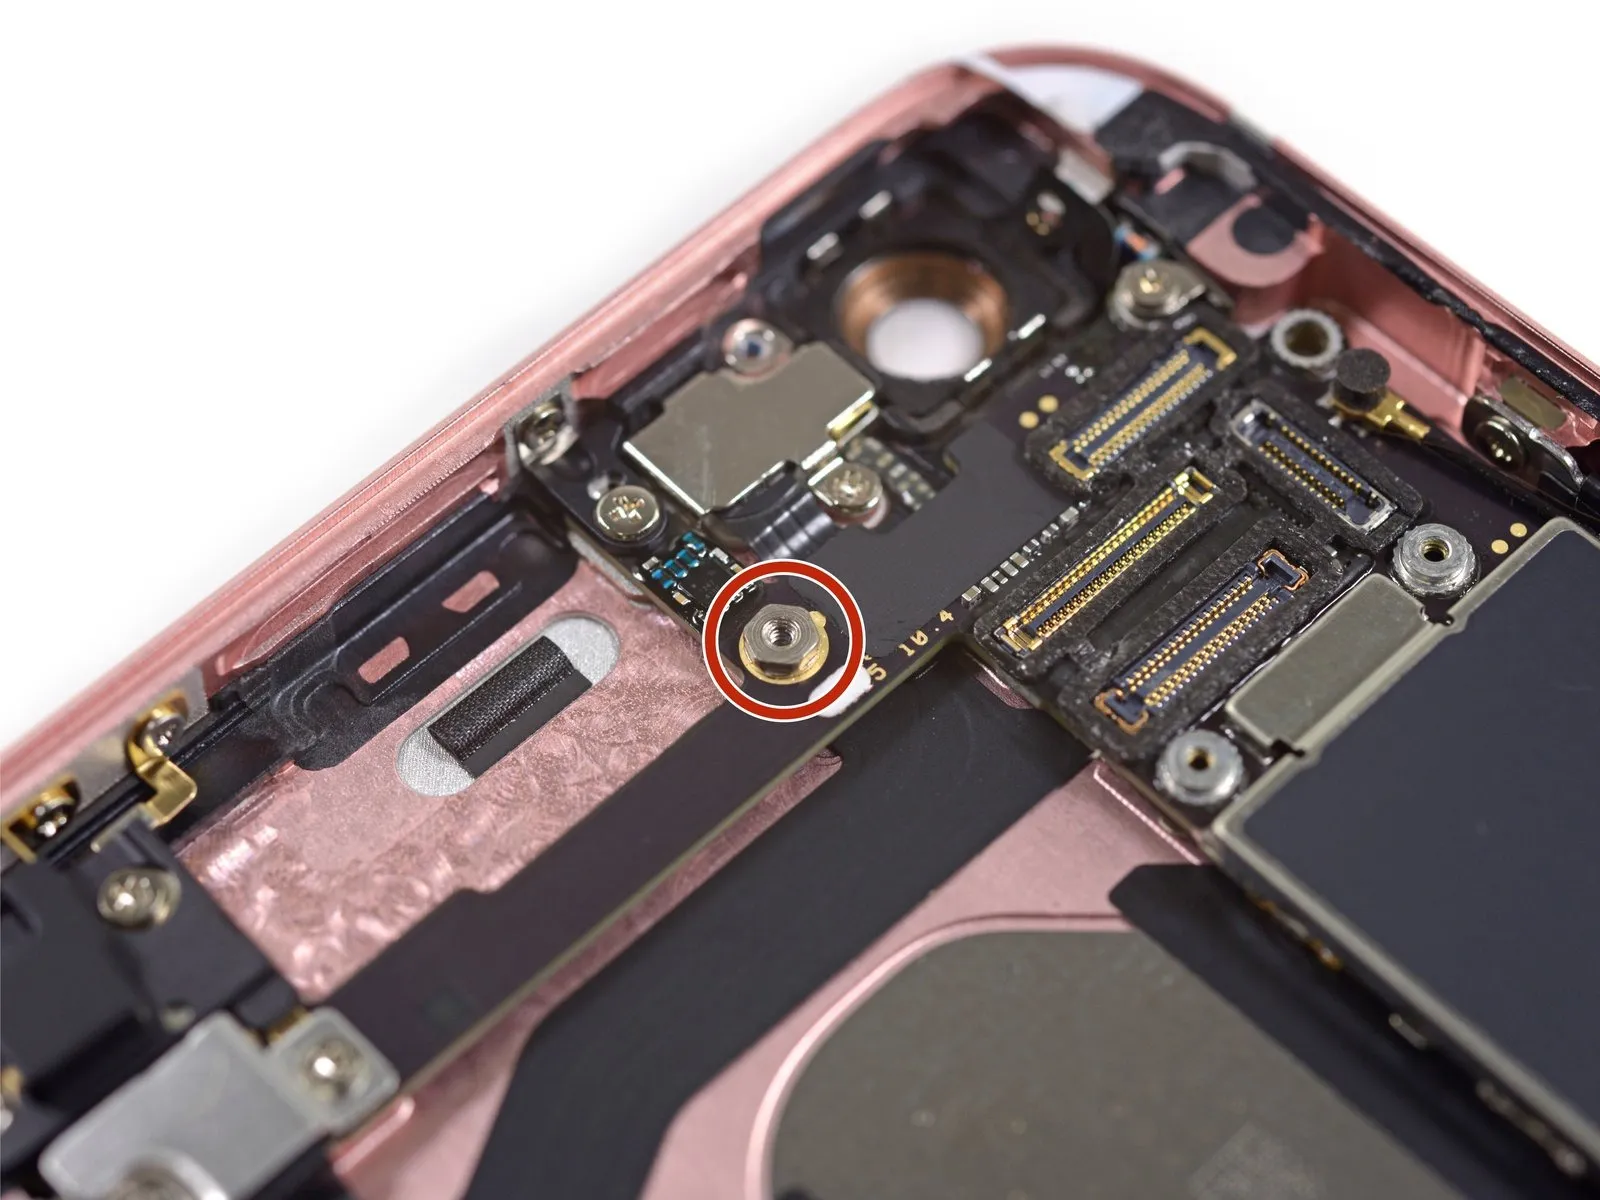
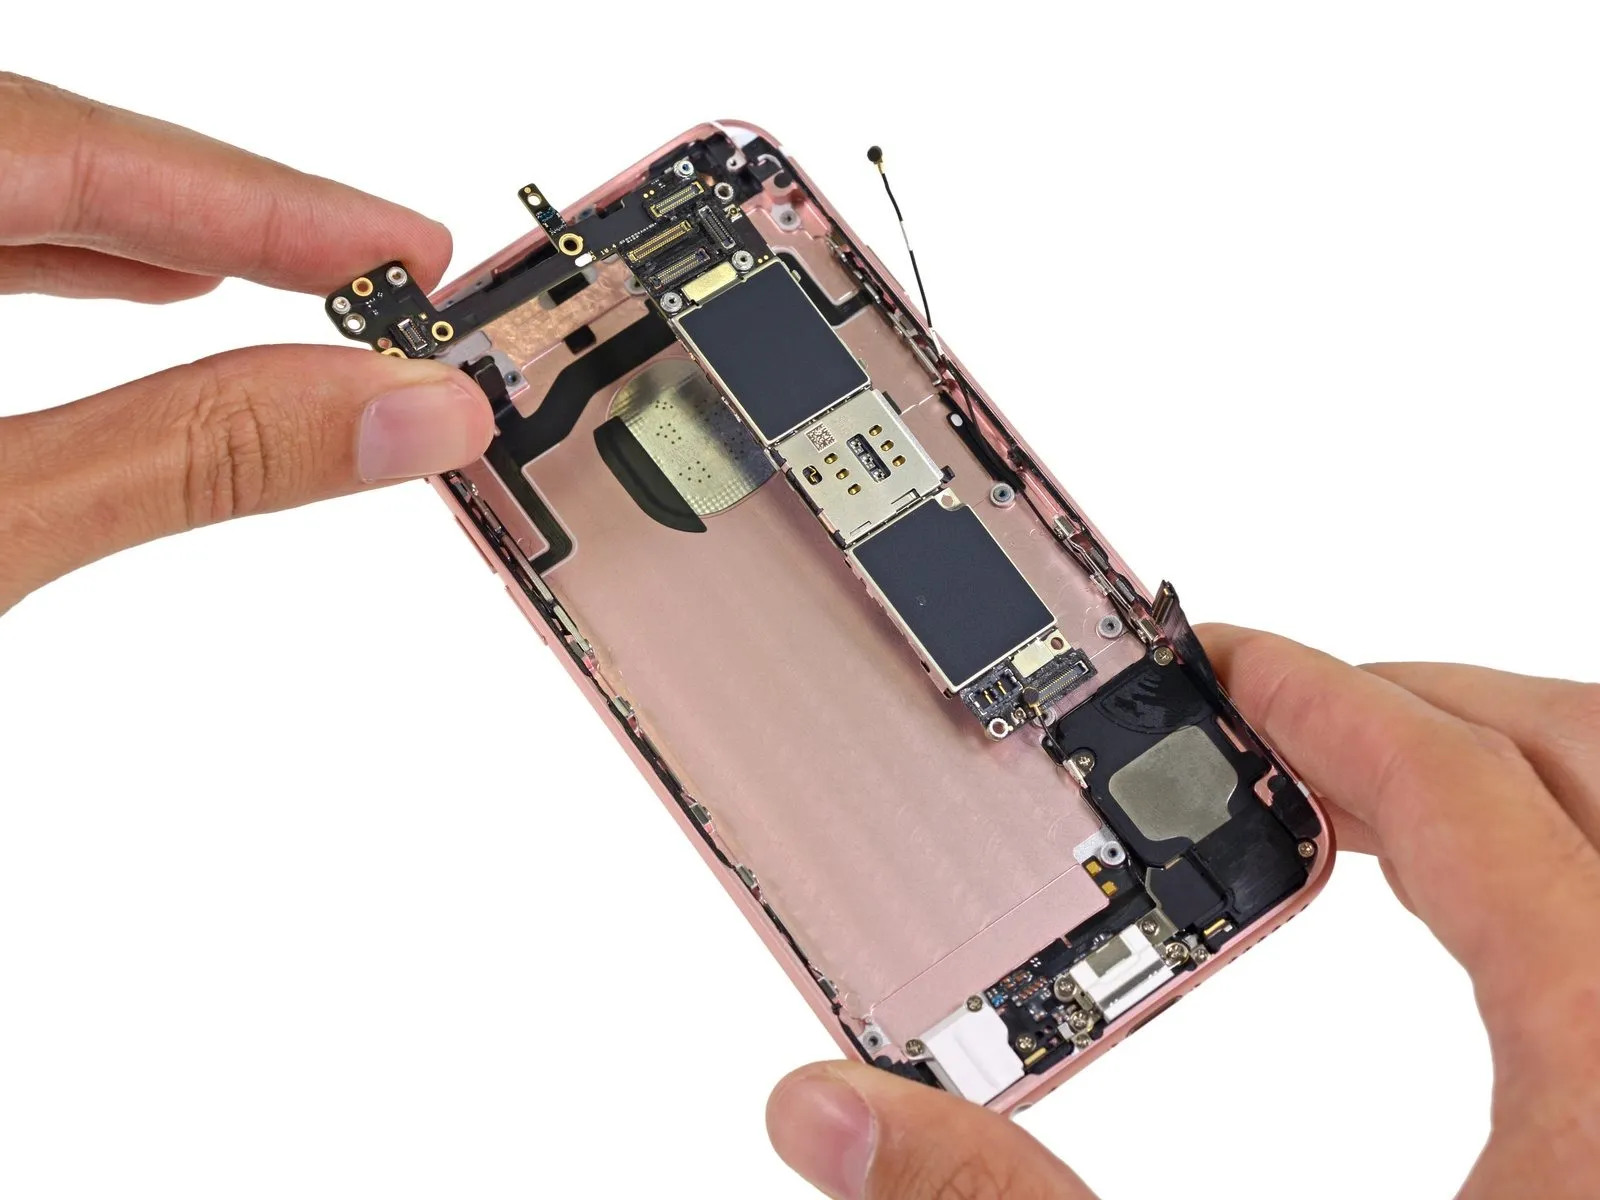
- Proceed with caution as you encounter an unusual component.Use a 2.5-millimeter hex key.Replace the conventional standoff screw with its alternative. Incorporate a new tool into your smartphone repair kit to access the antenna assembly, previously featured in earlier designs.
Step 17
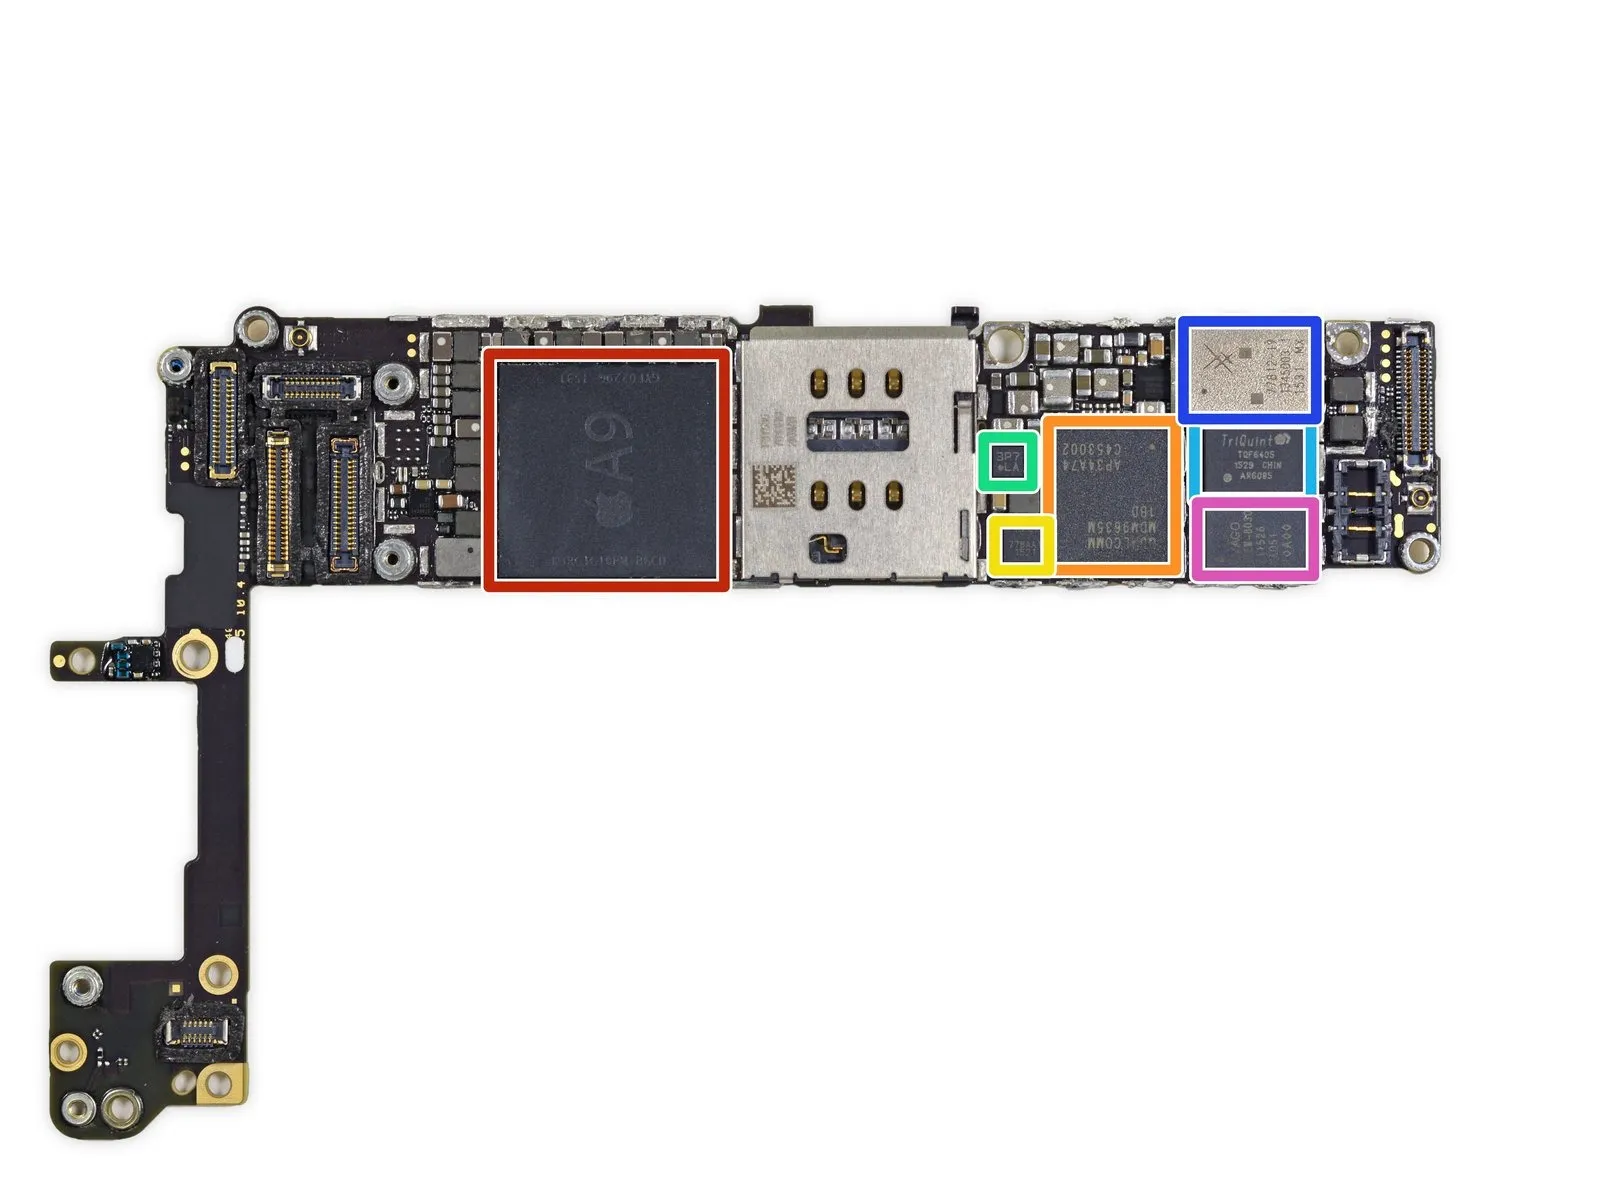
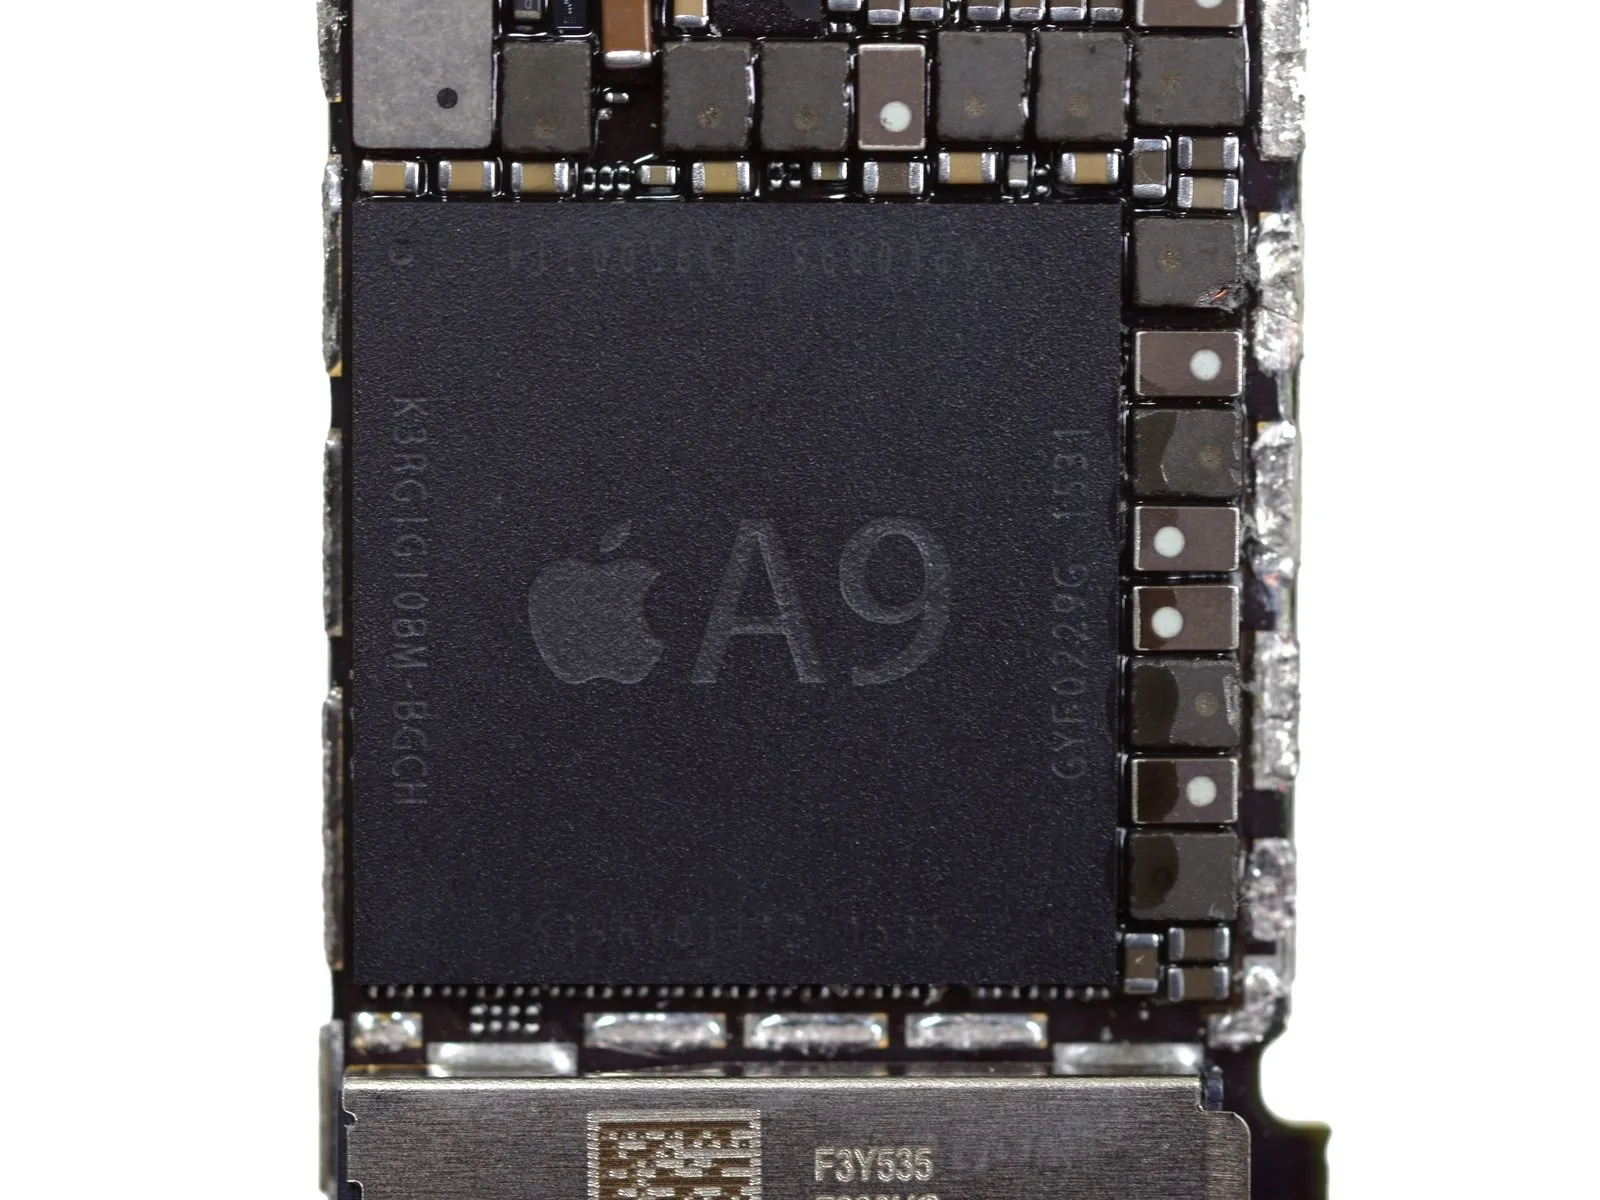
- Using appropriate safety precautions, carefully inspect the device for any visible damage and then verify its functionality according to Apple's established testing procedures.The system-on-a-chip is designated A9 APL0898.The memory module is a Samsung component, identified by the part number K3RG1G10BM-BGCH, and has a capacity of 2 gigabytes, utilizing the LPDDR4 standard.
- QualcommLTE Category 6 modem, model MDM9635M.The MDM9625M chip, as utilized in the iPhone 6, differs.
- Utilize components manufactured by InvenSense.The MP67B integrates a gyroscope and accelerometer into a single 6-axis device.Using a P2 Pentalobe screwdriver, secure the battery connector to the logic board by tightening the 3.6 mm screw located directly beneath it, a procedure also employed when servicing an iPhone 6.
- Bosch SensortecThe 3P7 is a three-axis accelerometer.Carefully position the BMA280 sensor, ensuring its mounting surface is level and within tolerance of ±0.1mm, then secure it with the provided M2 screws, applying a torque of 4.5 Nm to each fastener, and observe the caution regarding electrostatic discharge during handling.
- TriQuint's TQF6405 is a power amplifier module.
- The SKY77812 is a Power Amplifier Module manufactured by Skyworks.
- Avago’s AFEM-8030 is a power amplifier module.
Step 18
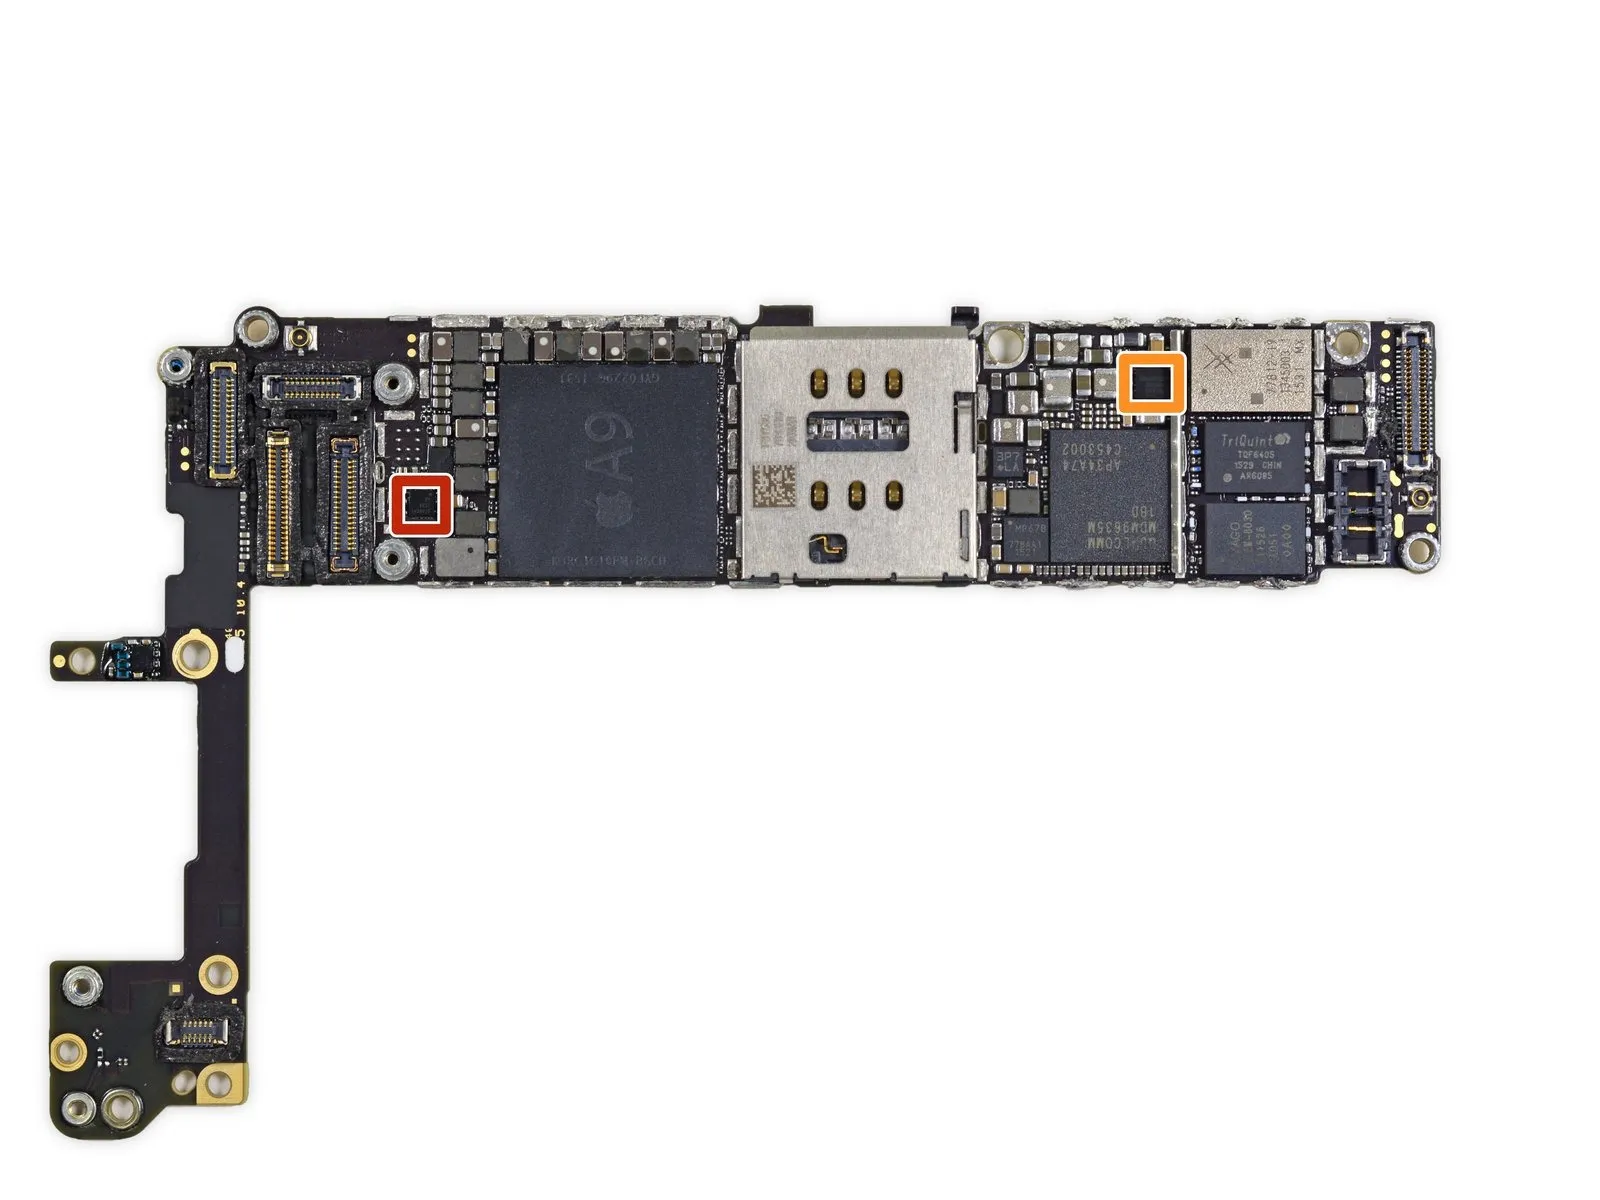
- Using a 5mm hex key, torque the 57A6CVI to 2.5 Nm.
- The device is a Qualcomm QFE1100 integrated circuit used for envelope tracking.
Step 19
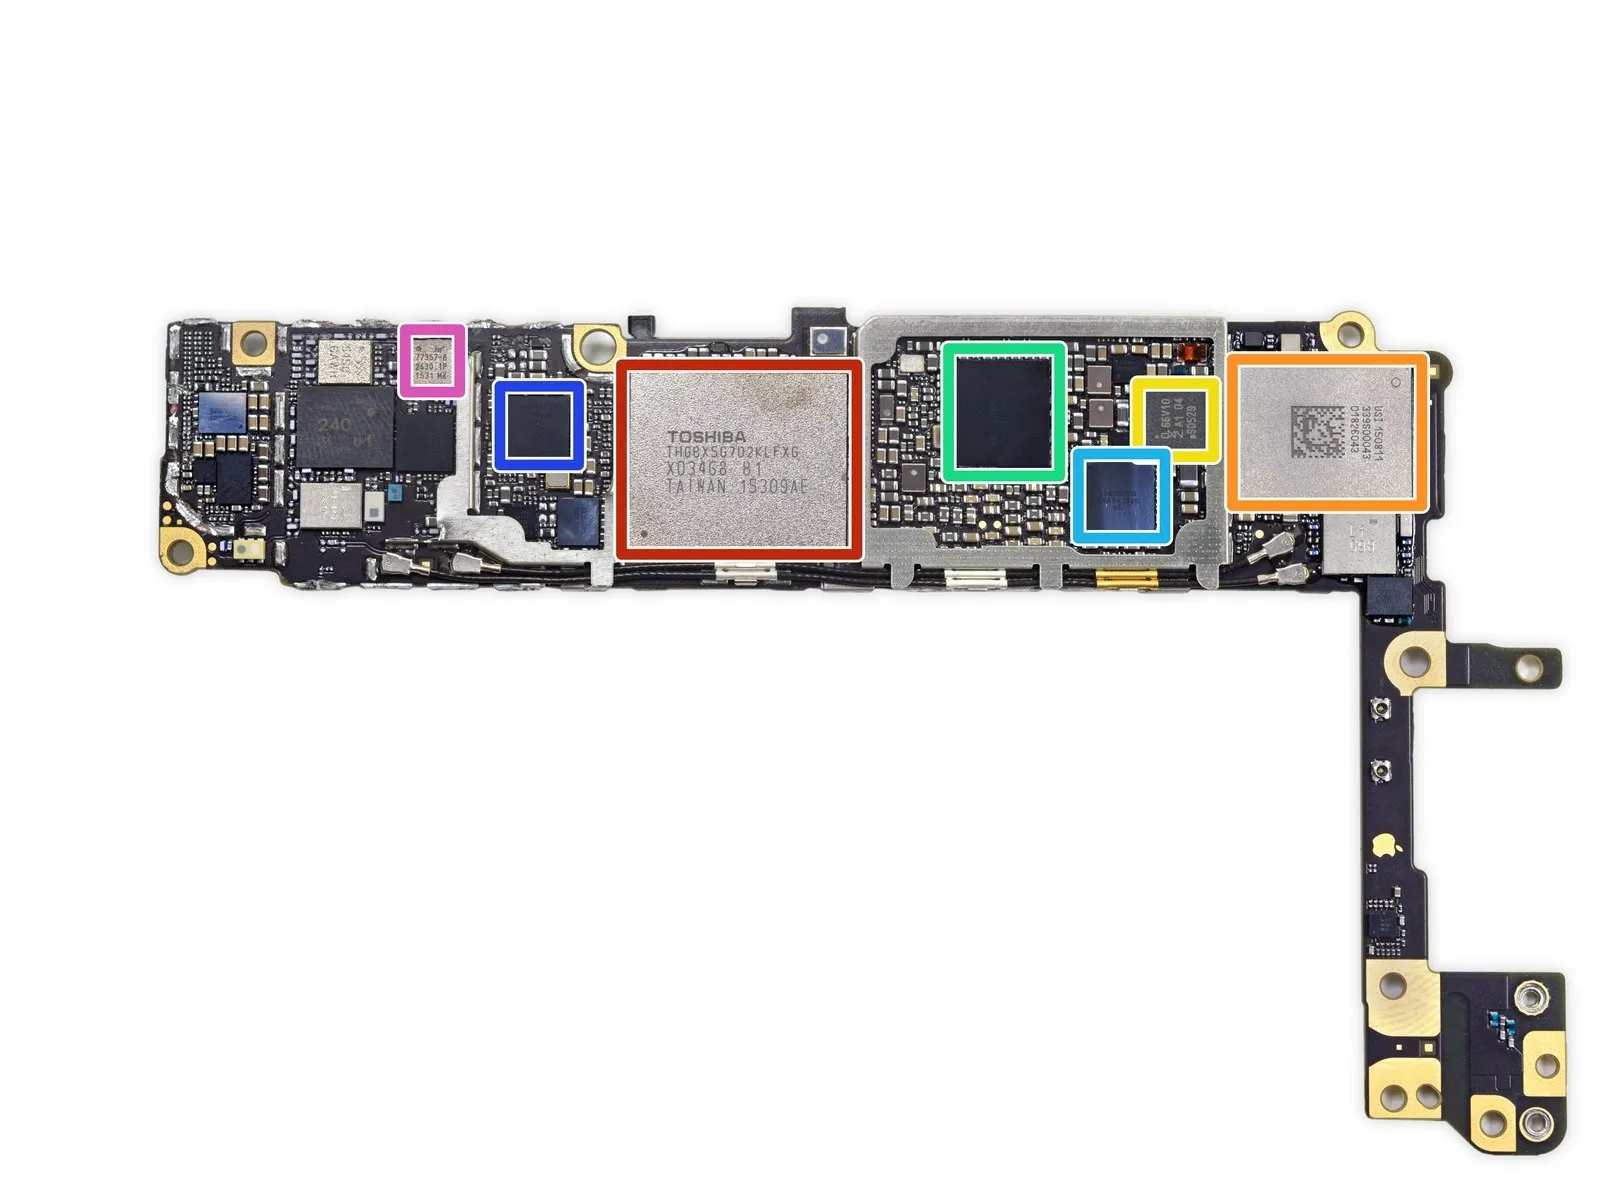
- This Toshiba THGBX5G7D2KLFXG component is a 16 GB NAND flash memory device manufactured using a 19 nm process.
- The Wi-Fi Module, identified as Universal Scientific Industrial part number 339S00043, facilitates wireless connectivity.
- NXPThe device incorporates an NFC Controller, model number 66V10.The iPhone 6 utilizes a 65V10 component, differing from earlier models.
- Utilize Apple or Dialog components.Power Management IC, part number 338S00120.
- Utilize components manufactured by Apple and Cirrus Logic.Identify component 338S00105, which is the audio integrated circuit.
- The device utilizes a Qualcomm PMD9635 integrated circuit for power management.
- The Skyworks SKY77357, potentially a revised version of the SKY77354, represents a power amplifier module.
Step 20
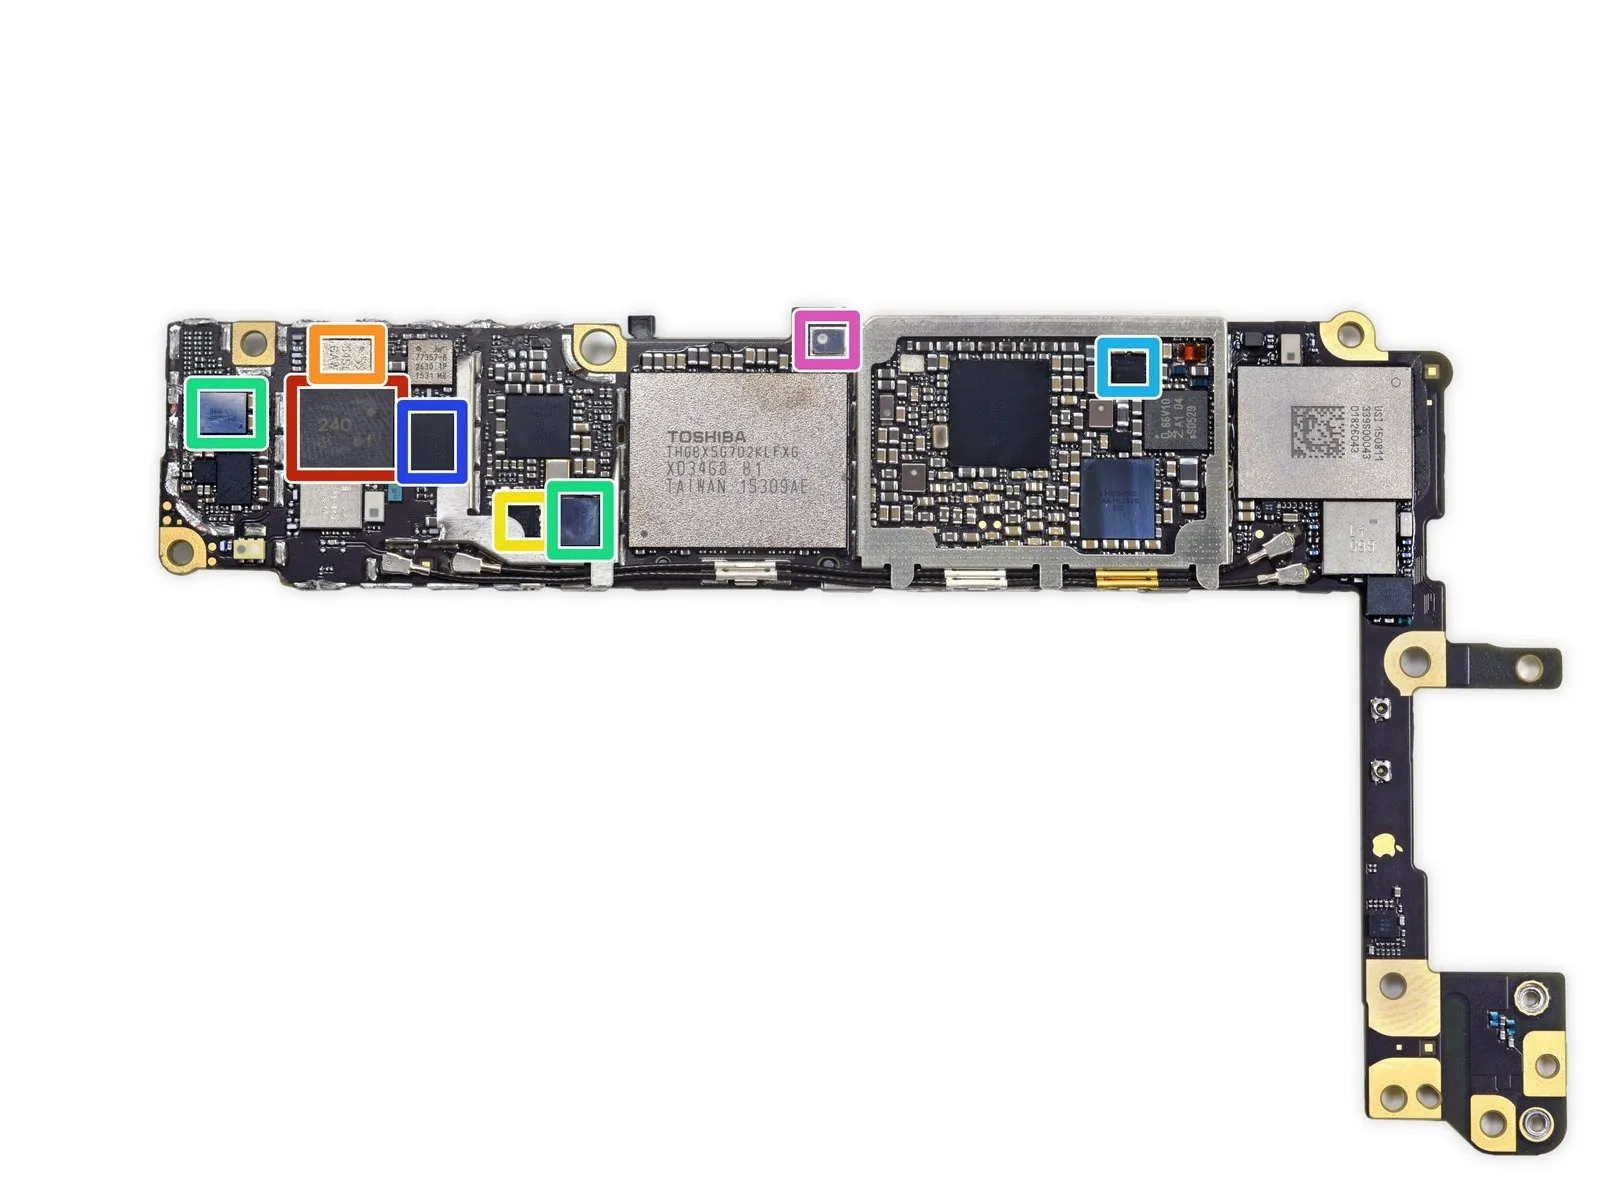
- Employ a Murata 240 front-end module.
- Employ the RF5150 antenna switch manufactured by RF Micro Devices.
- NXPThis component, designated 1610A3, is a variant of the 1610A1 previously utilized in iPhone 5s and 5c models.
- Utilize components manufactured by Apple and Cirrus Logic.Integrated circuit, part number 338S1285, handles audio functions.Carefully disconnect the 338S1202 audio codec, a component measuring approximately 11.5mm x 8.5mm, from the main system board using a non-conductive spudger tool, ensuring no static discharge occurs and observing all ESD precautions, as damage to this part can result in permanent failure.
- Refer to components manufactured by Texas Instruments.The power management integrated circuit is designated 65730AOP.
- Qualcomm's WTR3925 serves as a radio frequency transceiver.
- It may be a BMP280, a barometric pressure sensor manufactured by Bosch Sensortec.
Step 21
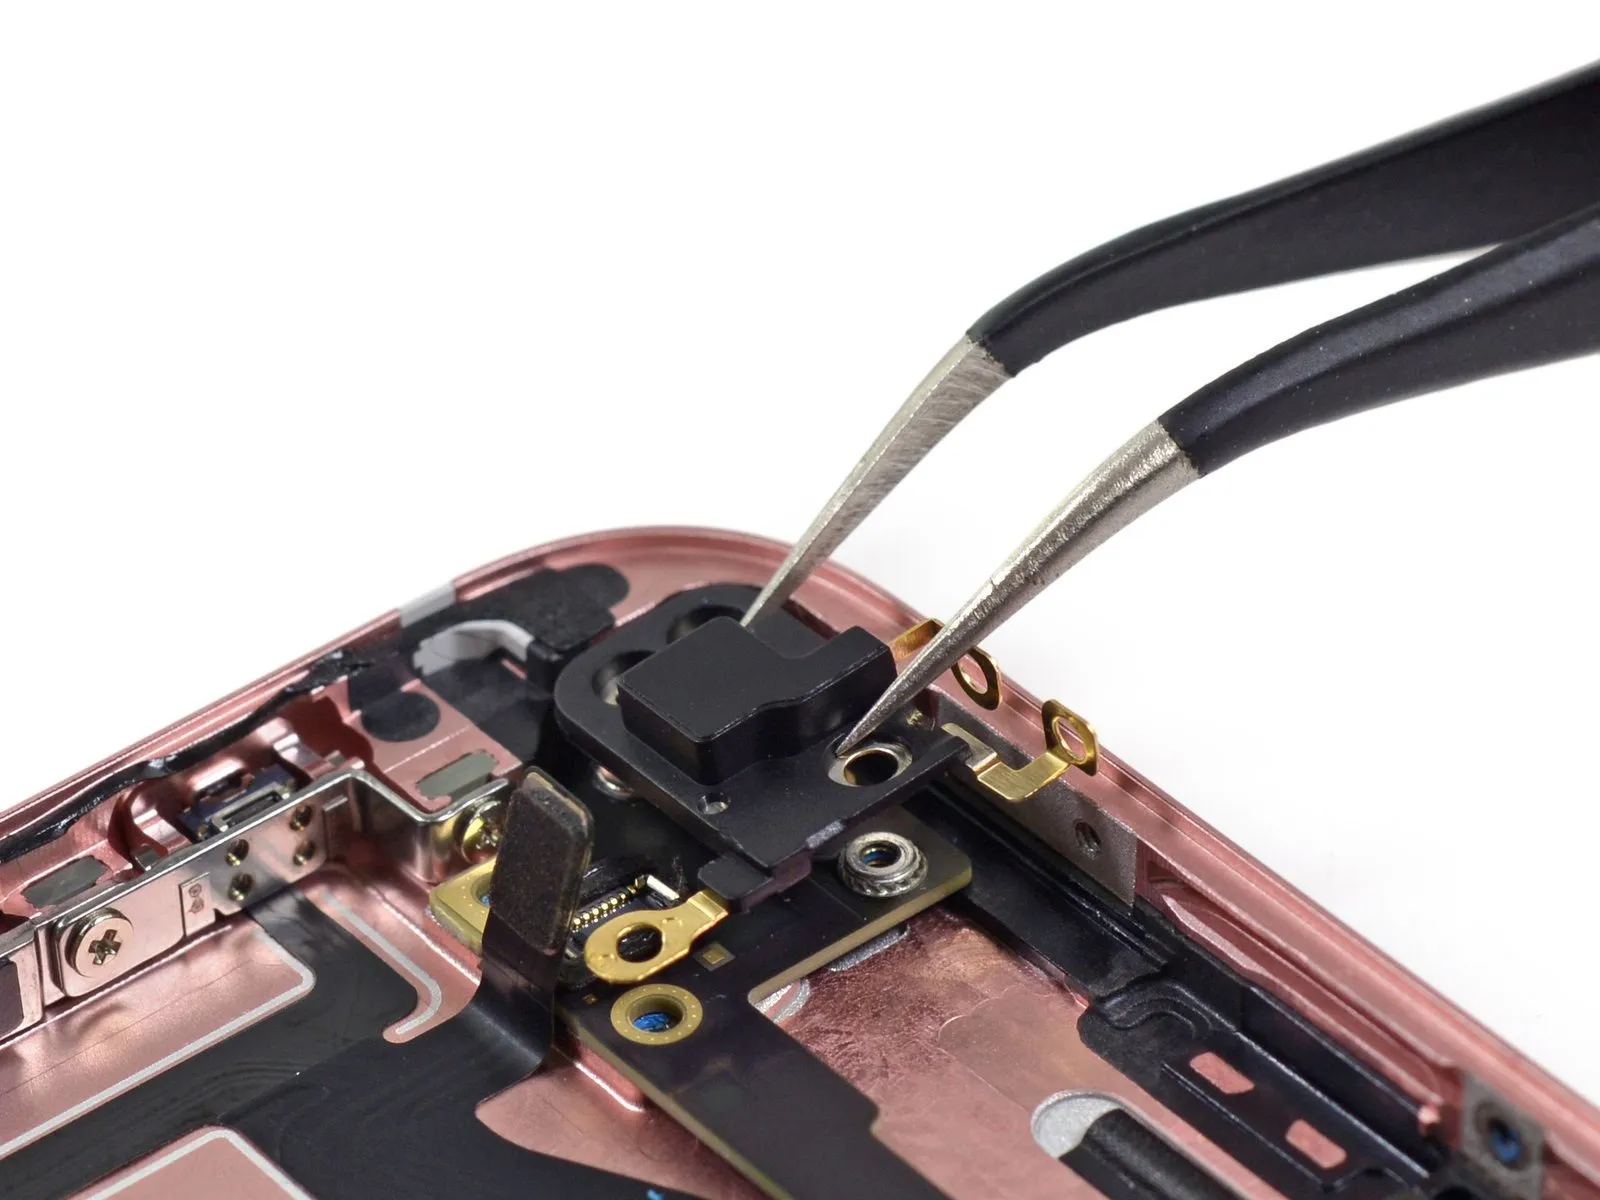
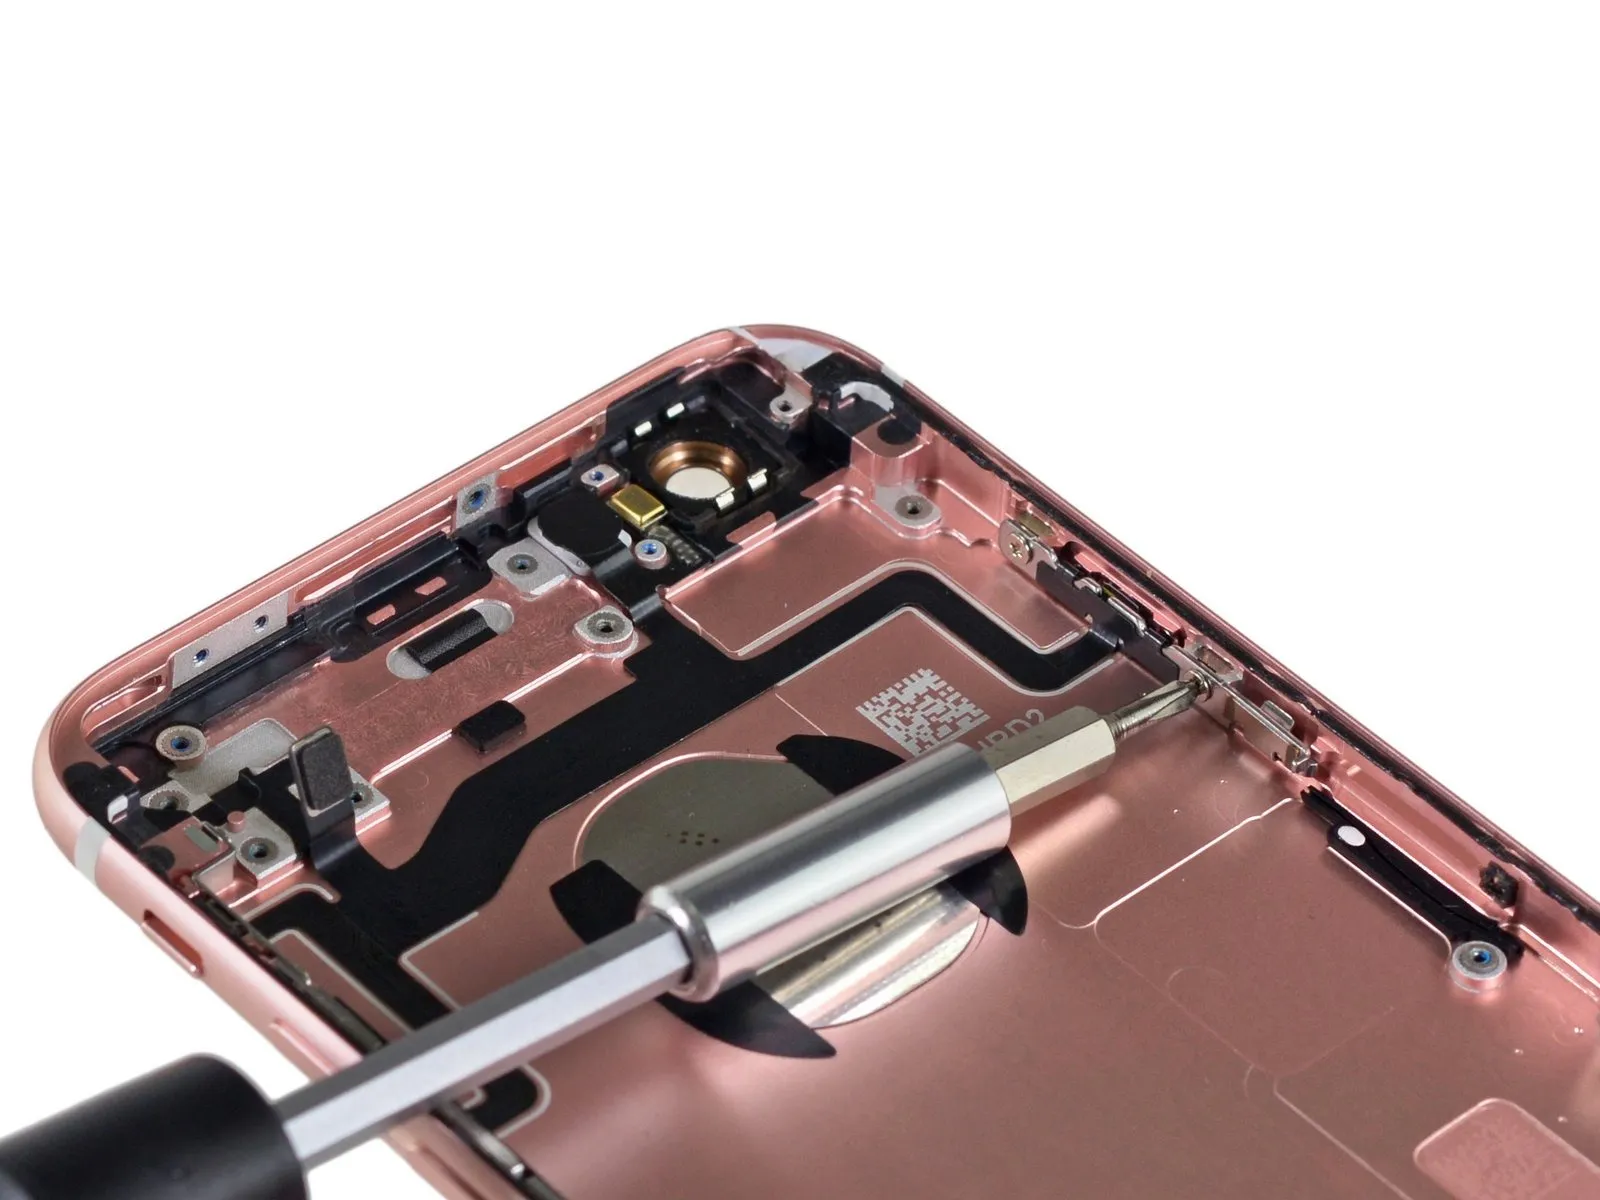
- Using a 5/32-inch hex key, carefully loosen the four retaining screws securing the fan assembly to the motor housing, noting that these screws are torqued to 6 in-lbs and that excessive force may damage the threads; subsequently, gently pull the fan assembly away from the motor, being mindful of the attached wiring harness to avoid strain or disconnection.These components appear to be waterproof silicone seals.
Due to the susceptibility of cable connectors to damage from liquids, these components are particularly at risk during water exposure incidents.
Recent testing indicates that the iPhone 6s and 6s Plus models exhibit significantly improved resilience against water damage, which likely accounts for the observed results.
Step 22
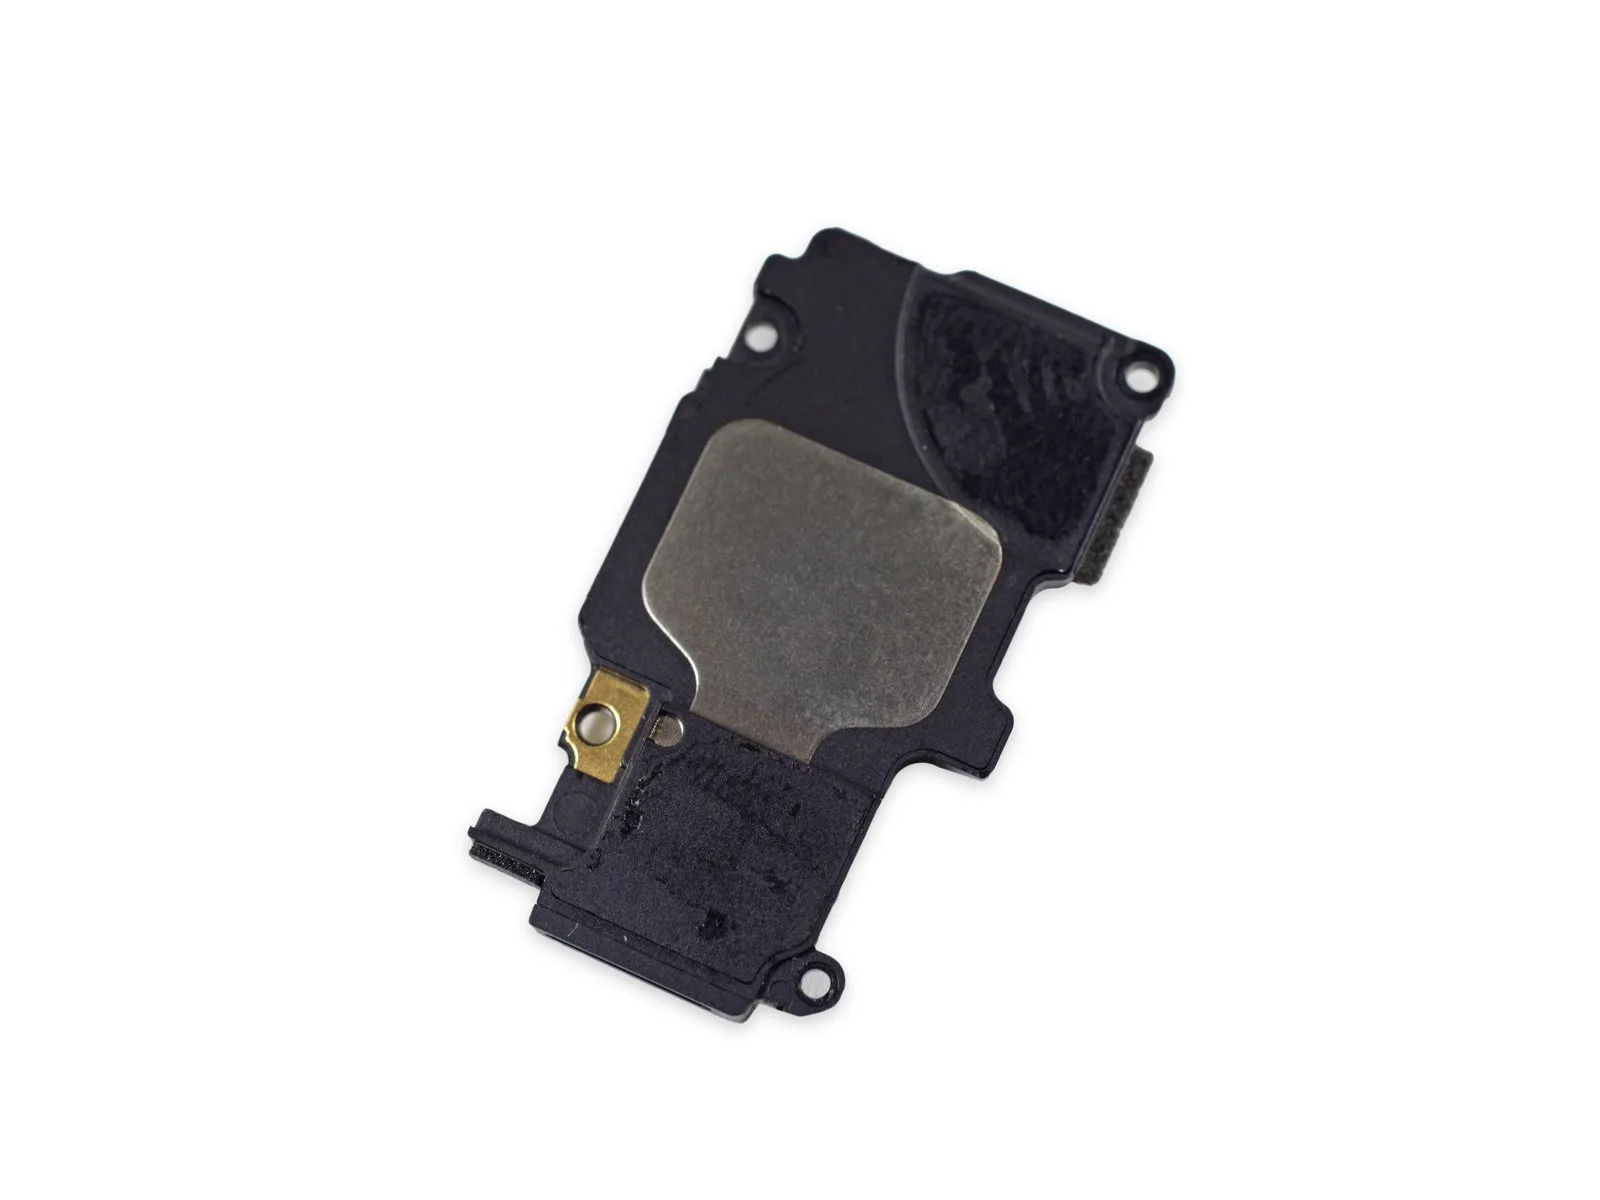
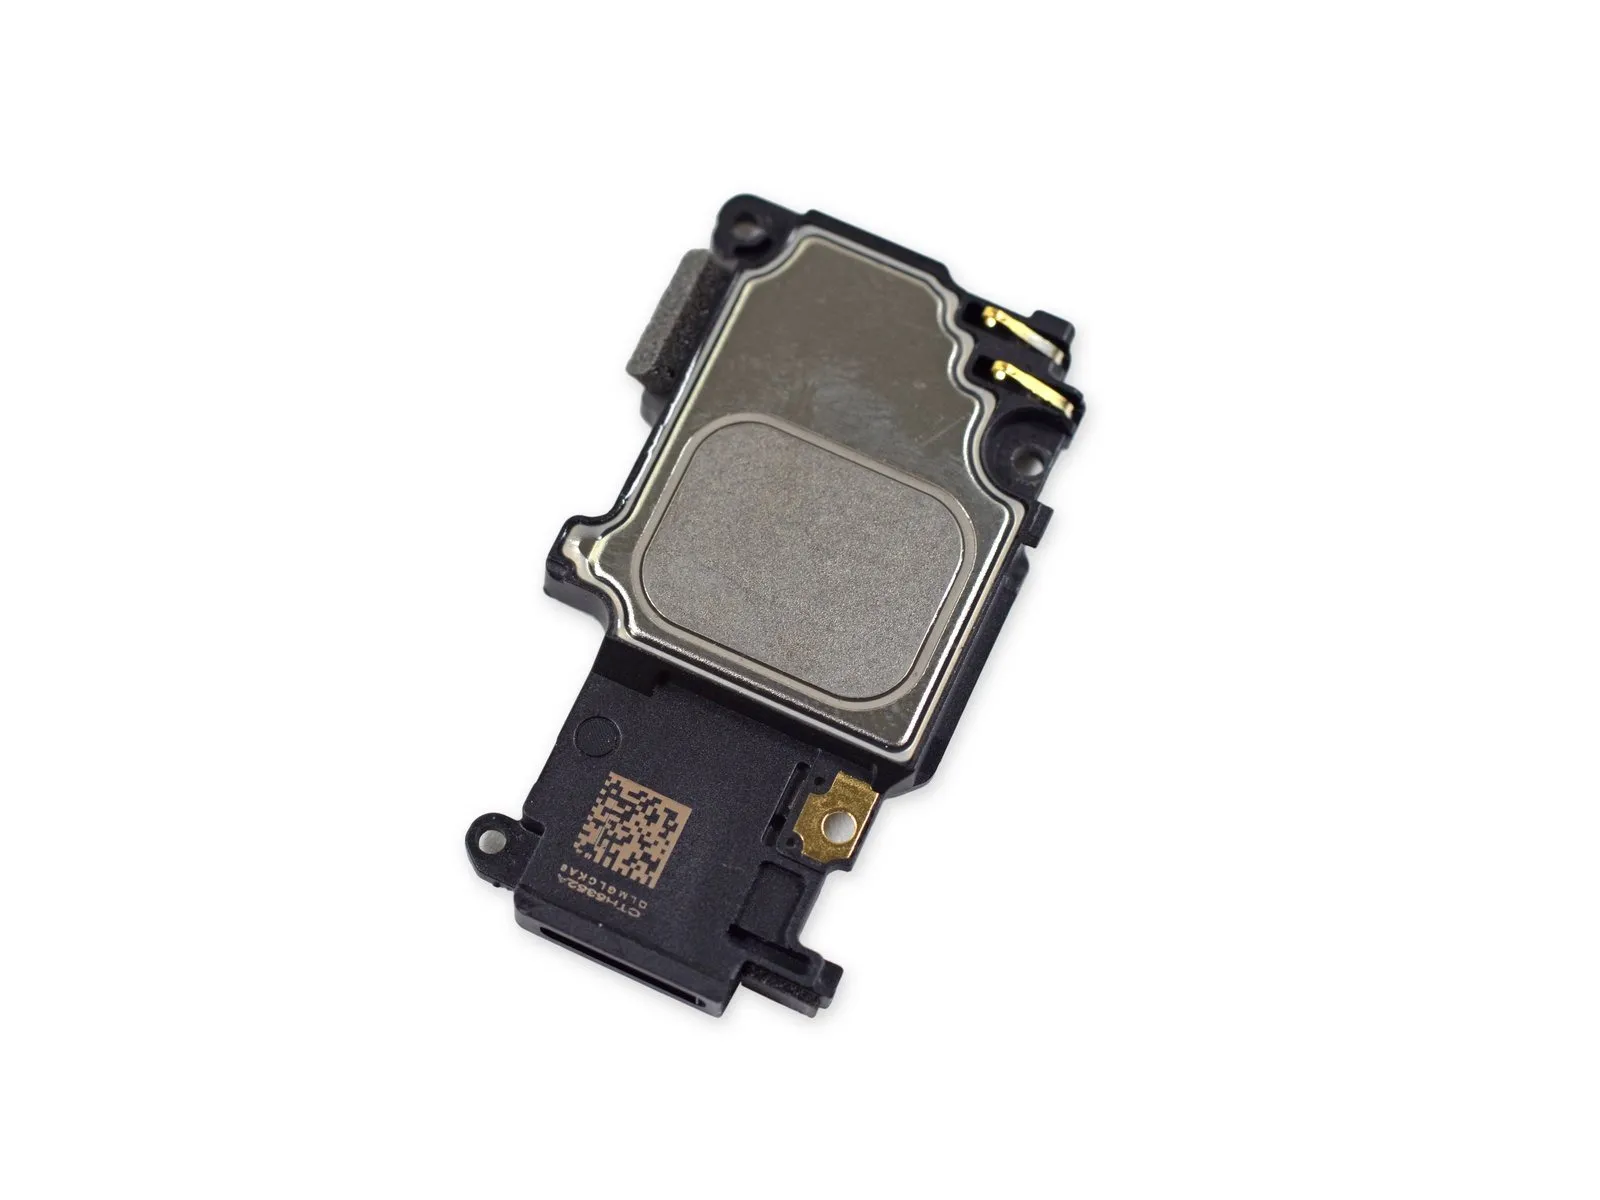
Inspection of the speaker component indicates a lack of readily apparent damage or anomalies.
The iPhone 6s speaker shares a similar design with the iPhone 6 speaker, likely modified to accommodate the Taptic Engine's physical space.
Step 23
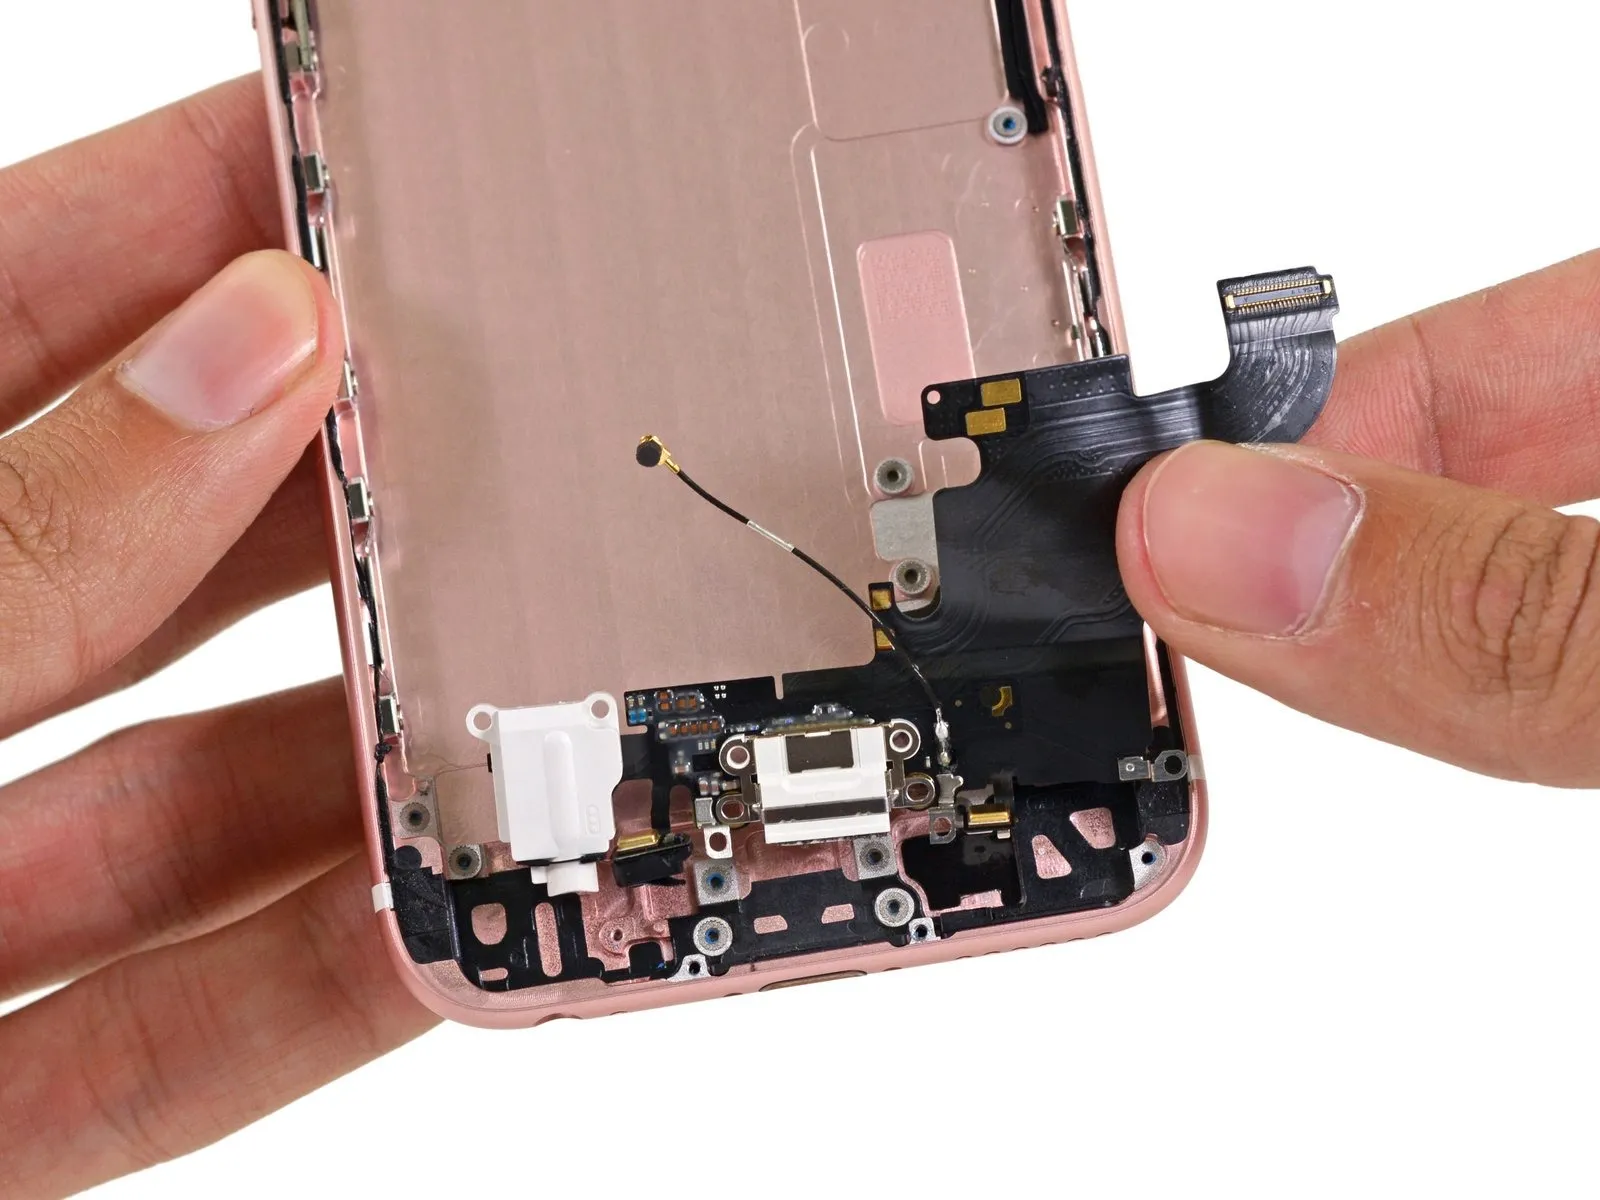
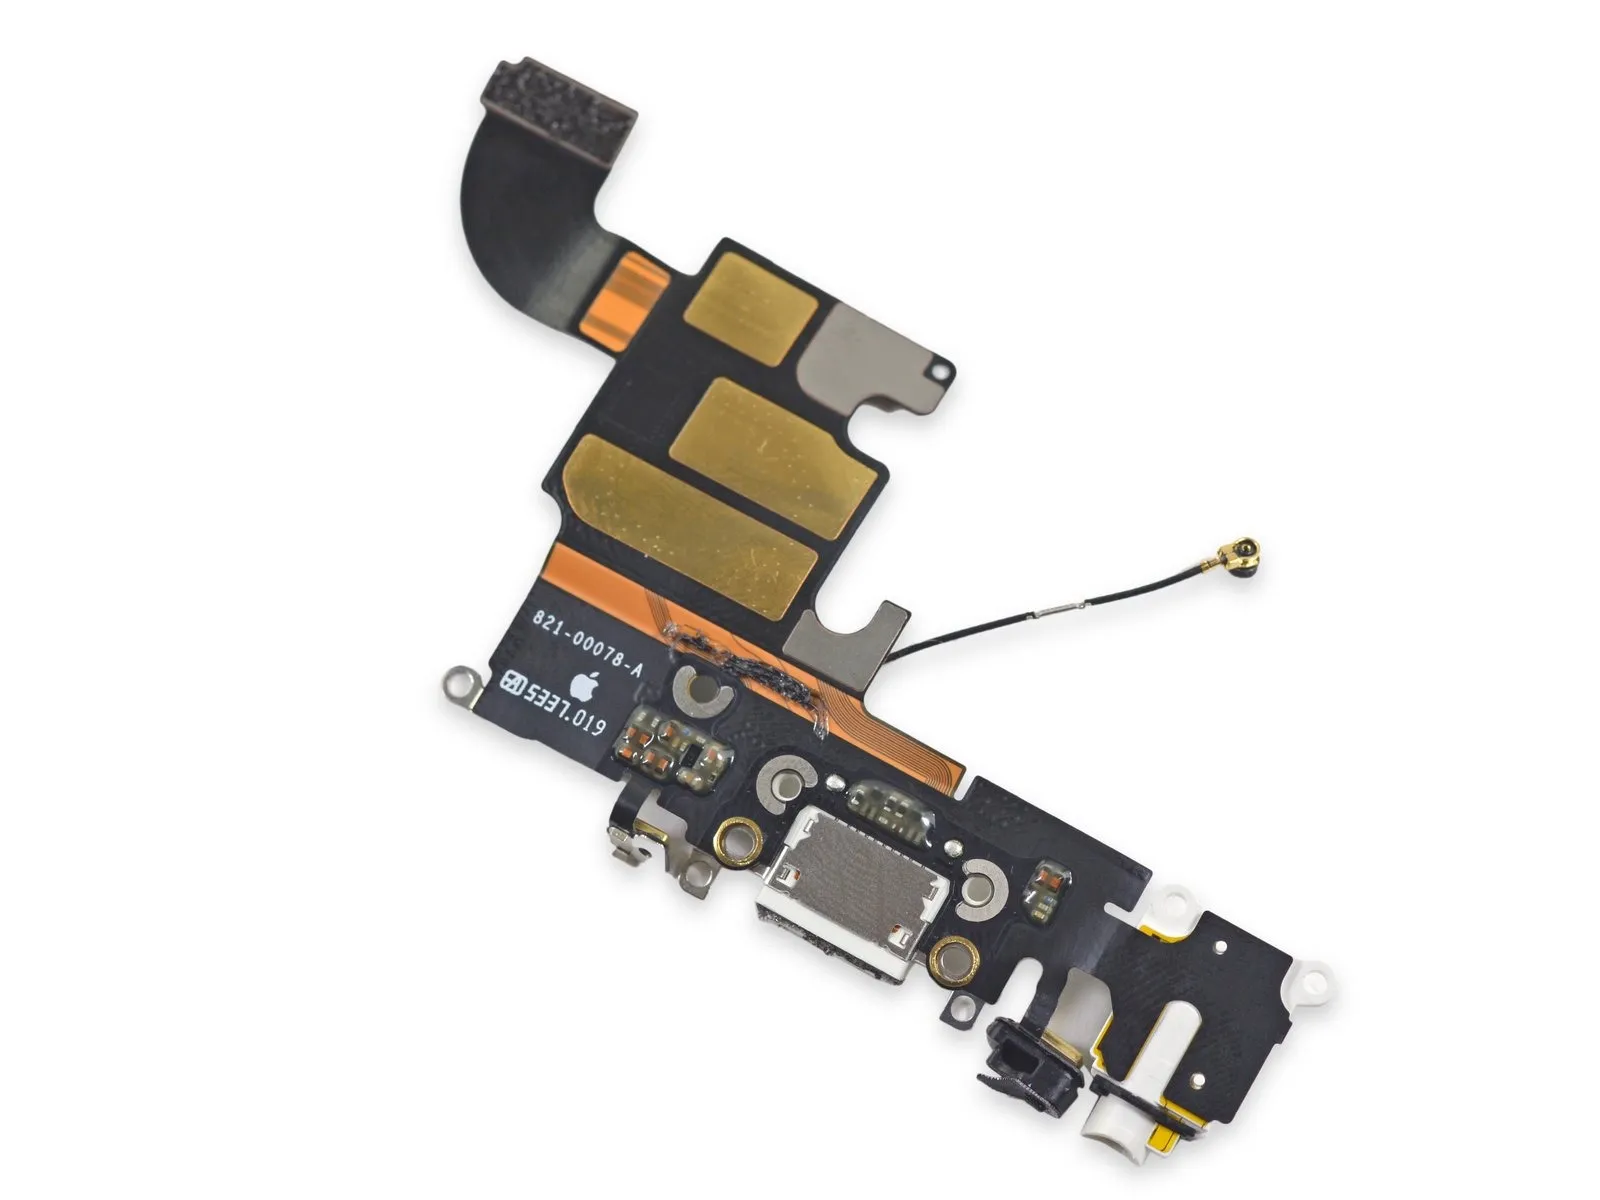
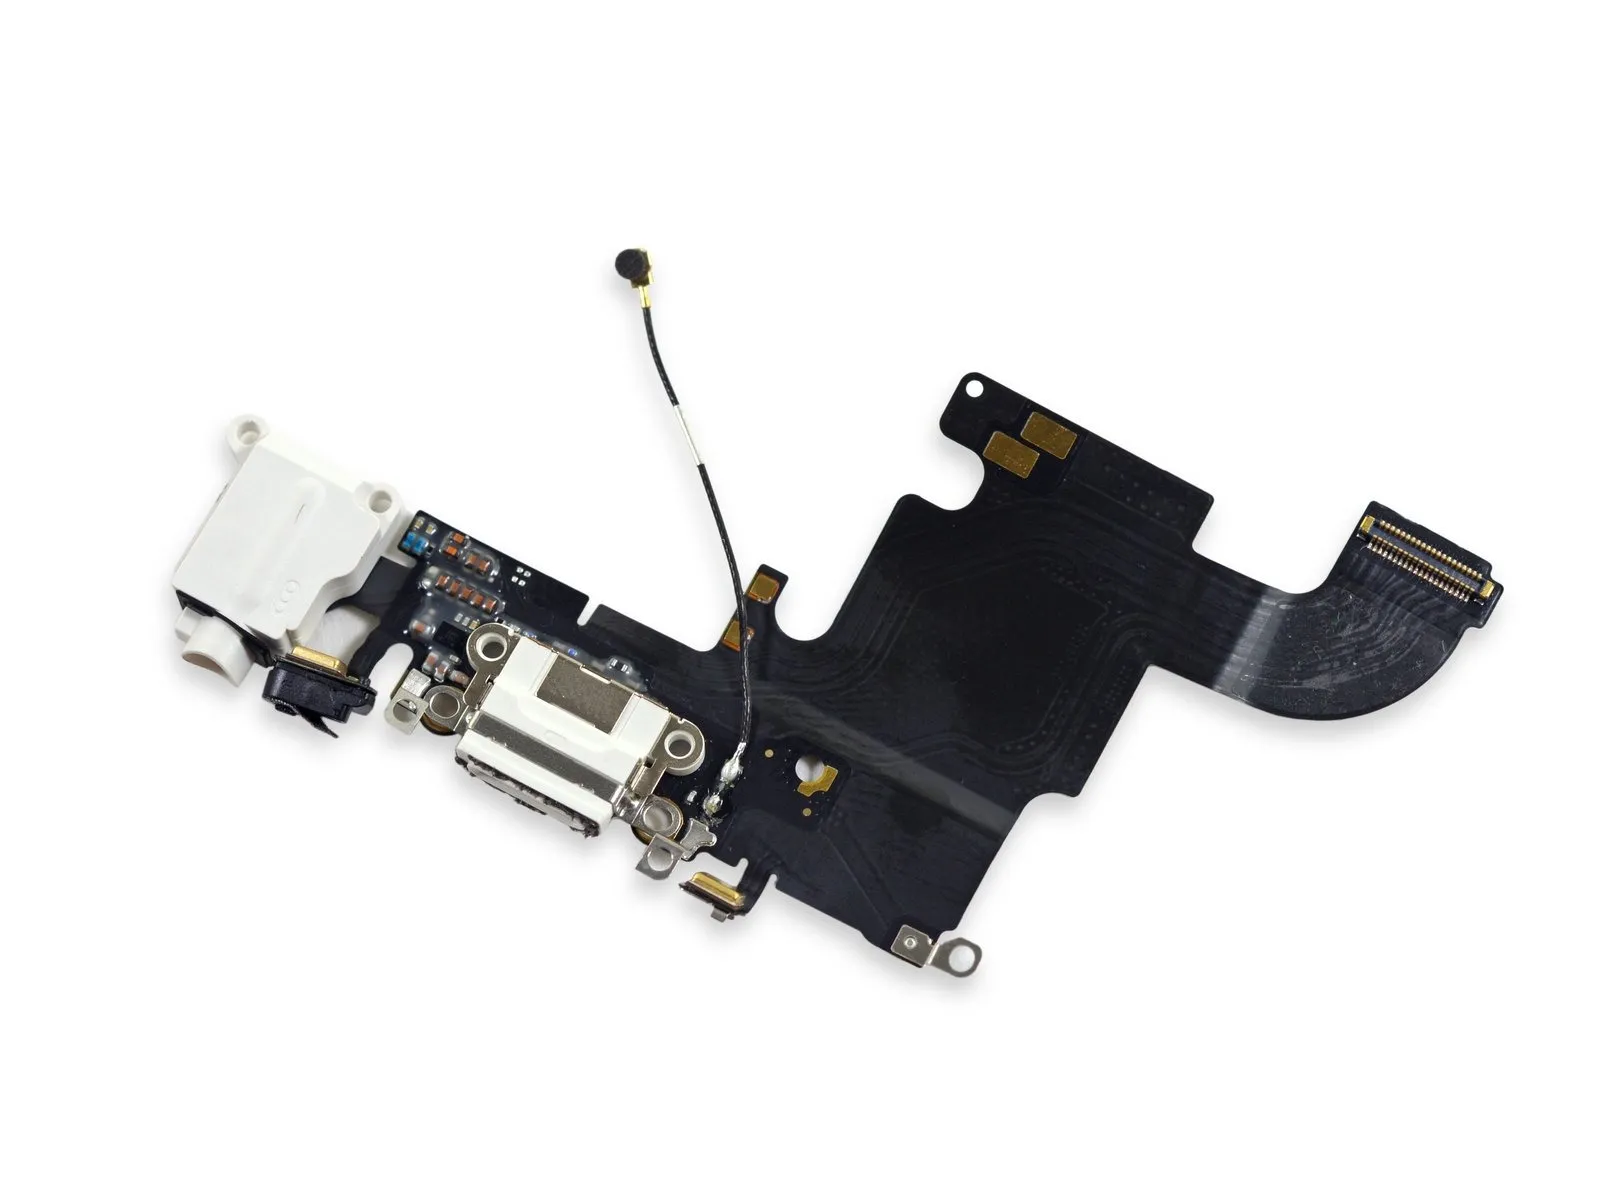
A significant number of parts are affixed to the Lightning cable assembly, in addition to the two microphones.
- For charging and data transmission, utilize the integrated Lightning connector.
- Utilize the headphone jack to connect audio equipment.
- These cables connect to cellular antennas, supporting various communication functions.
Due to the tightly integrated design of the Lightning cable assembly, individual component failures typically necessitate complete cable replacement, as repairs are generally impractical.
Step 24
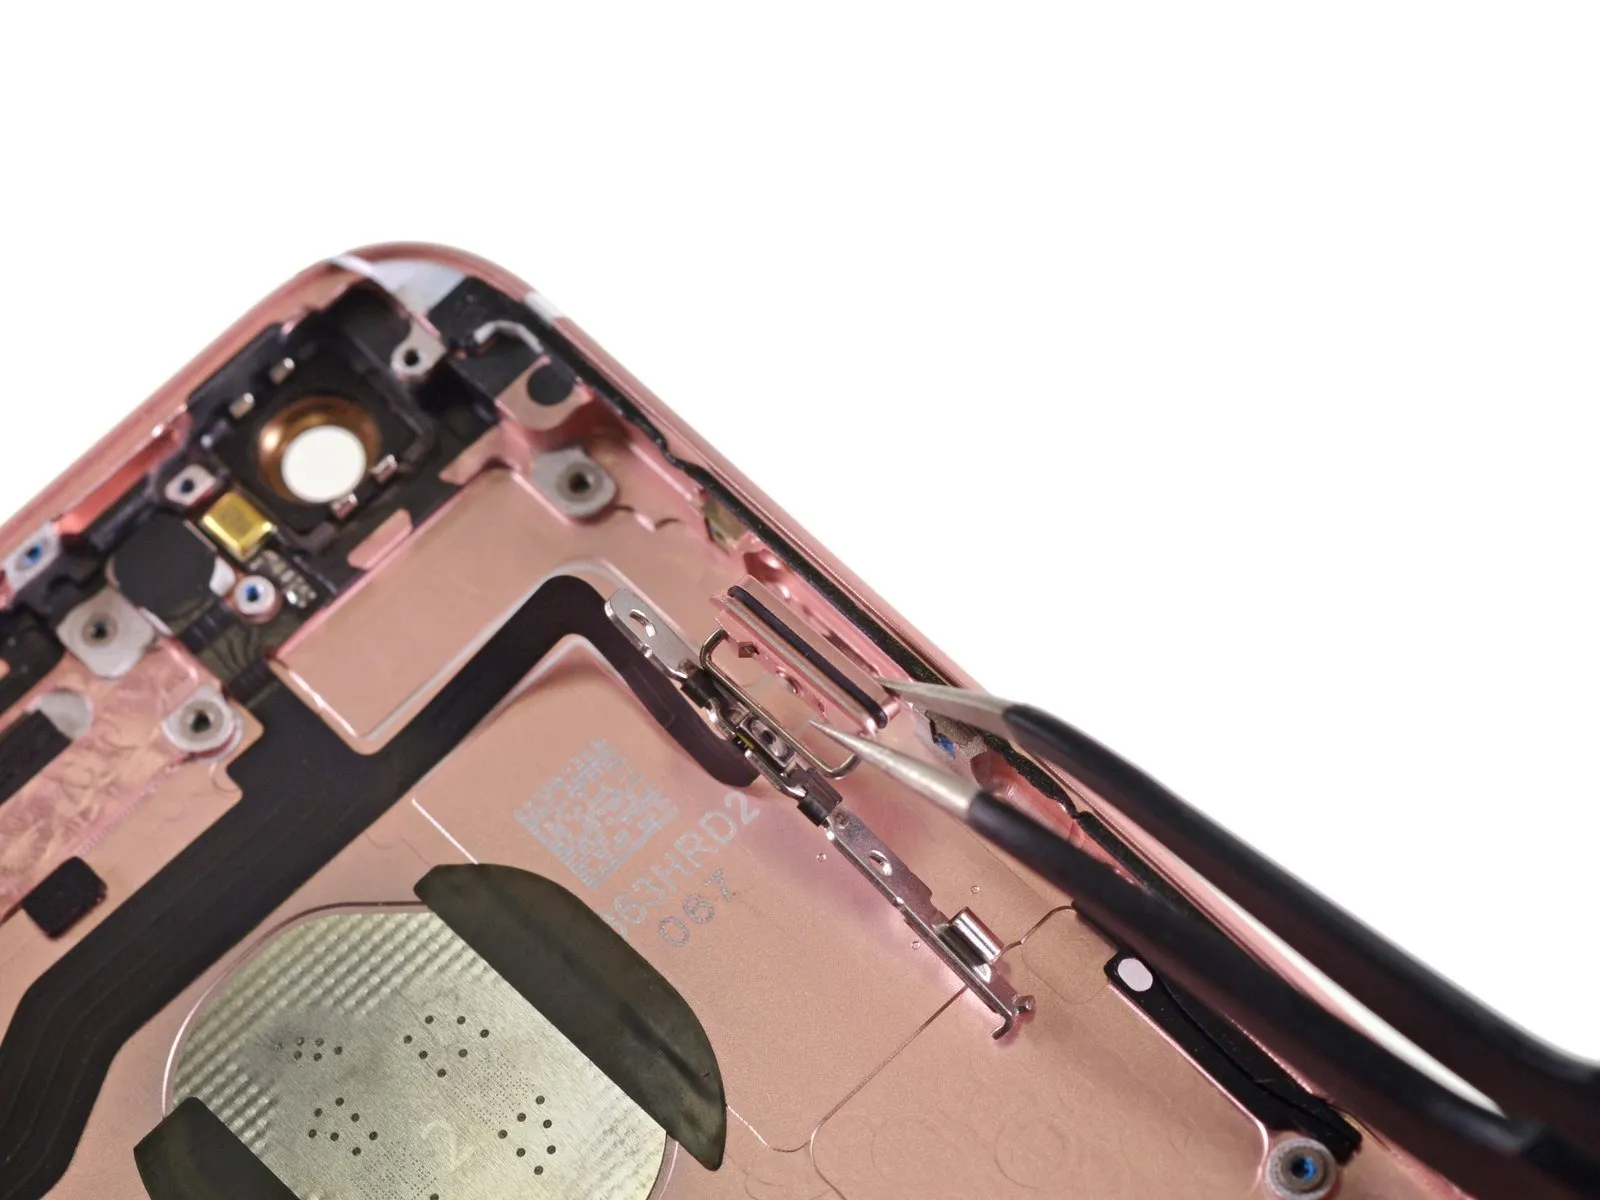
Despite the removal of the original, large sealing gasket, a waterproofing function remains.
Because this device lacks any official water resistance certification, avoid exposure to water; doing so could cause damage.
Step 25

- Removing the display assembly initially allows easier access for screen replacements.
- Accessing the battery is relatively simple, though it necessitates a specialized pentalobe screwdriver and familiarity with adhesive release procedures; the process itself isn't complex.
- Because the Touch ID cable remains positioned aside, connecting to the logic board, accessing it presents a repair challenge.
- Due to the use of unique, non-standard Pentalobe screws securing the exterior, a specialized screwdriver is necessary for their removal during iPhone 6s disassembly.