iPhone 6s Plus Teardown
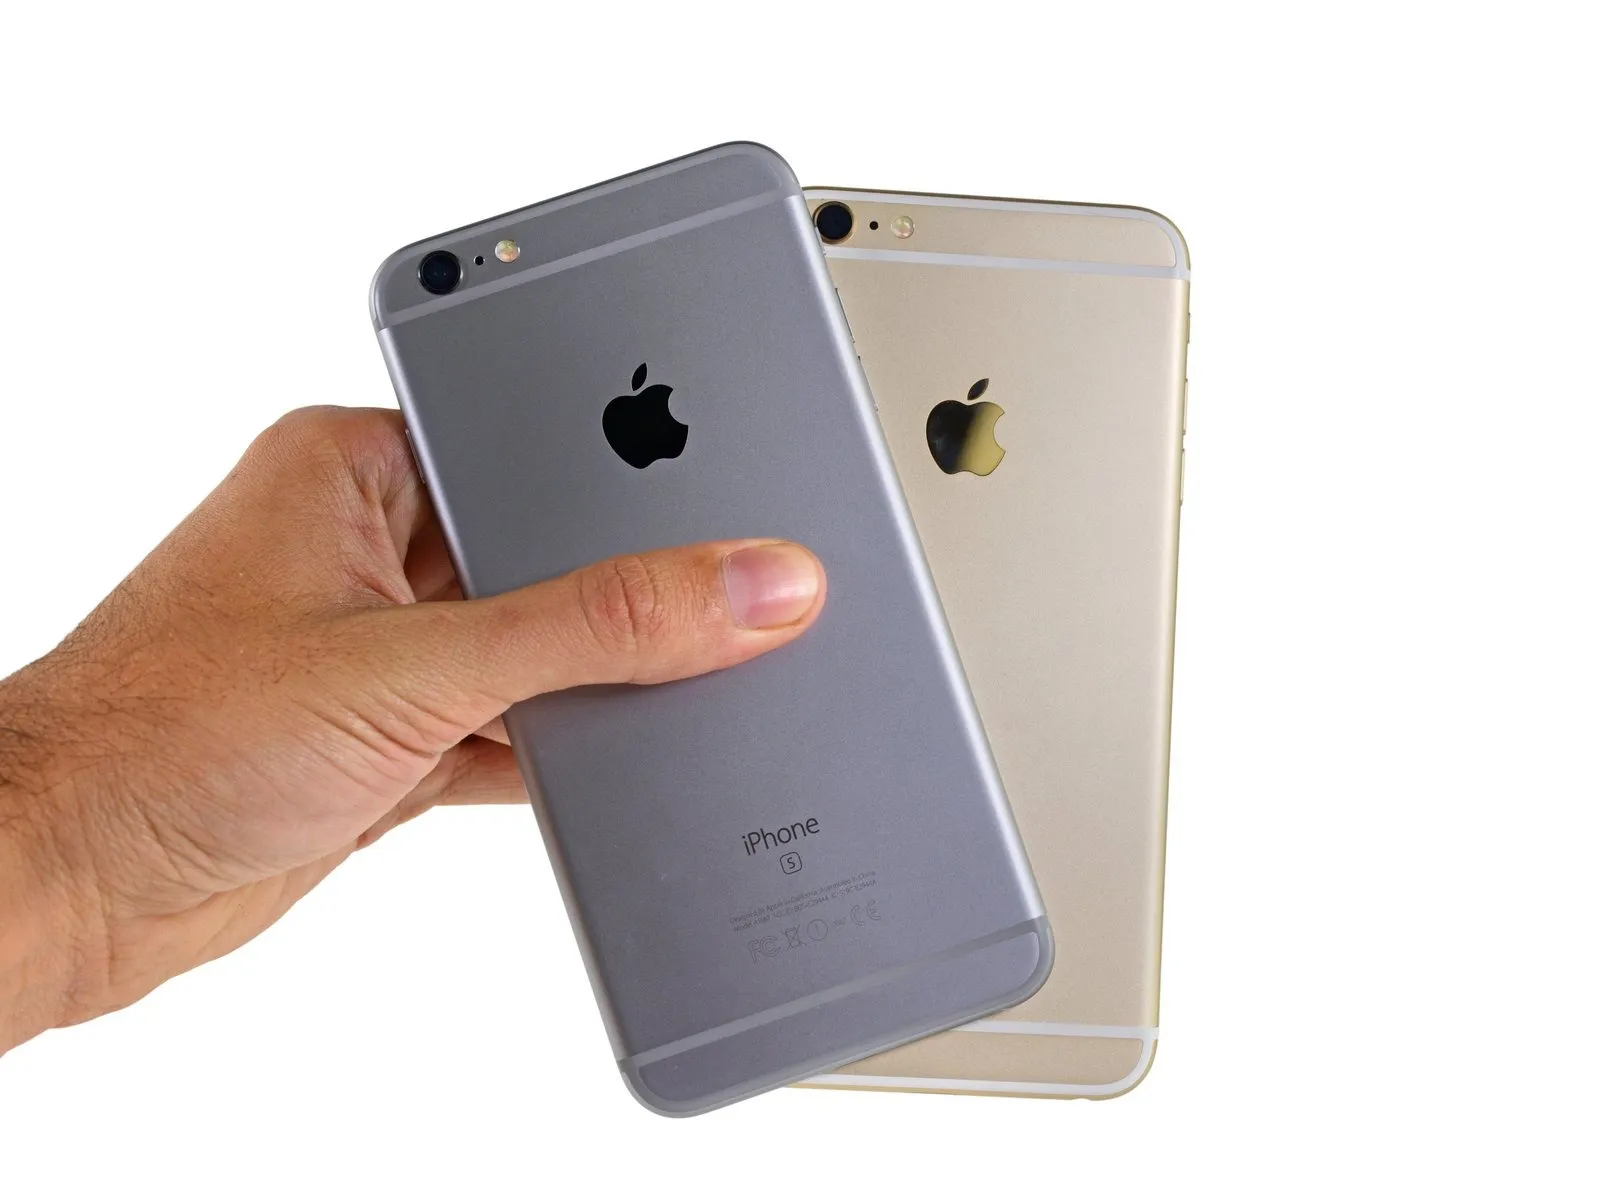
Begin the disassembly process of the iPhone, the largest model produced to date, which measures slightly more than its predecessor.Apple iPhone 6sThis device incorporates advanced features and a more substantial internal design.Apple's sixth-generation iPhone model, designated 6s.Beginning the disassembly, our team at iFixit systematically examines every component, mirroring the detailed process already completed on the standard model.
For more in-depth disassembly discussions, join our online community.Meta,Use the Instagram application to document the repair process with photos and videos, ensuring all images are clear and well-lit, and that any relevant measurements or part numbers are visible.Using a 5/32-inch hex key, carefully tighten the set screw located on the motor shaft until snug, but do not overtighten to avoid damaging the threads.Carefully position the 1.5mm Allen wrench into the designated set screw, ensuring a snug fit, and rotate it precisely 90 degrees counterclockwise to loosen and remove the retaining clip, observing caution to prevent damage to the adjacent micro-switch.Stay informed about current repair techniques and updates.
Step 1 | iPhone 6s Plus Teardown

- Carefully prepare the device for disassembly.Use a plastic pry tool to gently separate.To proceed, ensure you consider:Initiate a voice command to access Siri and request information regarding the internal components and construction of the device.
- The device incorporates an Apple A9 processor, which includes an integrated M9 motion coprocessor.
- Storage capacity options include 16 gigabytes, 64 gigabytes, or 128 gigabytes.
- The screen is a 5.5-inch Retina HD display, boasting a resolution of 1920 by 1080 pixels and a pixel density of 401 pixels per inch, and incorporates 3D Touch functionality.
- The device incorporates a 12-megapixel iSight camera capable of recording 4K video, utilizing 1.22-micrometer pixels, alongside a 5-megapixel FaceTime HD camera.
- The device's housing is constructed from 7000 Series aluminum and features a cover of Ion-X Glass.
- The device incorporates 802.11a, 802.11b, 802.11g, 802.11n, and 802.11ac Wi-Fi connectivity, utilizing MIMO technology, alongside Bluetooth version 4.2, NFC functionality, and support for 23 LTE bands.
- The device incorporates a Taptic Engine.
Step 2
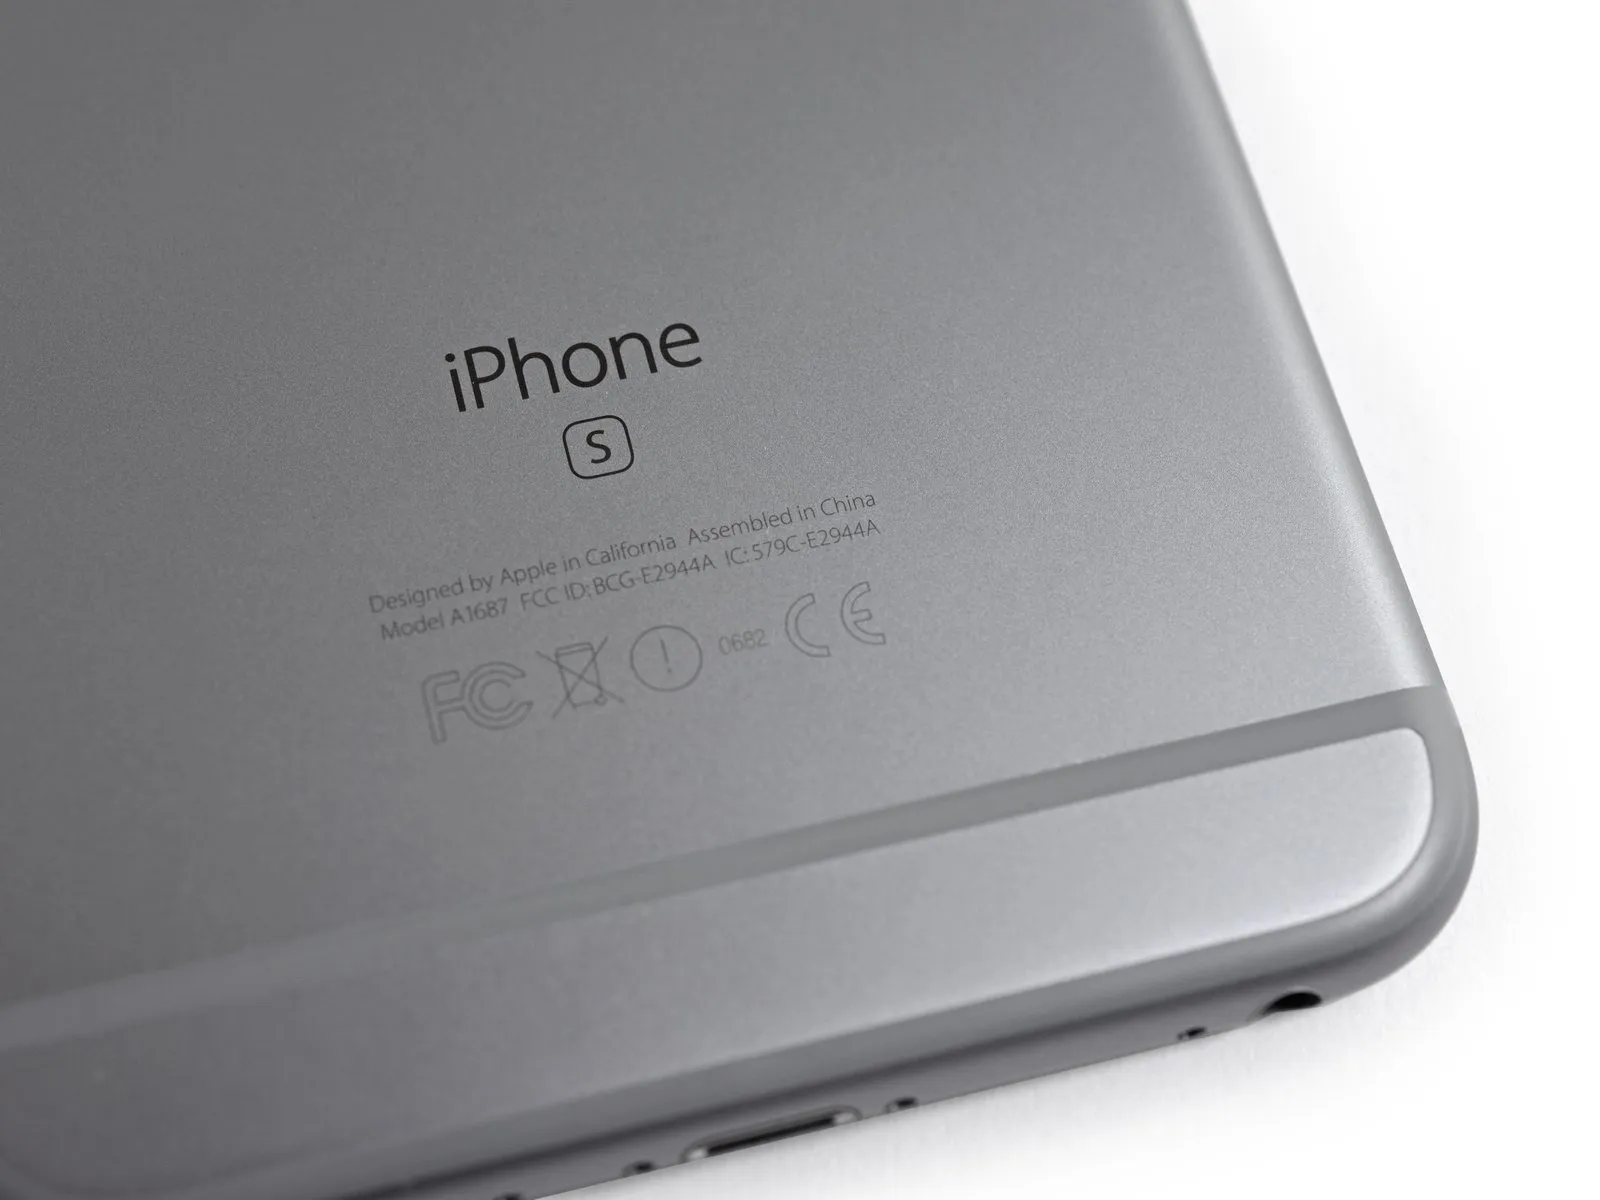
- Examination of the 6s Plus provides a more detailed perspective on the customAluminum alloy composition designated as 7000 series.It now displays an updated model identifier.Using a 5/32-inch hex key, tighten the retaining screw to a torque of 6 in-lbs, ensuring the shaft is securely fixed within the housing and preventing any potential disengagement.
- Compositional testing of the alloy reveals a makeup of approximately 91.17% aluminum, 0.08% iron, 7.64% zinc, and 0.106% tungsten.
- Due to the increased zinc levels, expect a notable improvement in tensile strength, accompanied by a corresponding rise in production expenses.The material used is an aluminum alloy of the 6063 grade.Within the iPhone 6,
- Carefully detach the small component, measuring 1.5 inches in diameter, using a Phillips head screwdriver, and be aware that it is fragile.The visible presence of this component on the expansive exterior of the latest iPhone model may seem unconventional; however, it serves as a readily apparent indicator of annual device upgrades to your acquaintances.
- Despite Apple’s assertions regarding device recyclability, their strategy to promote frequent replacements negatively impacts the environment, resulting in elevated carbon dioxide emissions and a greater volume of electronic waste due to a reduced product lifespan.
Step 3


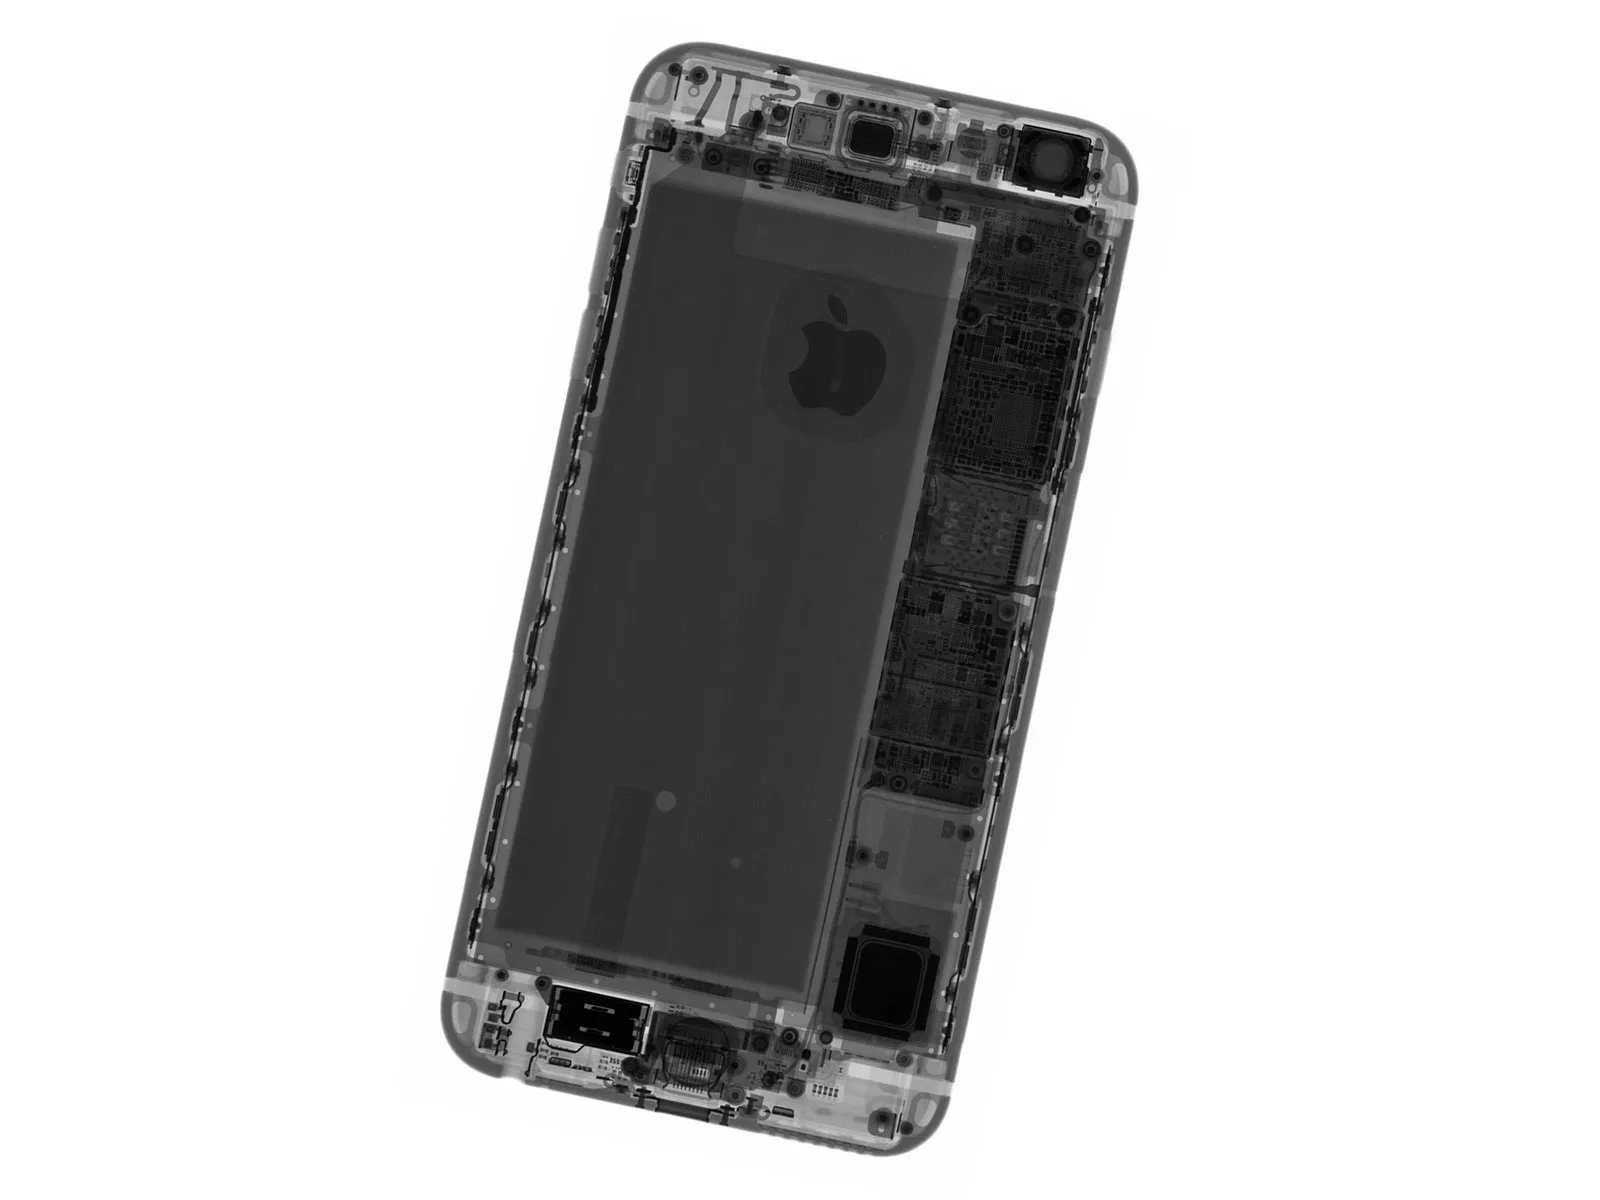
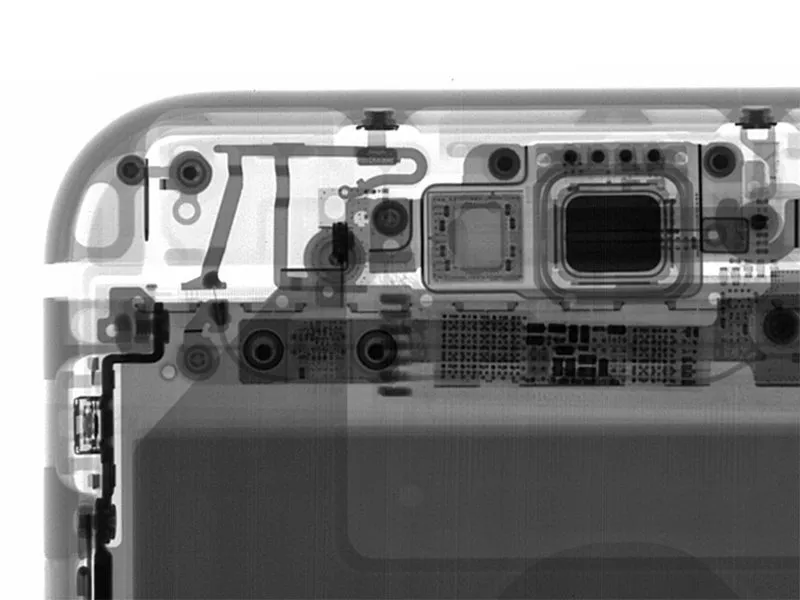
Using X-ray technology provided by Creative Electron, we will now examine the internal components of this iPhone to facilitate the repair process.
Immediately move the iPhone to a secure location to protect it from further damage.
This disassembly was filmed in Australia with the support and assistance of Macfixit and Circuitwise.
Begin the disassembly process.
Step 4

- After disassembling the engine,6sInitiating the Plus repair process begins here.
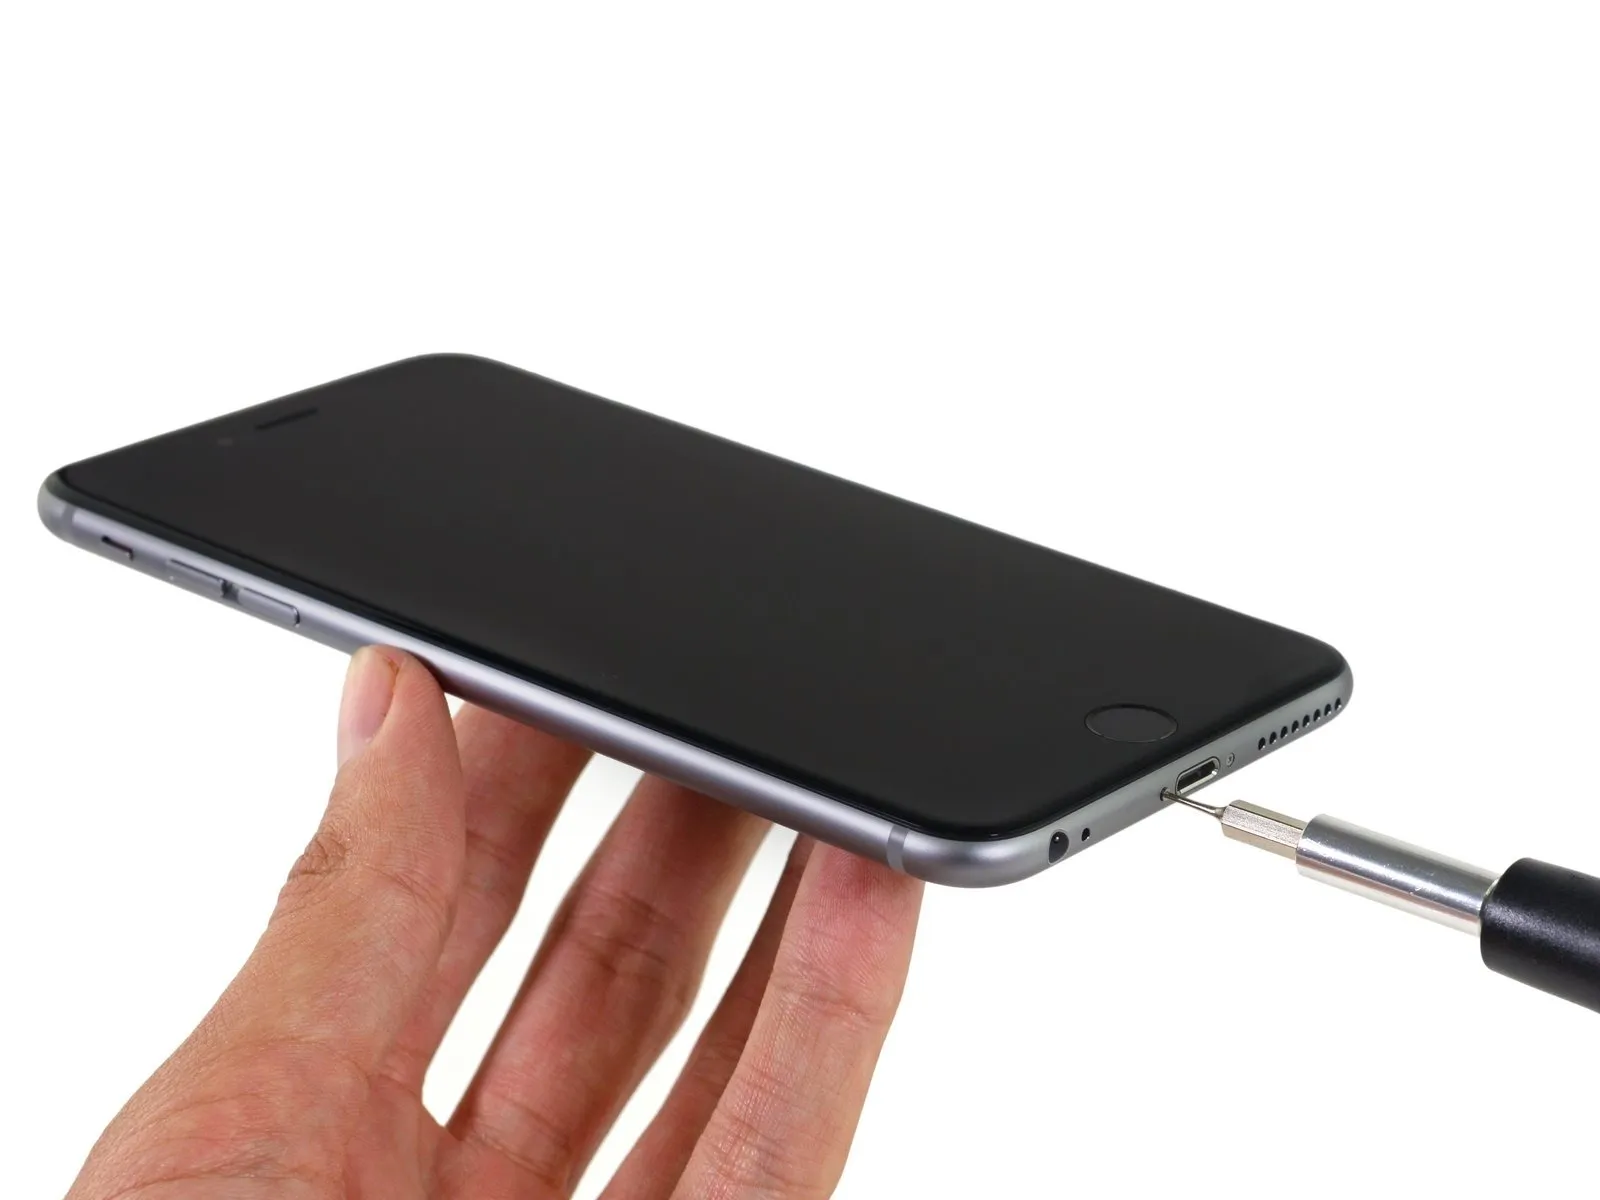
- Careful disassembly of the device requires meticulous attention; each of the two screws securing the casing should be removed deliberately, typically taking one second per screw to avoid damage.iPhone 6s PlusEnsure the component is secured with a torque of 4.5 Nm using a 5 mm Allen wrench, paying close attention to the manufacturer's specifications to prevent damage.
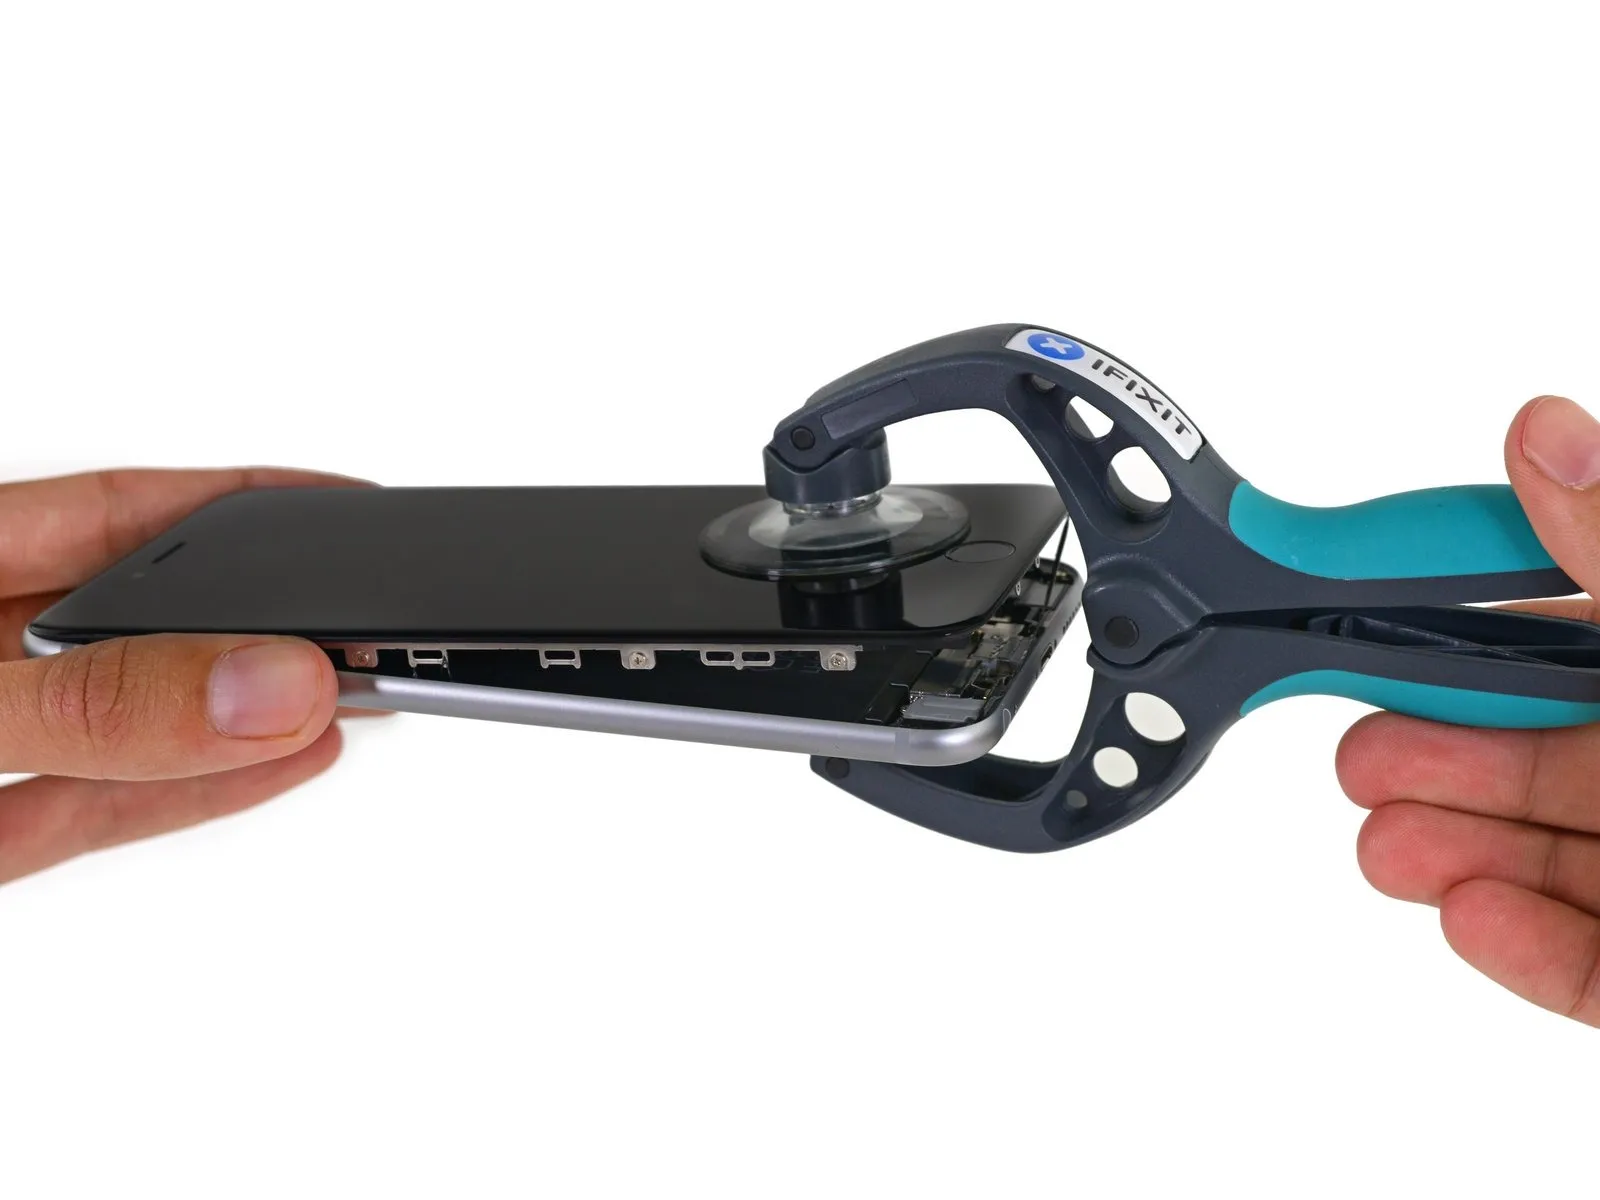
- Similar to the earlier model, ensure the same procedures are followed.iPhone 6s PlusA perimeter adhesive strip secures the display assembly; fortunately, this bond is easily overcome with appropriate solvent application.Employ the iSclack device..
- Having removed the Pentalobe screws and successfully released the display adhesive, proceed with the next step.
Step 5
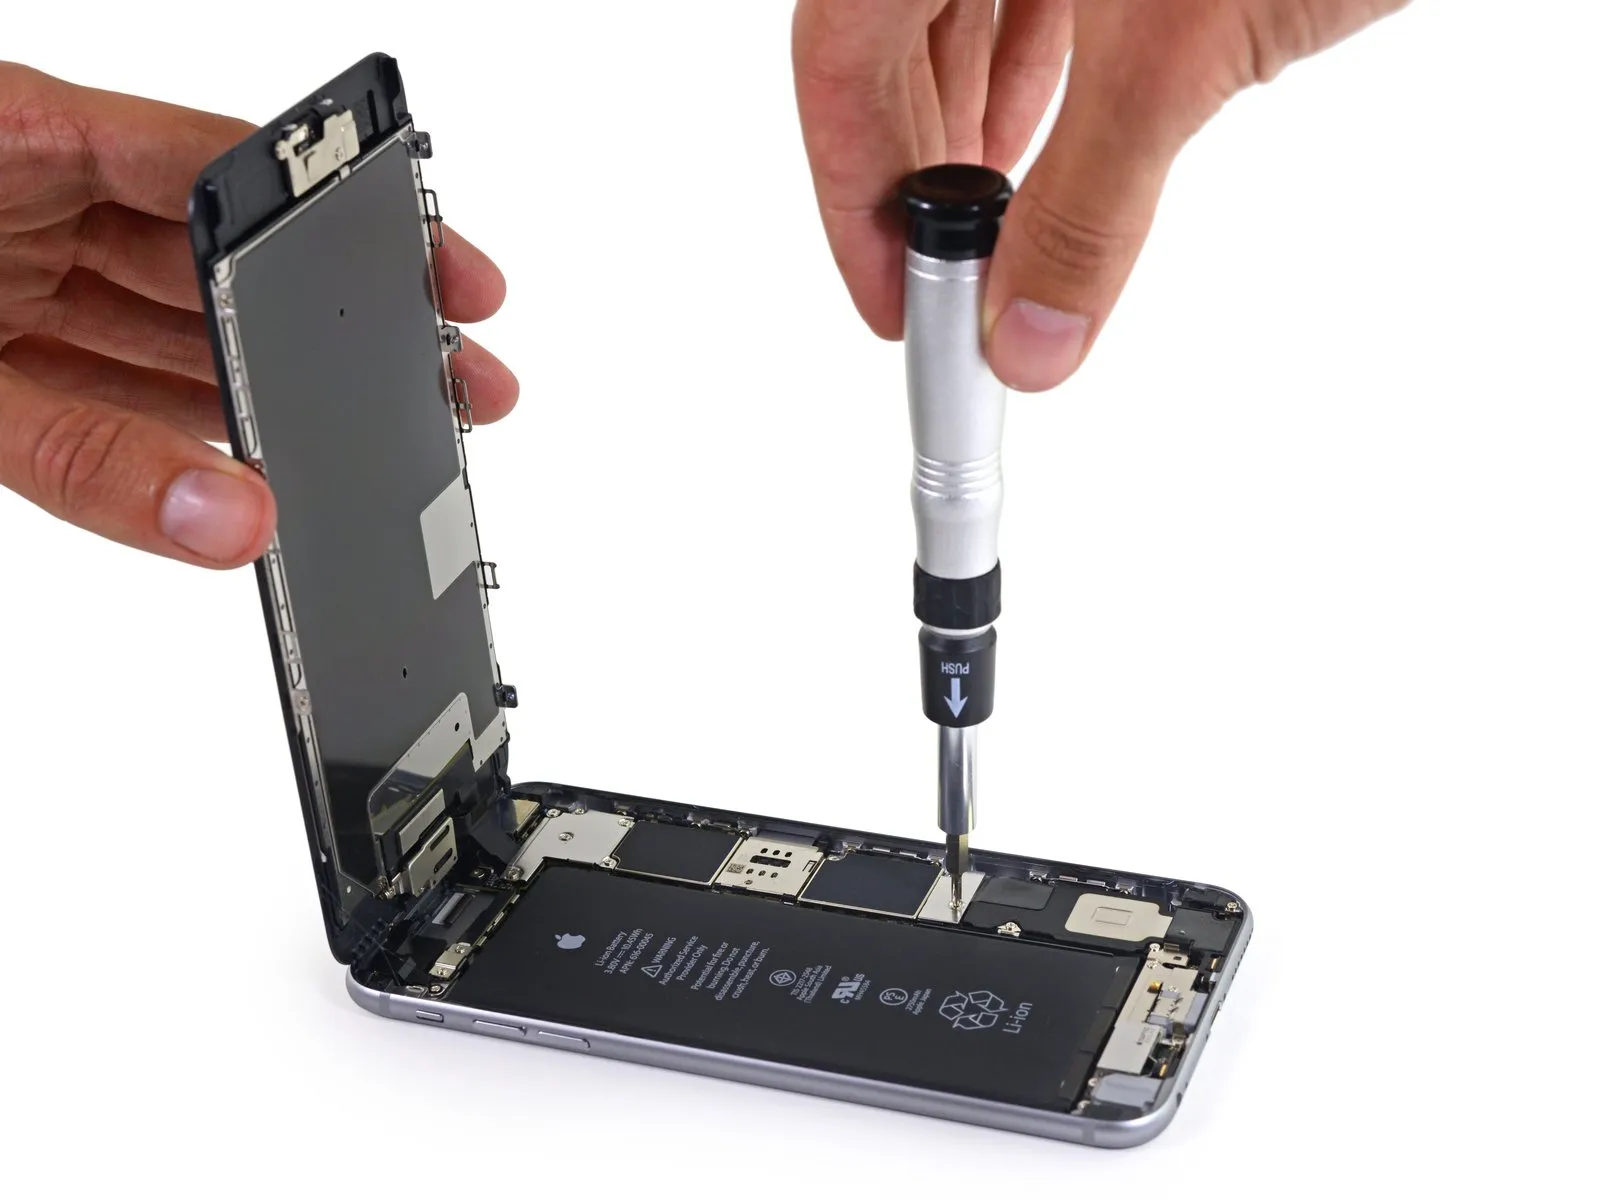
- Begin the disassembly process by disconnecting the battery connector.
- Similar to the 6s, the 6s Plus utilizes Phillips head screws internally, a welcome change from the Pentalobe design.
Step 6
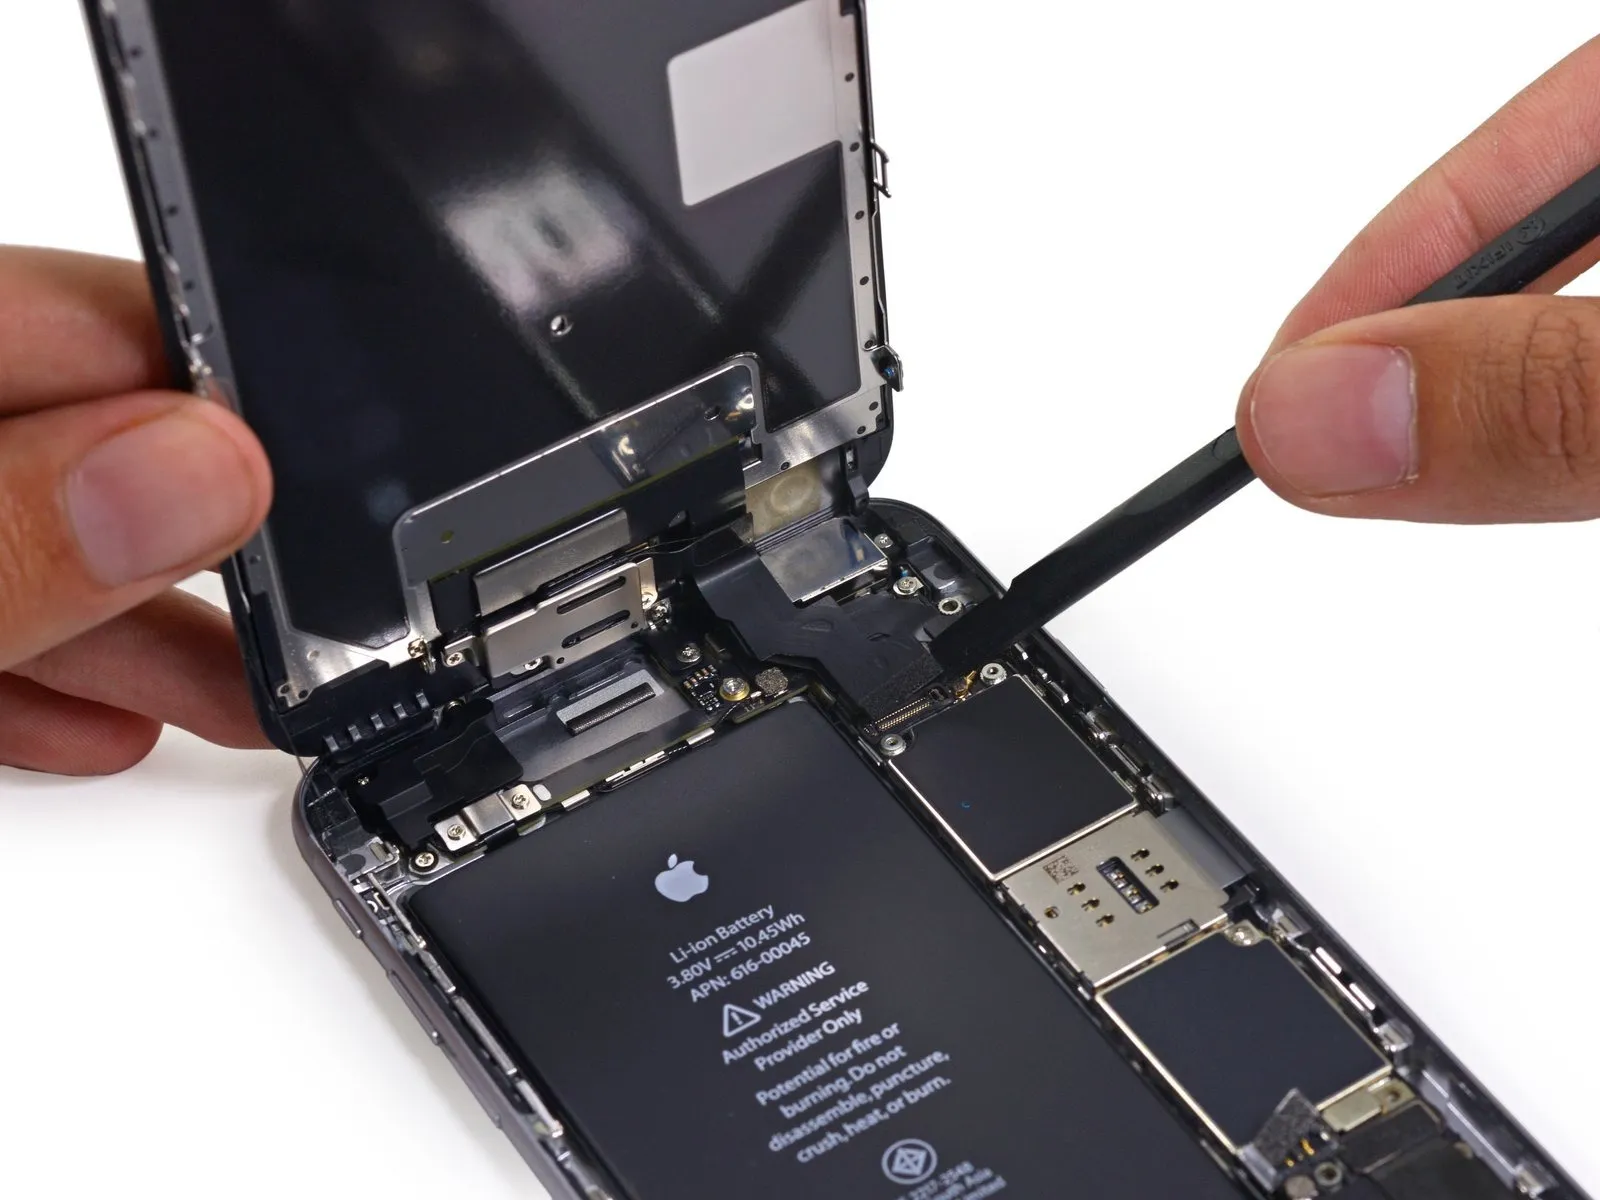

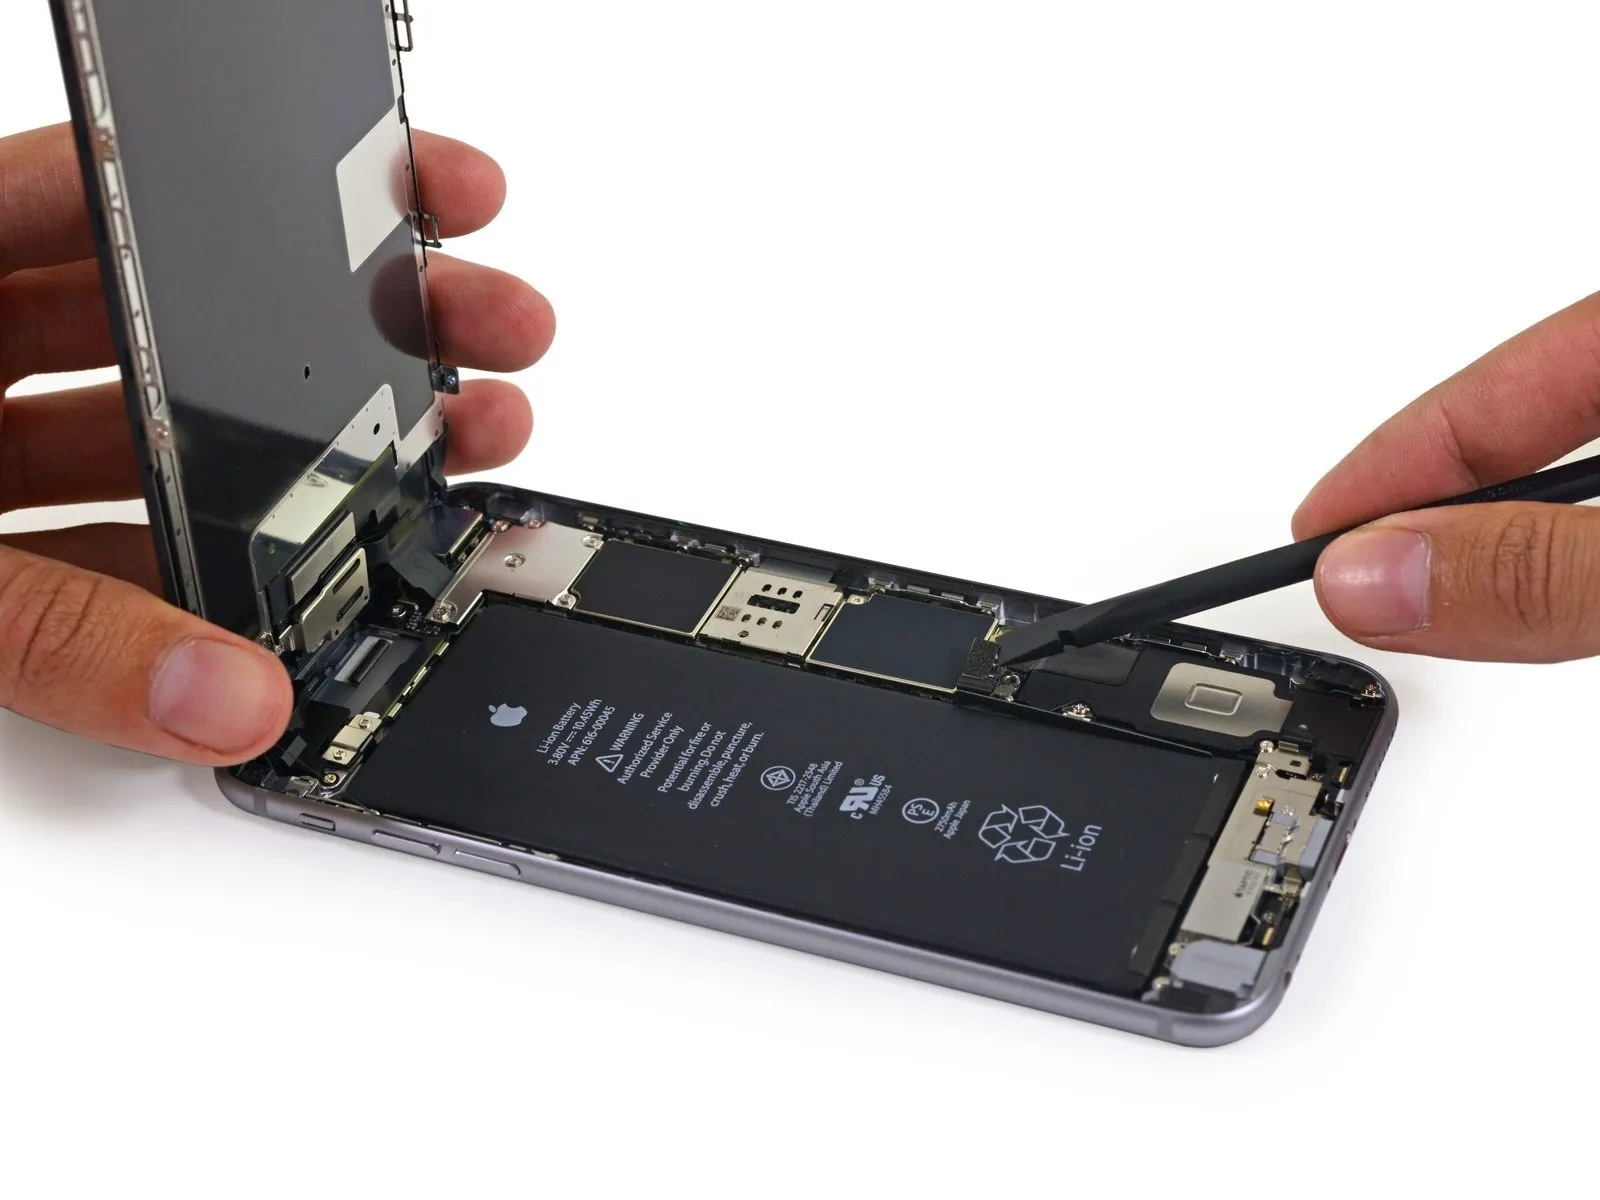
- Using a spudger, carefully release the display assembly from its connectors with three distinct prying motions to detach and remove it.
- Using a scale, record the weight of the display assembly; it should measure 80 grams on the 6s Plus, a significant increase from the previous 6 Plus model's 60-gram weight.
Using X-ray imaging, confirm the presence of additional silicon material adhered to the display surface, mirroring the condition previously observed in 6s models.
Step 7

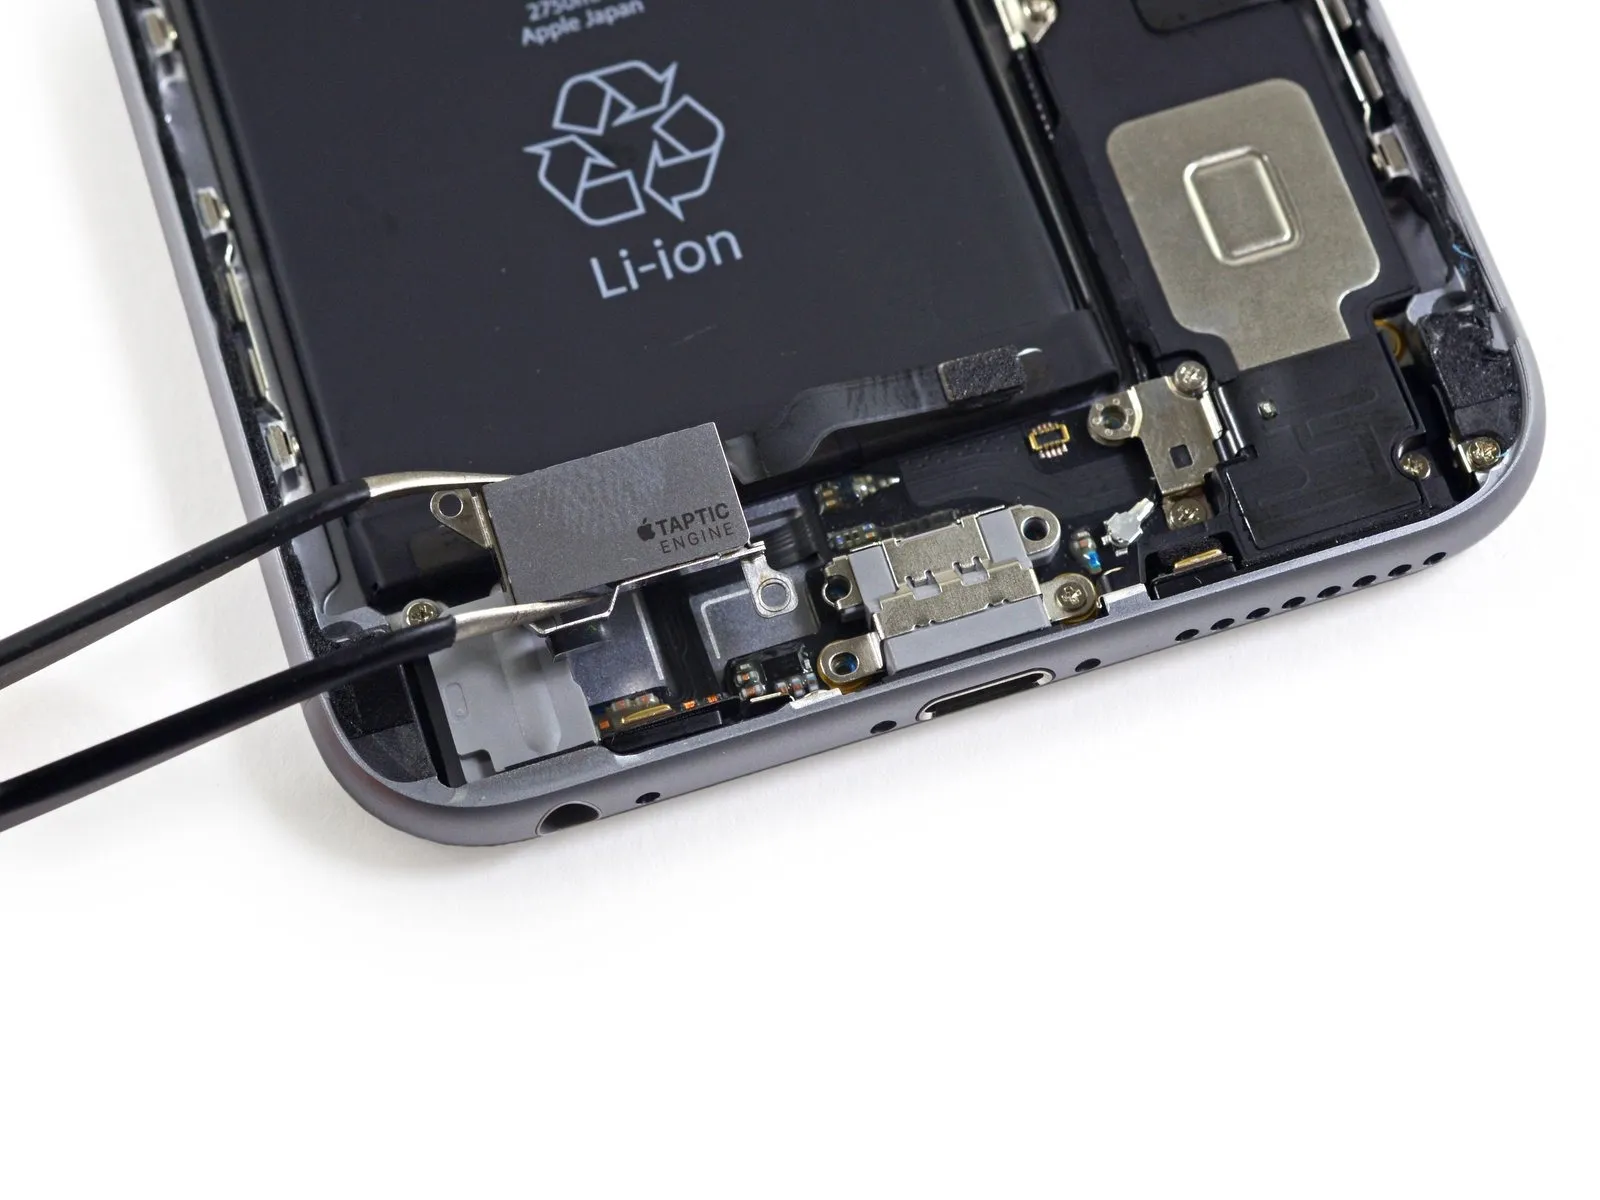
- Install a replacement bracket to fasten the Taptic Engine and its associated cable in place.
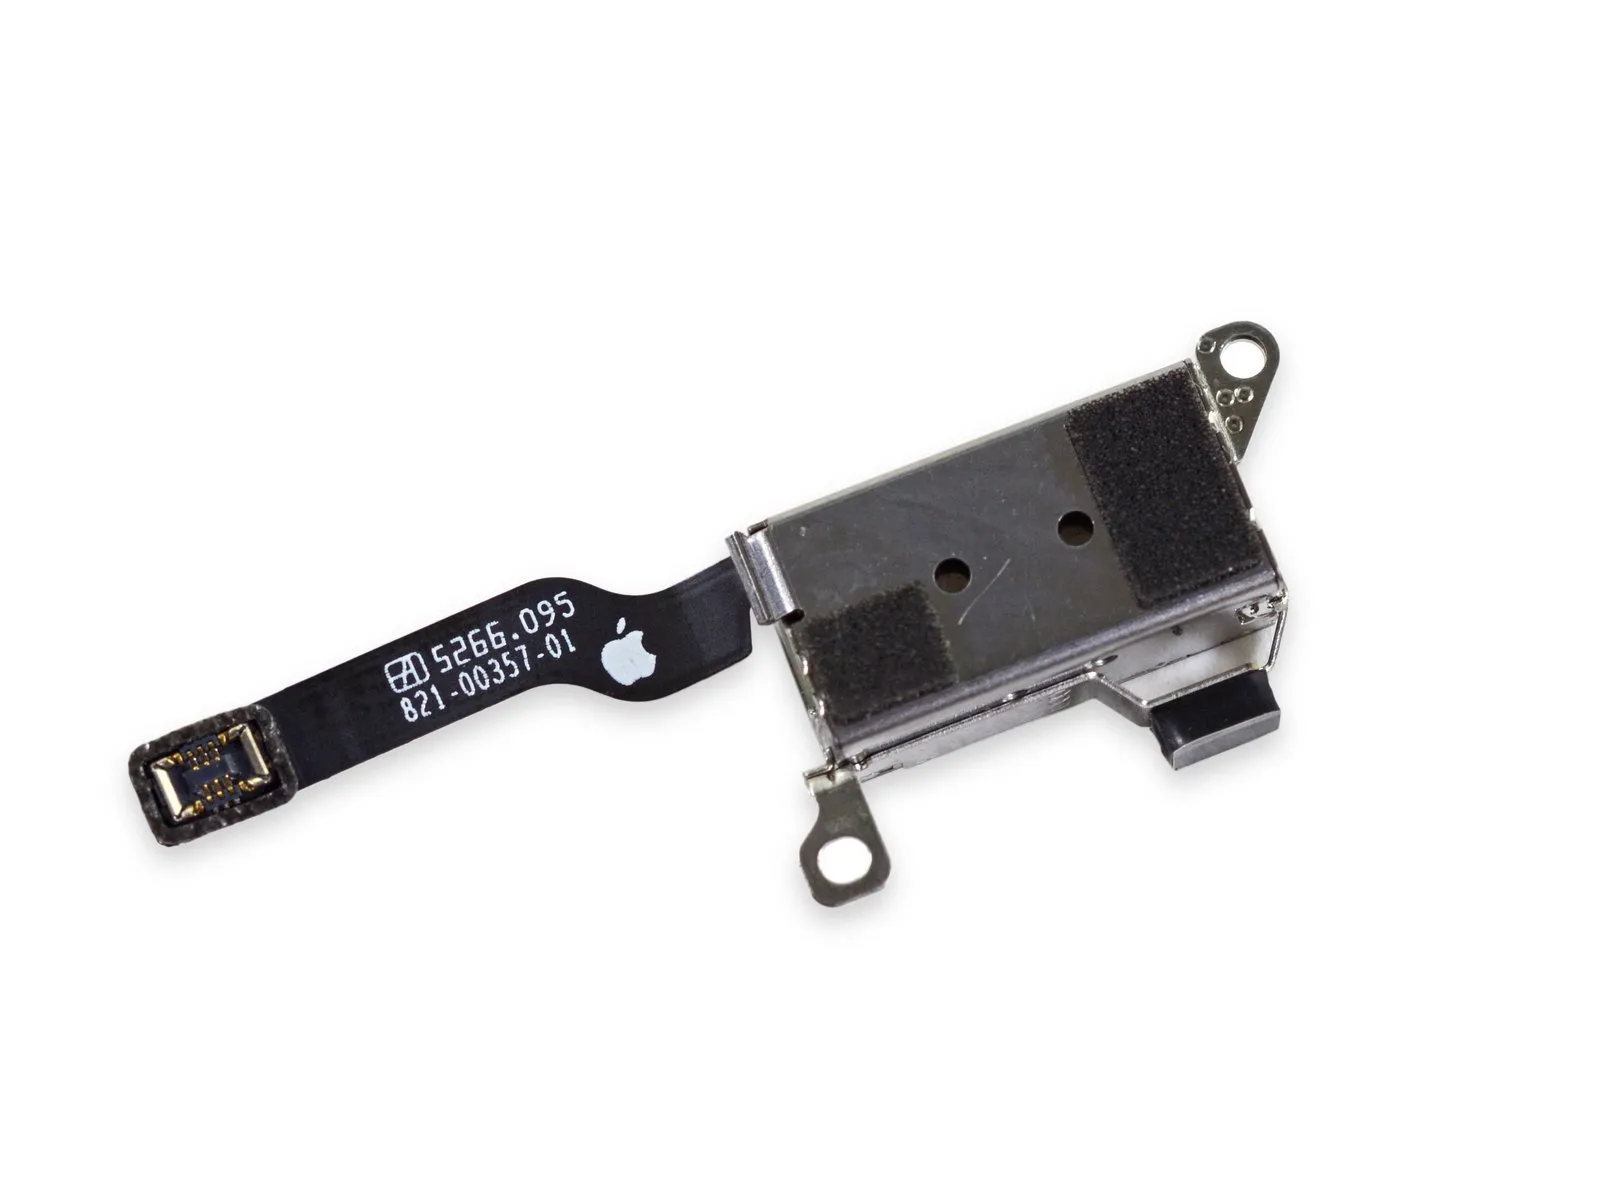
- The 6s Plus utilizes a Taptic Engine with dimensions of 20.3mm x 12.7mm x 3.2mm.The dimensions are 4.9 millimeters in height, 8 millimeters in width, and 15 millimeters in length.When making a comparison, utilize theThe dimensions of the component are 3.2 millimeters in height, 6 millimeters in width, and 35 millimeters in length.Locate the component originally used in the 6s model.
The reduced size of the device’s base is likely due to Apple’s decision to prioritize maintaining the existing, smaller battery capacity. - Expect limited space during assembly, as components are closely positioned.
A small rubber bumper secures the Taptic Engine and prevents it from contacting the microphone.
Step 8

- Briefly reinstall the Taptic Engine to allow it to execute its characteristic actuation.
- Unbeknownst to the device, its actions were under observation.
Step 9

- Under no circumstances should you detach the adhesive pull tabs.
- To detach the battery, grasp and release three tabs, ensuring proper alignment for successful separation.
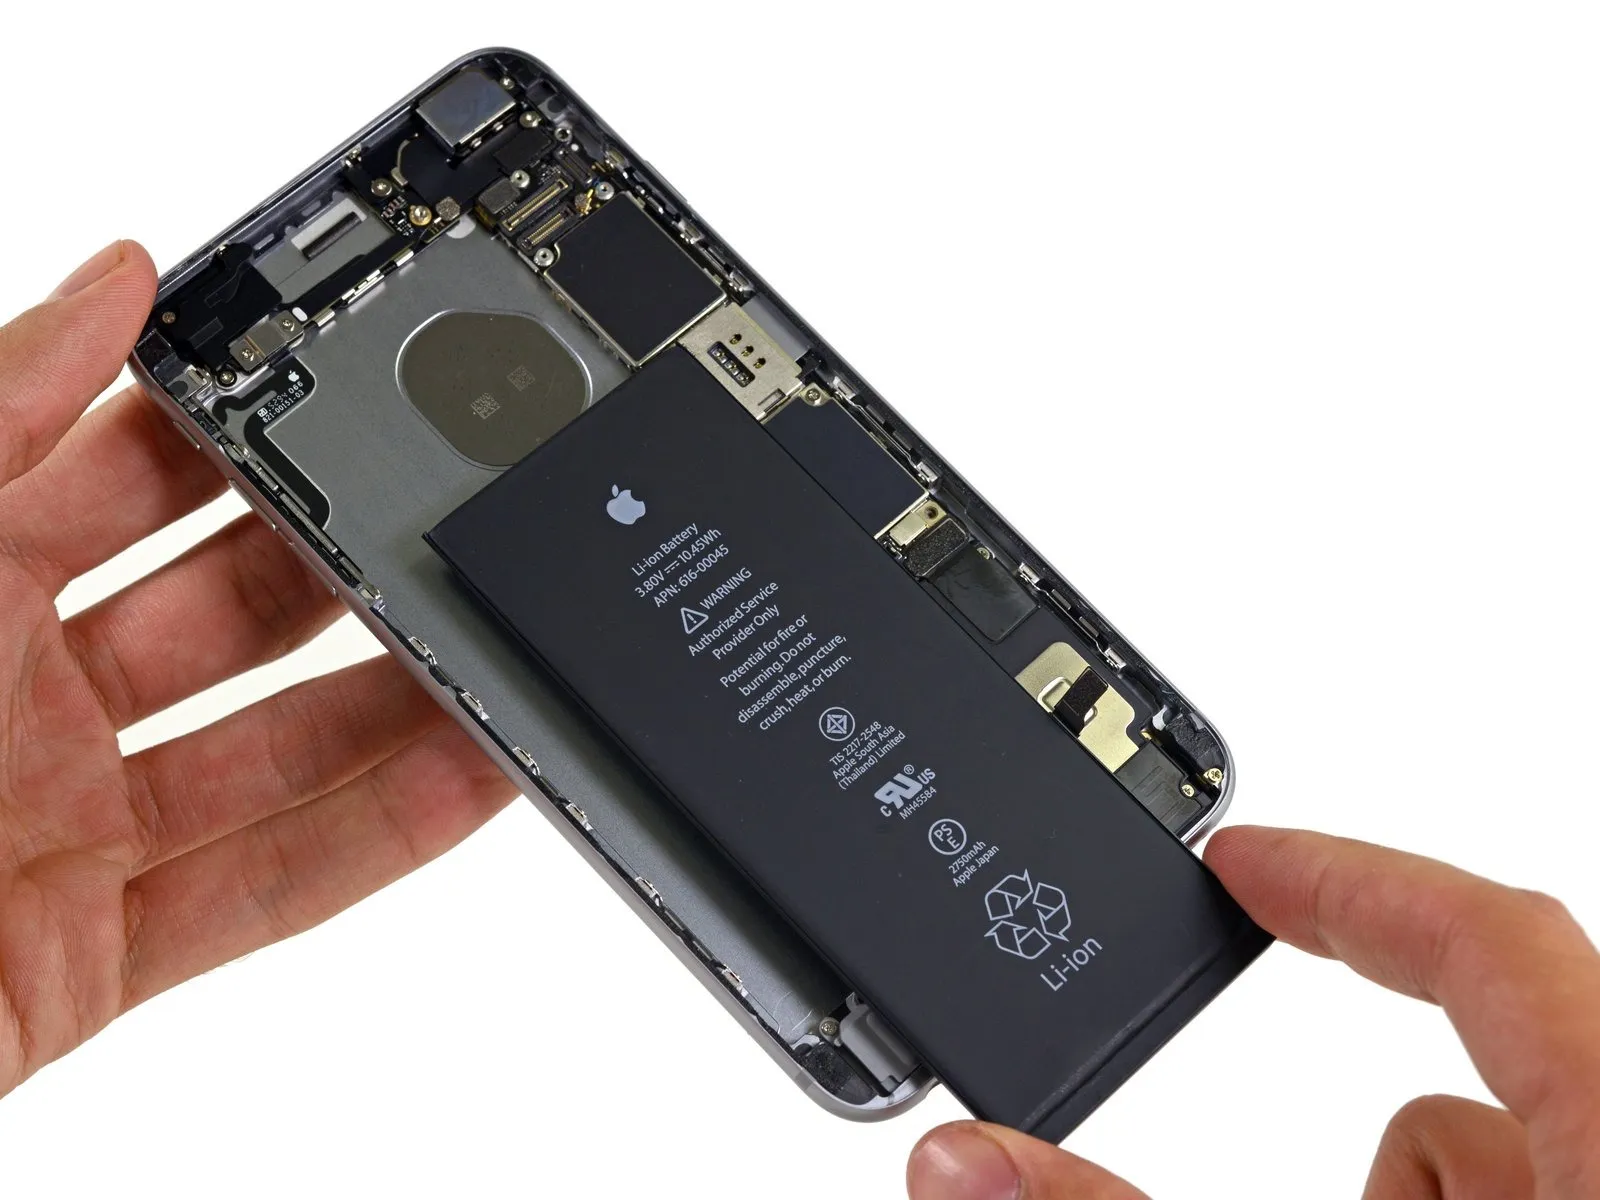
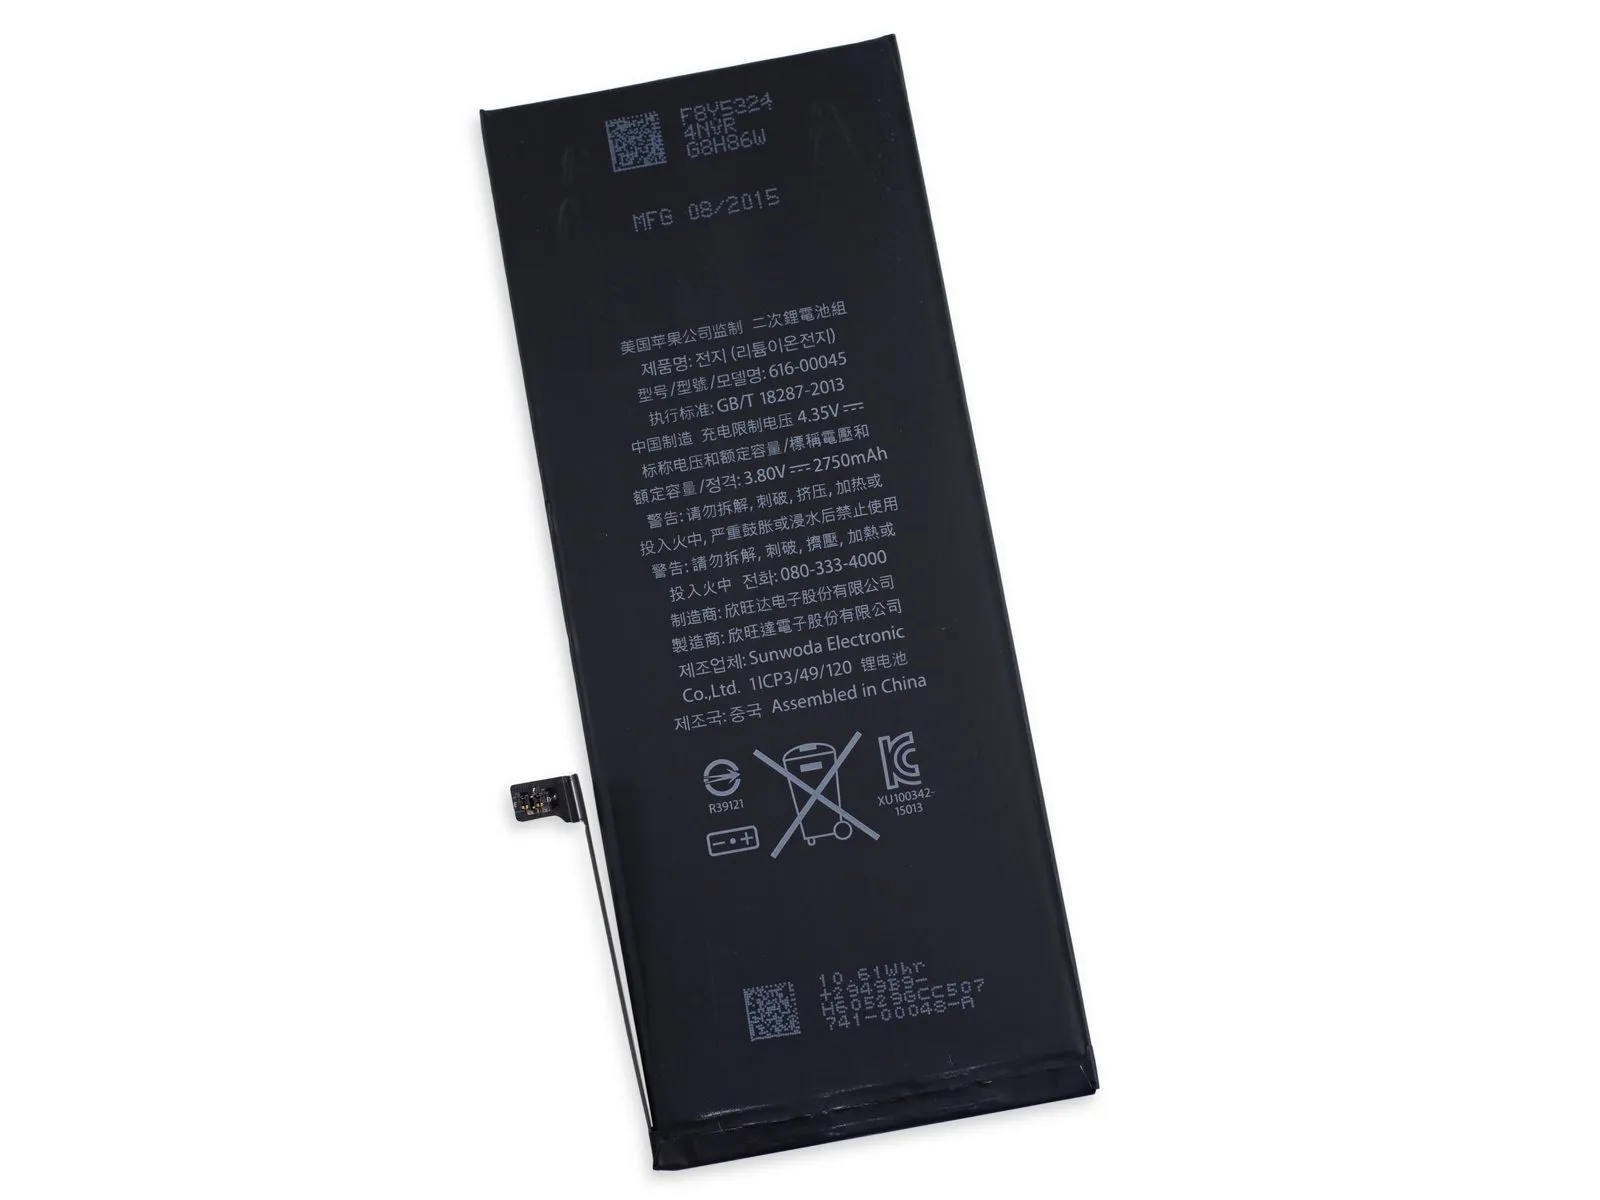
- The battery holds 2750 milliampere-hours (10.45 watt-hours), representing a 165 milliampere-hour reduction in capacity when compared to the 6 Plus model from the previous year.
- Apple states that, even with reduced performance, the device's battery performance should mirror that of the 6 Plus, delivering roughly 14 hours of 3G calls, around 10 hours of web browsing, or a standby time of up to 10 days.
Step 10

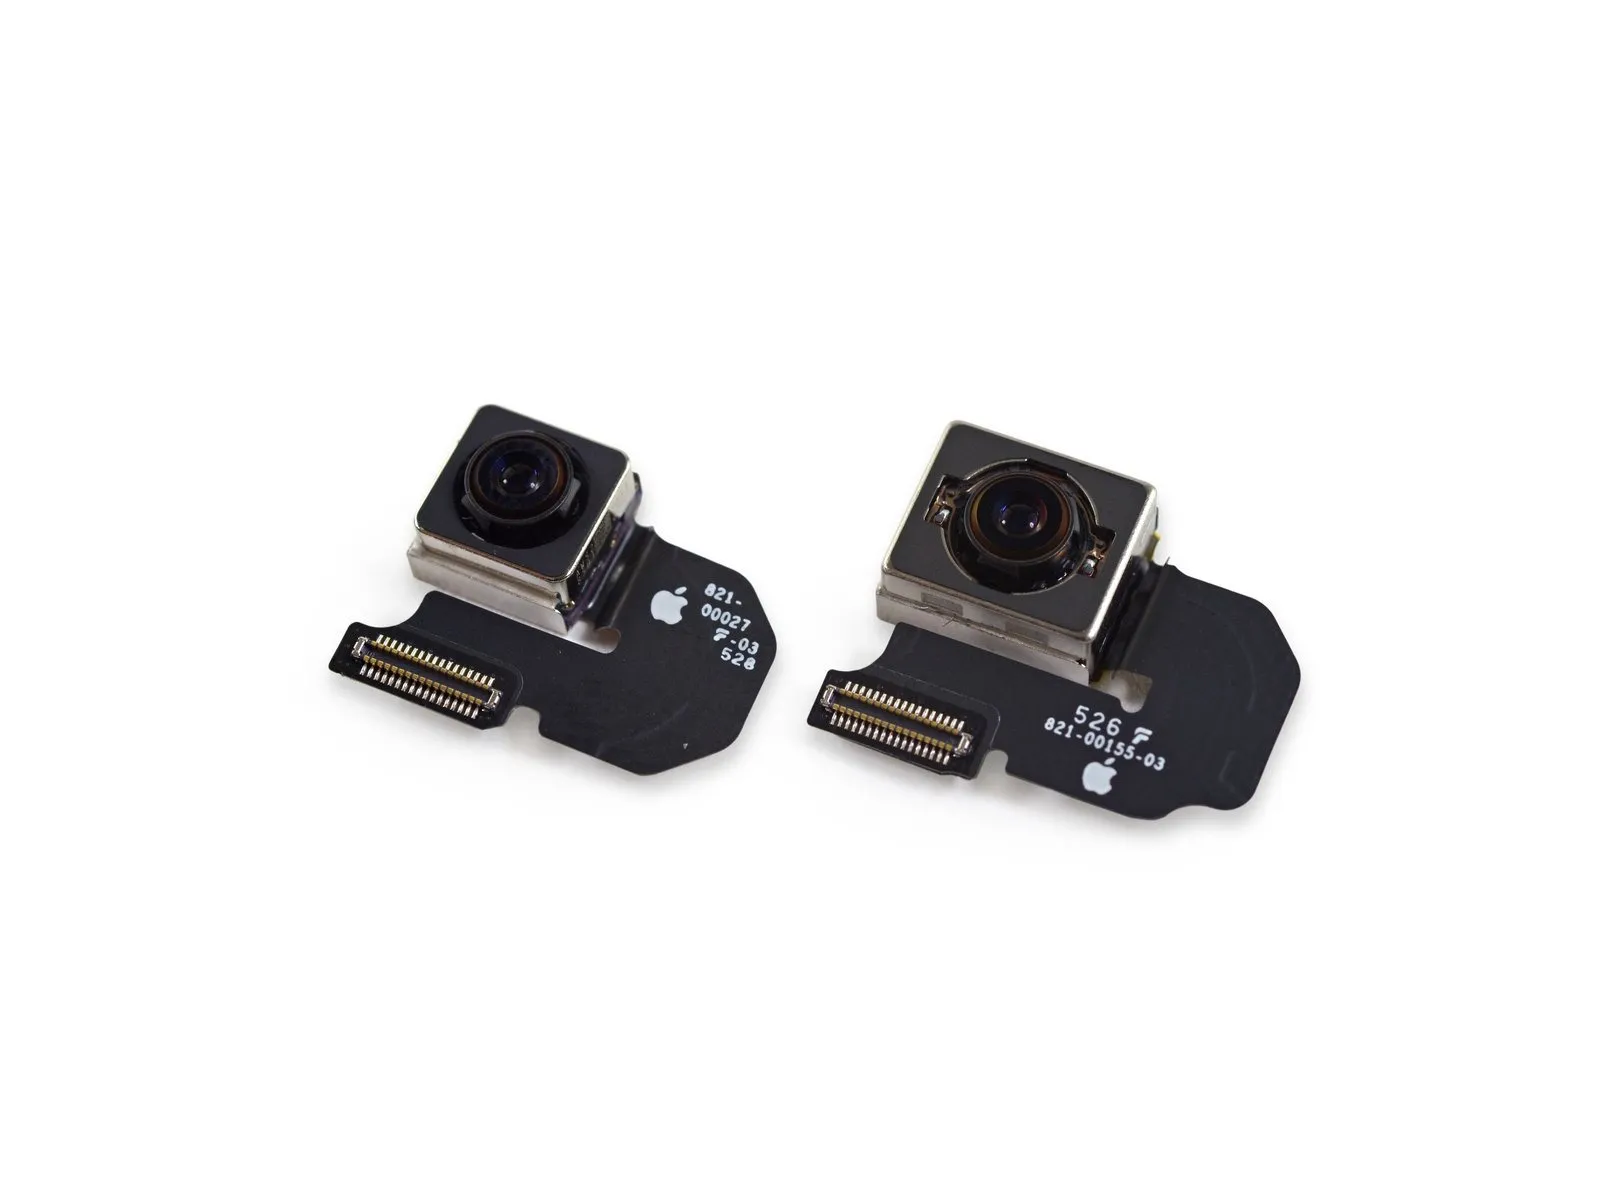
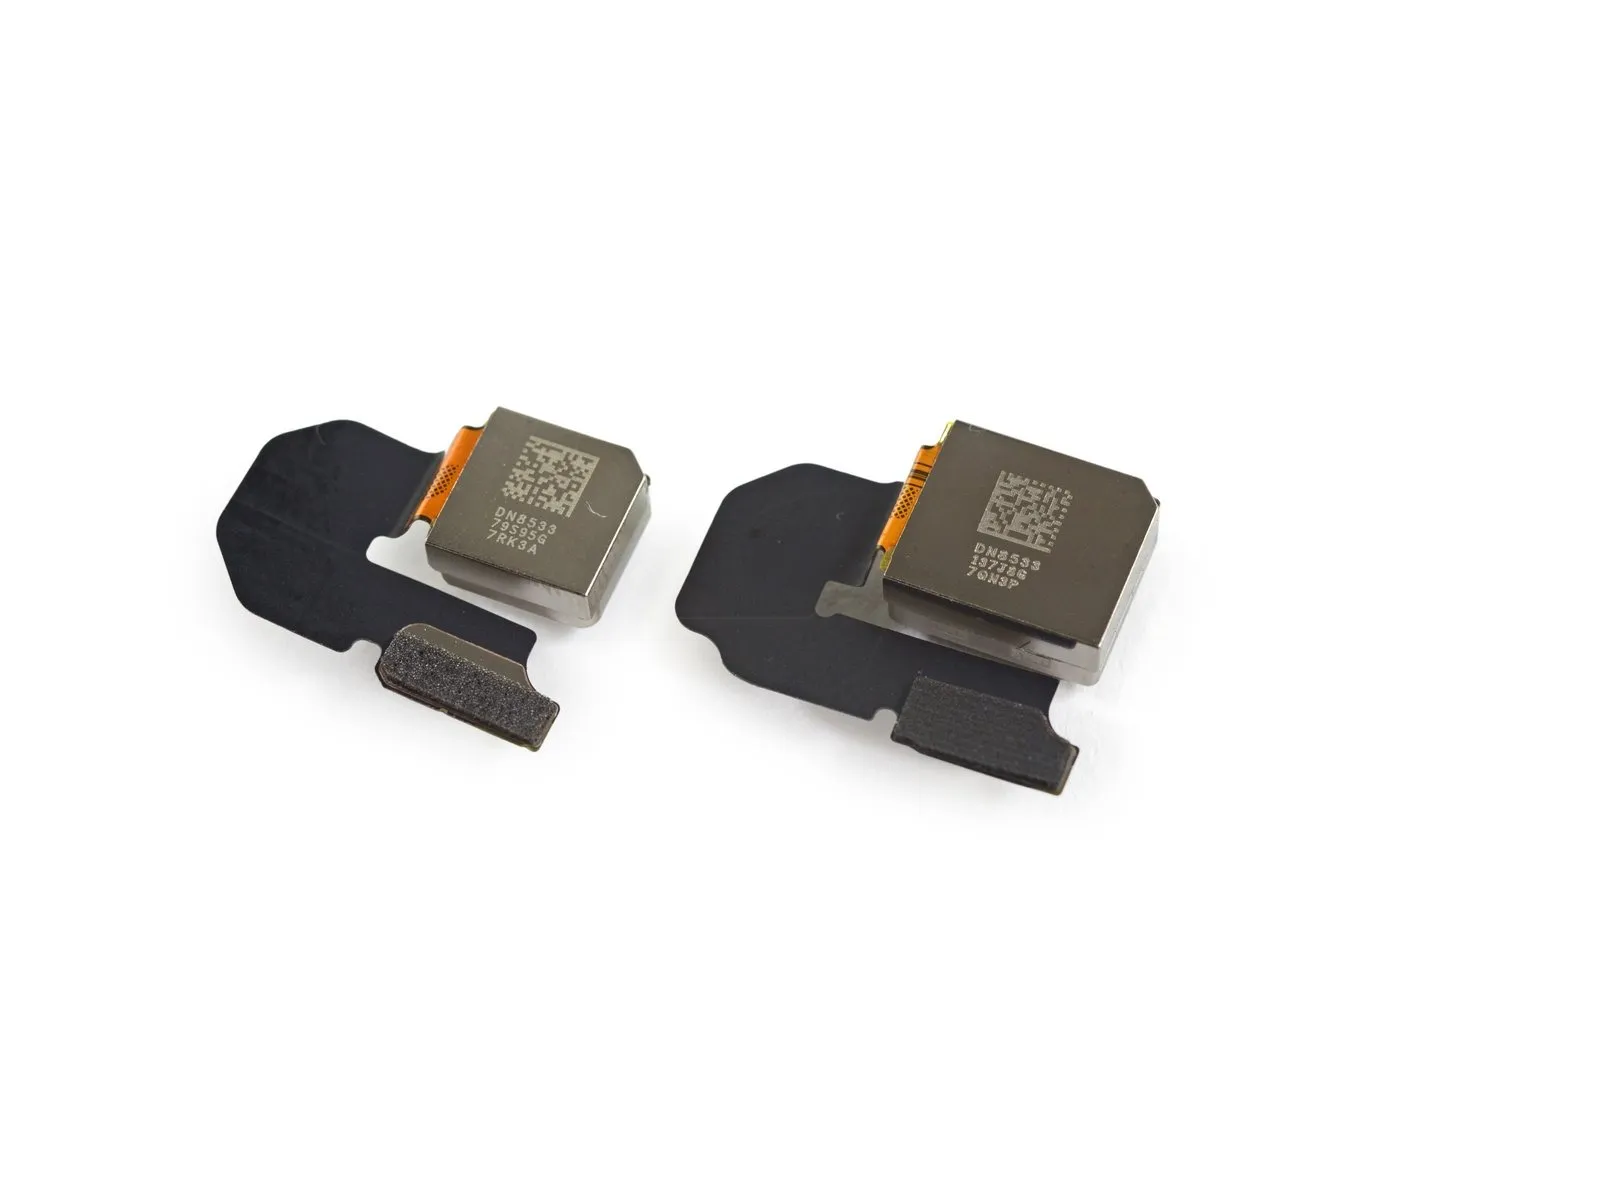
- A visual comparison of the iPhone 6s Plus iSight camera reveals a noticeable difference in size compared to the 6s camera, attributable to the inclusion of optical image stabilization components, which add extra weight.
Step 11
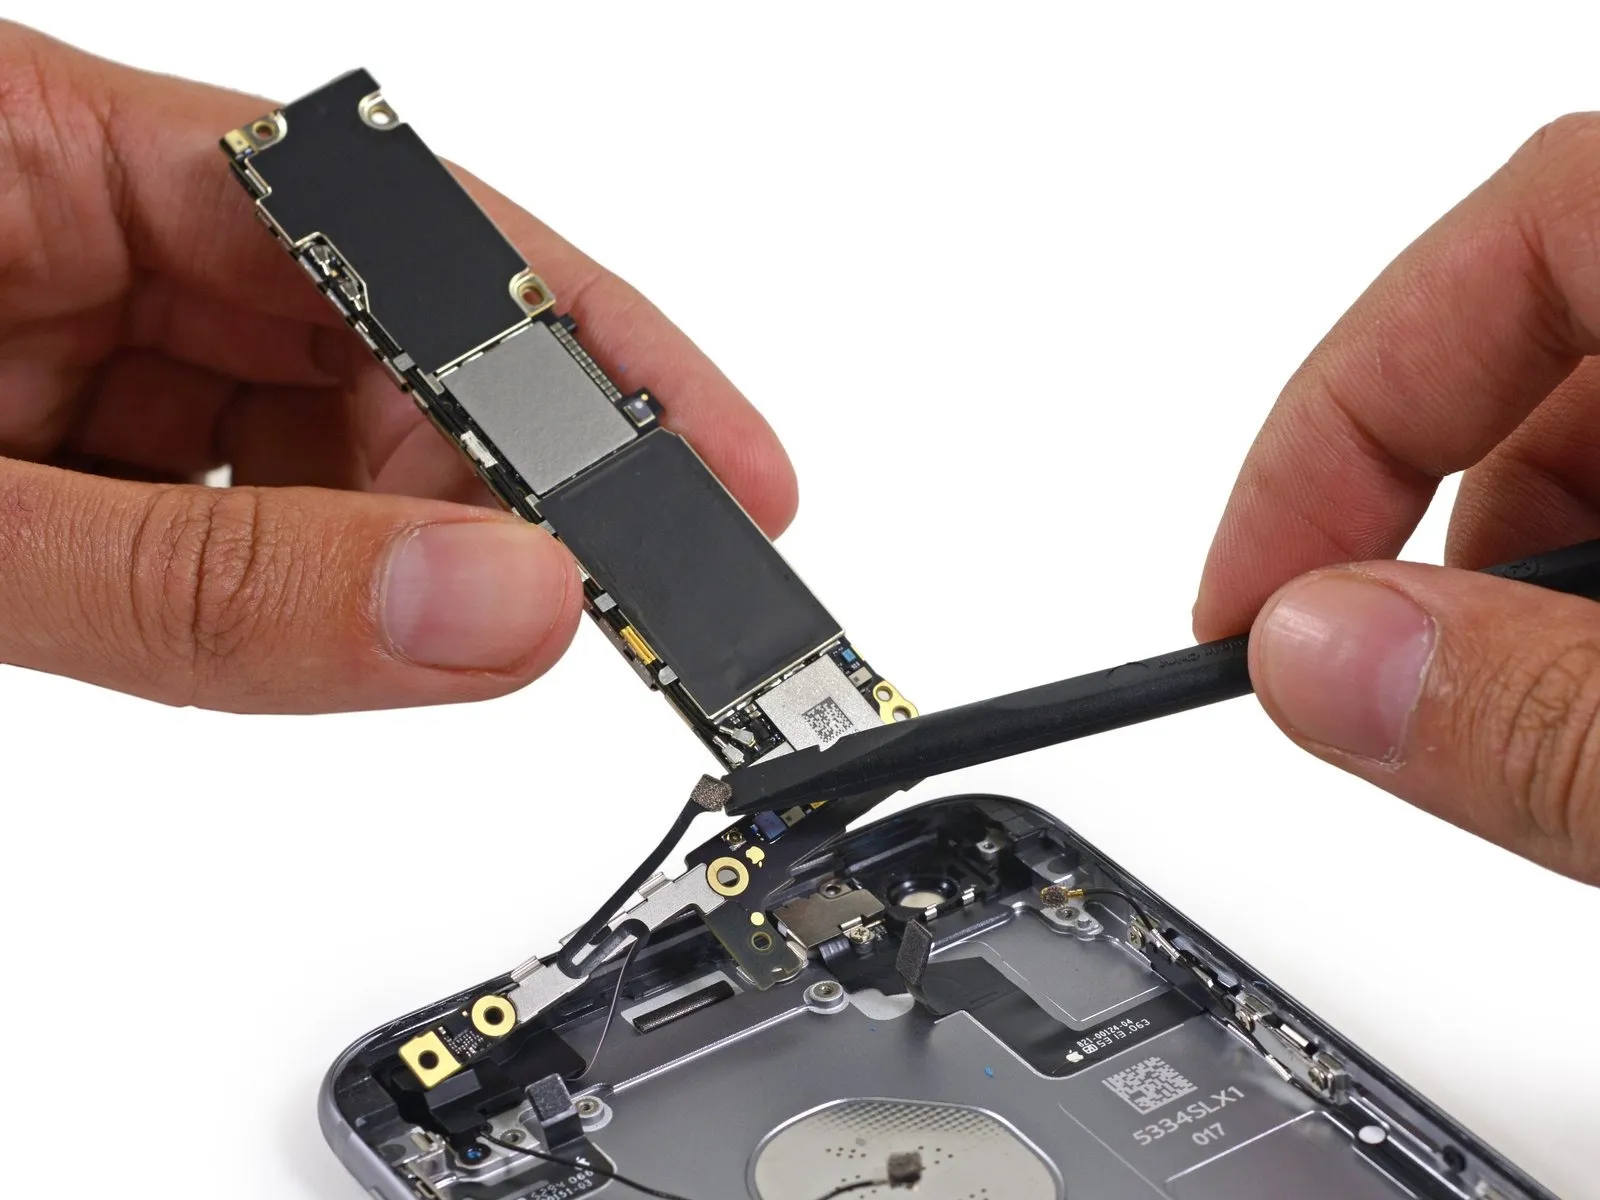

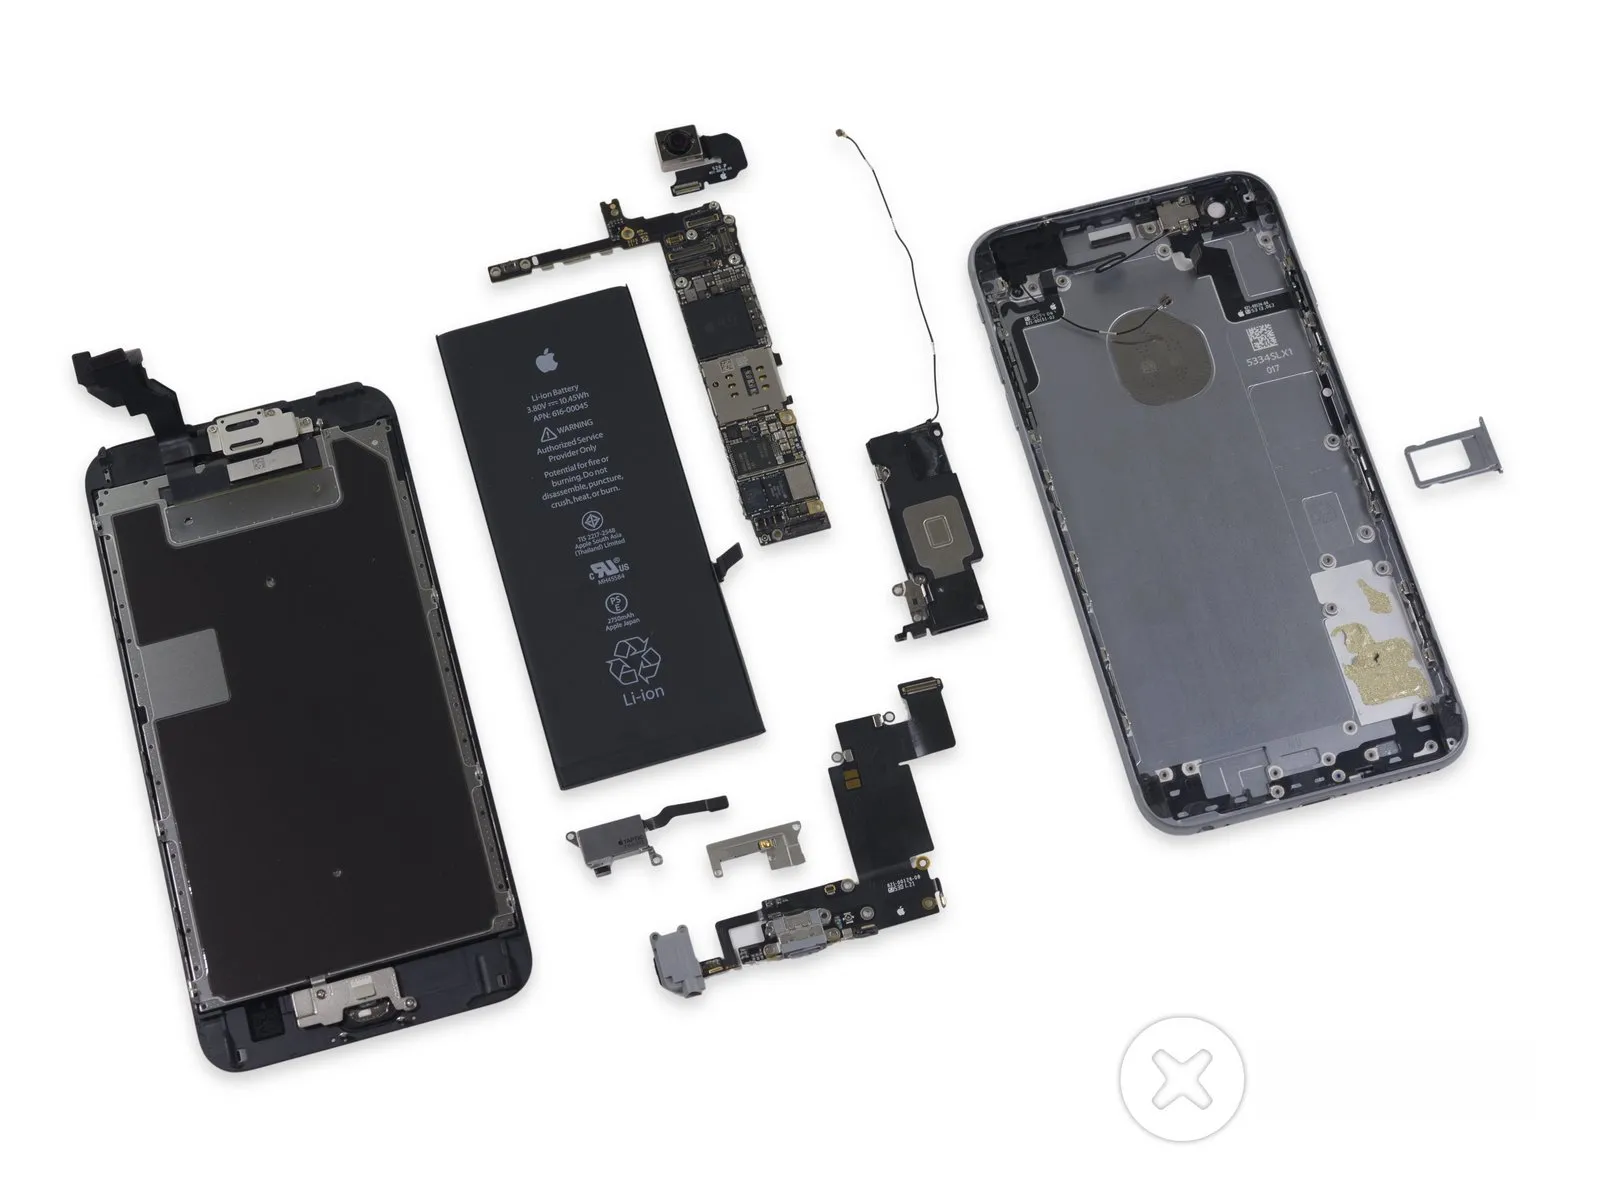
- Carefully detach the logic board, ensuring all technical specifications and part names are preserved.
- Carefully disconnect the ribbon cables and circuit boards, employing dexterity comparable to a professional card dealer.
- Extracting the logic board demands careful maneuvering, similar to a skilled card player. Once the last connector is disconnected, rotate the board; this step is minor in scope but may present some difficulty.
- Carefully remove the logic board from its enclosure to facilitate detailed inspection, ensuring ample workspace is available to accommodate the numerous integrated circuits during the disassembly process.
Step 12

- Prepare fish and chips on a grill; fish is not supplied.
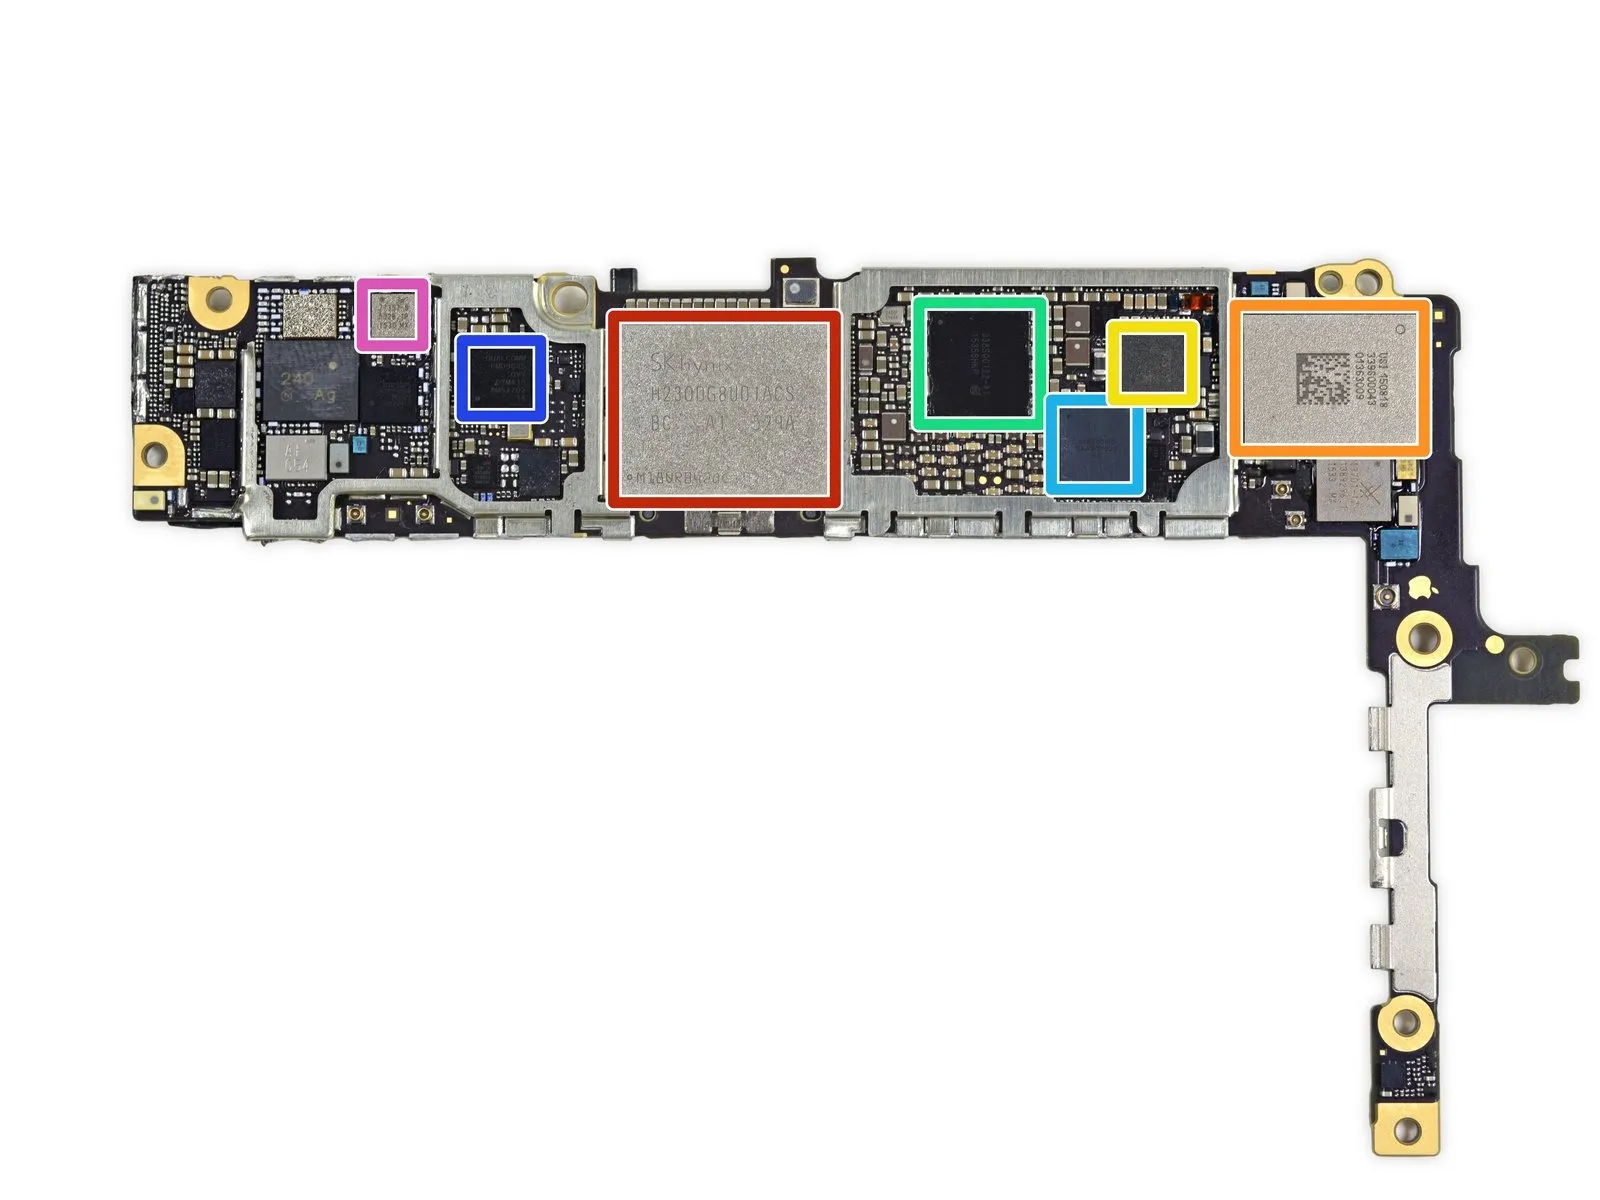
- The device incorporates an Apple A9 APL1022 system-on-a-chip paired with SK Hynix LPDDR4 RAM, identifiable by the part number H9HKNNNBTUMUMR-NLH, which is likely a 2 GB LPDDR4 module consistent with the iPhone 6s configuration.
- The iPhone 6 utilizes the MDM9625M LTE Cat. 6 Modem, whereas newer devices incorporate the Qualcomm MDM9635M.
- TriQuint's TQF6405 serves as a power amplifier module.
- The Skyworks SKY77812 is a power amplifier module.
- Avago's AFEM-8030 is a power amplifier module.
- The device is a Qualcomm QFE1100 integrated circuit designed for envelope tracking.
- The device probably incorporates a combined gyroscope and accelerometer module manufactured by InvenSense, featuring six axes of measurement.
Step 13
Locate the Apple chips affixed to the rear surface of the logic board.
- SK Hynix H23QDG8UD1ACS16 gigabytes of NAND flash memory.
- Wi-Fi connectivity is provided by the Universal Scientific Industrial 339S00043 module.
- The iPhone utilizes an NXP 66V10 NFC controller, a successor to the 65V10 previously used.
- Power management integrated circuit, Apple/Dialog 338S00122.
- The audio integrated circuit is designated Apple/Cirrus Logic 338S00105.
- The device utilizes a Qualcomm PMD9635 integrated circuit for power management.
- The Skyworks SKY77357 is a power amplifier module, functionally similar to the SKY77354.
Step 14

- Employ a Murata 240 front-end module.
- Employ the RF5150 antenna switch manufactured by RF Micro Devices.
- The component identified as an NXP 1610A3, which is probably a revised version of the 1610A1 previously used in iPhone 5s and 5c models, is present.
- The audio integrated circuit, identified as an Apple/Cirrus Logic 338S1285, is probably a revised version of the 338S1202 audio codec previously used in the iPhone 5s.
- The power management integrated circuit is a Texas Instruments TPS65730A0P.
- The device is a Qualcomm WTR3925 Radio Frequency Transceiver.
- The Skyworks SKY13701 is a module combining a low-noise amplifier and filter for cellular and GPS reception.
- Employ a Texas Instruments TI 57A5KXI.
Step 15

It is conceivable that aThe BMP280, a barometric pressure sensor manufactured by Bosch Sensortec, measures atmospheric pressure.
Step 16
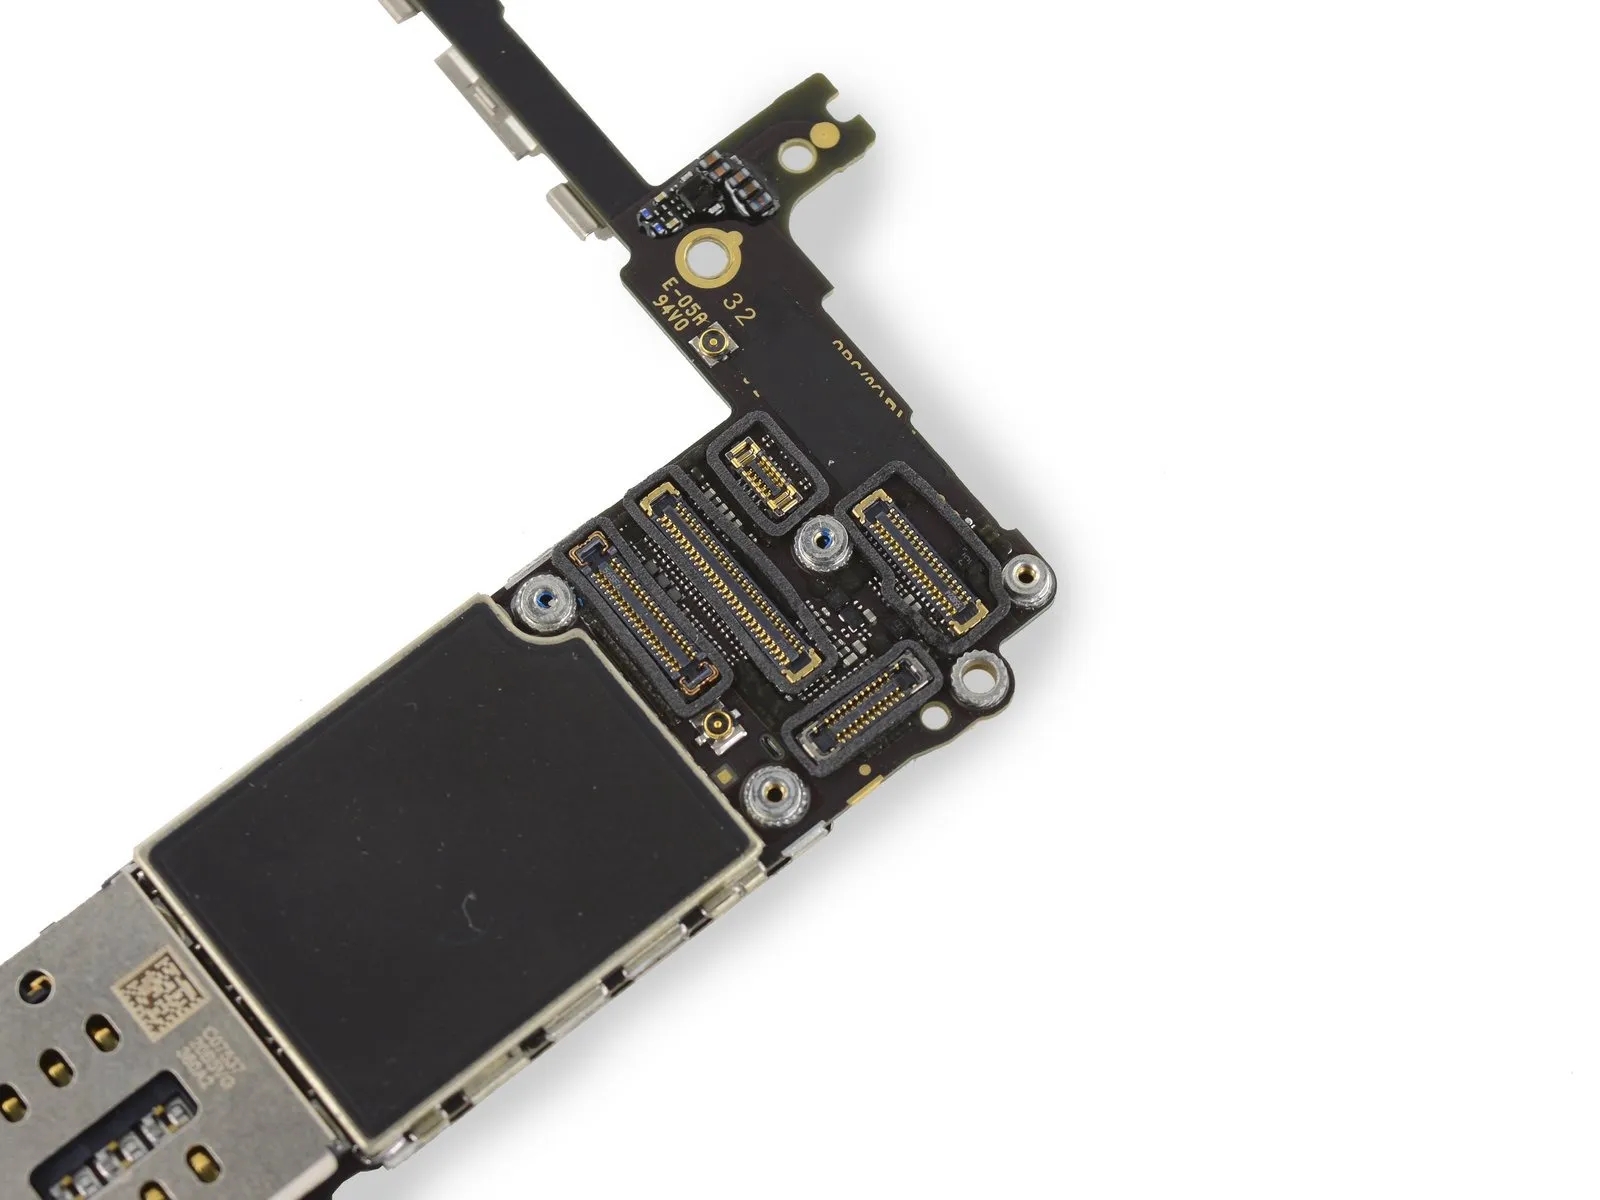
Similar to the iPhone 6s's design, the logic board incorporates small silicone seals to safeguard its connectors.
These are the waterproof seals made of silicone.The technology was formally secured by Apple through a patent application filed in March..
Water-damaged phones frequently experience connector issues on the logic board.
Evaluations confirm a significant enhancement in water resistance for both the iPhone 6s and iPhone 6s Plus models.Apple does not provide any claims regarding water resistance.Ensure proper installation and operation according to the included documentation.
Step 17
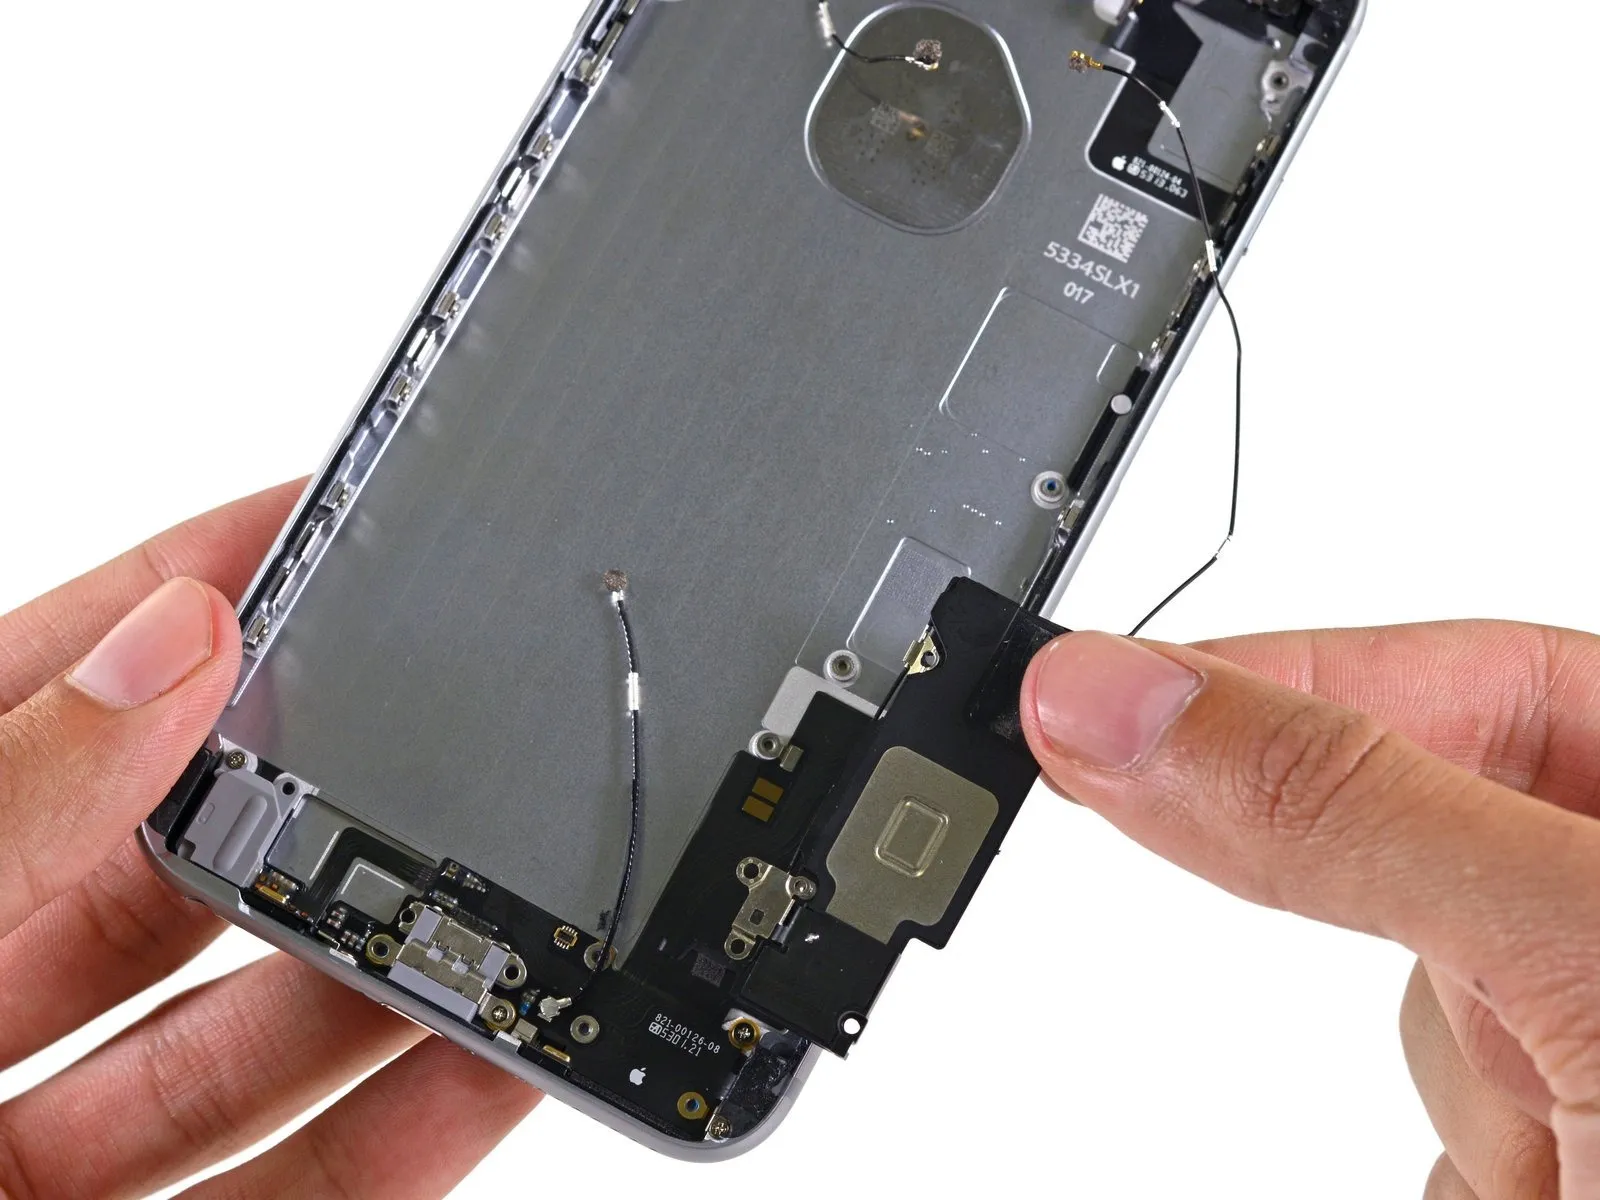

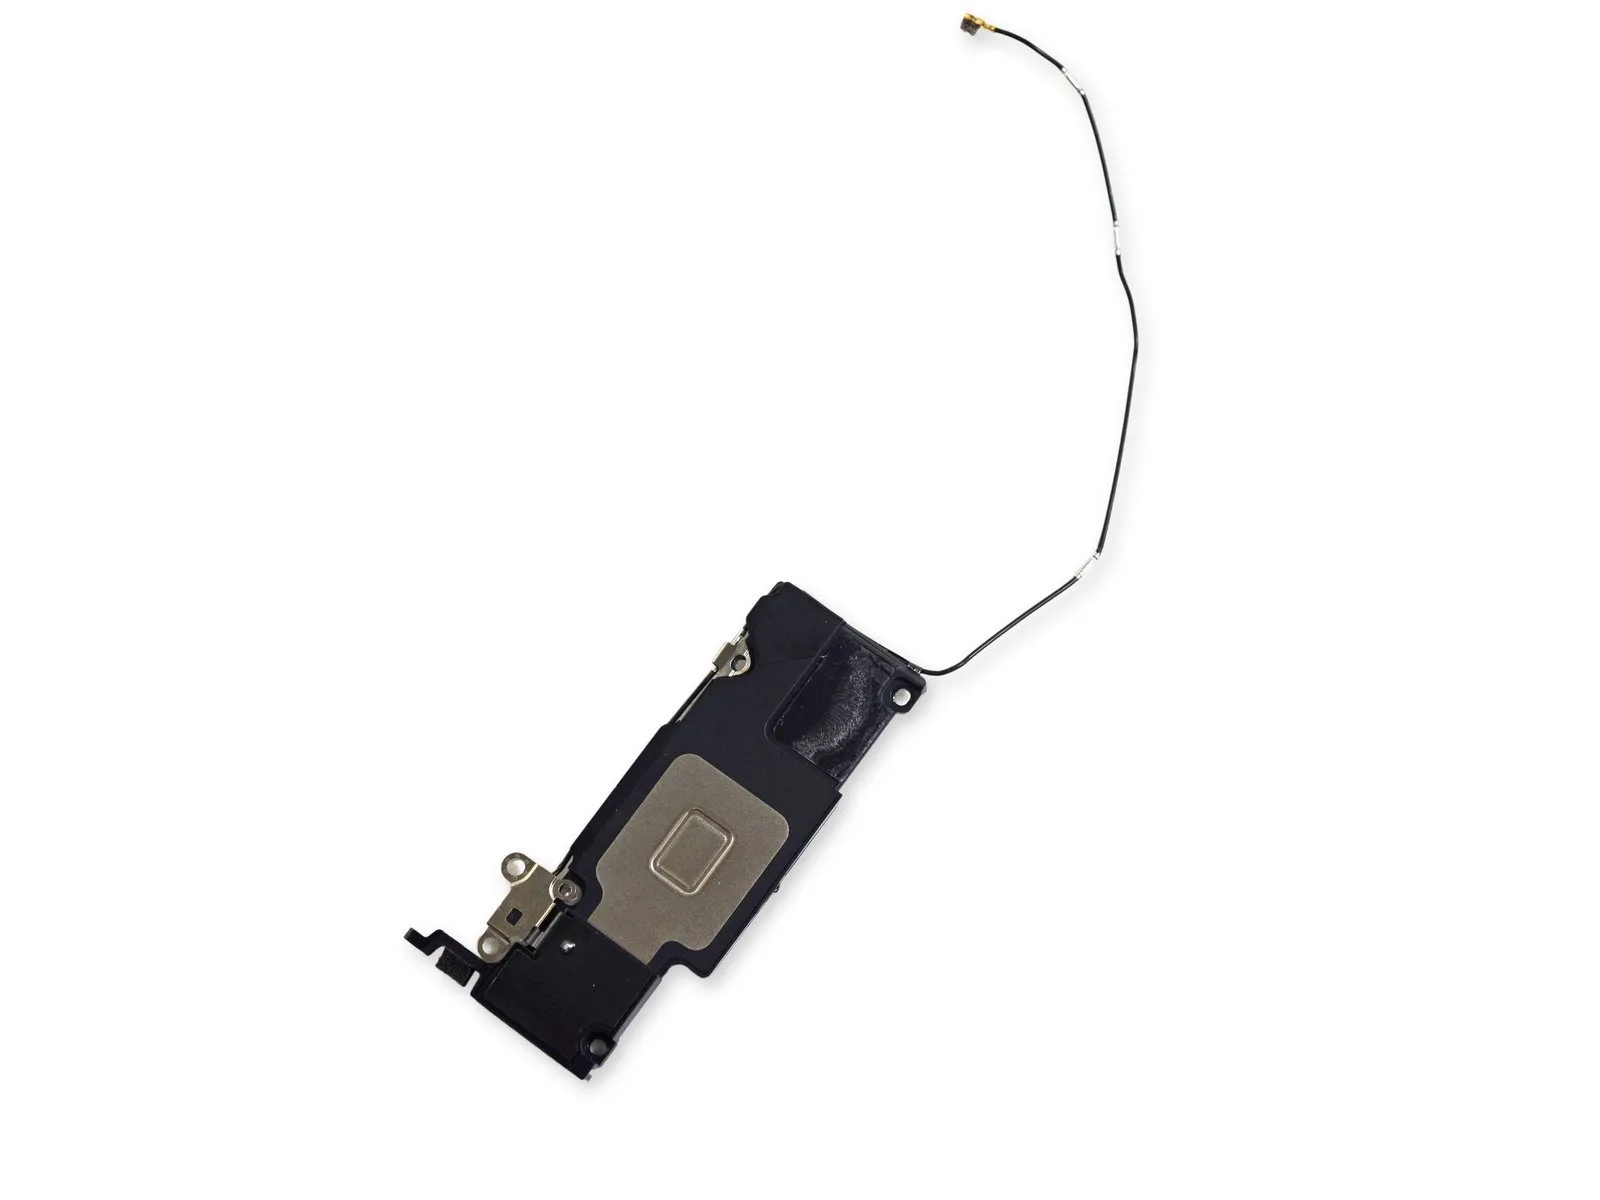
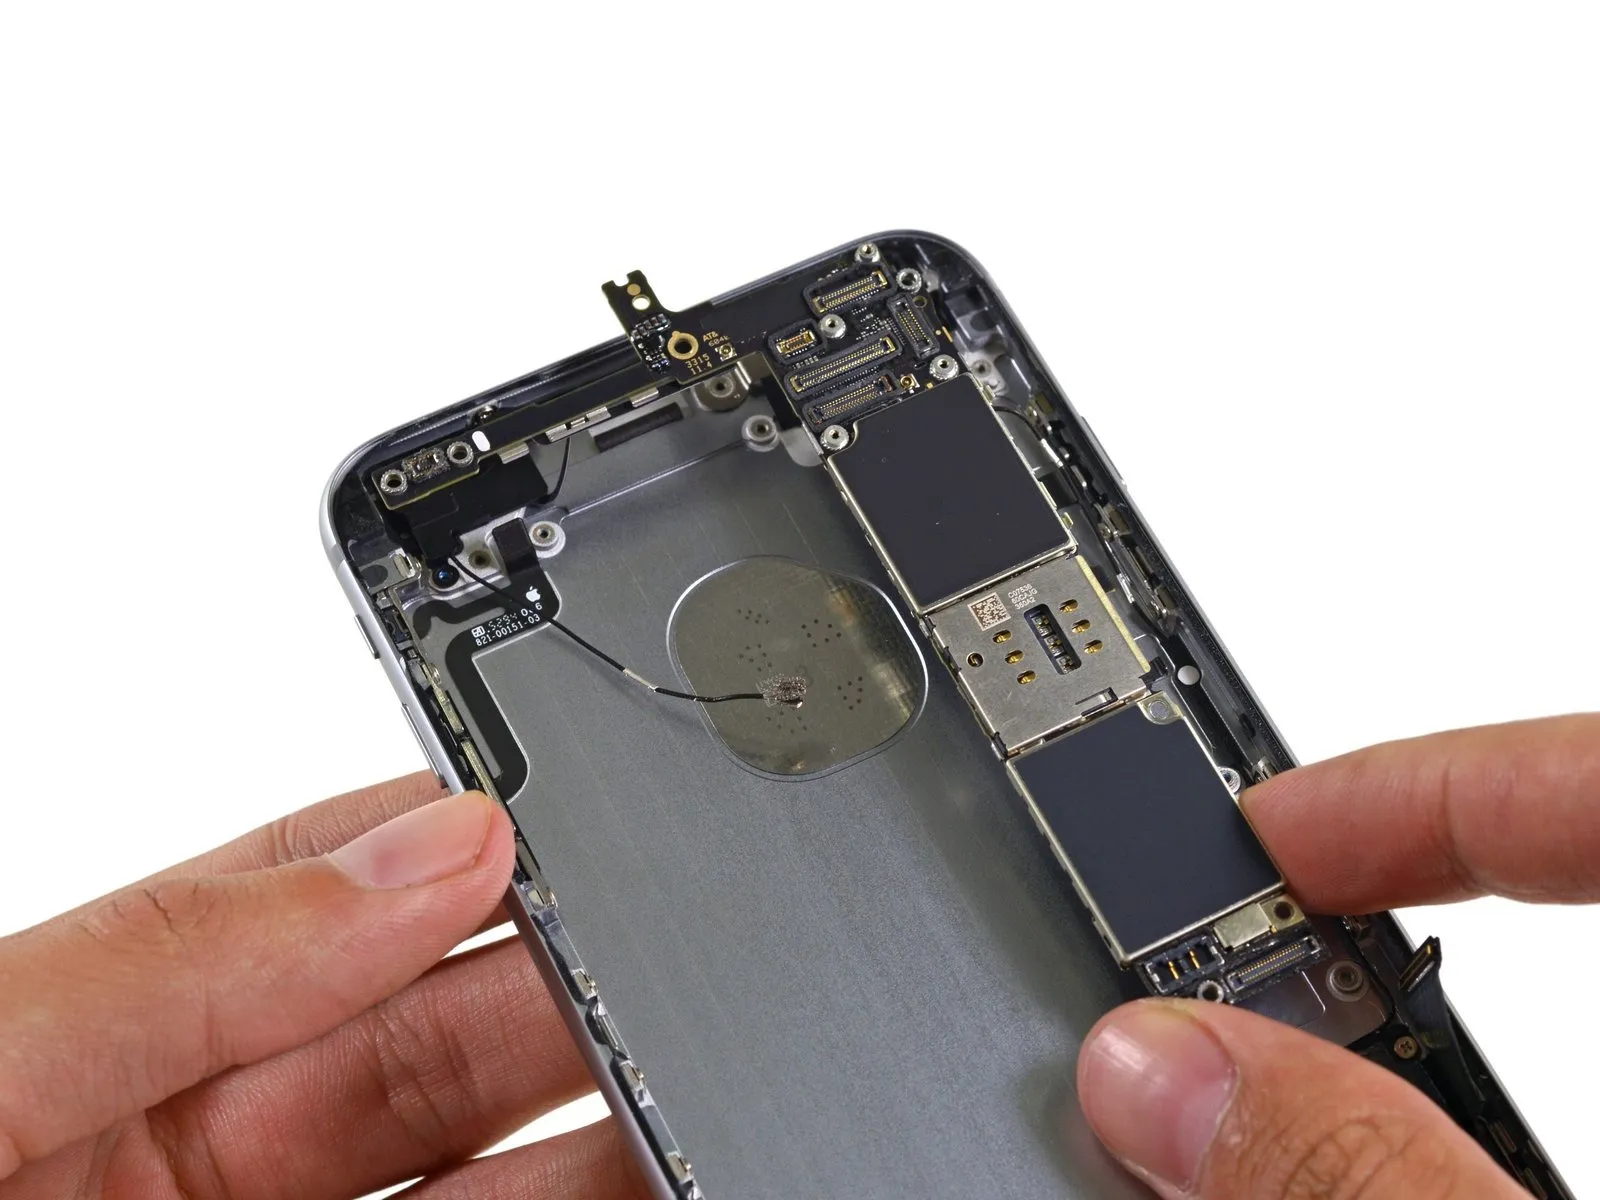
- Carefully access the most recessed areas of theiPhone 6s PlusThe speaker component, accompanied by its associated antenna, is now visible.
- Carefully align the component, ensuring a precise 1.2mm gap, and then secure it with the provided M3 screw using a Phillips head screwdriver, observing the caution regarding potential pinch points.6sThe replacement speaker closely matches the specifications and design of the original unit.iPhone 6 PlusThe design is nearly identical in physical dimensions, with no readily apparent alterations.
Step 18

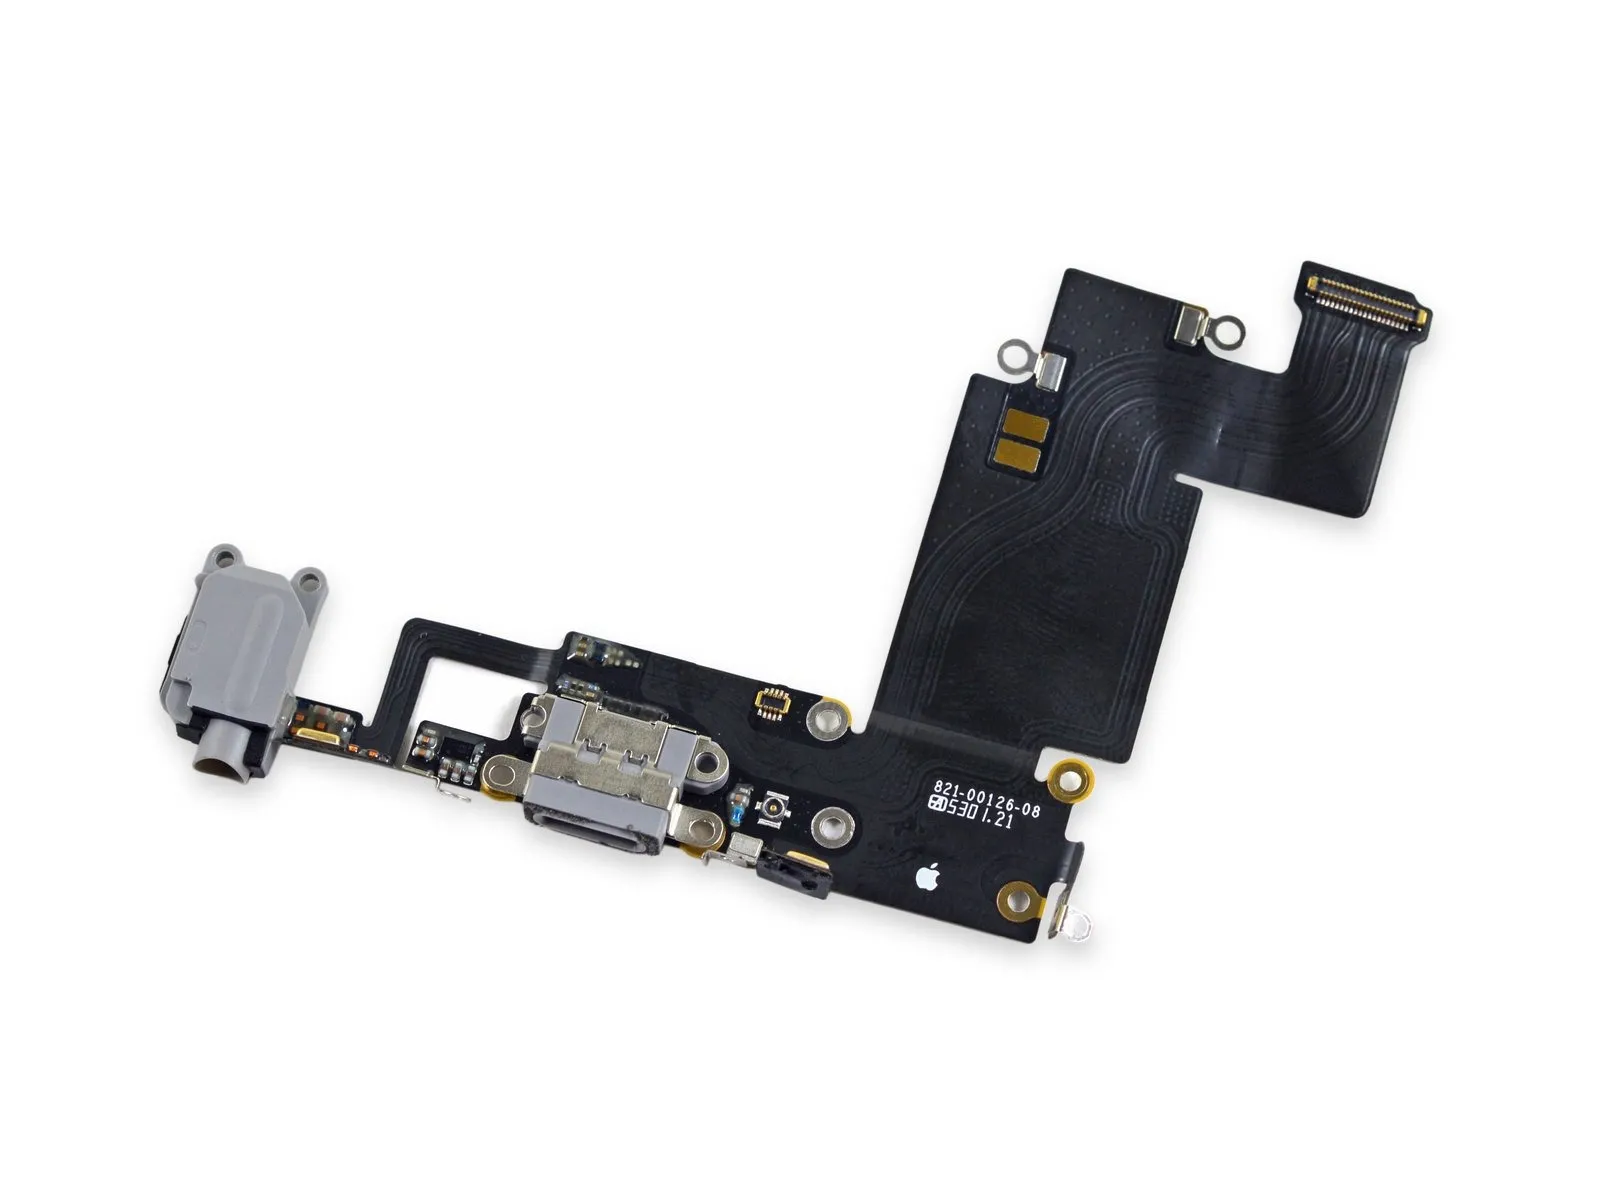
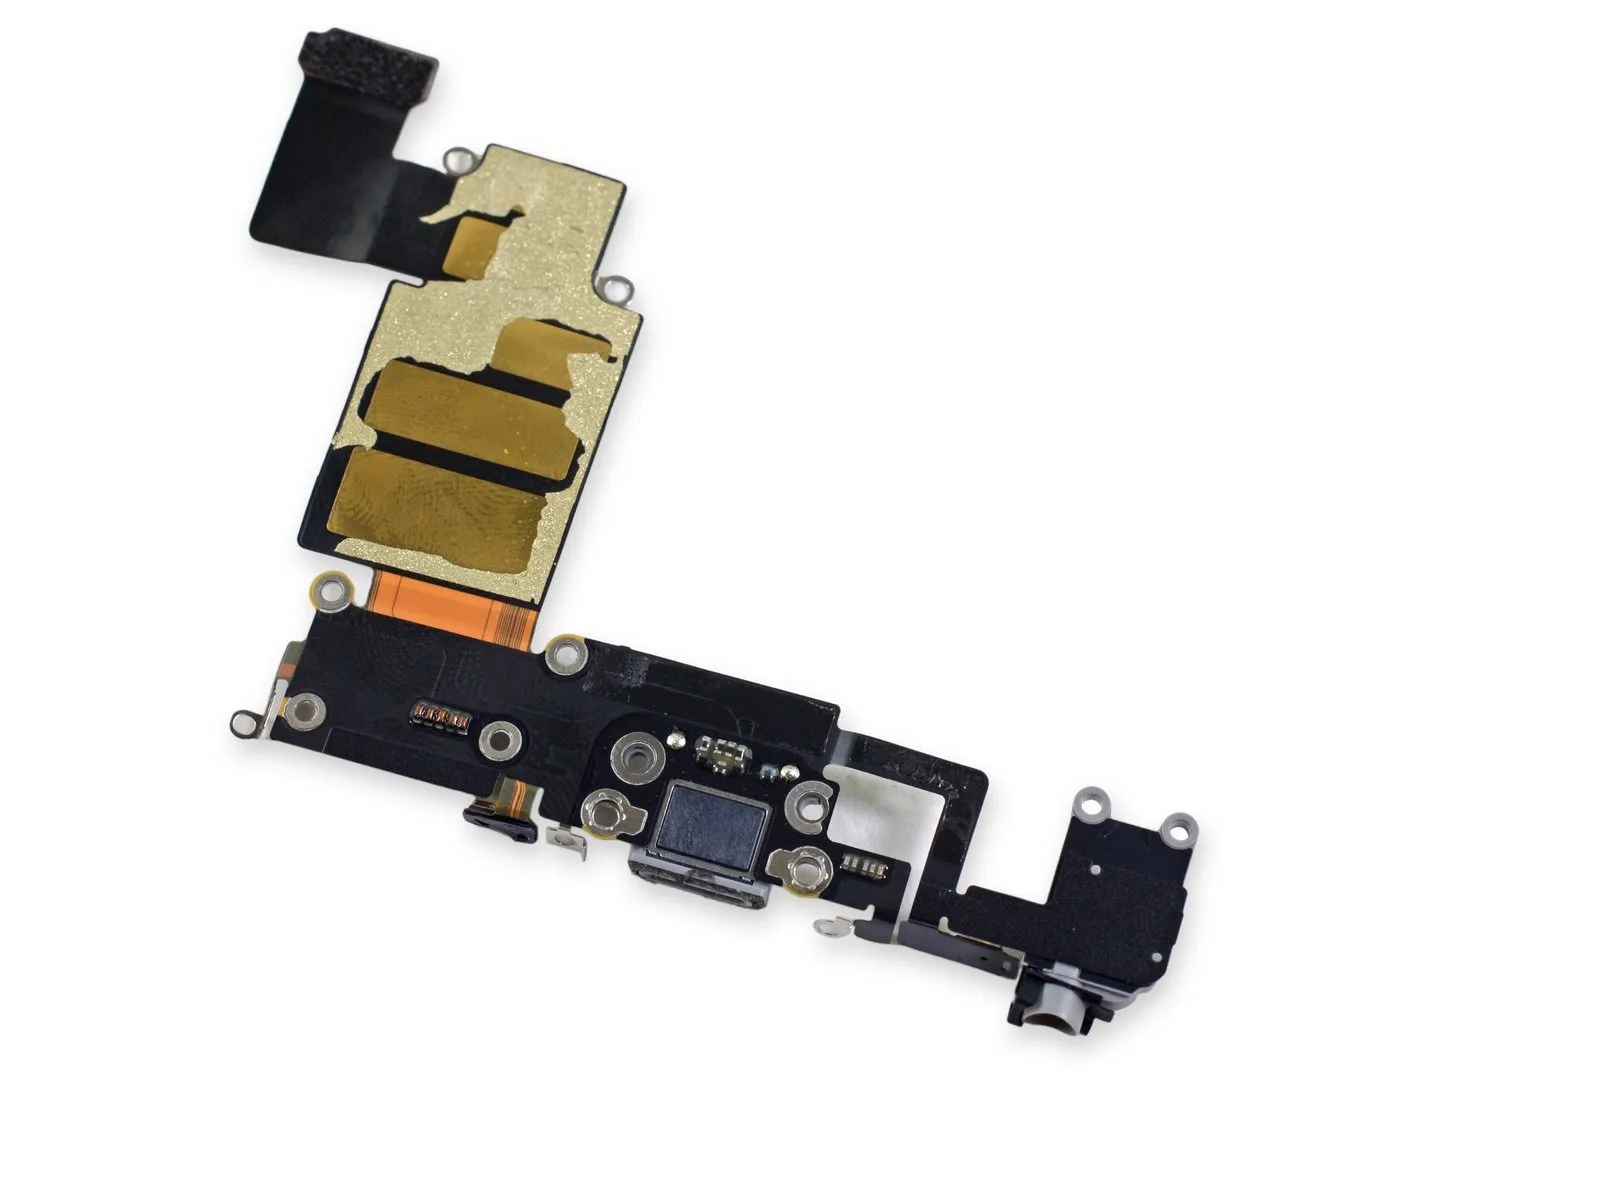
- Carefully detach the Lightning connector assembly, the final component requiring removal during disassembly.
- The updated Lightning connector assembly incorporates all previous features, notably including an extra microphone.
- Due to its compact design, this component minimizes space usage; however, a failure affecting either the Lightning port or the headphone jack necessitates complete replacement of the entire unit.
Step 19

Using appropriate safety precautions and specialized tools, carefully disassemble the iPhone, meticulously documenting each step and component location for reassembly.iPhone 6s PlusAchieving a Repairability score of 7 out of 10 indicates a moderate level of ease for servicing.
- Removing the display assembly initially streamlines the screen repair process.
- Accessing the battery is relatively simple; however, it necessitates a specialized Pentalobe screwdriver and familiarity with adhesive release procedures for successful removal, though the process itself isn't complex.
- Because the Touch ID cable remains positioned aside, connecting it to the logic board presents a challenge during servicing.
- Carefully detach the iPhone's display assembly using a suction cup and spudger, ensuring the adhesive securing it at the lower edge remains intact to prevent damage, then gently pivot the display upwards approximately 90 degrees, taking care to avoid stressing the flex cables connecting it to the device's logic board.iPhone 6s PlusAccessing the device's exterior necessitates a specialized screwdriver due to the continued use of proprietary Pentalobe screws.