iPhone 7 Battery Replacement
Follow these instructions to restore functionality to yourApple's seventh-generation iPhone model.Replace the existing battery with a fresh one, ensuring you follow safety protocols if the battery exhibits swelling.
To avoid potential damage to the display cables, fully separate the display assembly from the device; however, if you are confident in your ability to remove the battery without stressing those cables, you may bypass the display disconnection procedure.
- To ensure peak functionality, perform a calibration procedure on your recently installedCarefully disconnect the battery, observing proper polarity and ensuring no shorts occur during removal, then safely store the battery, noting its voltage rating and physical dimensions for accurate replacement.:
- Allow the battery to fully recharge, then continue the charging process for a minimum of 120 minutes.
- Allow the device to power down completely by depleting the battery until it automatically switches off.
- Ensure a complete charging cycle, allowing it to reach a full 100% capacity without interruption.
Step 1 | Pentalobe Screws
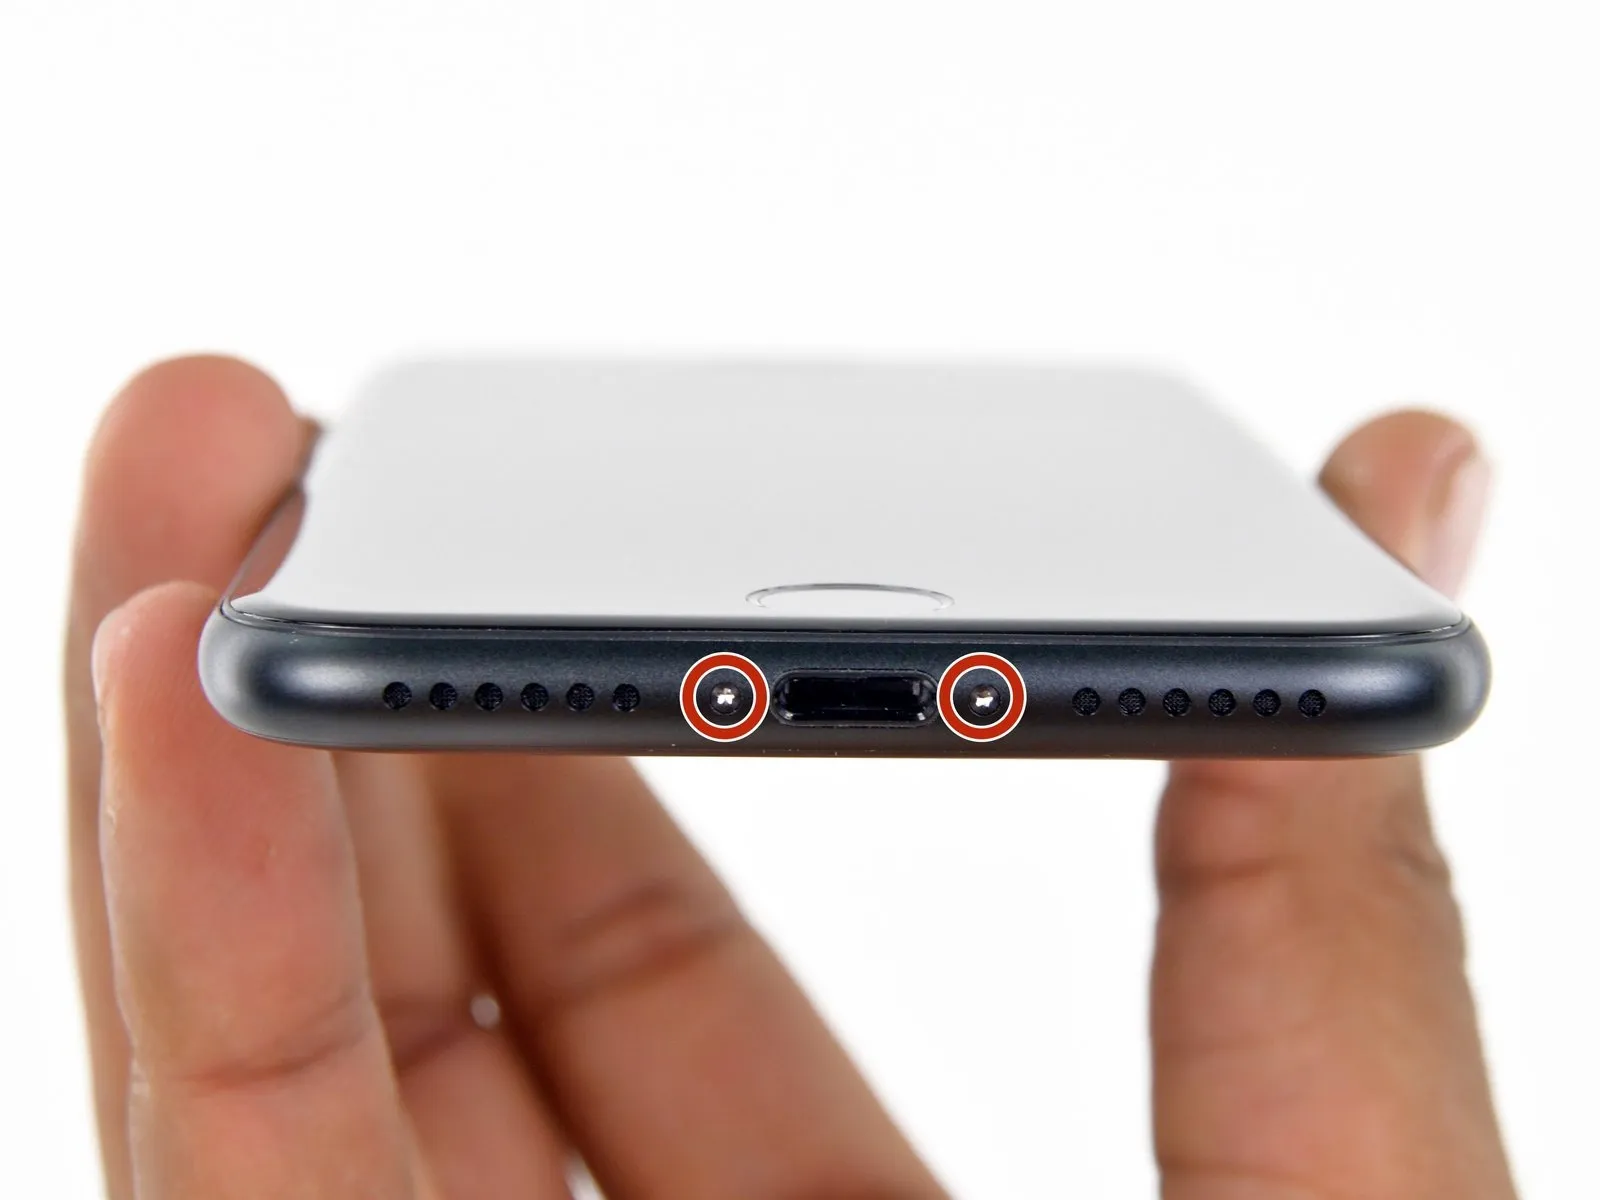
- To start the repair, ensure the iPhone's battery level is depleted to less than 25% to prevent potential issues.A lithium-ion battery must be fully charged.Accidental puncture creates a risk of fire and/or explosion.
- To prevent electrical shock or damage, ensure the iPhone is completely de-energized prior to starting the repair process.
- Using a tool compatible with 3.4 mm pentalobe fasteners, detach the two screws located along the device's lower border.
- Because removing the display panel will damage the iPhone's water resistance, ensure you have new seals available for installation before continuing, or exercise extreme caution to prevent liquid ingress if you reinstall the display without replacement.
Step 2 | Mark your opening picks


- To avoid potential damage to your device, ensure the opening pick does not extend beyond a safe depth; use this step to create a reference mark on the pick, limiting its insertion.
- Determine the dimension using a suitable measuring tool.Three millimeters.Using a permanent marker, indicate the opening point on the pick.
- Alternative corner markings, using the same measurement tools, can be applied to the remaining corners of the pick.
- Securely affix a coin to the tip of a pick using adhesive tape.Three millimeters.Beginning at the very end.
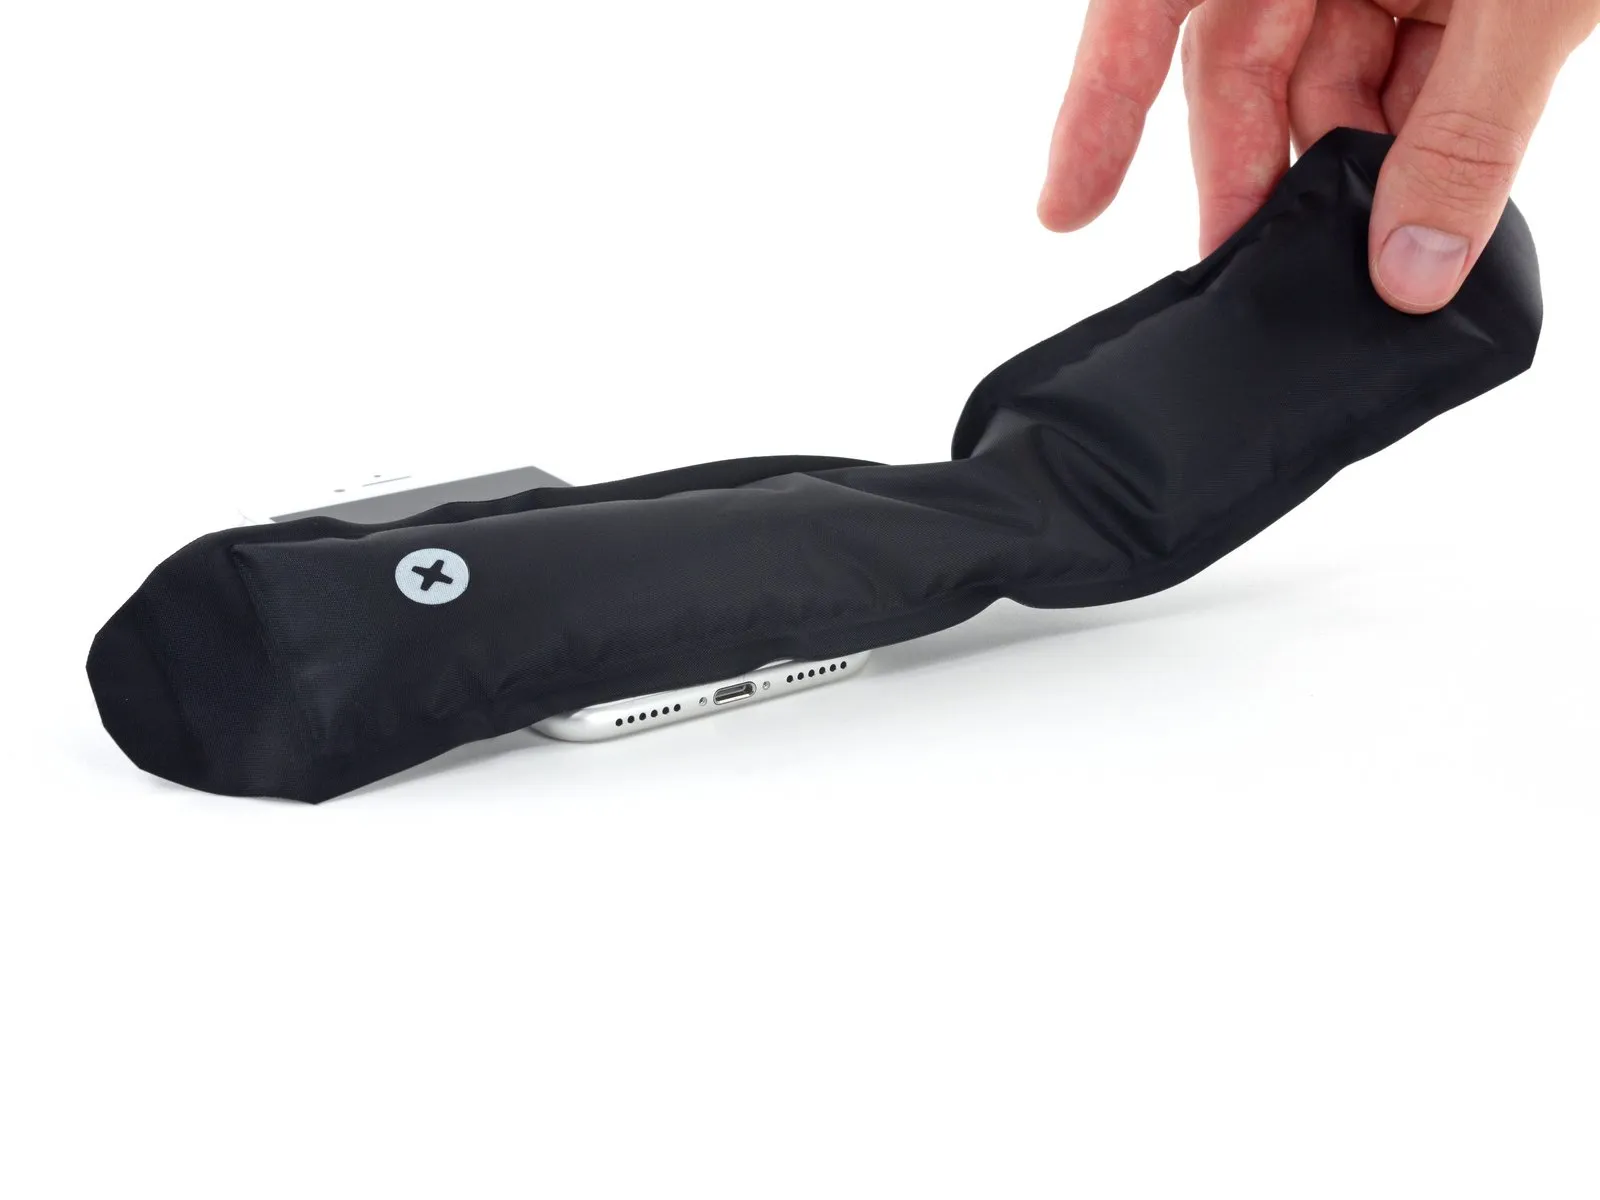
Step 3 | Anti-Clamp instructions


To simplify the opening process, the following three steps utilize the Anti-Clamp tool; if you do not have this tool, proceed to the instructions three steps further down.
Refer to the included guide for detailed procedures regarding Anti-Clamp operation.
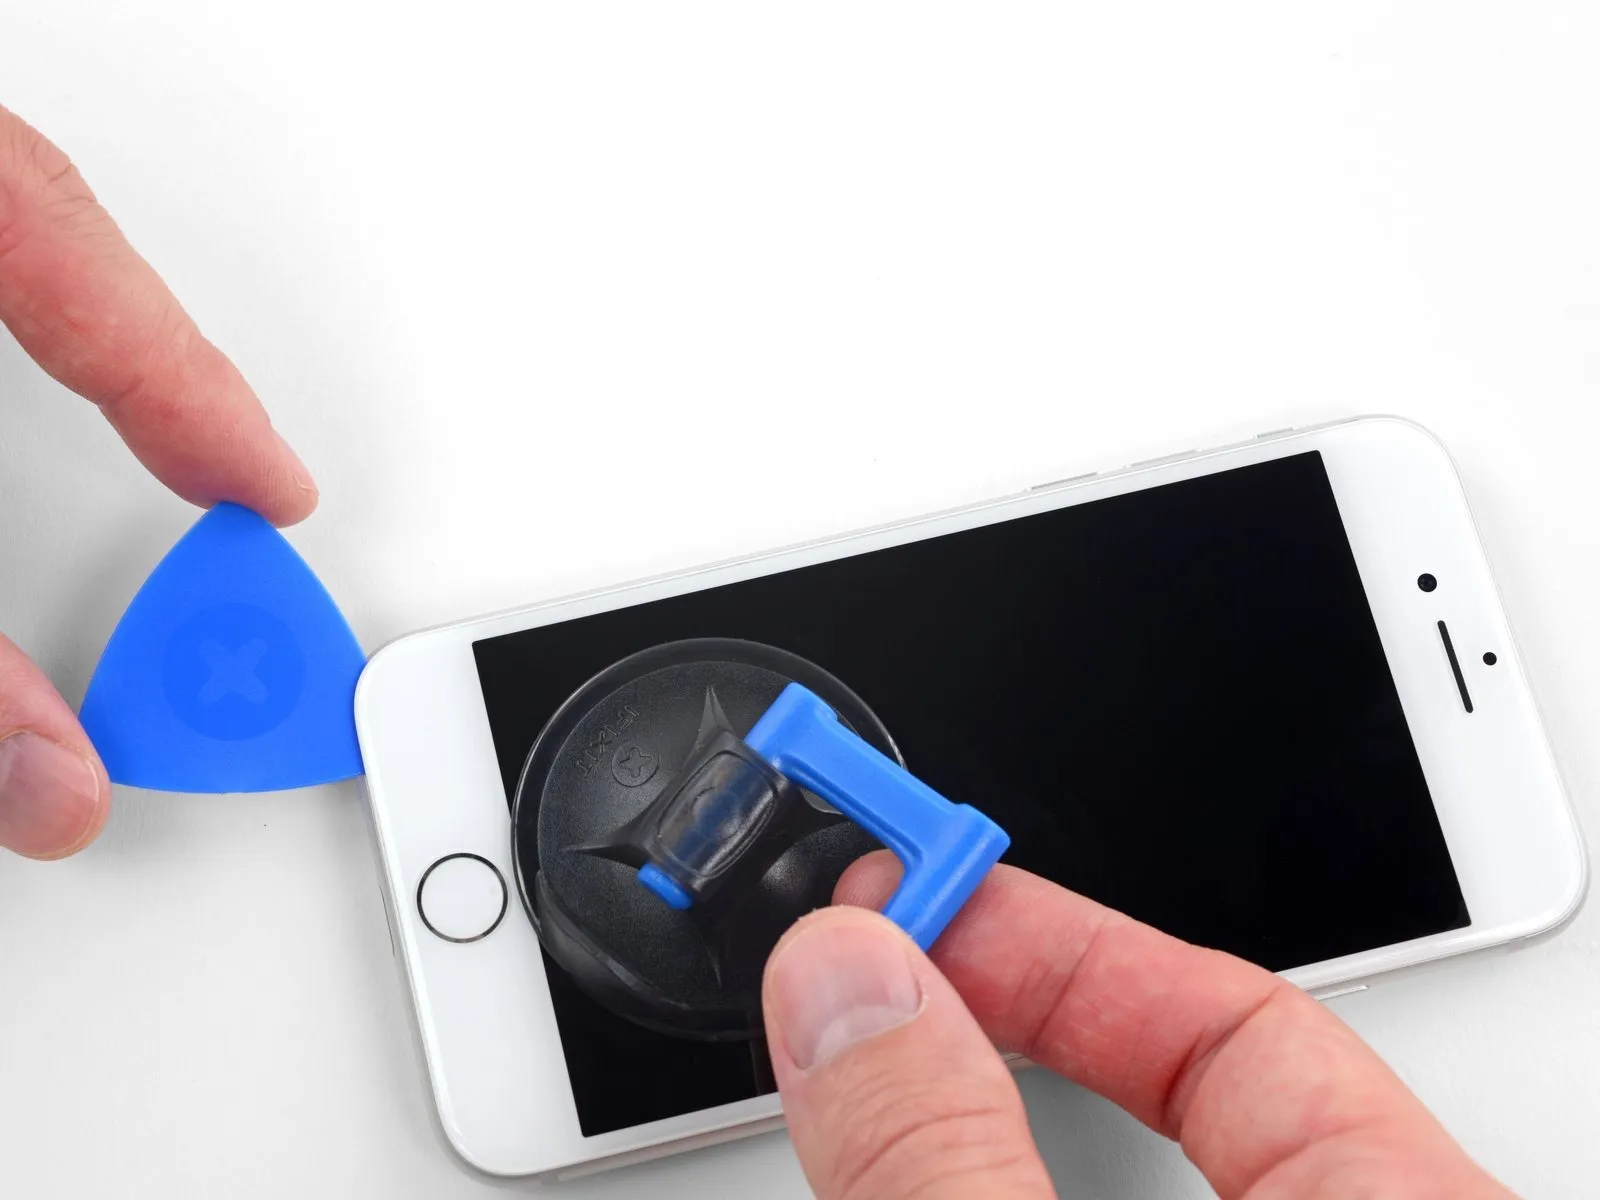
- To release the Anti-Clamp’s arms, move the blue handle in a rearward direction.
- Position the arms so they extend across the iPhone's left or right side.
- Affix two suction cups to the iPhone's front and back surfaces, placing them close to the lower edge, directly over the home button.
- Apply vacuum by pressing the cups firmly against the surface needing treatment.
- To improve the Anti-Clamp's grip if the iPhone's exterior feels excessively smooth, apply adhesive tape to the device's surface.
Step 4


- Moving the blue handle in a forward direction will engage the locking mechanism for the arms.
- Rotate the handle in a direction that tightens it.Rotate fully around its axis.Continue the process, observing for signs of cup expansion.
- Maintain parallel positioning of the suction cups; should misalignment occur, gently release the suction cups' grip and reposition the arms.
Step 5


- Apply heat to the component using a heat gun.Utilize the iOpener device.Carefully guide the string through the arm openings.Prevent clamping..
- To soften adhesives, apply warmth from a hair dryer, heat gun, or hot plate; however, exercise caution as excessive heat may harm the display panel and/or the internal battery.
- Carefully bend theUse the iOpener to gently warm the adhesive securing the display assembly to the device's midframe, maintaining a consistent temperature and avoiding excessive heat.Position the component along the lower edge of the iPhone.
- Allow a full 60 seconds for the adhesive to soften and create a separation.
- Using a specialized opening tool, carefully slide the tip into the separation.
- Using the specified torque of 25 Nm and a 10 mm socket, securely fasten the component to the chassis, ensuring adherence to all safety precautions detailed in Section 3.2 regarding pinch points and potential electrical hazards.Employ a device designed to prevent clamping.If the separation isn't adequate, increase the heat applied to that spot and adjust the handle by 90 degrees.
- Allow a one-minute pause and avoid rotating beyond a 90-degree movement for each incremental adjustment.Employ a locking mechanism to prevent unintentional movement.Allow the specified duration for the process to complete automatically.
Step 6 | Heat the display
Employing a suction cup, proceed with the following three steps to detach the display assembly.
- Applying heat to the phone's bottom perimeter with a heat gun or hairdryer will loosen the adhesive that holds the display in place, facilitating separation.
- Apply heat with a hairdryer or similar device to gently warm the component, ensuring the temperature does not exceed 150°F (65°C).Use the iOpener.To loosen the adhesive securing the lower portion, hold a heat source against that edge for roughly 90 seconds.
Step 7 | Separate the display
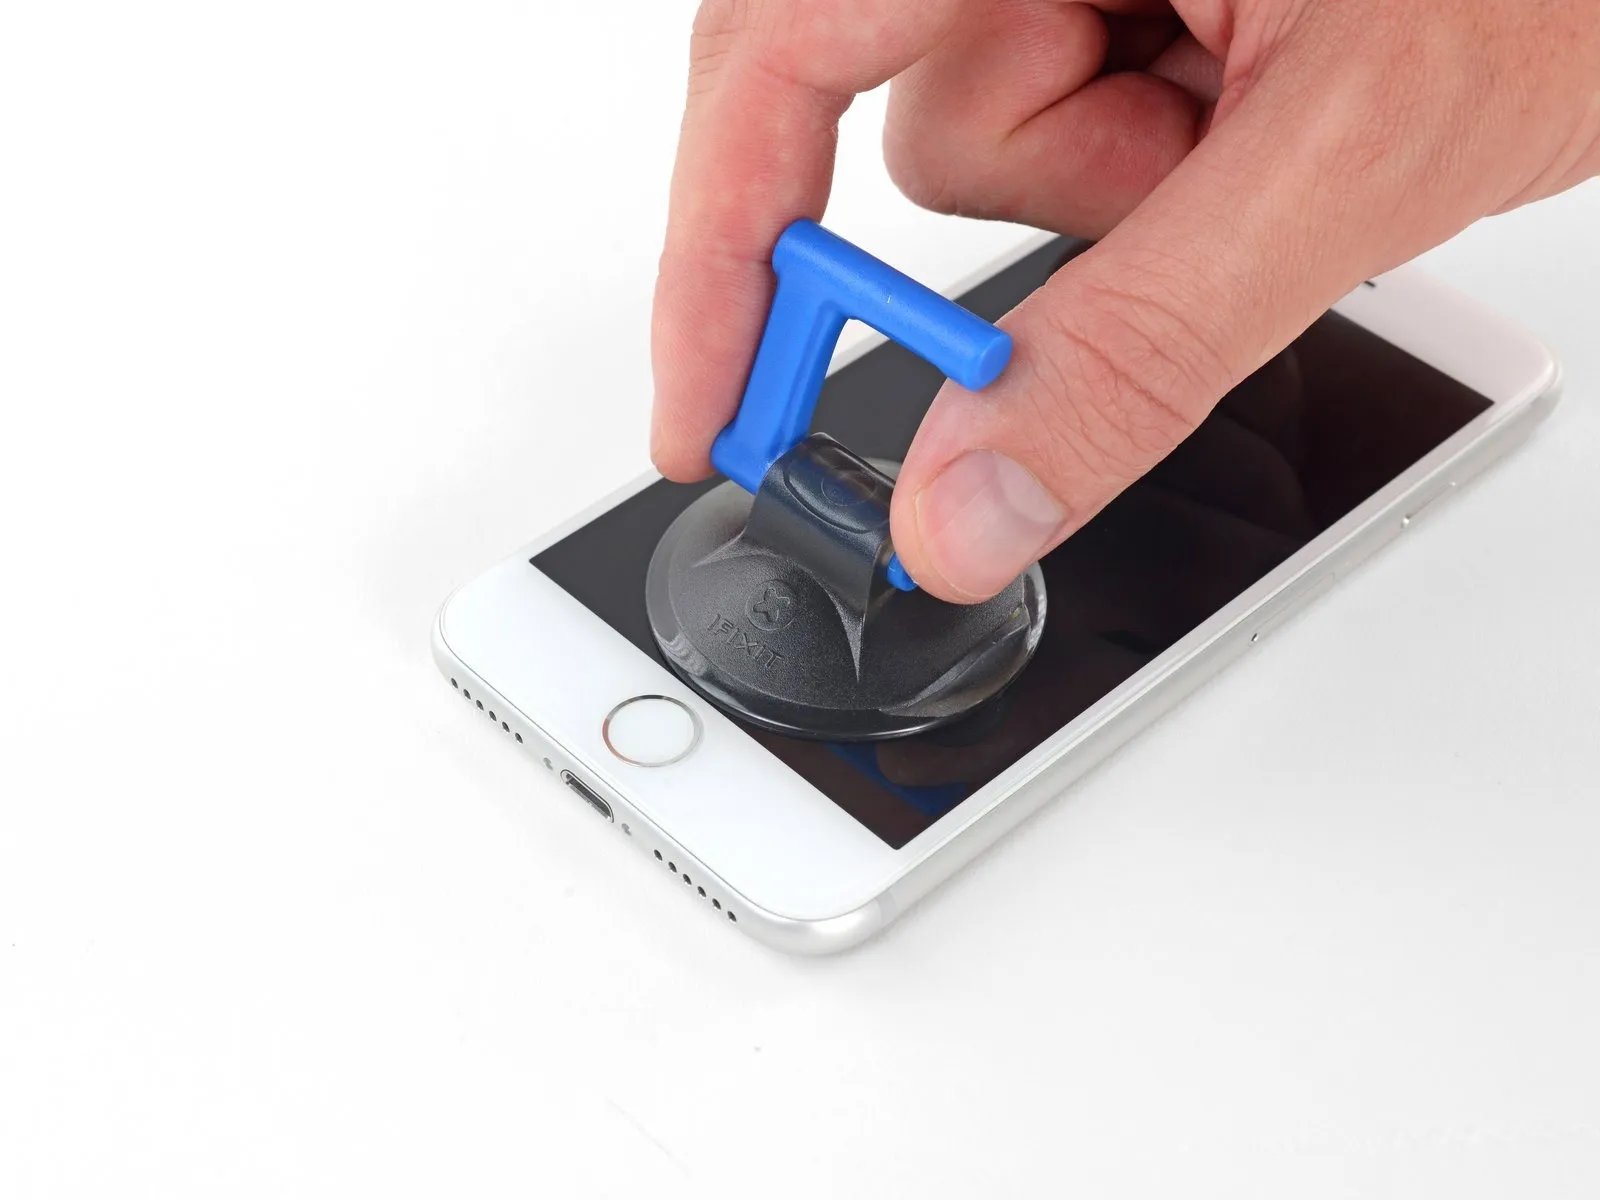

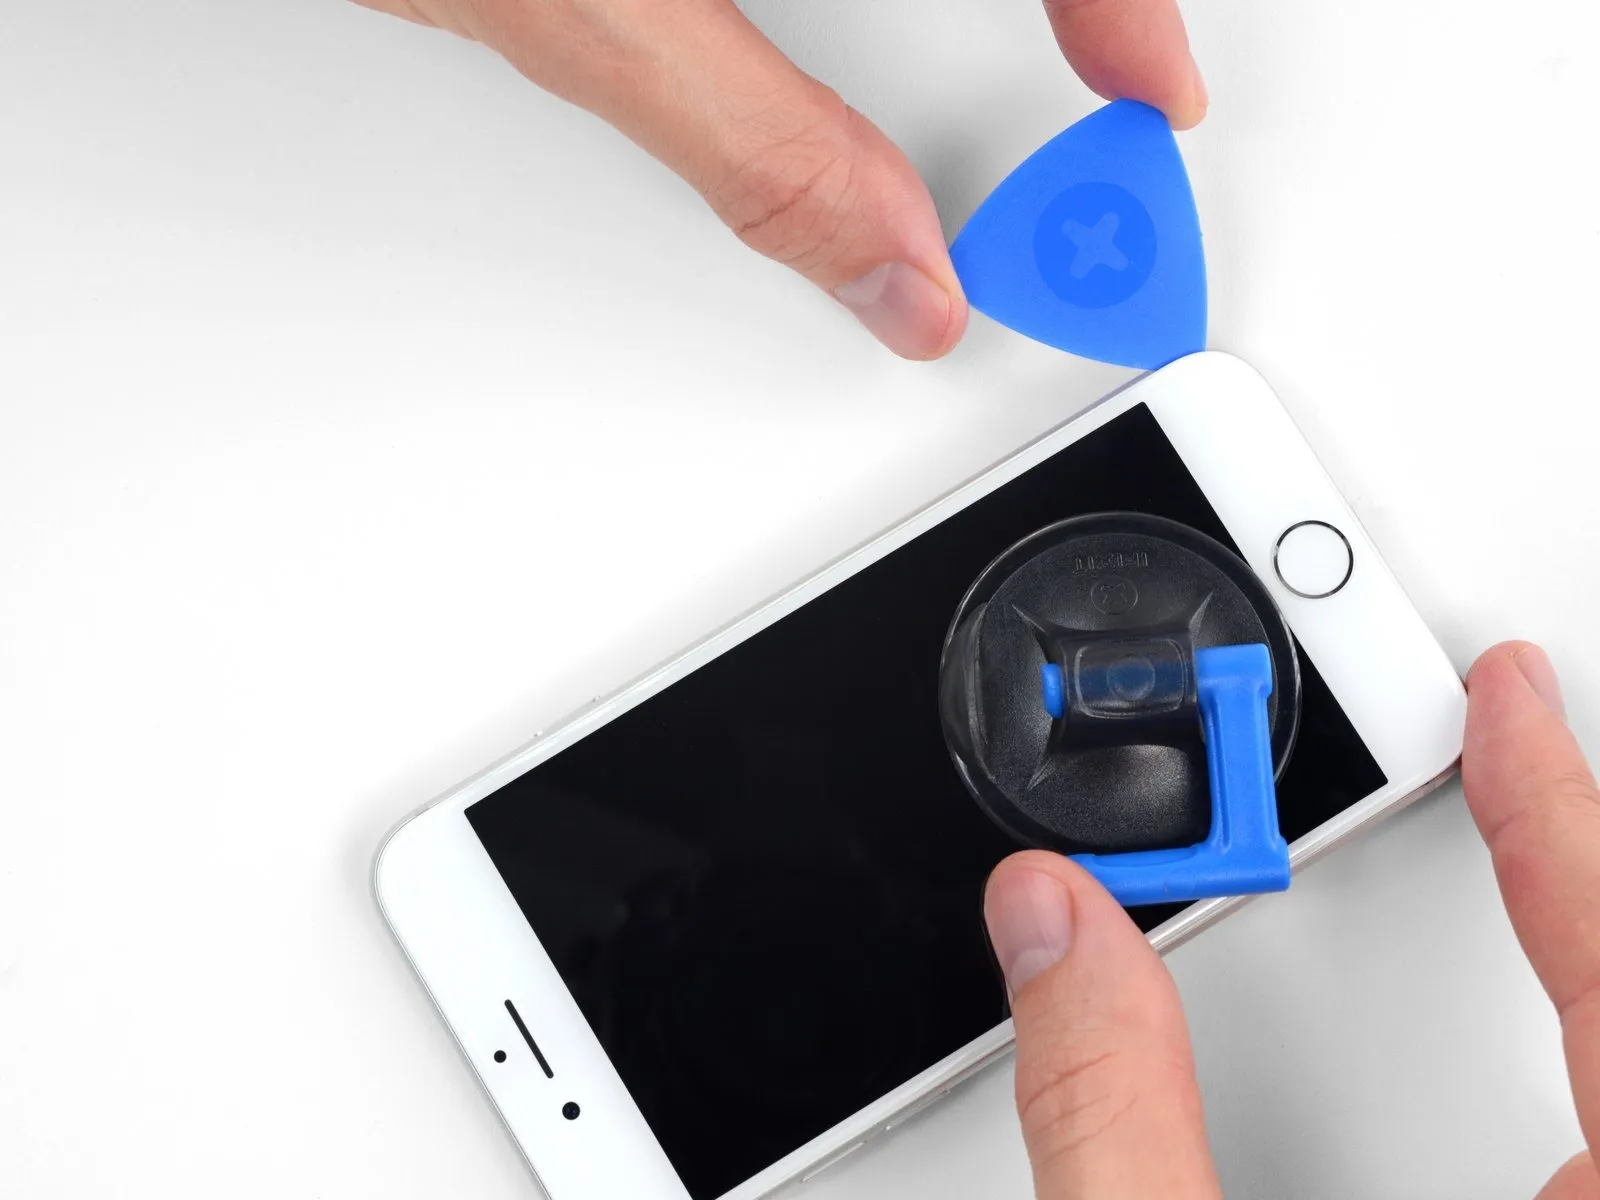
Using a suction cup, secure it to the front panel's bottom portion, positioned directly over the home button.
To ensure a proper seal between the suction cup and the front glass, avoid positioning the cup so that it covers the home button.
Step 8
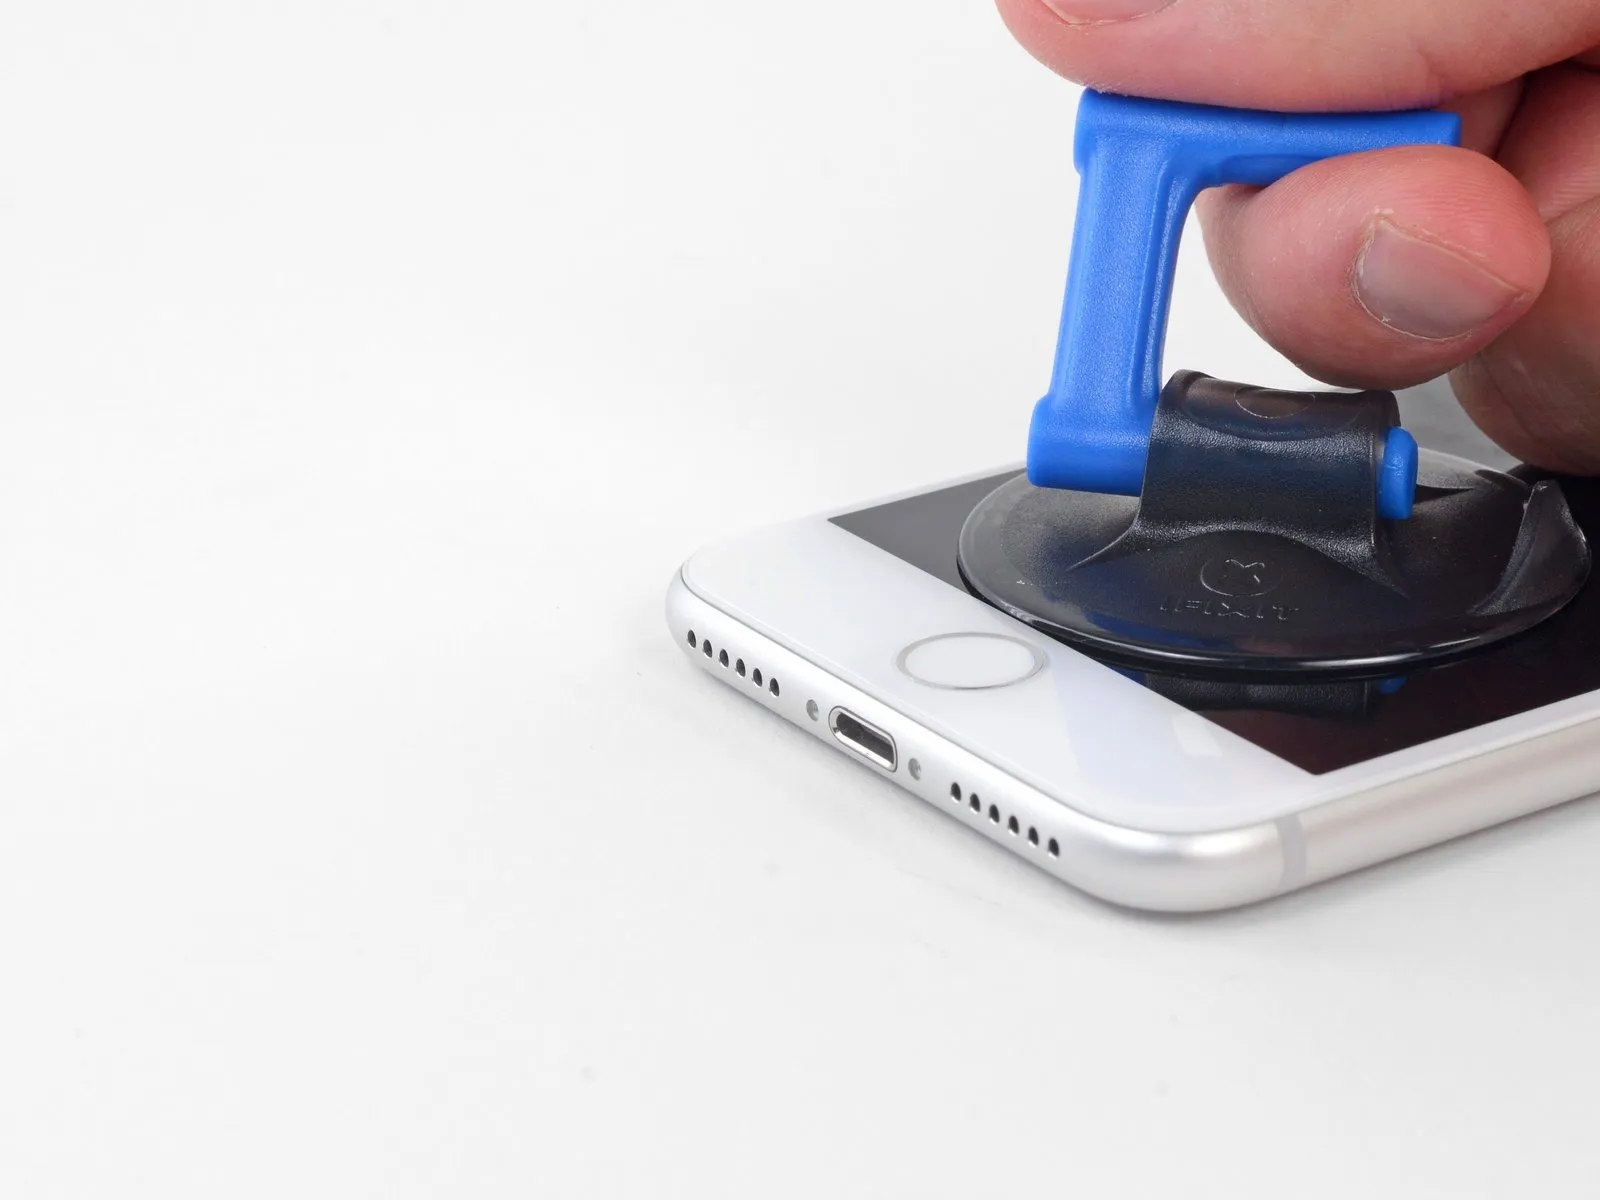


- Apply steady, even force to lift the suction cup, generating a small separation between the display assembly and the device’s surrounding frame.
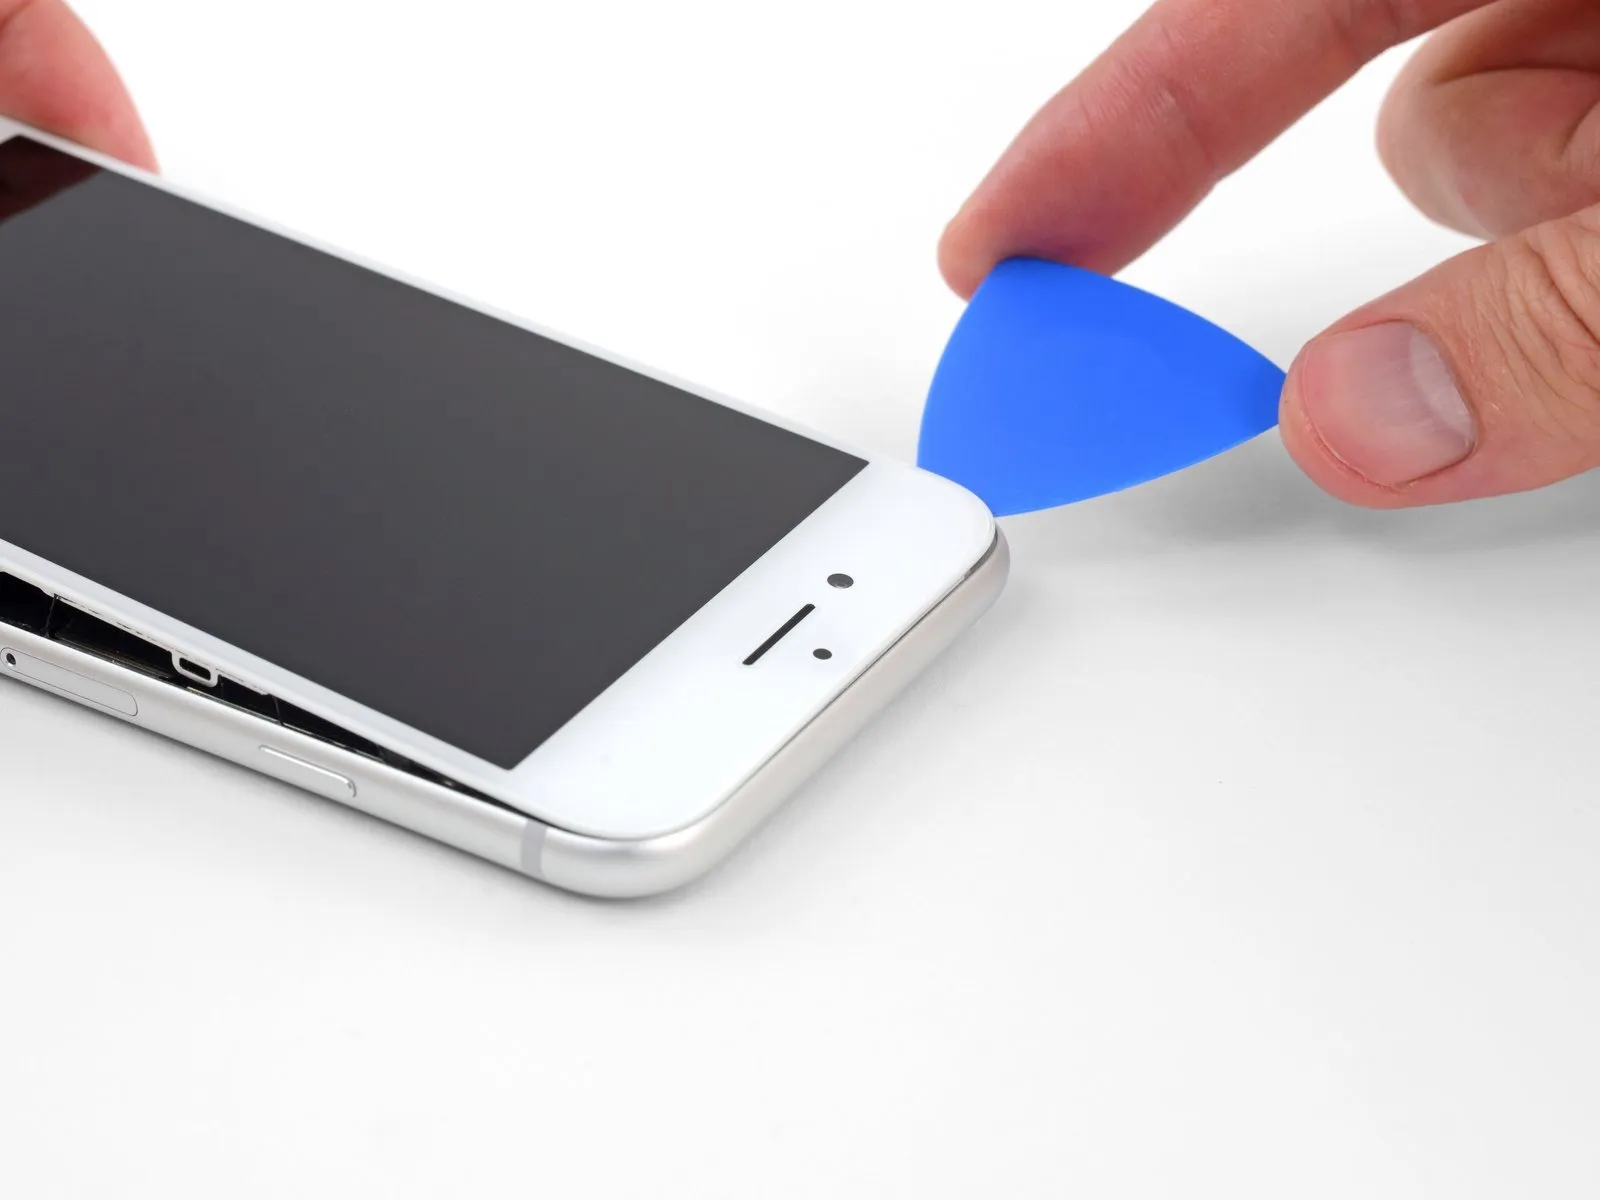
- Using a specialized opening tool, carefully create a small separation between the surfaces.
- Due to the robust nature of the watertight adhesive securing the screen, substantial force is required to initially separate it. Should you encounter difficulty, apply additional heat and use a gentle rocking motion to soften the adhesive, gradually increasing the gap until it's sufficient for tool insertion.
Step 9


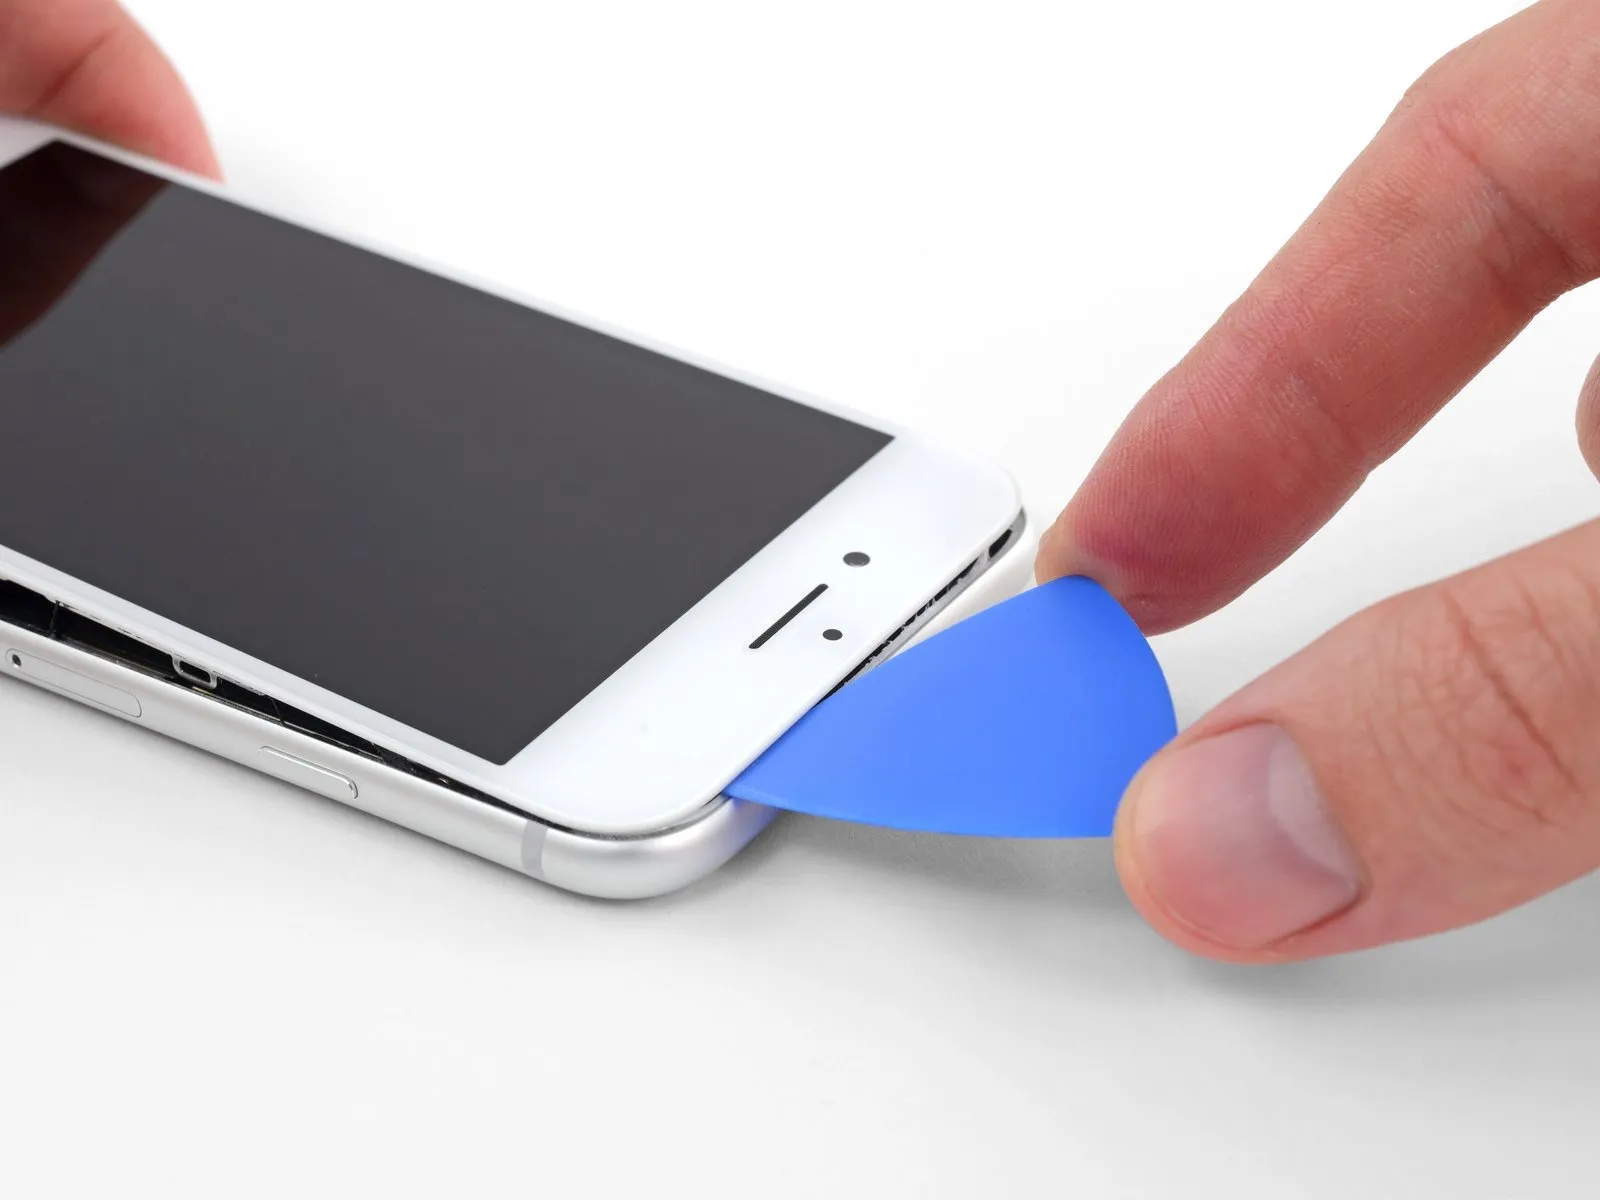
- Beginning at the phone's bottom edge, insert the opening pick between the display and the chassis, carefully working it upwards along the left side, progressing towards the volume buttons and silent switch to release the adhesive securing the display.
- Position yourself close to the upper left edge of the screen.
- Avoid separating the display's upper border from the back cover by force; it is secured with plastic clips susceptible to damage.
Step 10 | Screen information

Avoid inserting any tools along the right side of the iPhone, as the sensitive internal wiring in that area is susceptible to damage.
Step 11


- Using your tool, begin at the lower-right edge of the iPhone and move it along the perimeter, releasing the adhesive bond by sliding it along the corner and up the right side.
- Ensure the pick's insertion depth remains limited toThree millimeters.Exercise caution to prevent harm to the display cables.
Step 12


- Using a suction cup, apply upward force to the display's lower border to detach it.
- Ensure the display’s elevation remains below the specified maximum of.Set the temperature dial to 150 degrees.Careless handling may damage the display's ribbon cables, potentially causing them to stretch or rip.
- To detach the suction cup, grasp the small projection extending from its surface and apply traction.
Step 13

Step 14


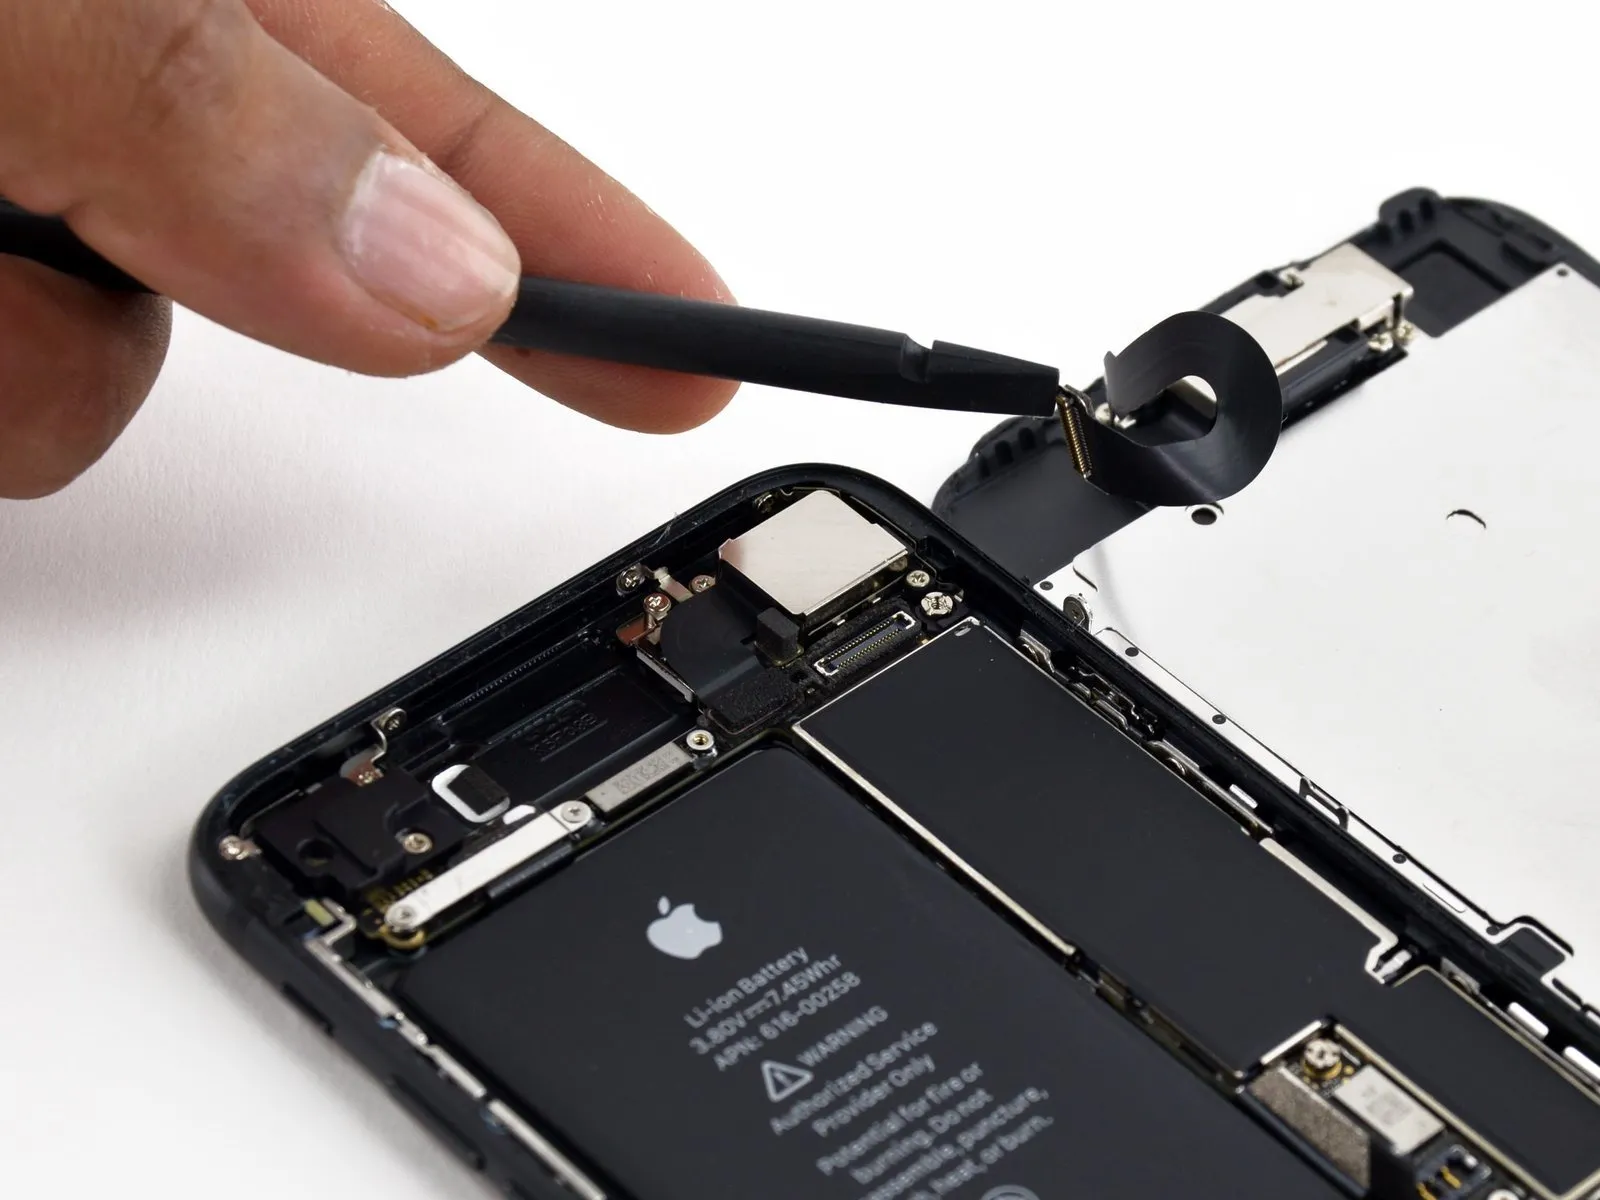
Step 15


Attempting this procedure is prohibited.Carefully detach the display, noting that multiple delicate ribbon cables remain connected between it and the iPhone’s logic board.
To allow for hands-free operation during the repair process, secure the display in an upright position using a support.
Step 16 | Battery Disconnection
- Three.One point two millimeters.Secure with screws.
- Begin the process by executing the action designated as "One."Two point four millimeters.Fasten with a screw.
Step 17
Step 18
- Carefully employ the tip of a screwdriver to apply pressure.Use a plastic pry tool, often referred to as a spudger.Carefully raise the battery connector's cable a small amount to ensure it cannot inadvertently connect to the socket and supply power to the device.
Step 19 | Display Assembly
- Verify thatPrior to either disconnecting or reconnecting the cables in this procedure, ensure the battery is disconnected.
- Employ a 3/8-inch socket wrench to loosen the retaining bolt, ensuring you maintain a firm grip and avoid over-tightening during reassembly, as excessive force can damage the threaded insert.Use a plastic pry tool, often referred to as a spudger, to gently separate components.Use a fingernail or similar tool to carefully separate the two lower display connectors from their sockets on the logic board by lifting them vertically. When reattaching, ensure each end clicks securely into place, repeating the process for both sides; avoid applying pressure to the connector's central section. Any slight misalignment risks bending the connector, potentially resulting in irreversible damage.
- Following reassembly, a non-functional display—characterized by a blank screen, white lines, or unresponsive or limited touch functionality—may be resolved by carefully disengaging and then firmly reseating both display cables to ensure proper connection.
Step 20
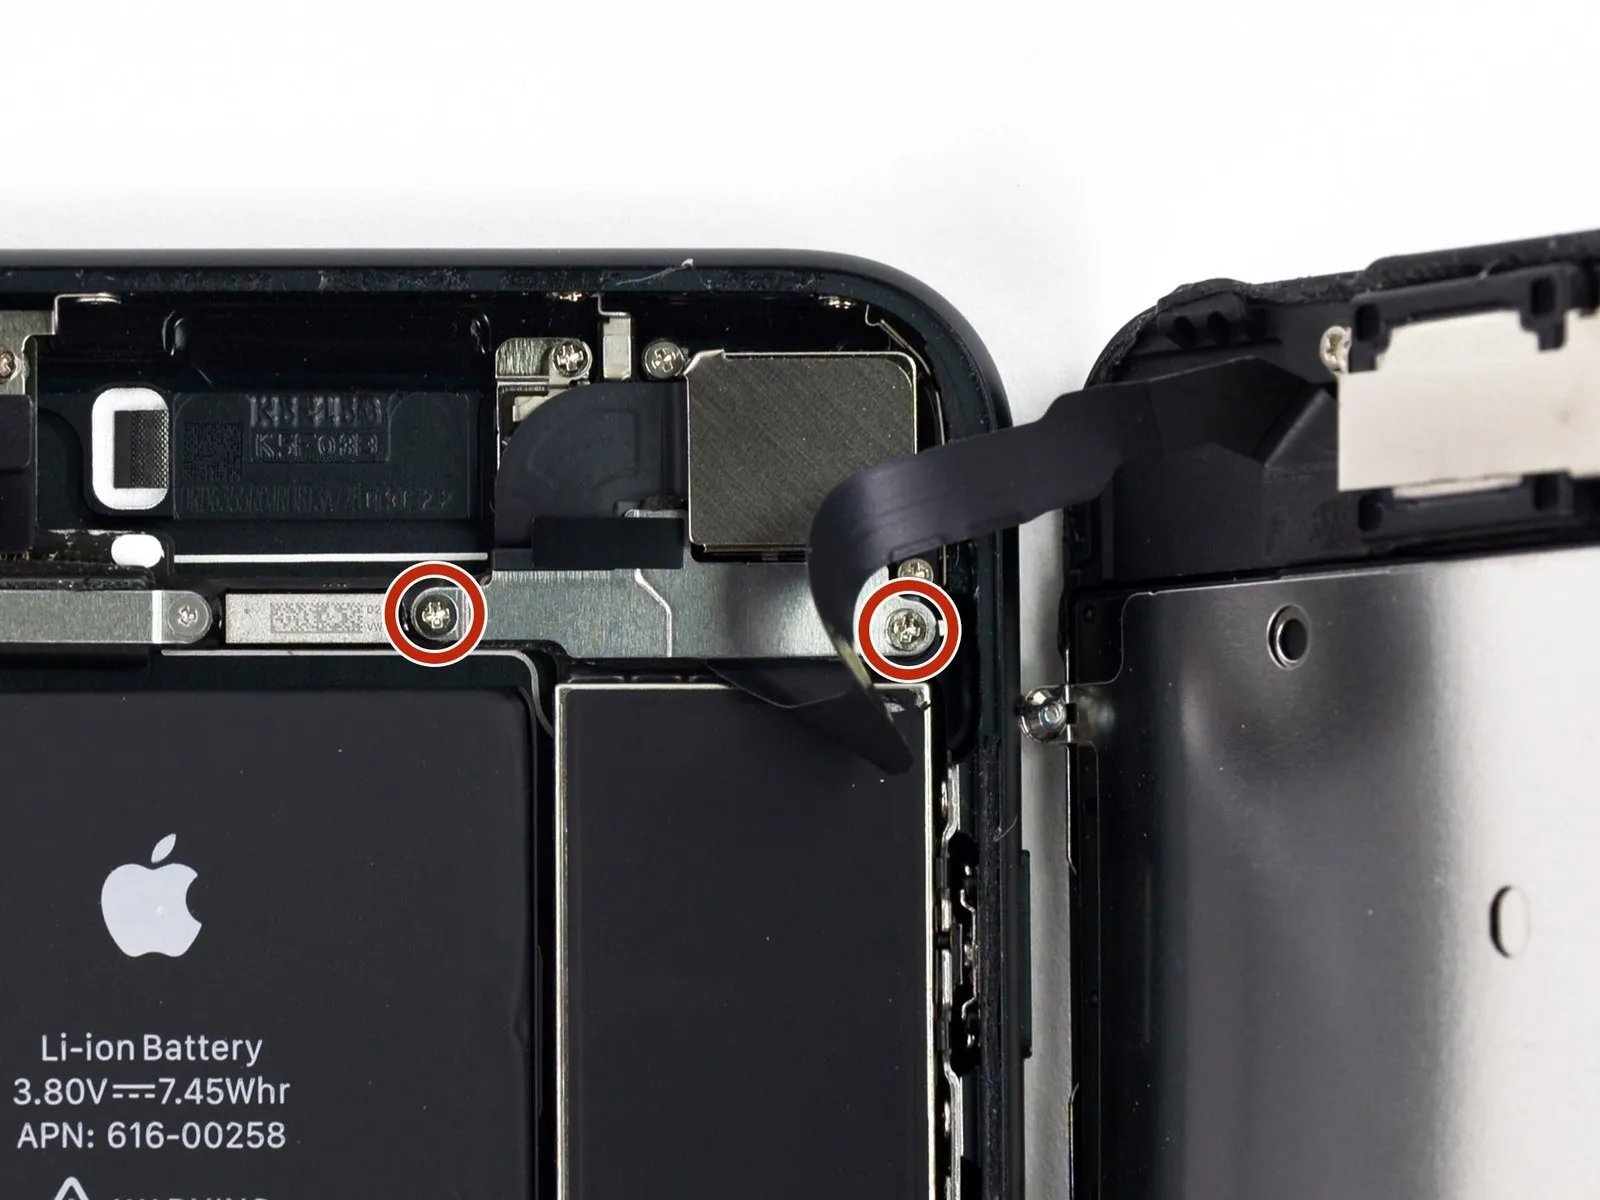
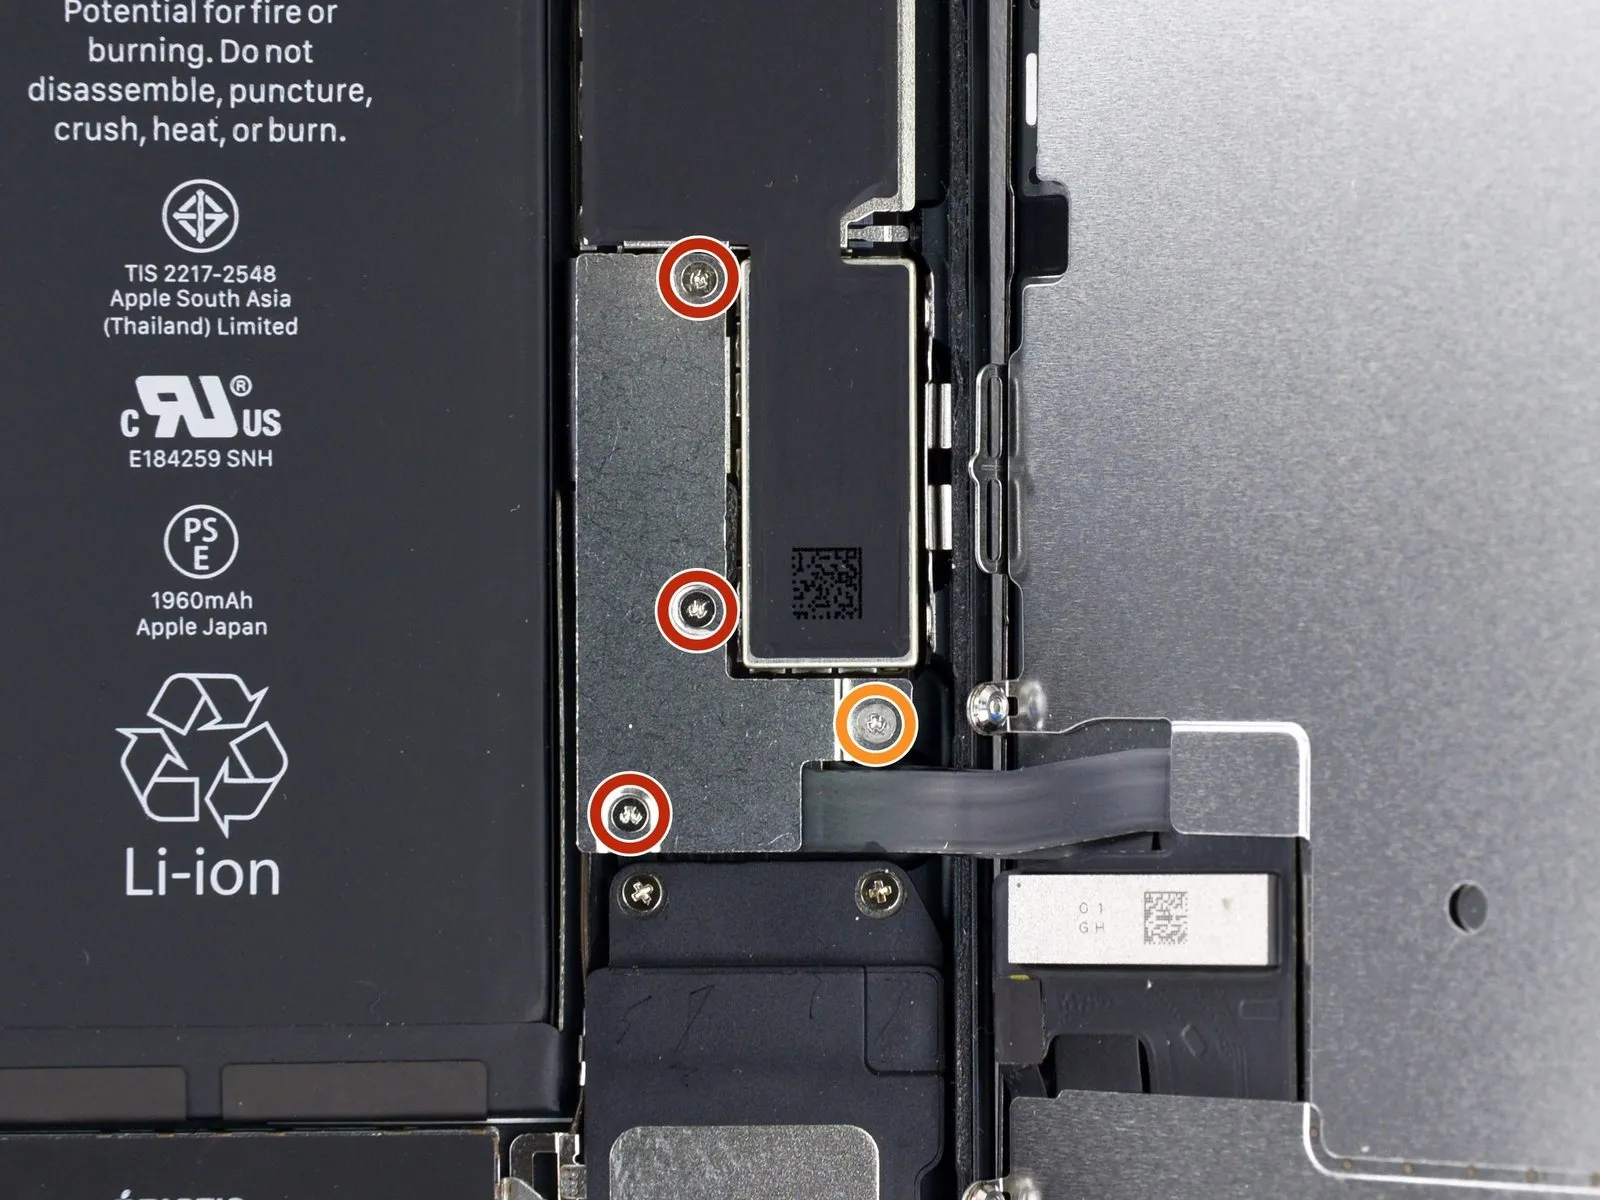
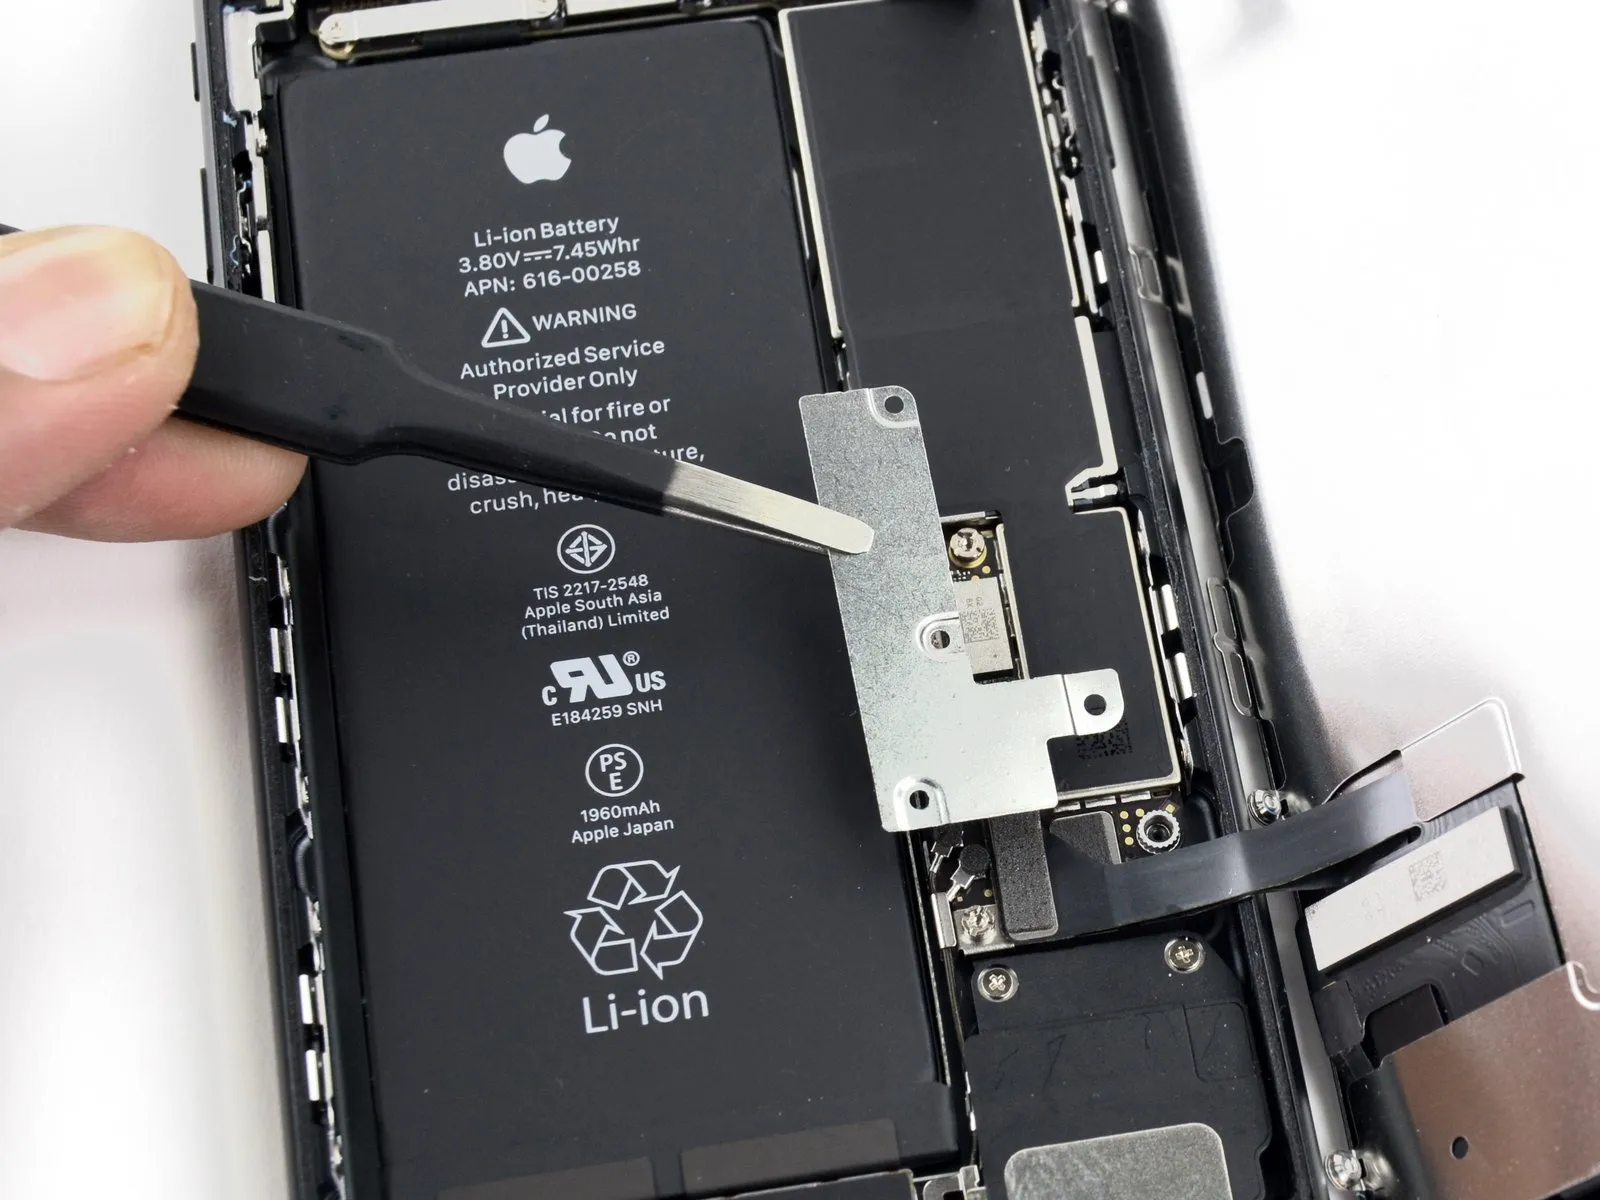
- Using a Phillips head screwdriver, detach the two 3.5mm screws.Use a Phillips head screwdriver, size #000, to tighten or loosen screws measuring 1.3 millimeters in width.Affix the bracket, ensuring it covers the connector for the front panel sensor assembly.
Certain phone models may incorporate a Y000 component, which Apple introduced during the product's operational period.
Step 21
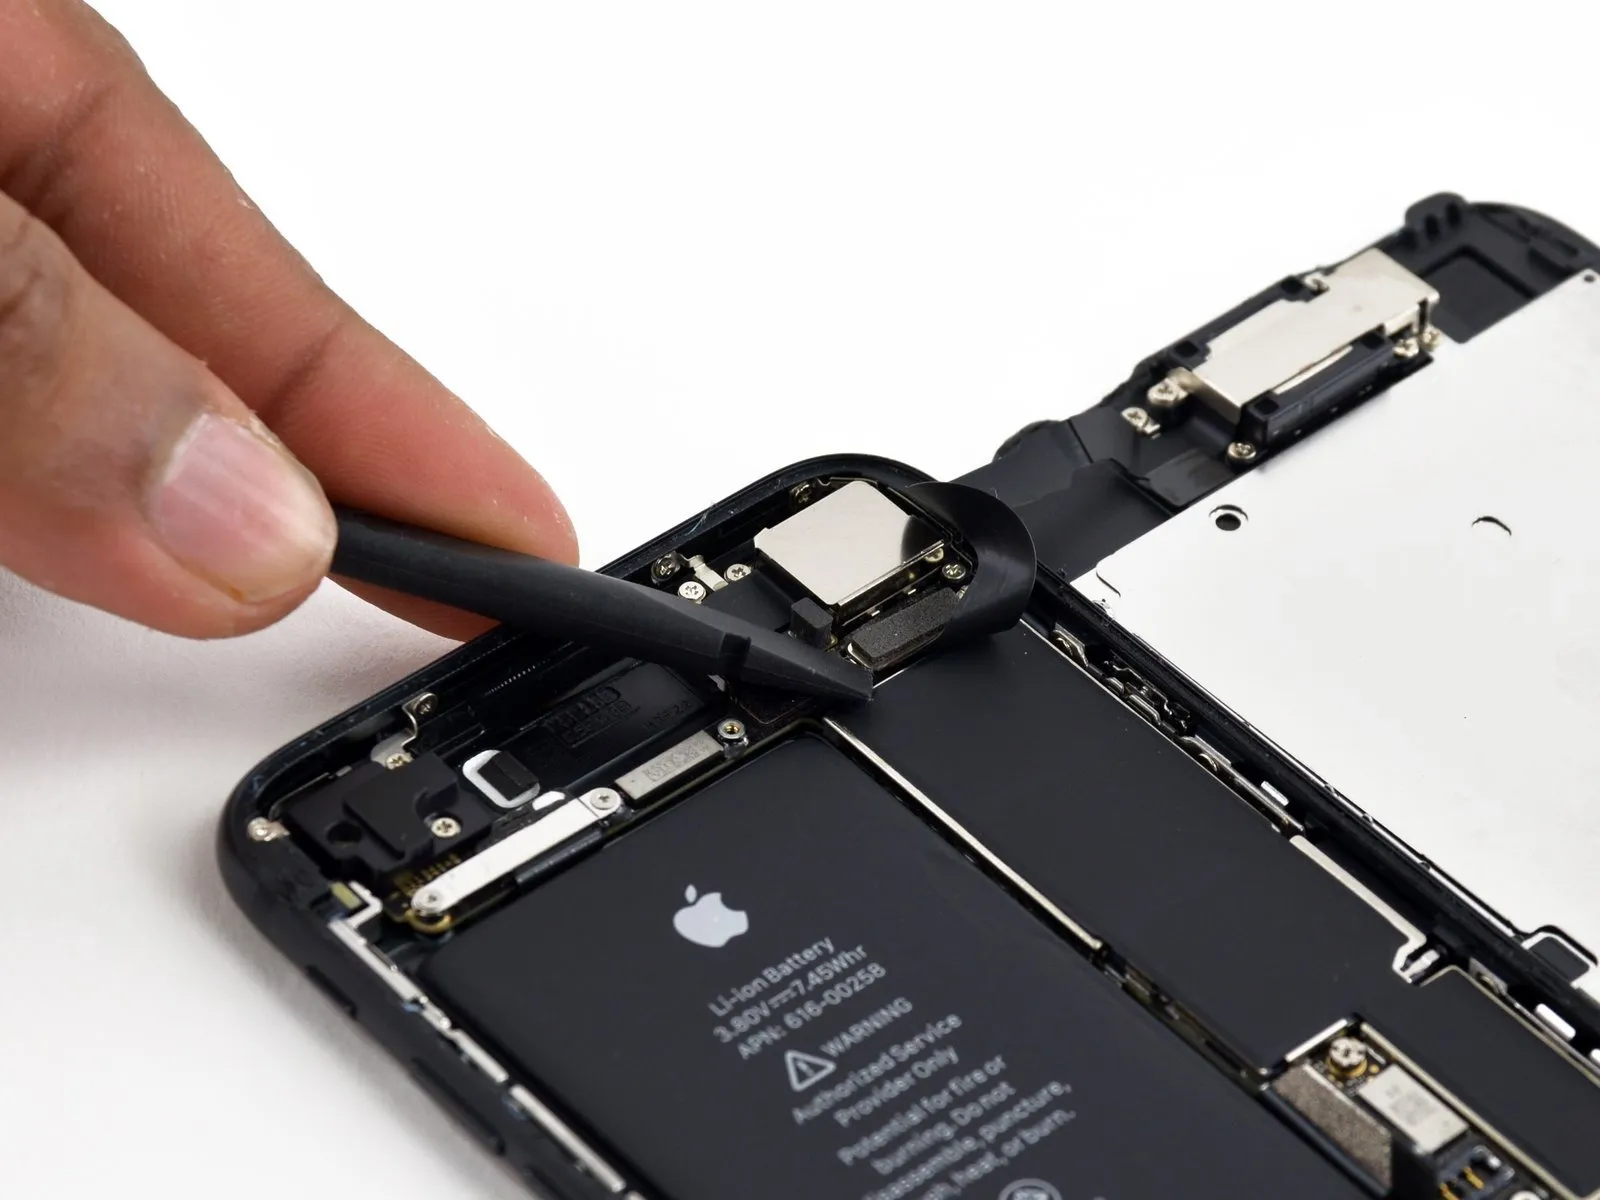
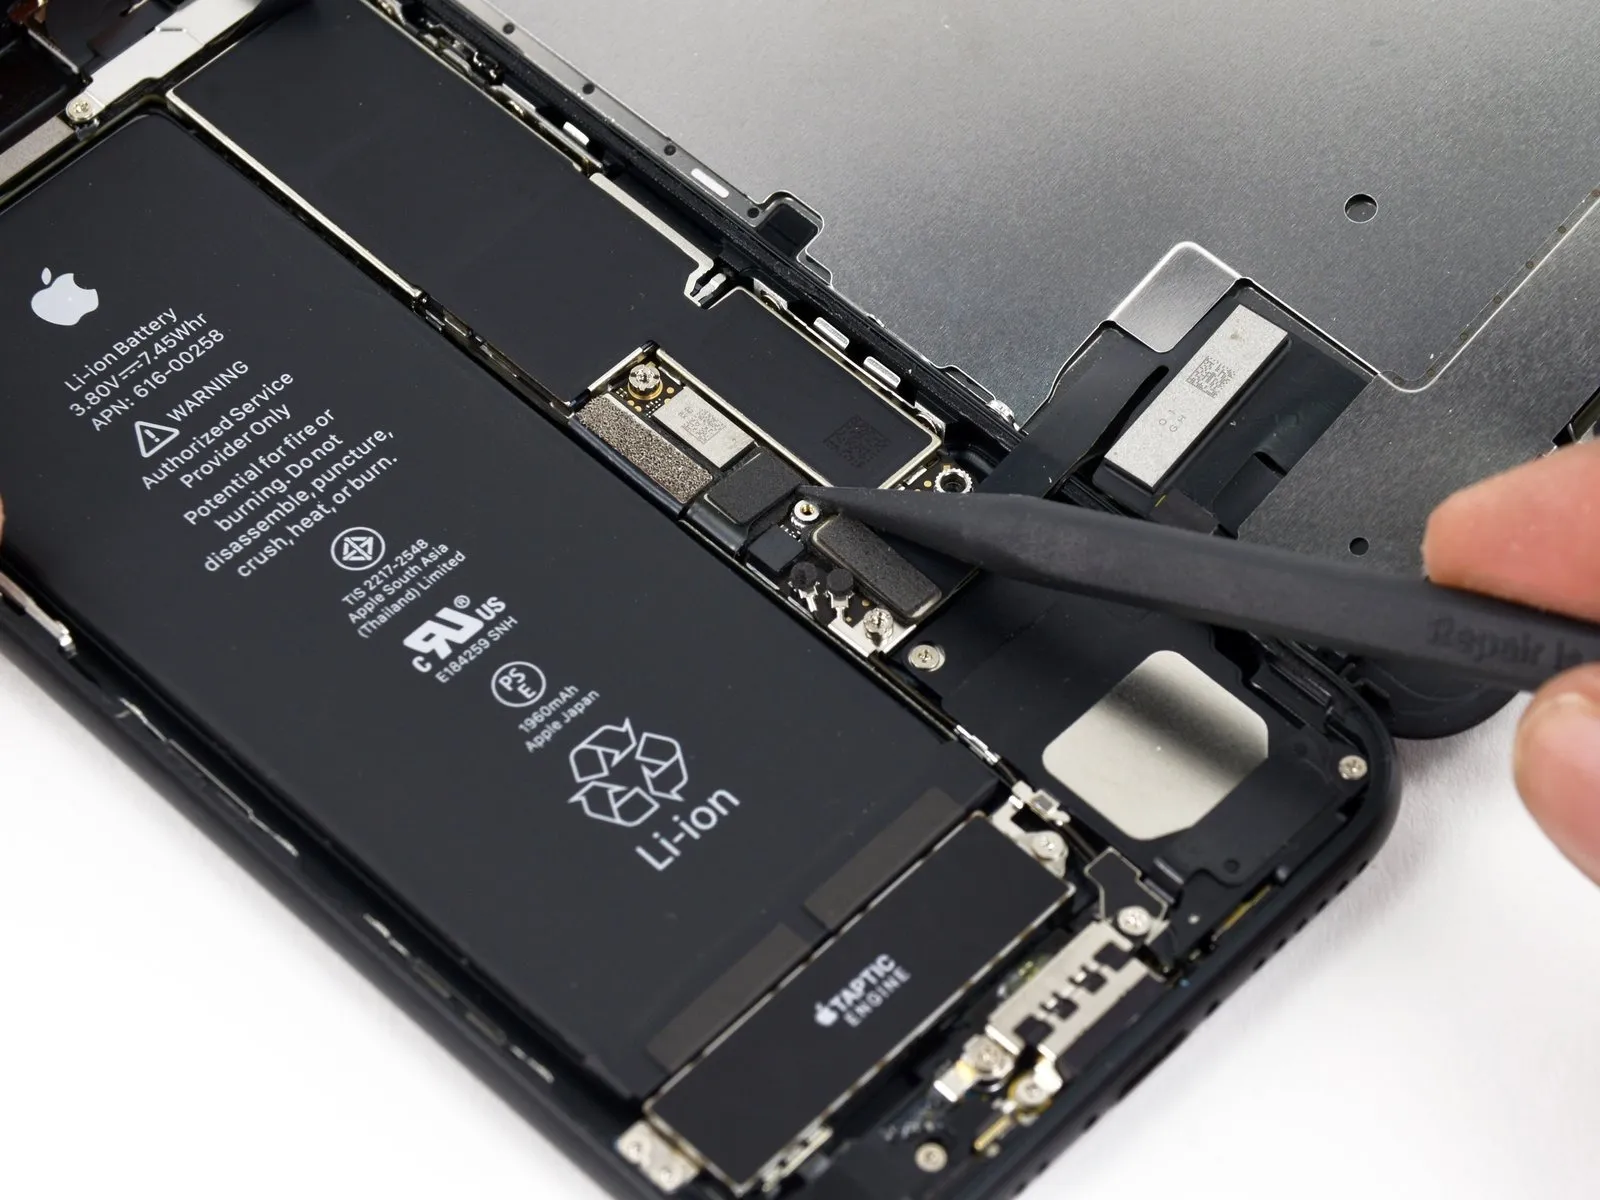
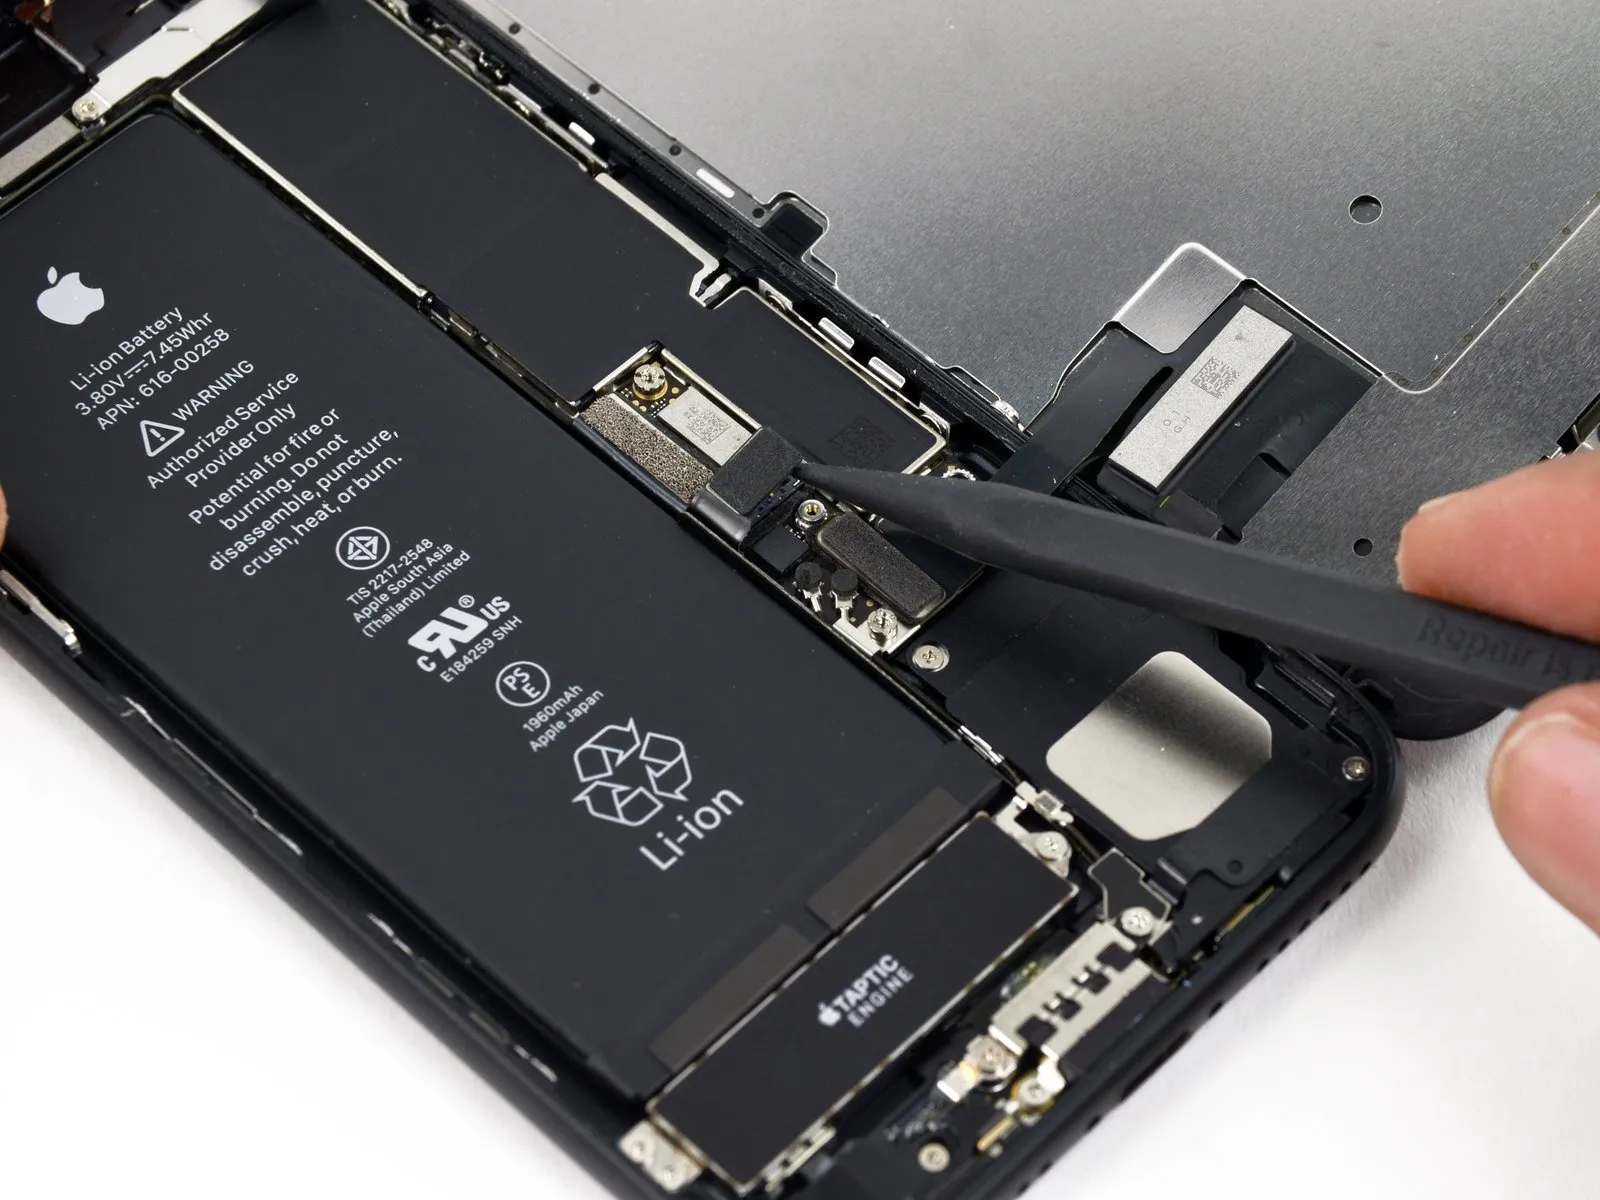
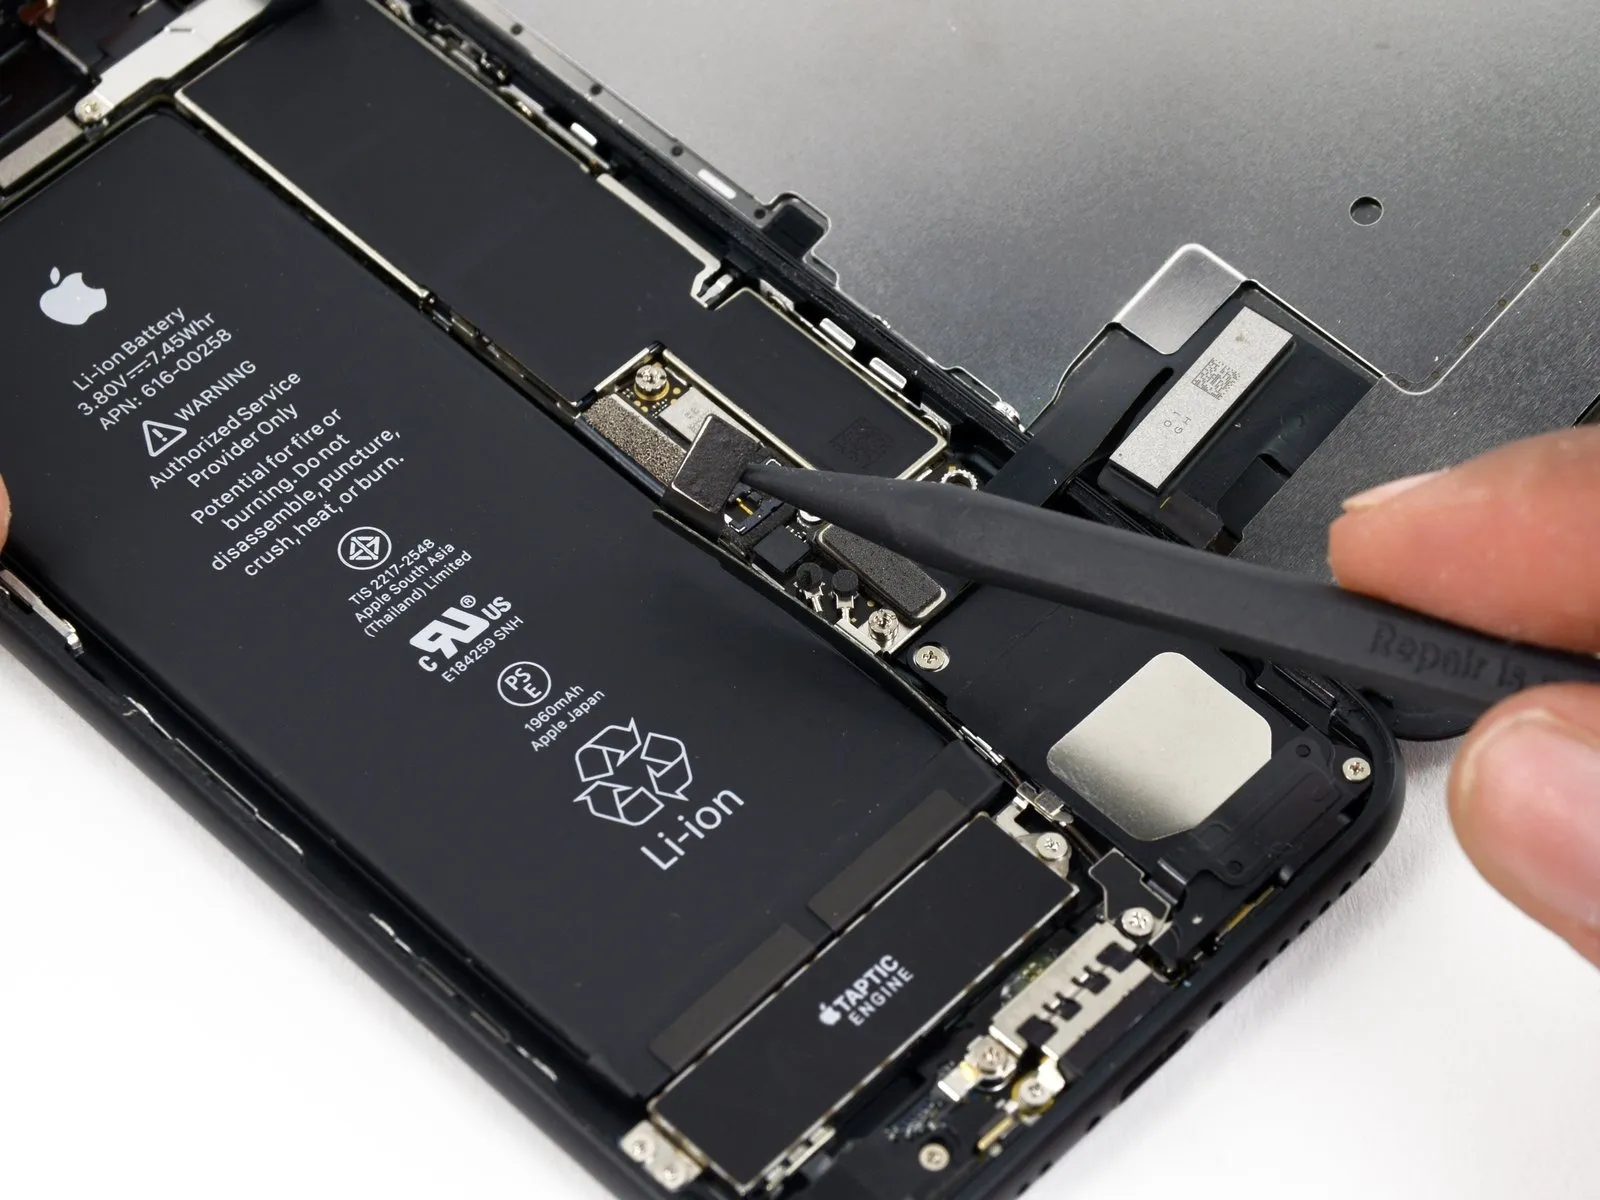
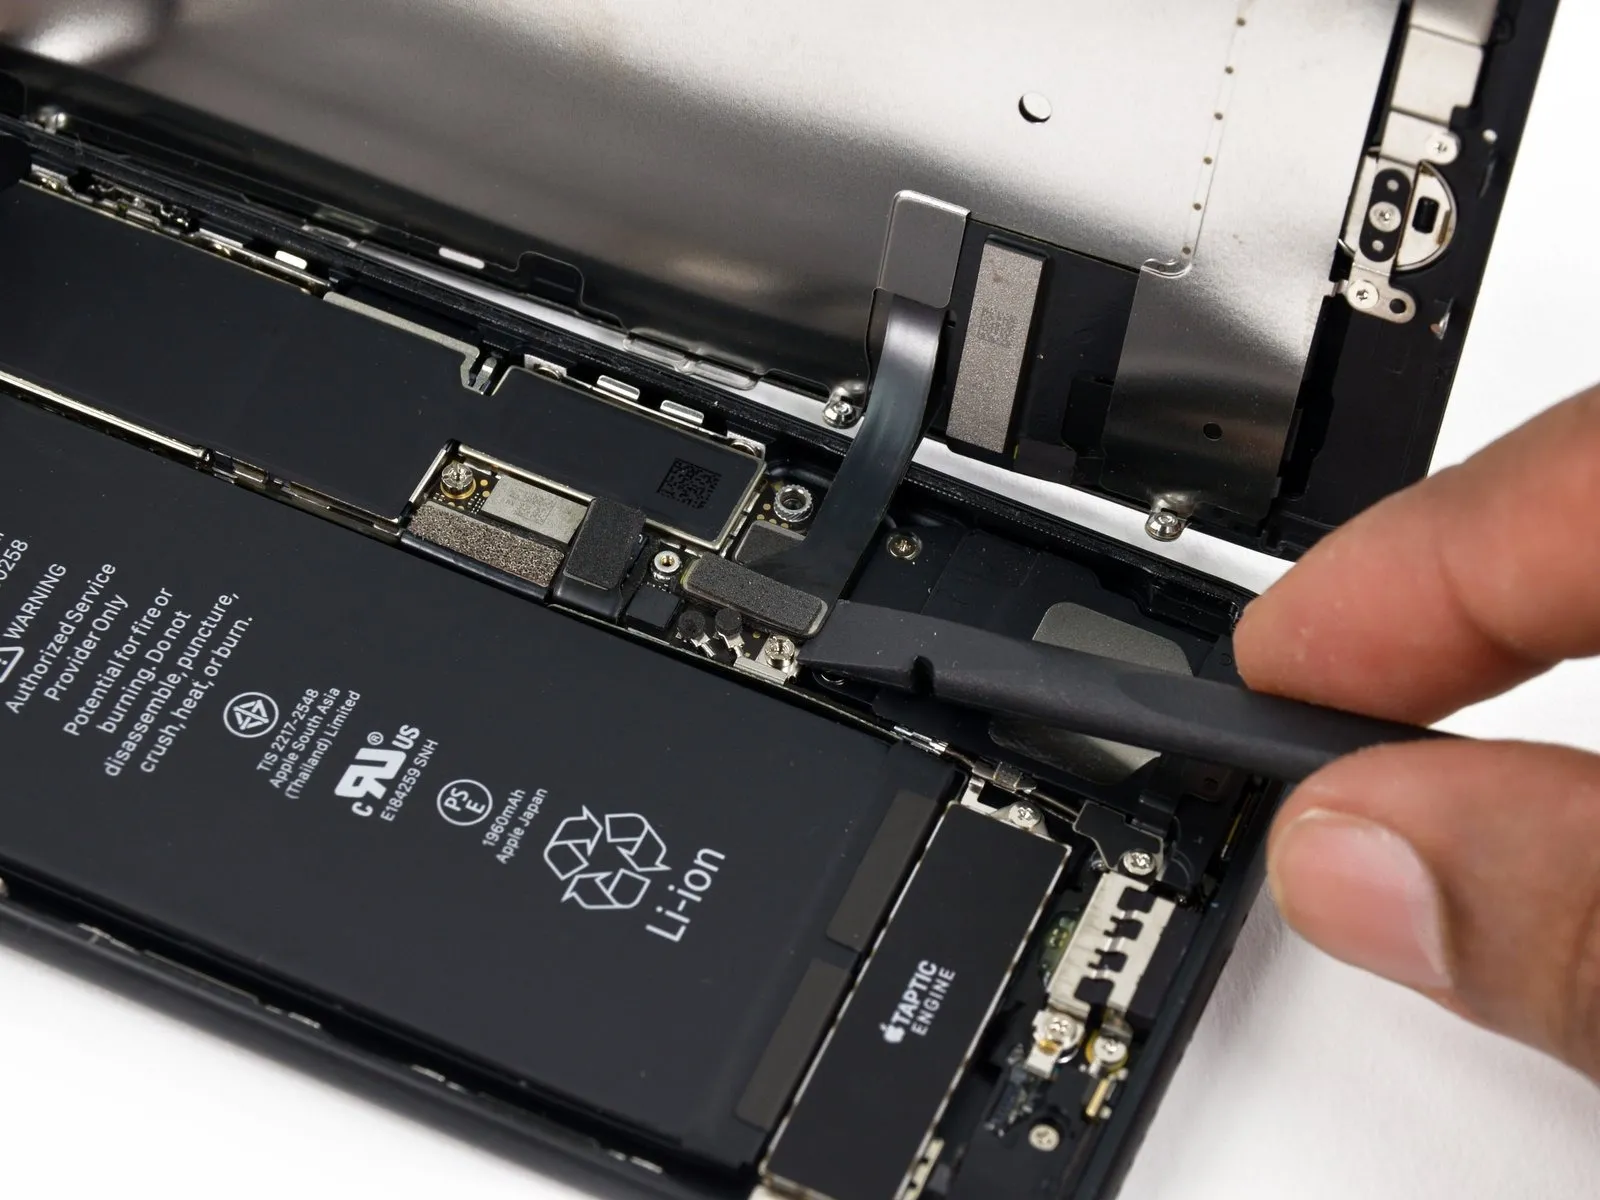
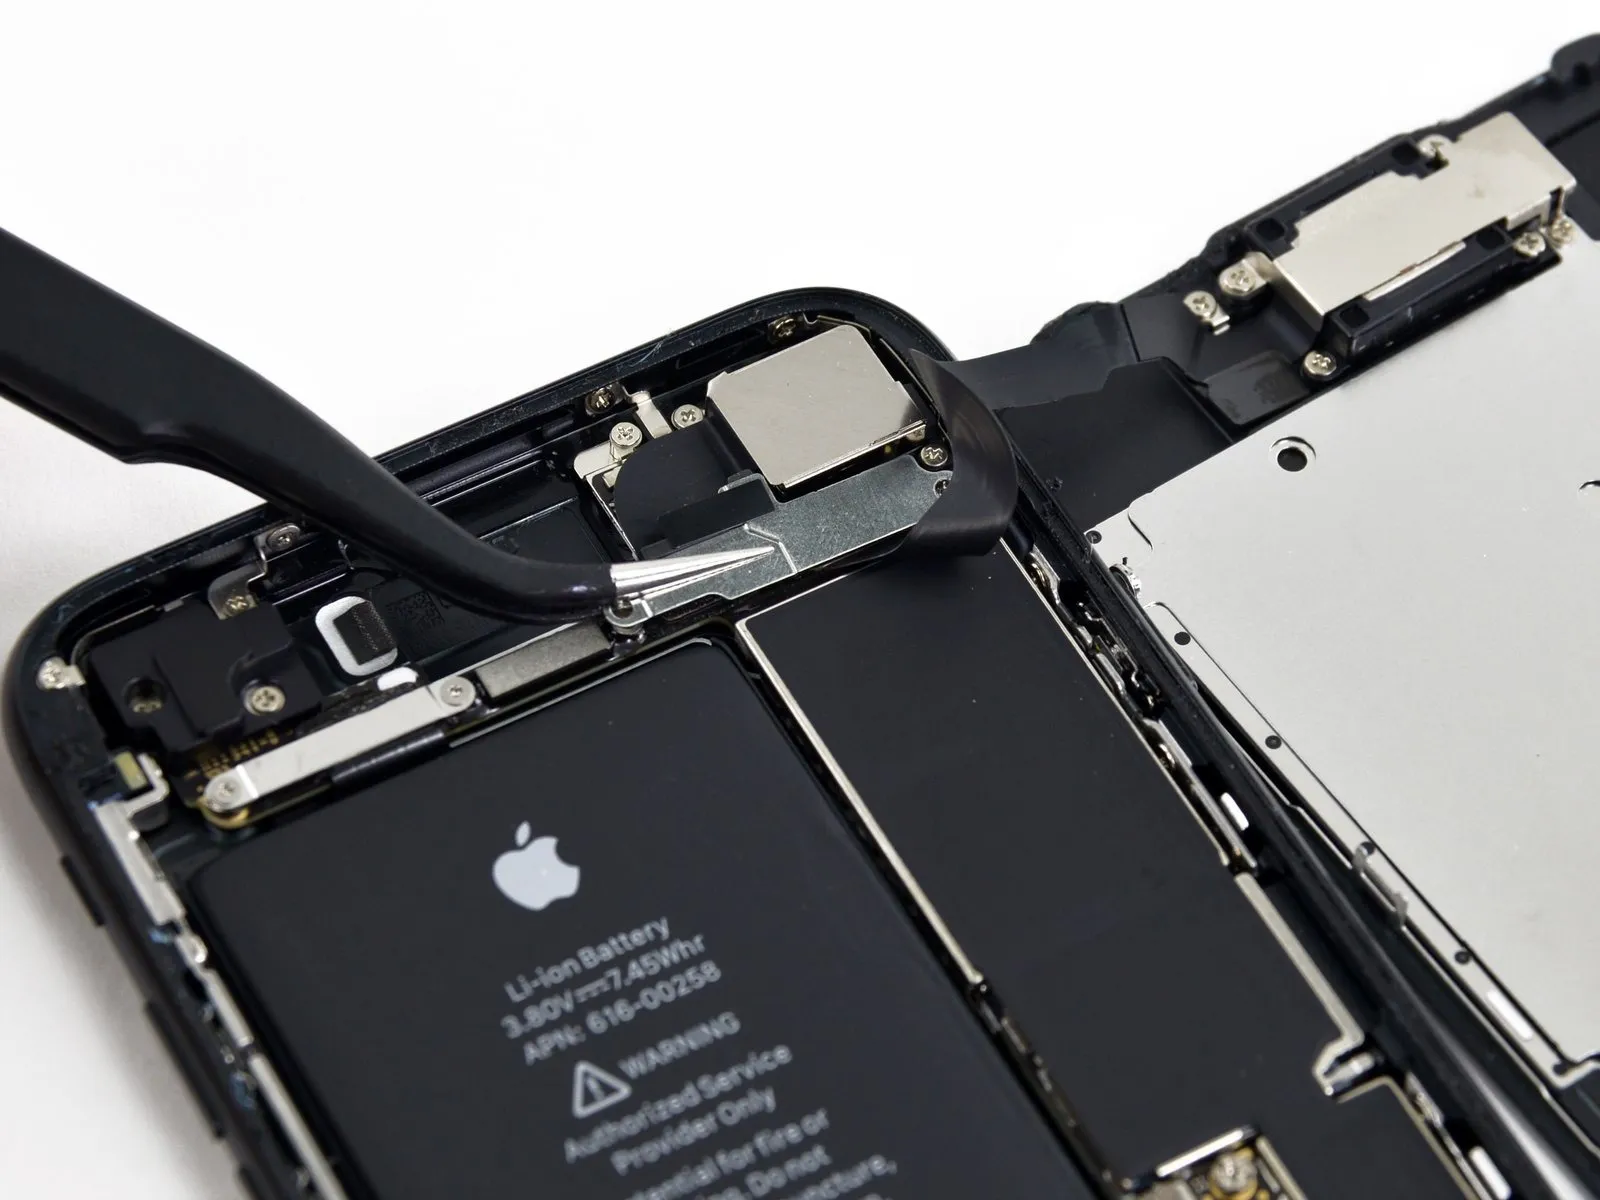
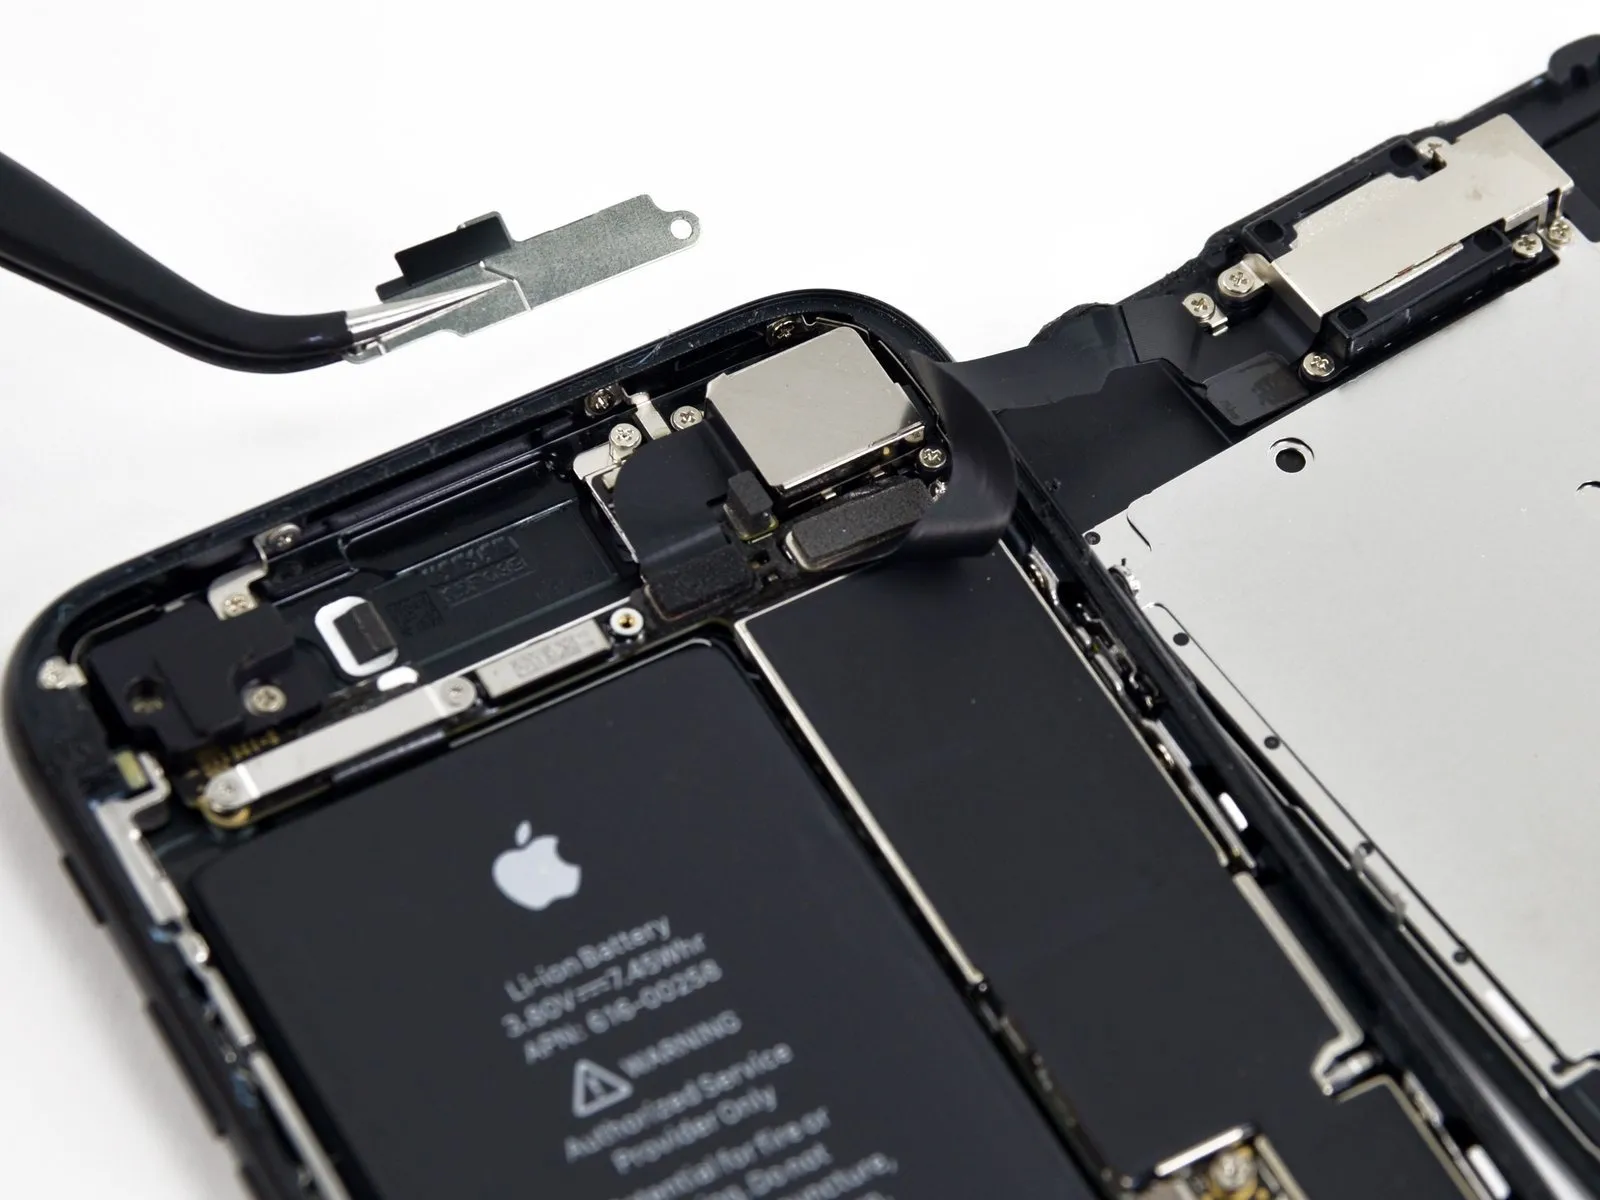
- Carefully detach the connector linking the front panel sensor assembly to its socket on the logic board.
- To reduce the possibility of deformation, reconnect the press connector by attaching one end at a time.
Step 22
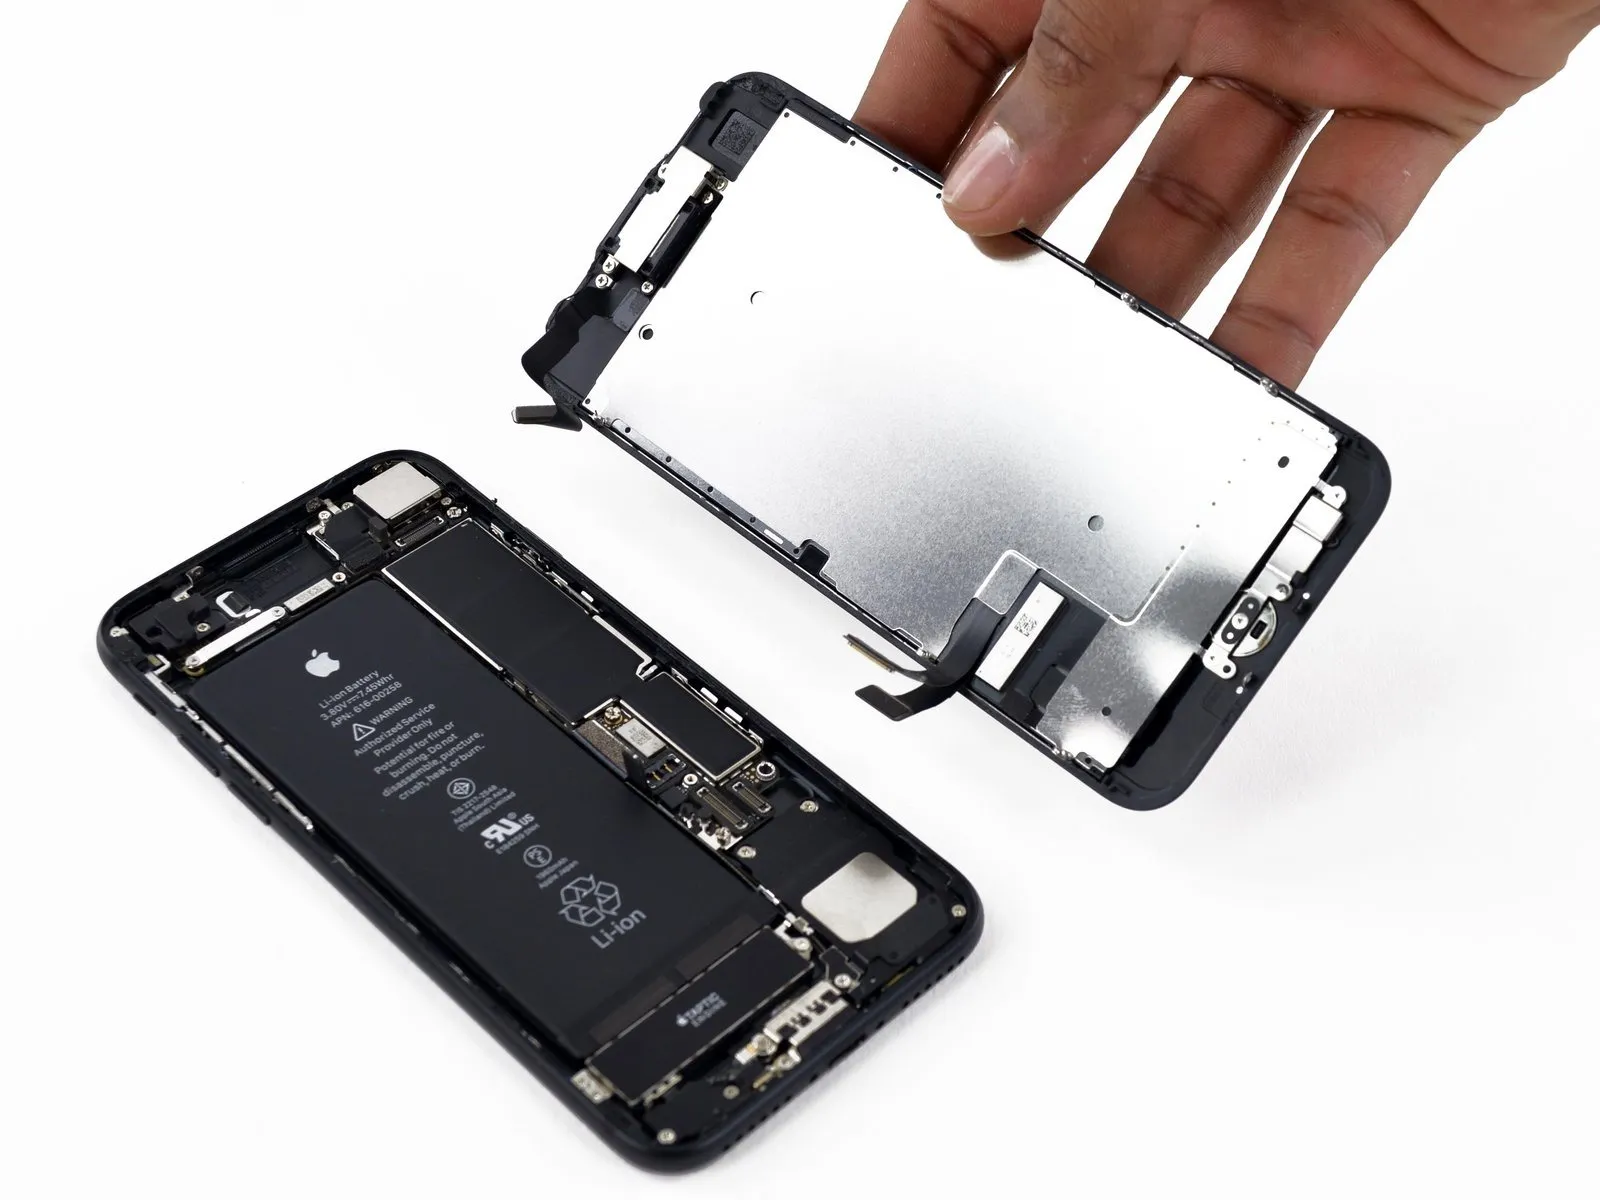
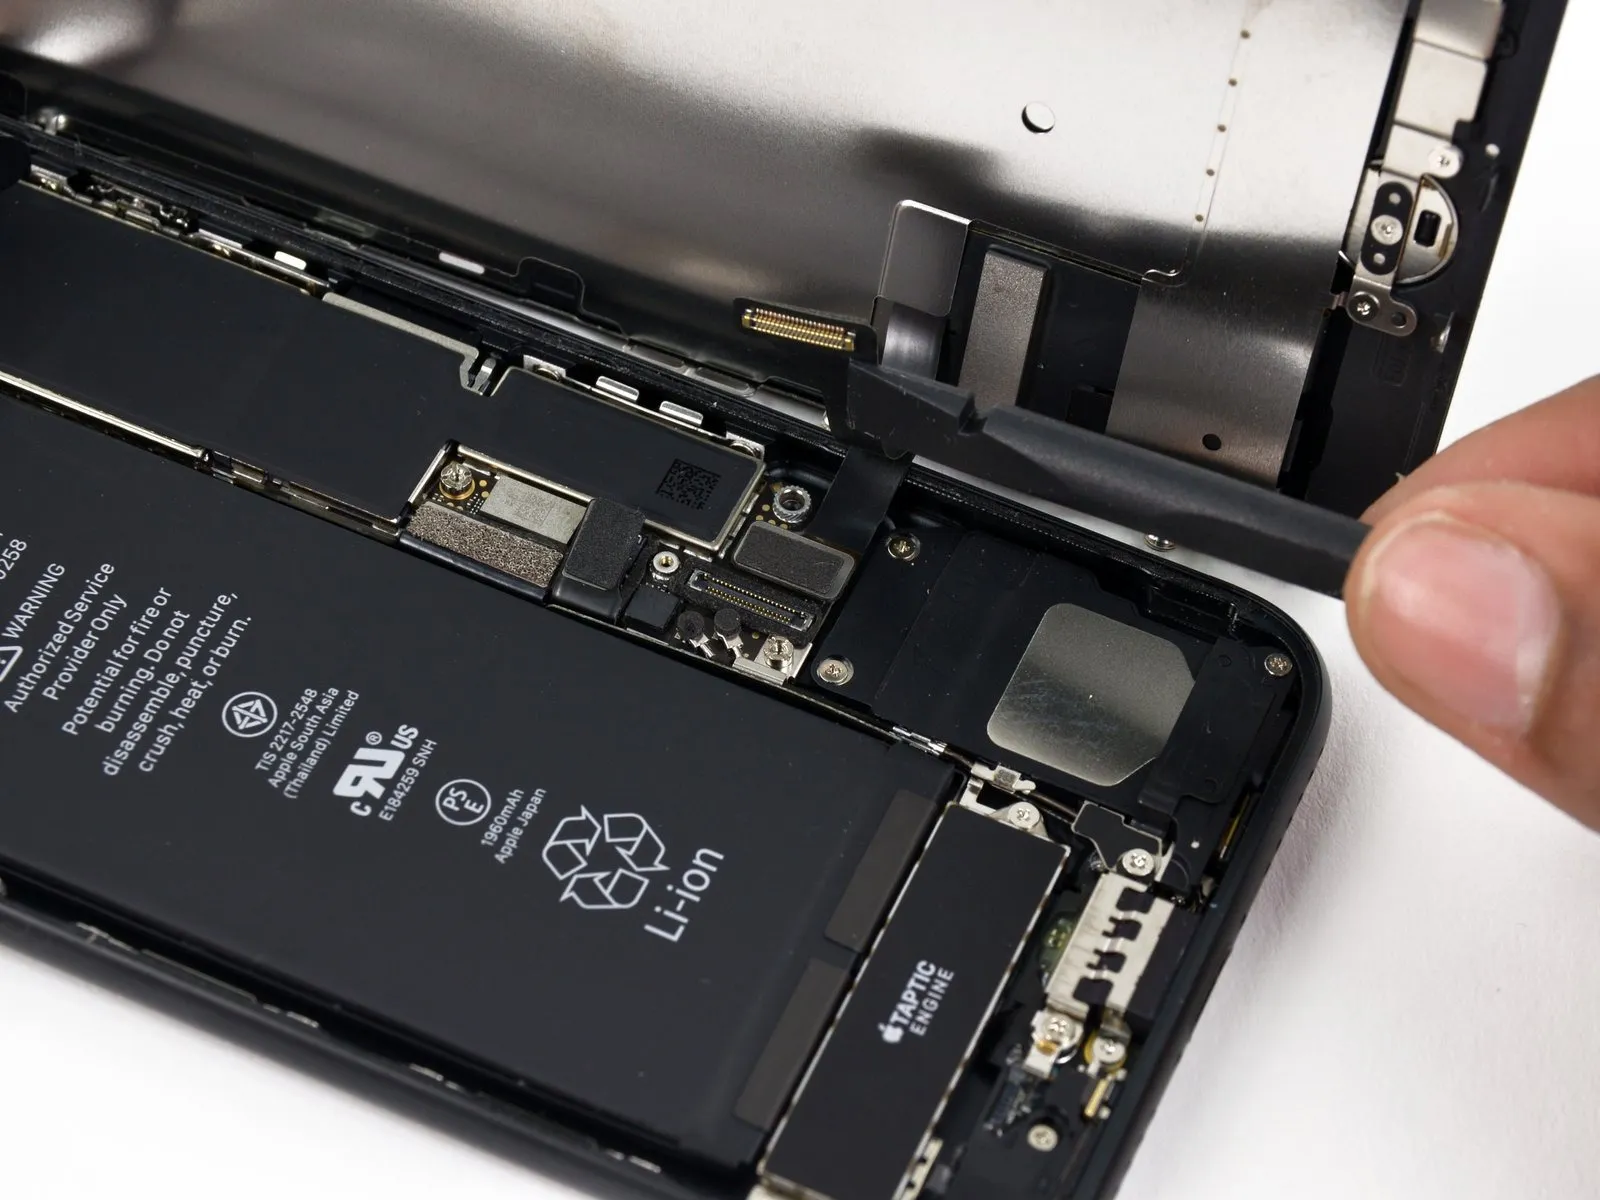
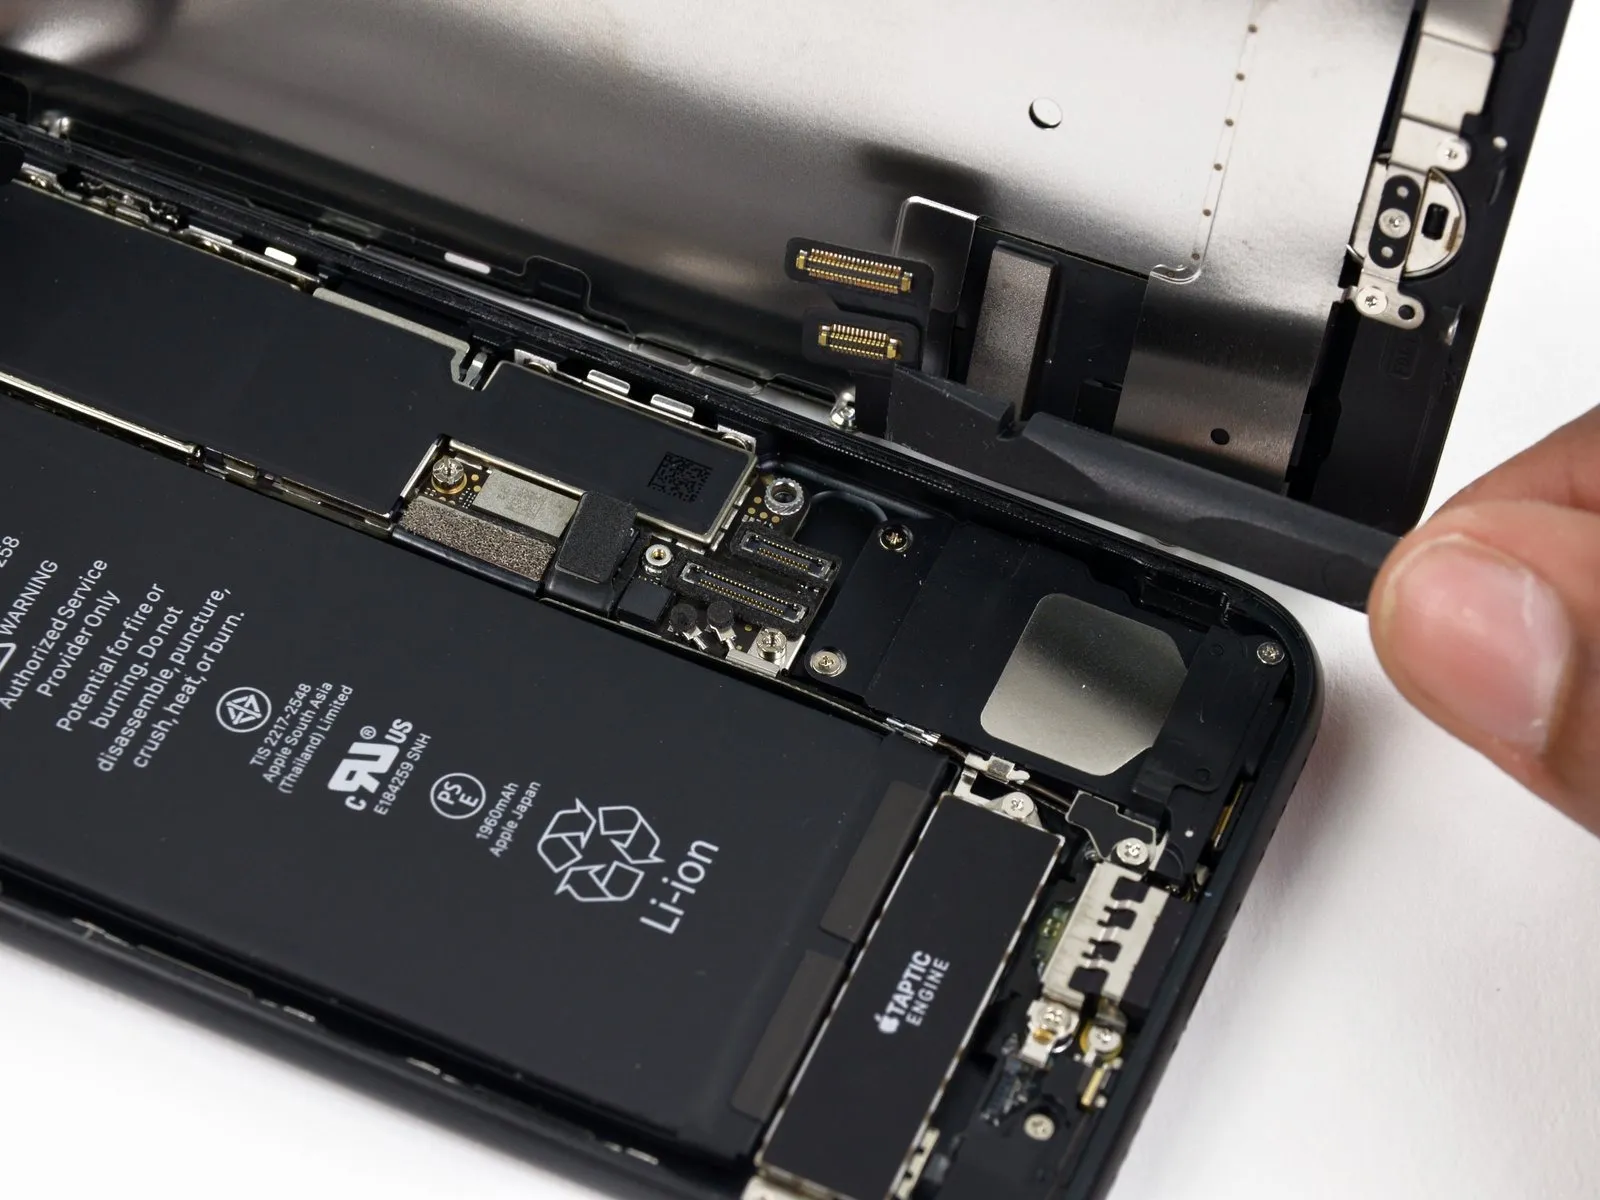
- Carefully detach the display assembly, ensuring all connections are released.
- If you intend to substitute fresh adhesive along the display's perimeter during reassembly, stop at this point.
Step 23 | Barometric Vent
Step 24
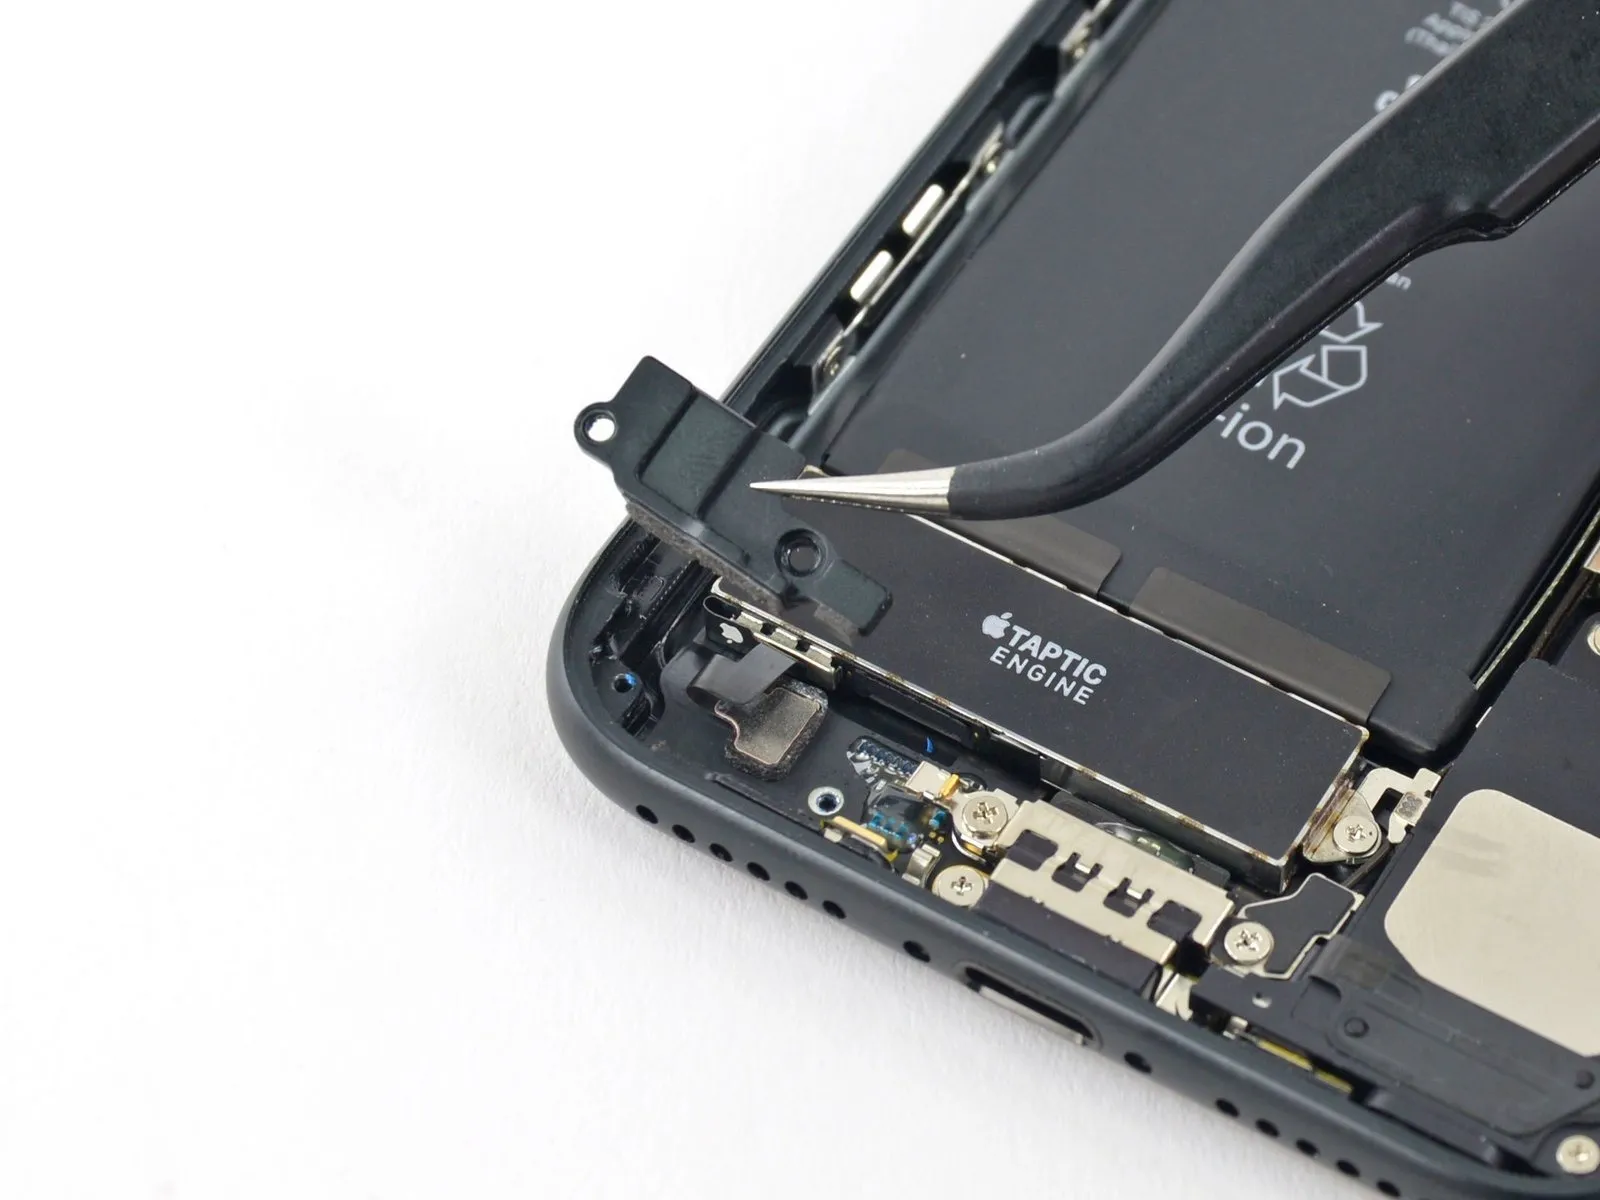
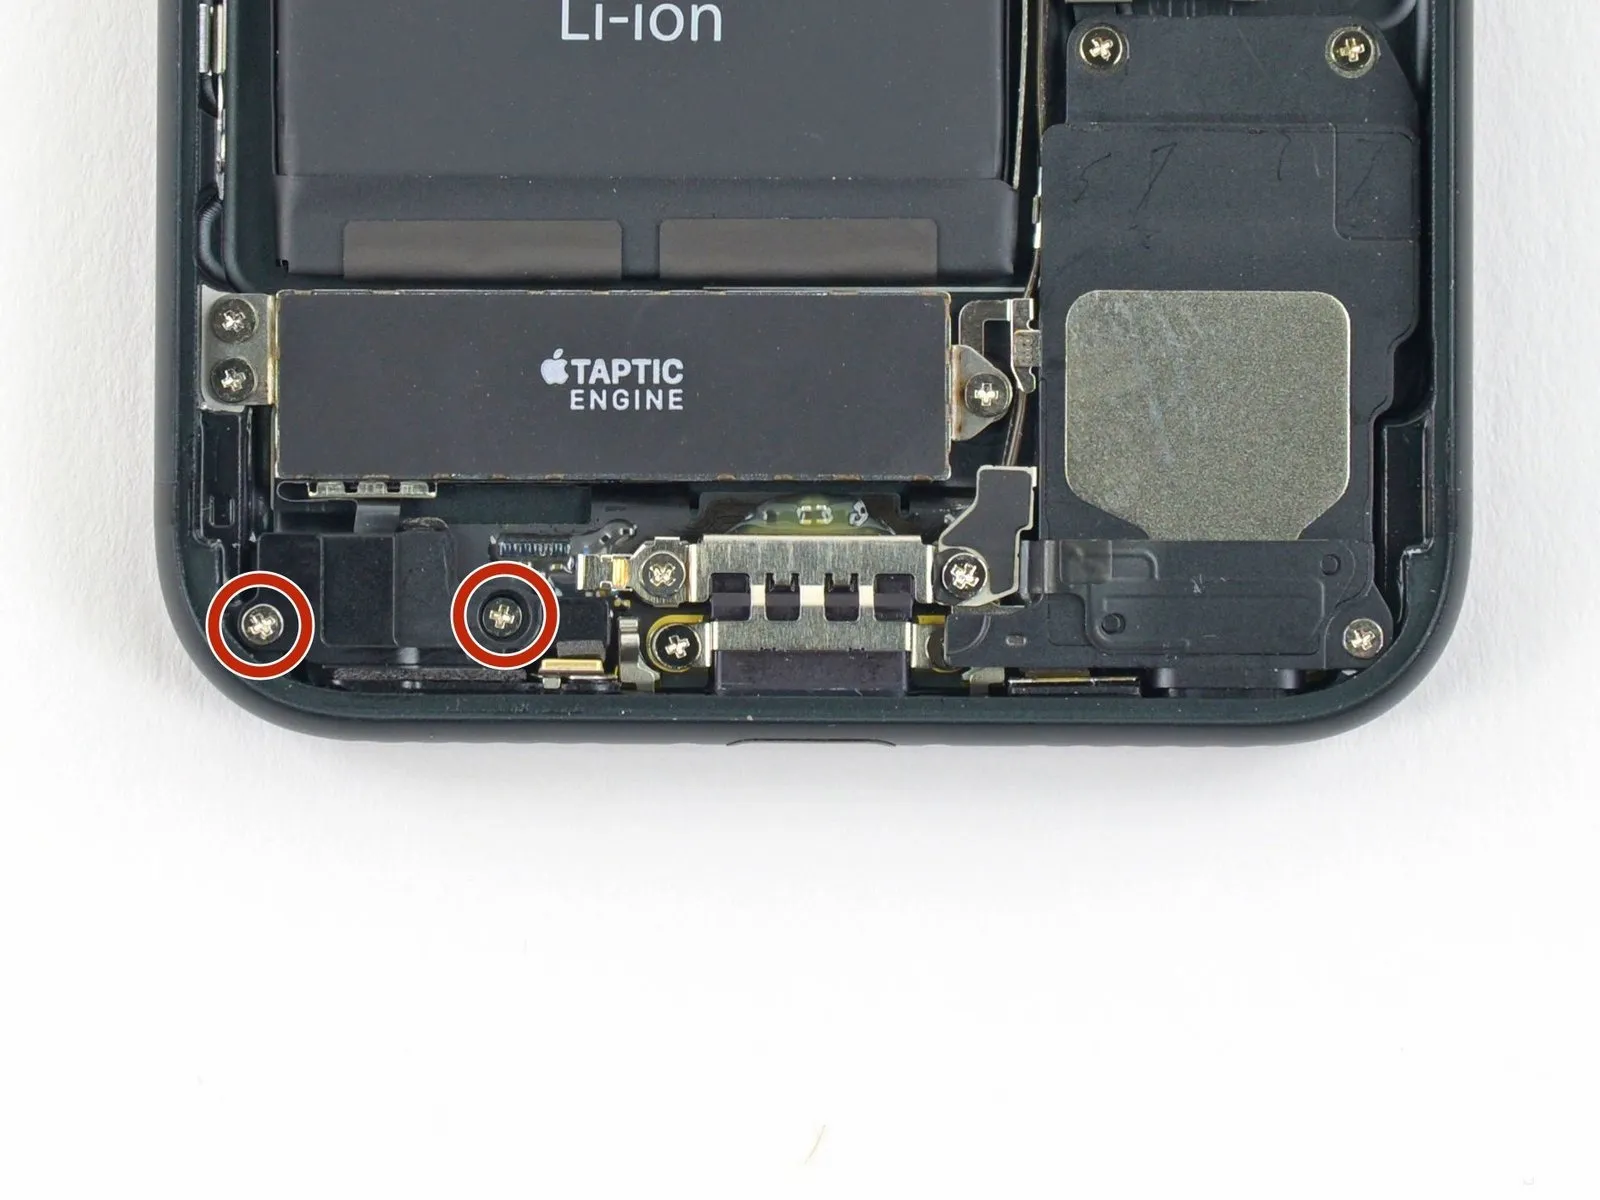
Step 25 | Taptic Engine

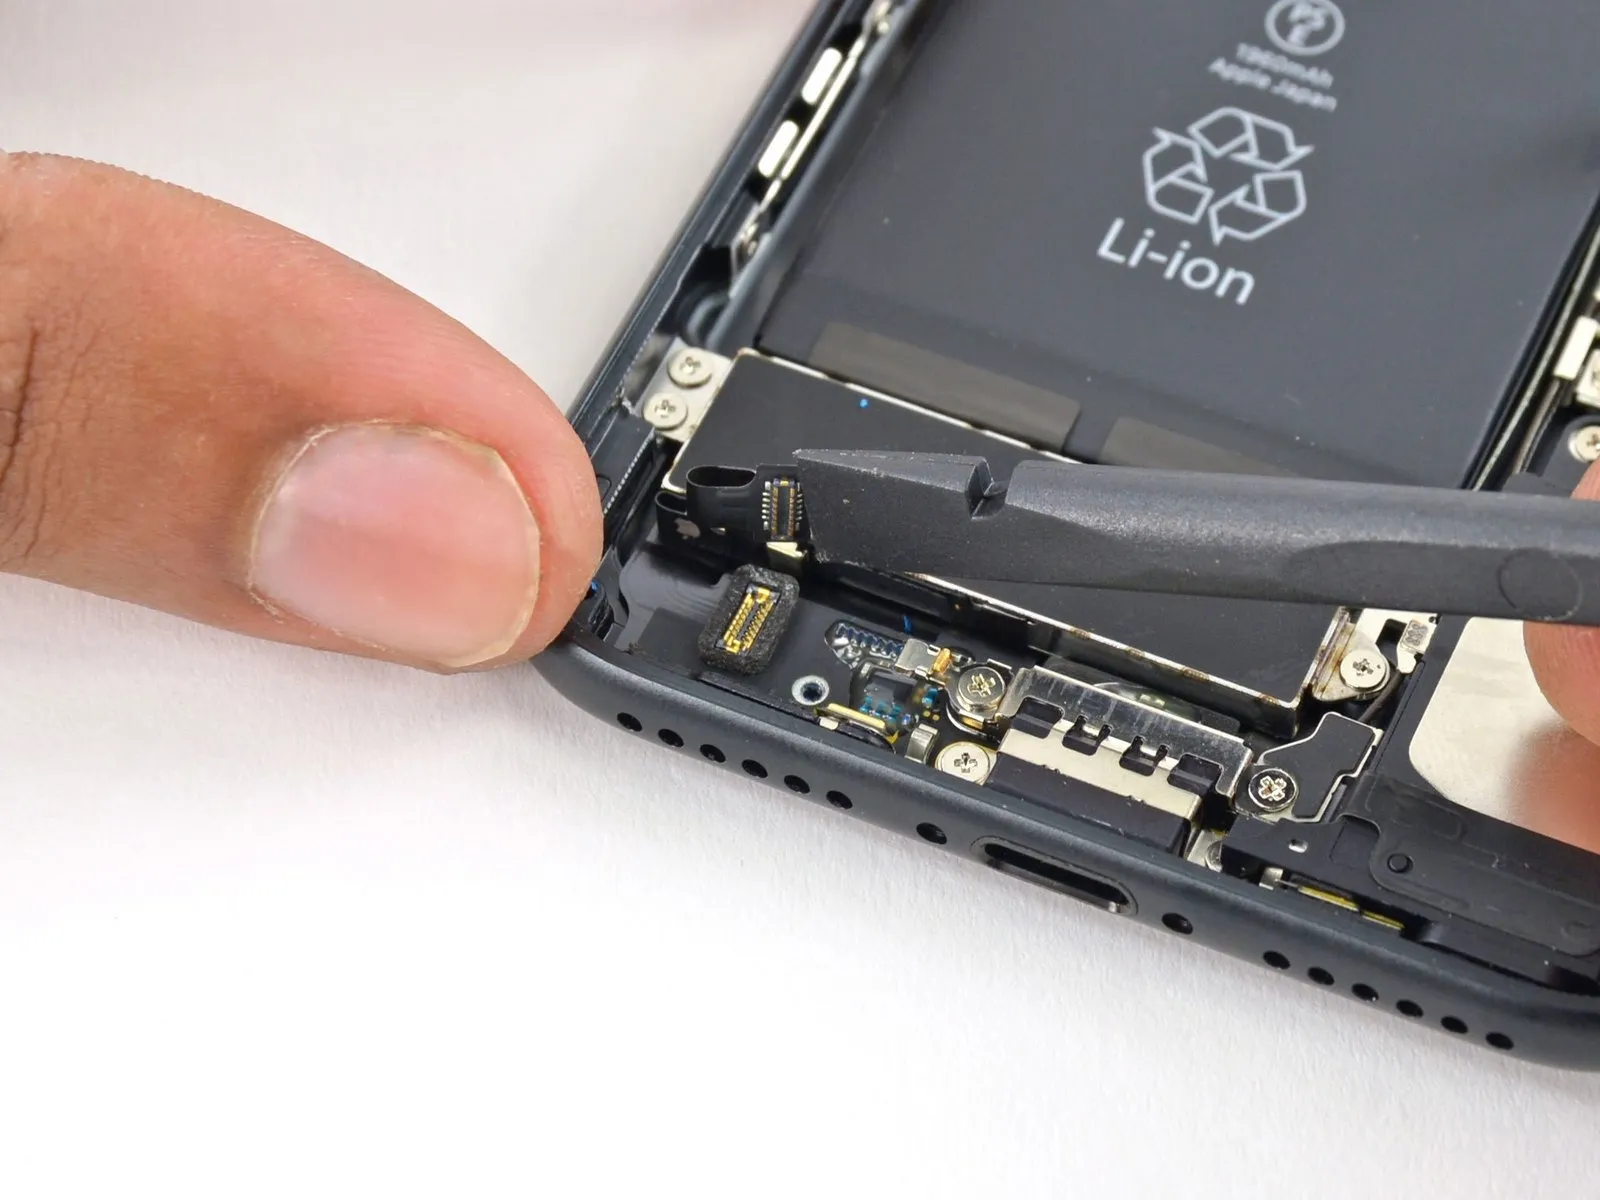
- Employ the tool's planar edge.Use a plastic pry tool, often referred to as a spudger, to gently separate components.Carefully separate the Taptic Engine connector from the corresponding socket on the logic board.
Step 26
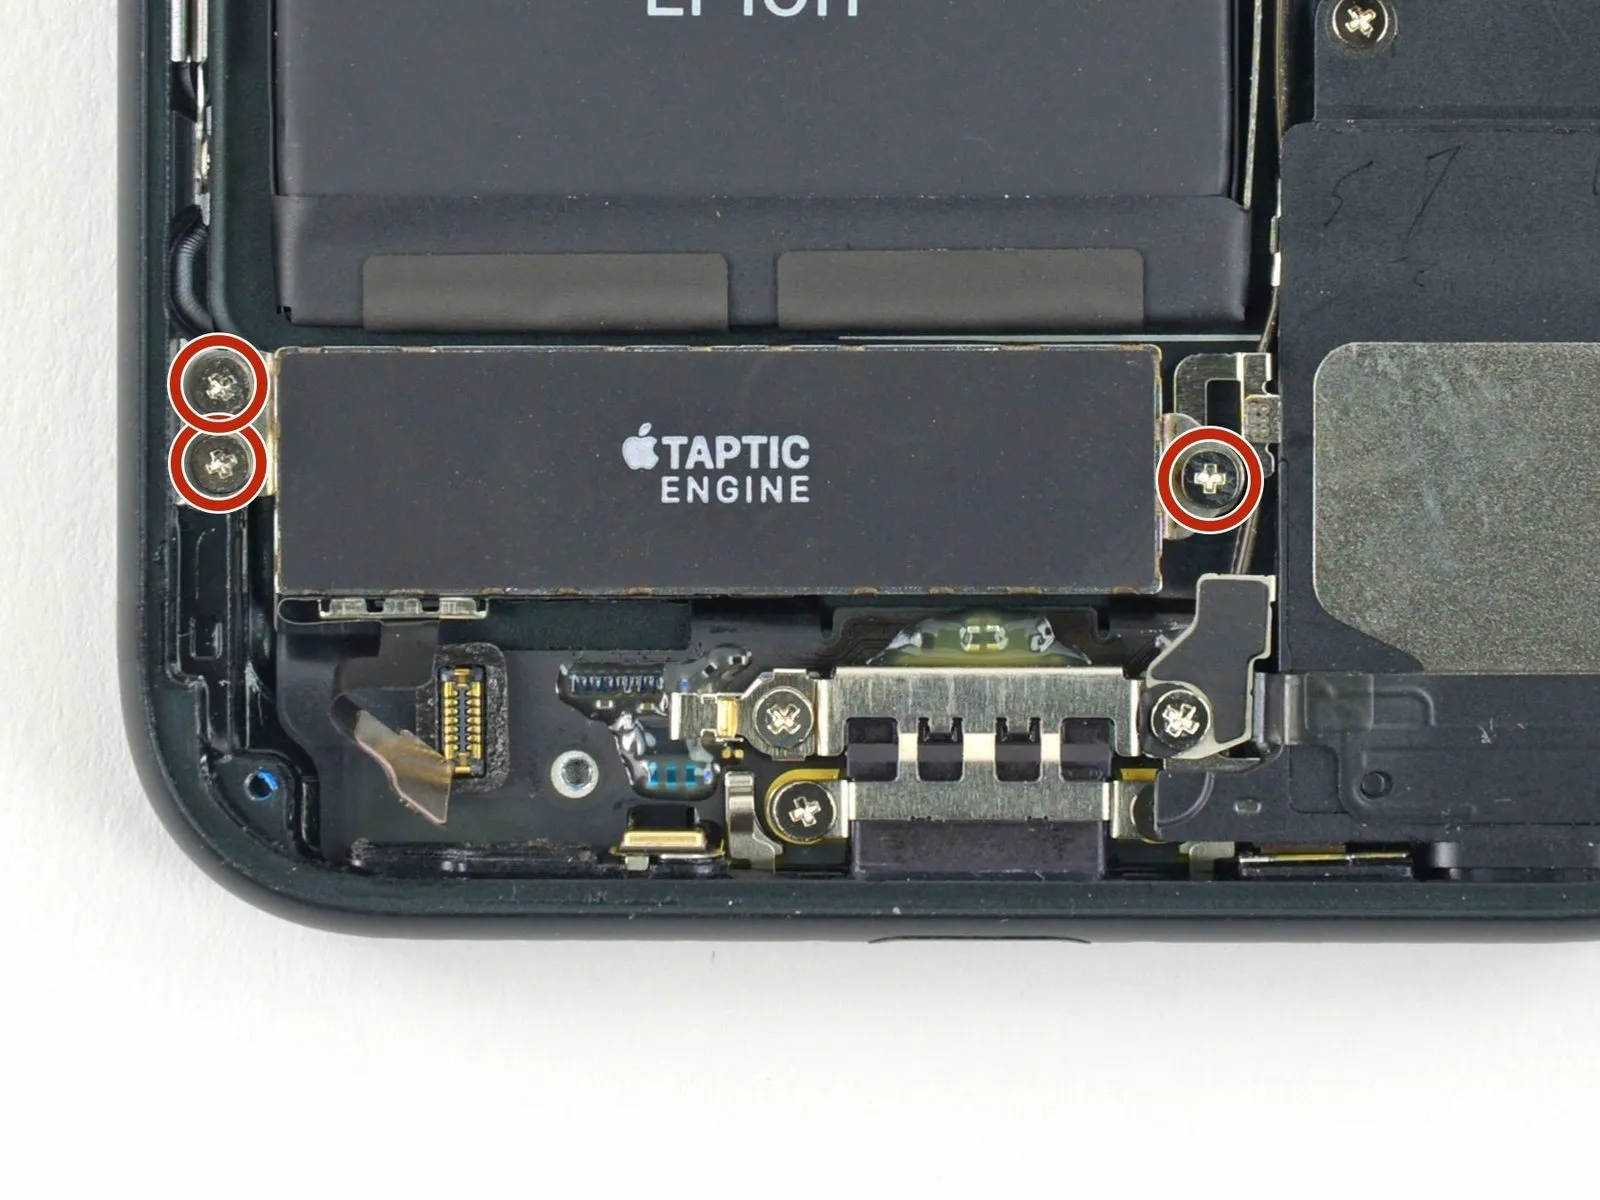
- Detach the component.Three.One point six millimeters.Use a Phillips head screwdriver.Affix the Taptic Engine to the rear case using the specified screws, ensuring proper alignment and torque as detailed in the service manual.
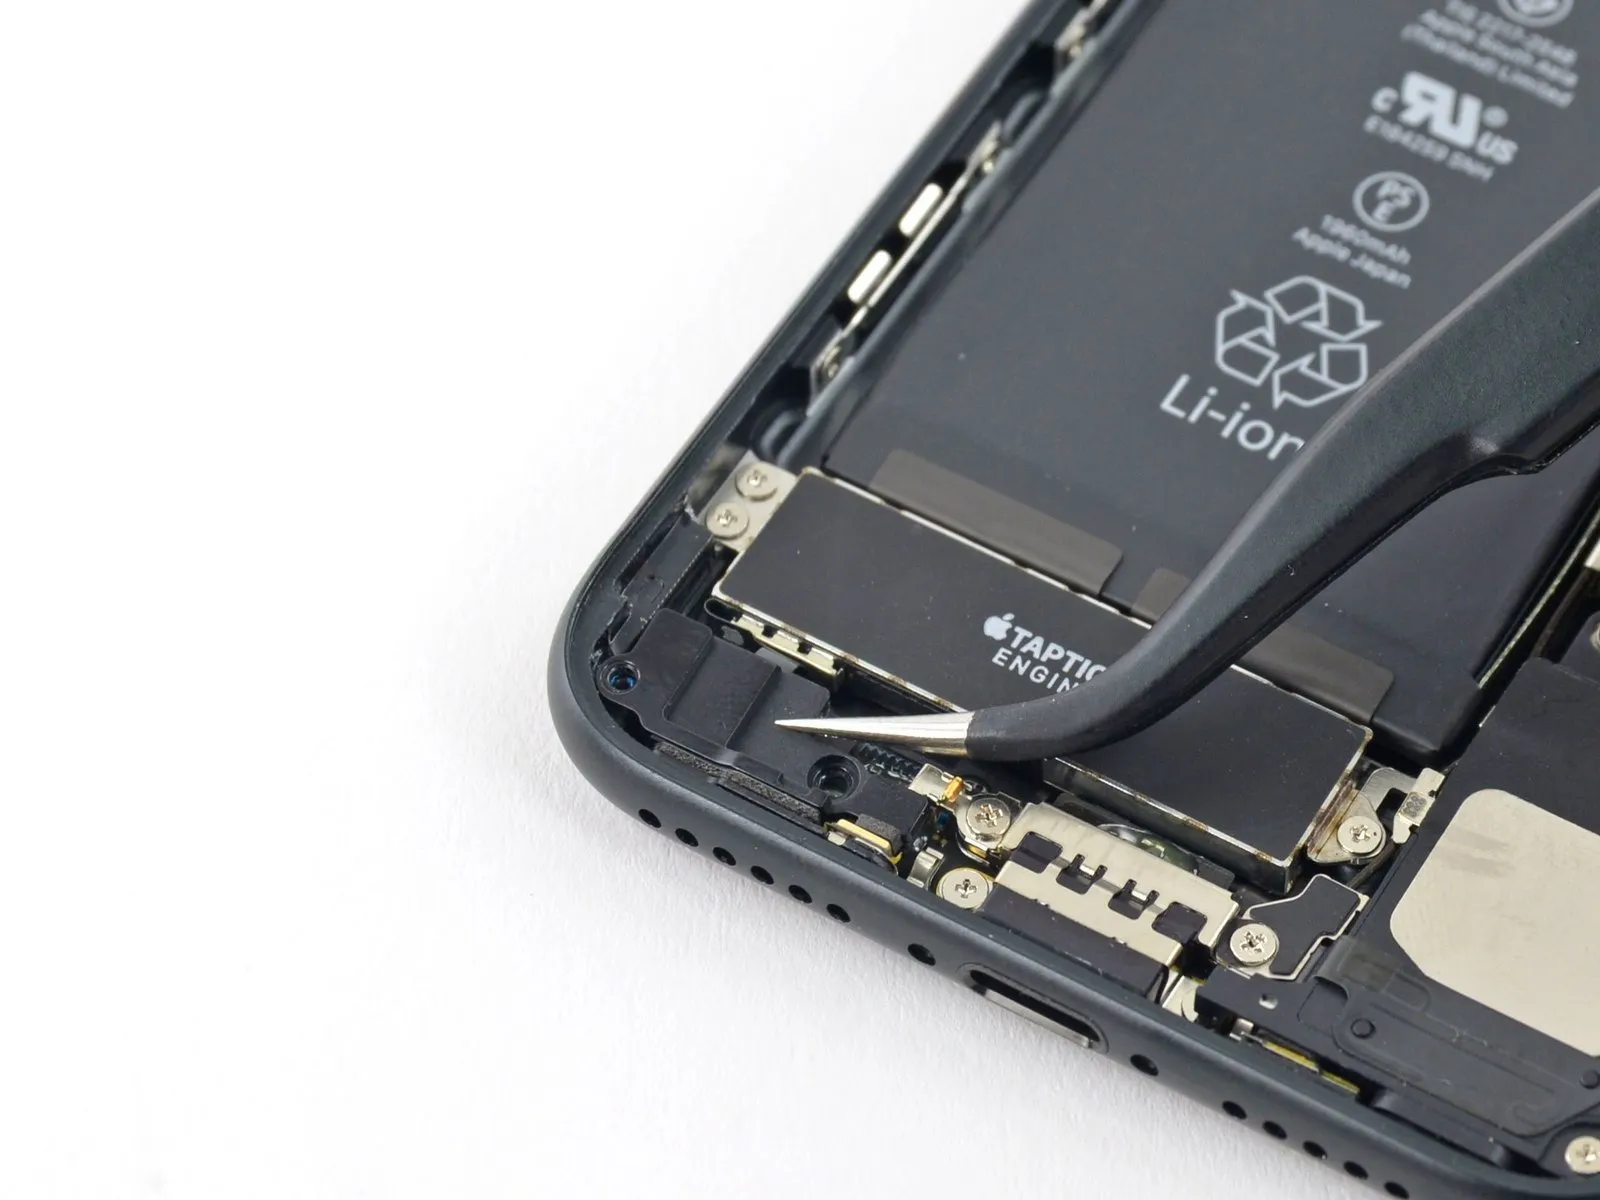
Step 27

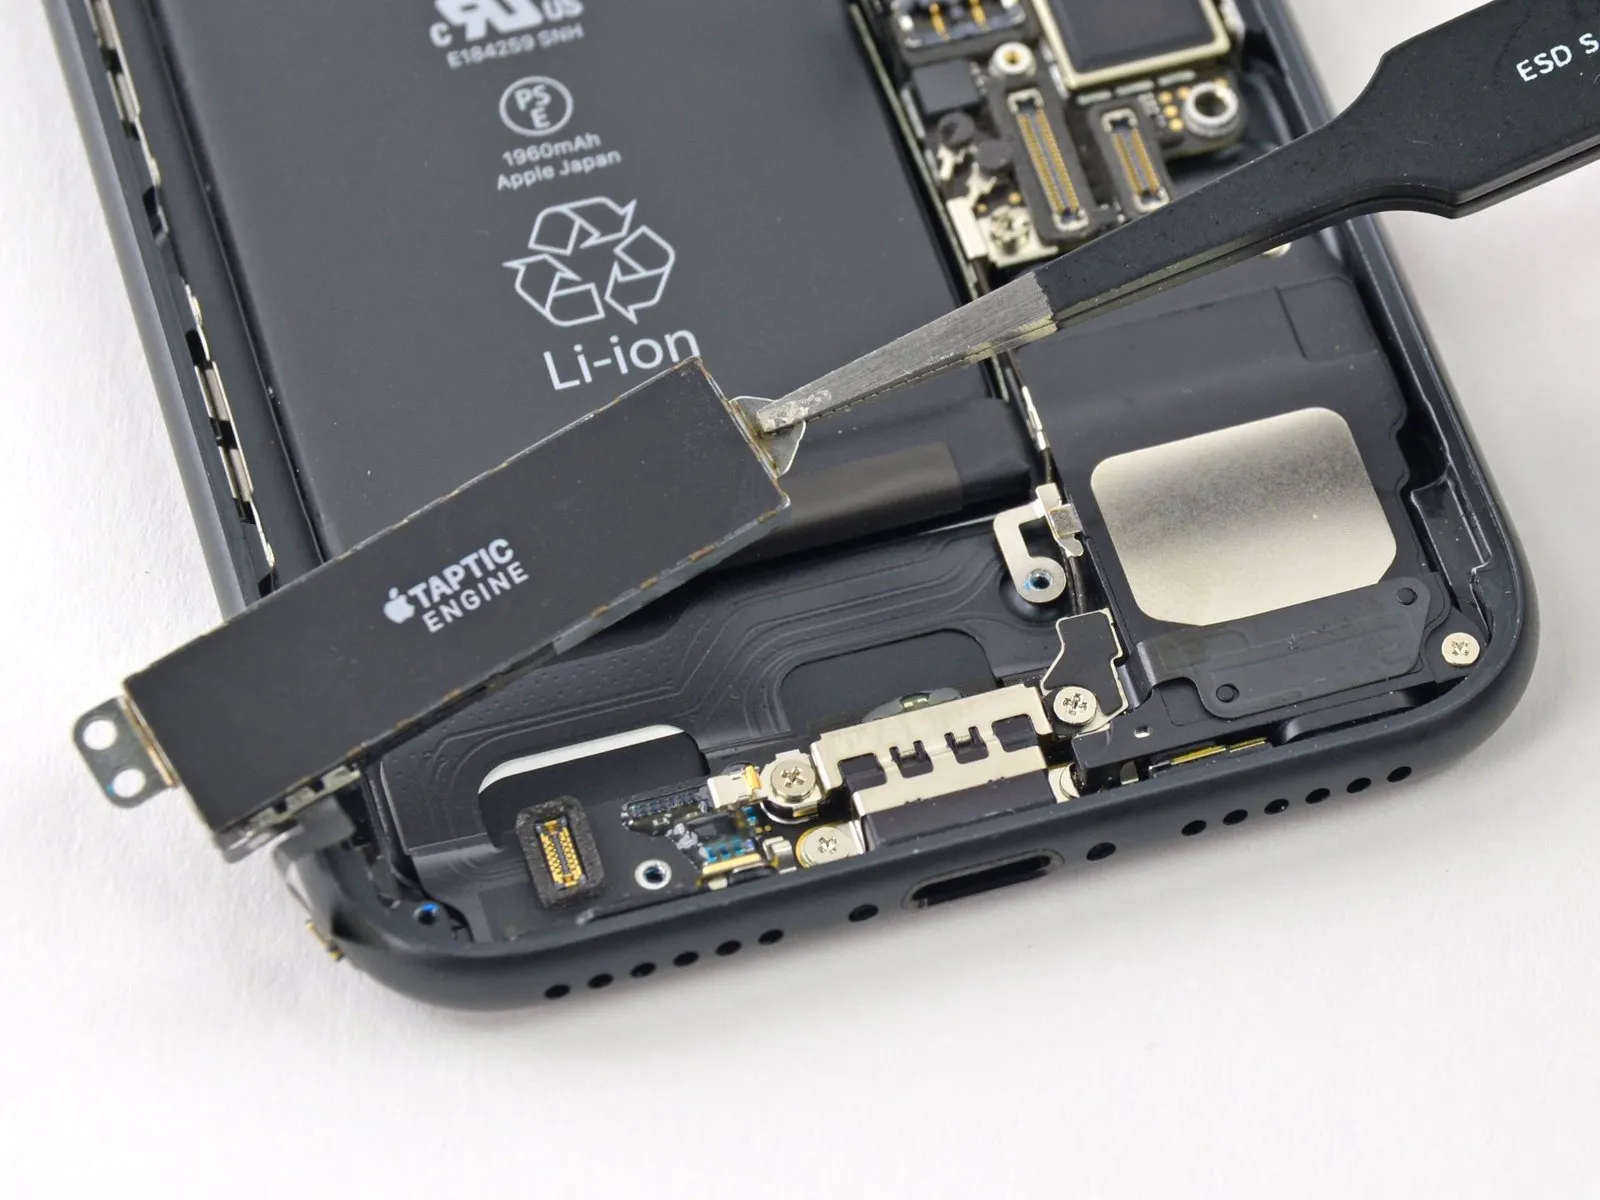
- Carefully detach the Taptic Engine, ensuring no damage occurs.
Step 28 | Battery
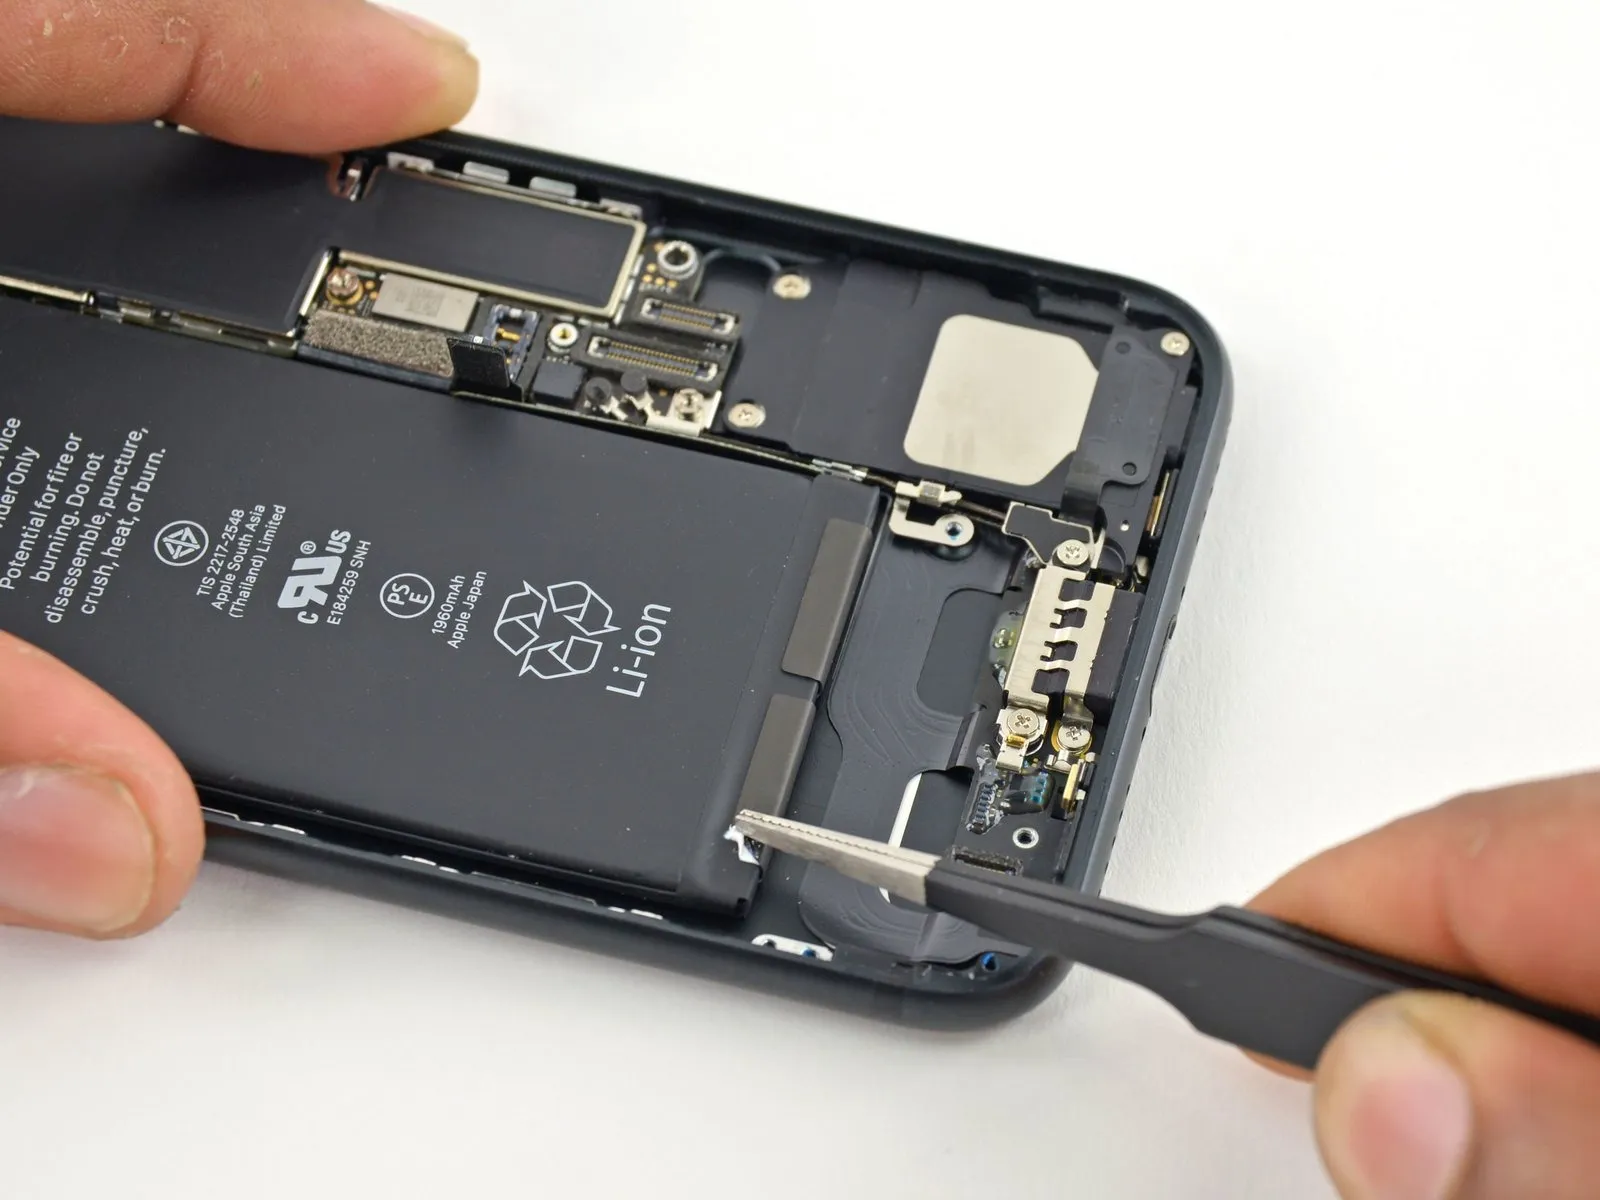

- Carefully lift one of the battery's lower edge adhesive strips by using tweezers with non-pointed tips.
Step 29
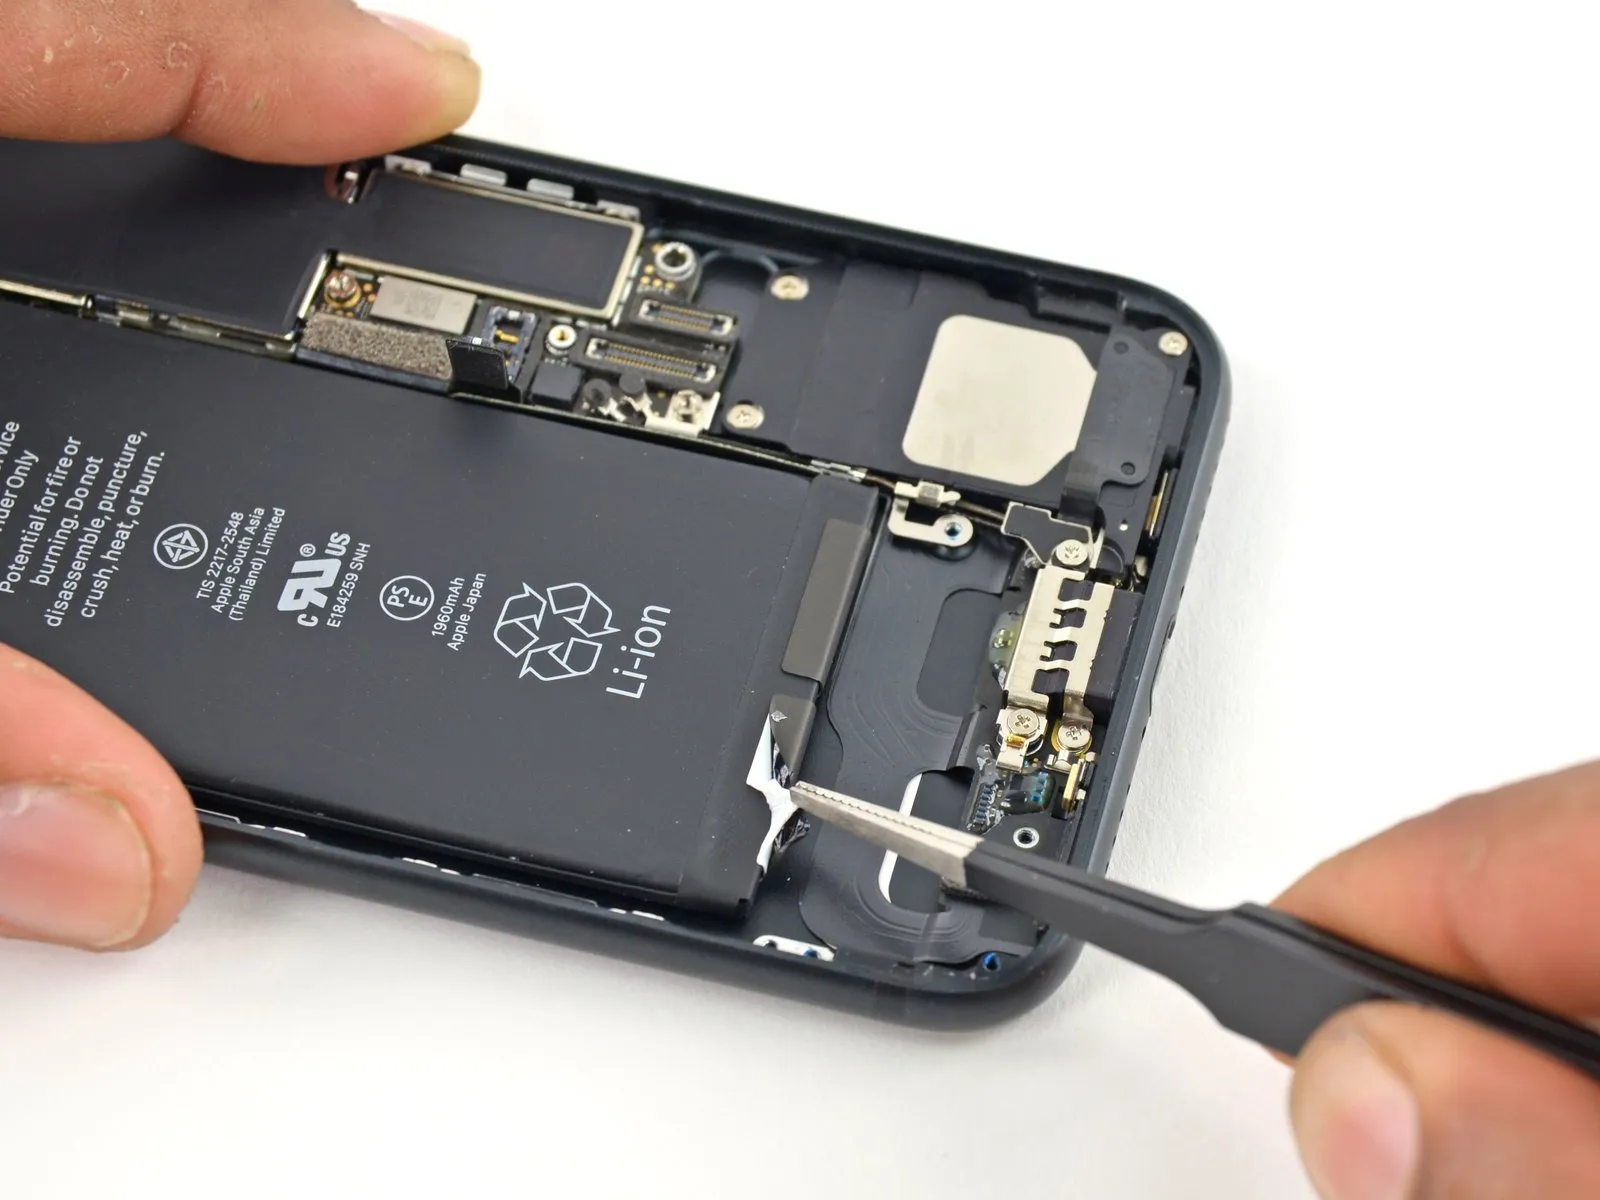
Employ pliers to grasp.Employ fine-tipped pliers or similar precision instruments.Use tools with rounded ends to carefully separate the adhesive securing the battery's lower edge.
Step 30
- For users unfamiliar with iPhone battery adhesive strip removal, consult the video provided in the subsequent step to ensure proper technique.
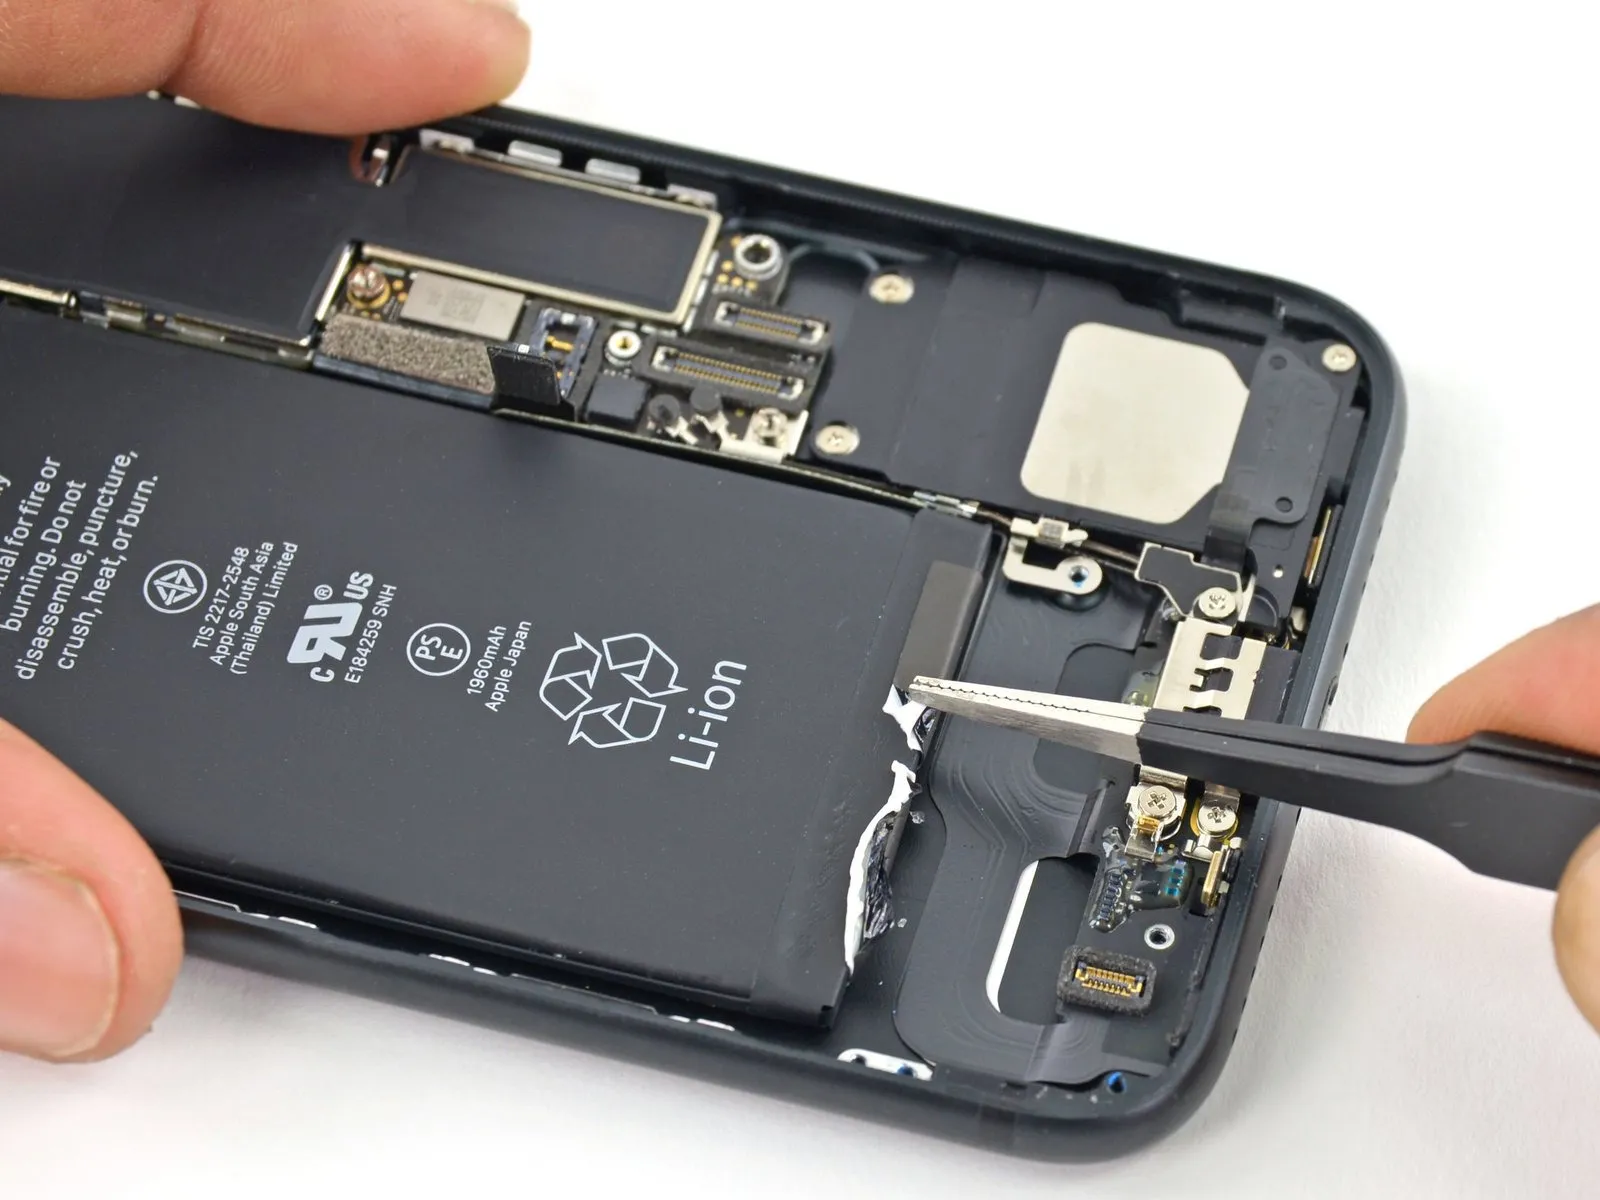
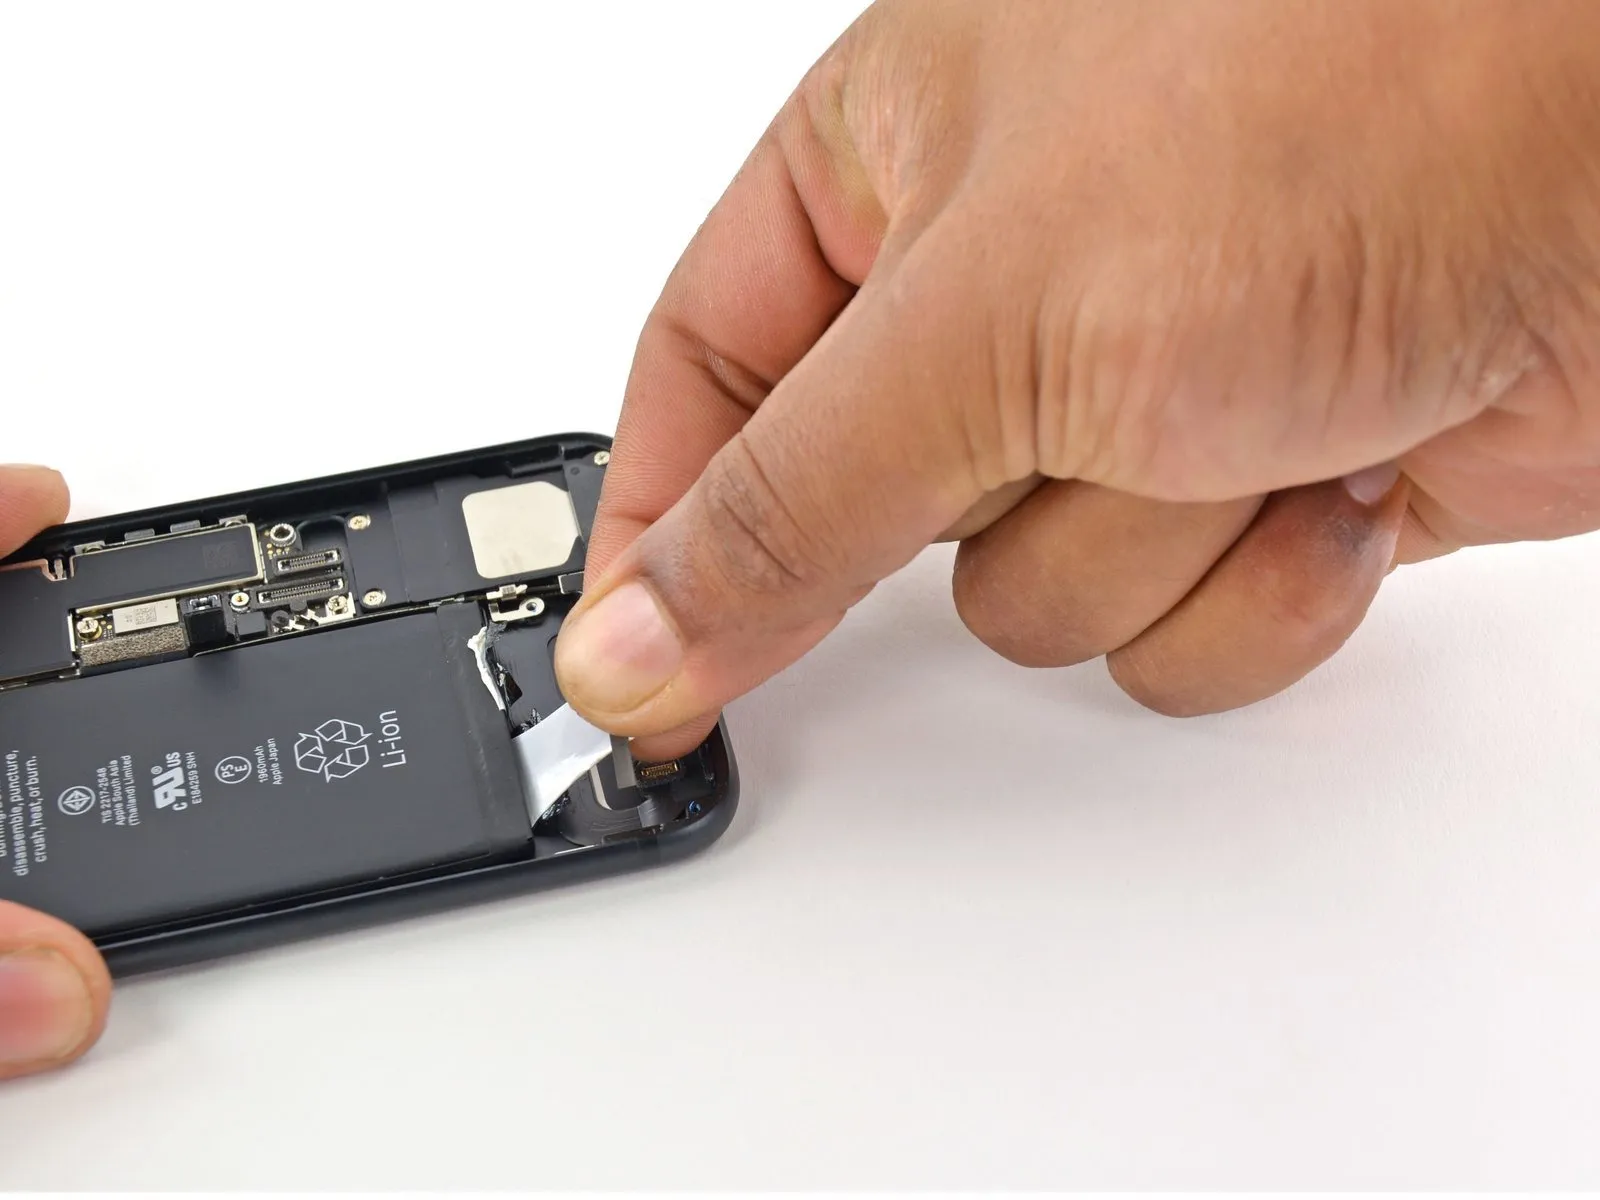
- To ensure proper removal, maintain the strips' flatness and avoid creases, as folds can cause them to adhere and tear rather than separate easily.
- Gently detach a battery adhesive strip, moving it downwards along the iPhone's chassis.
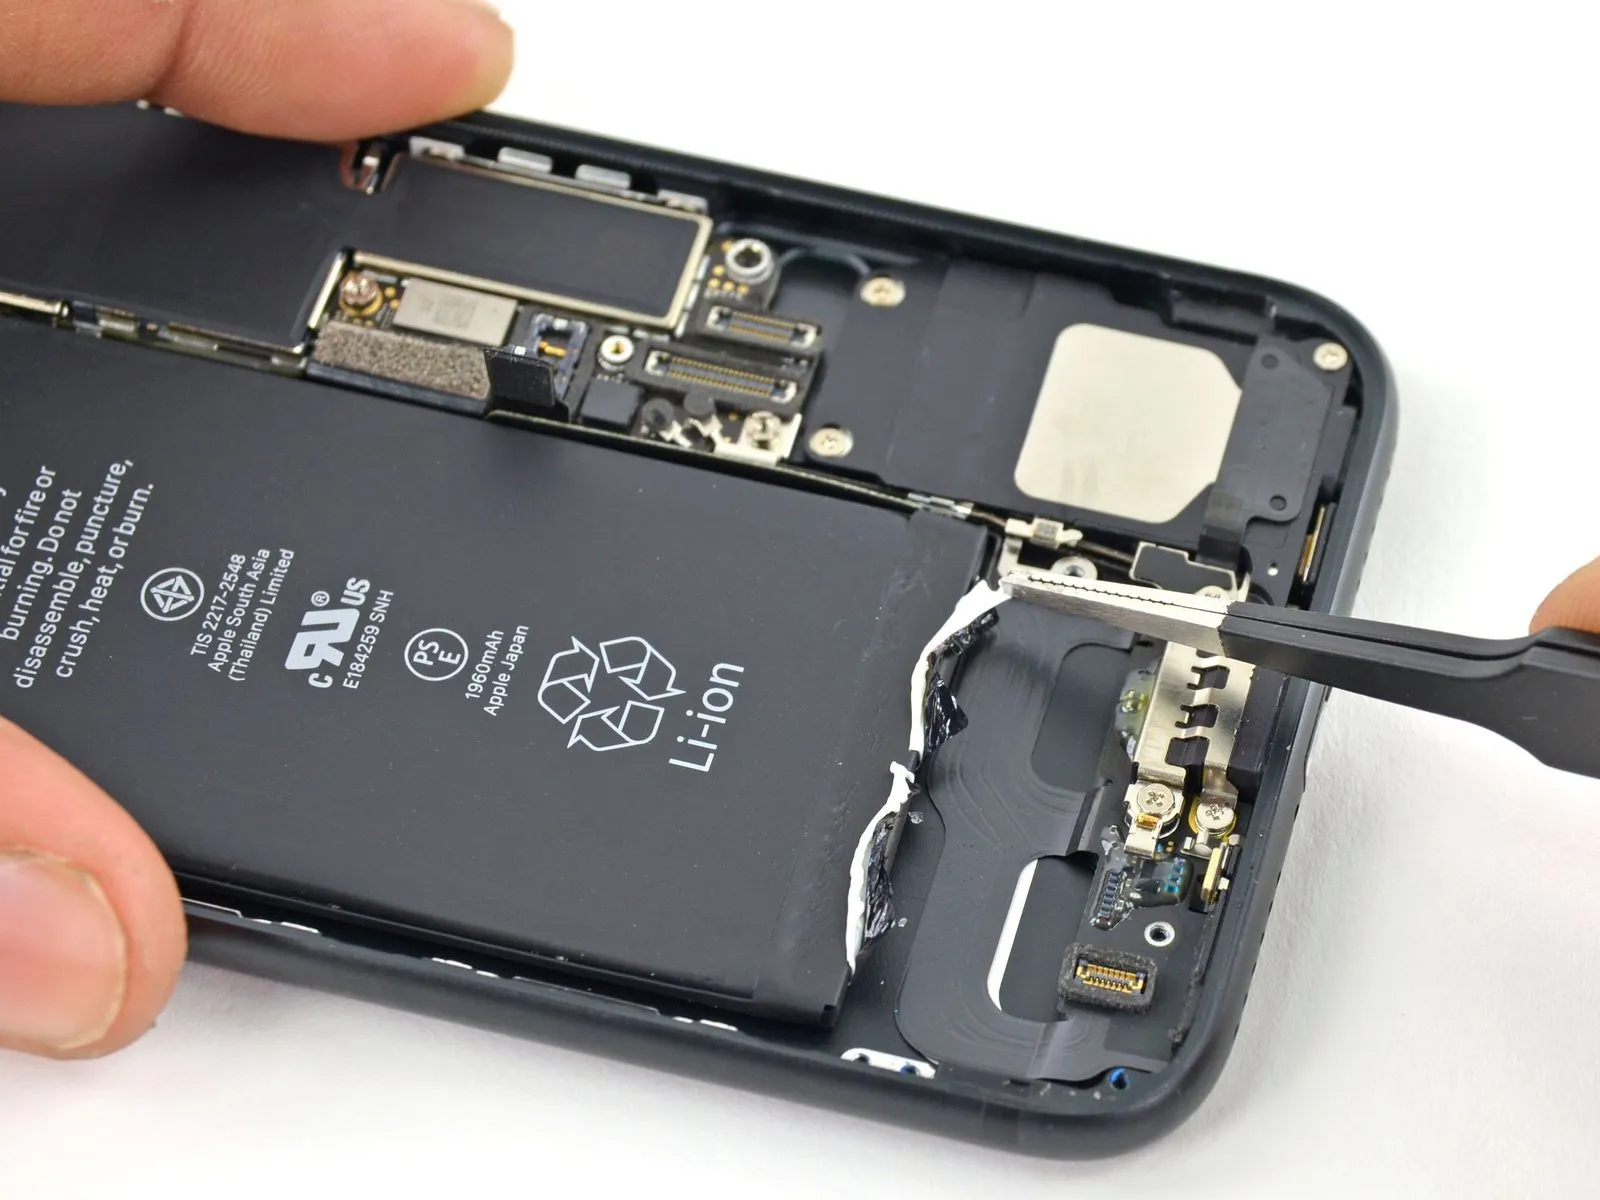
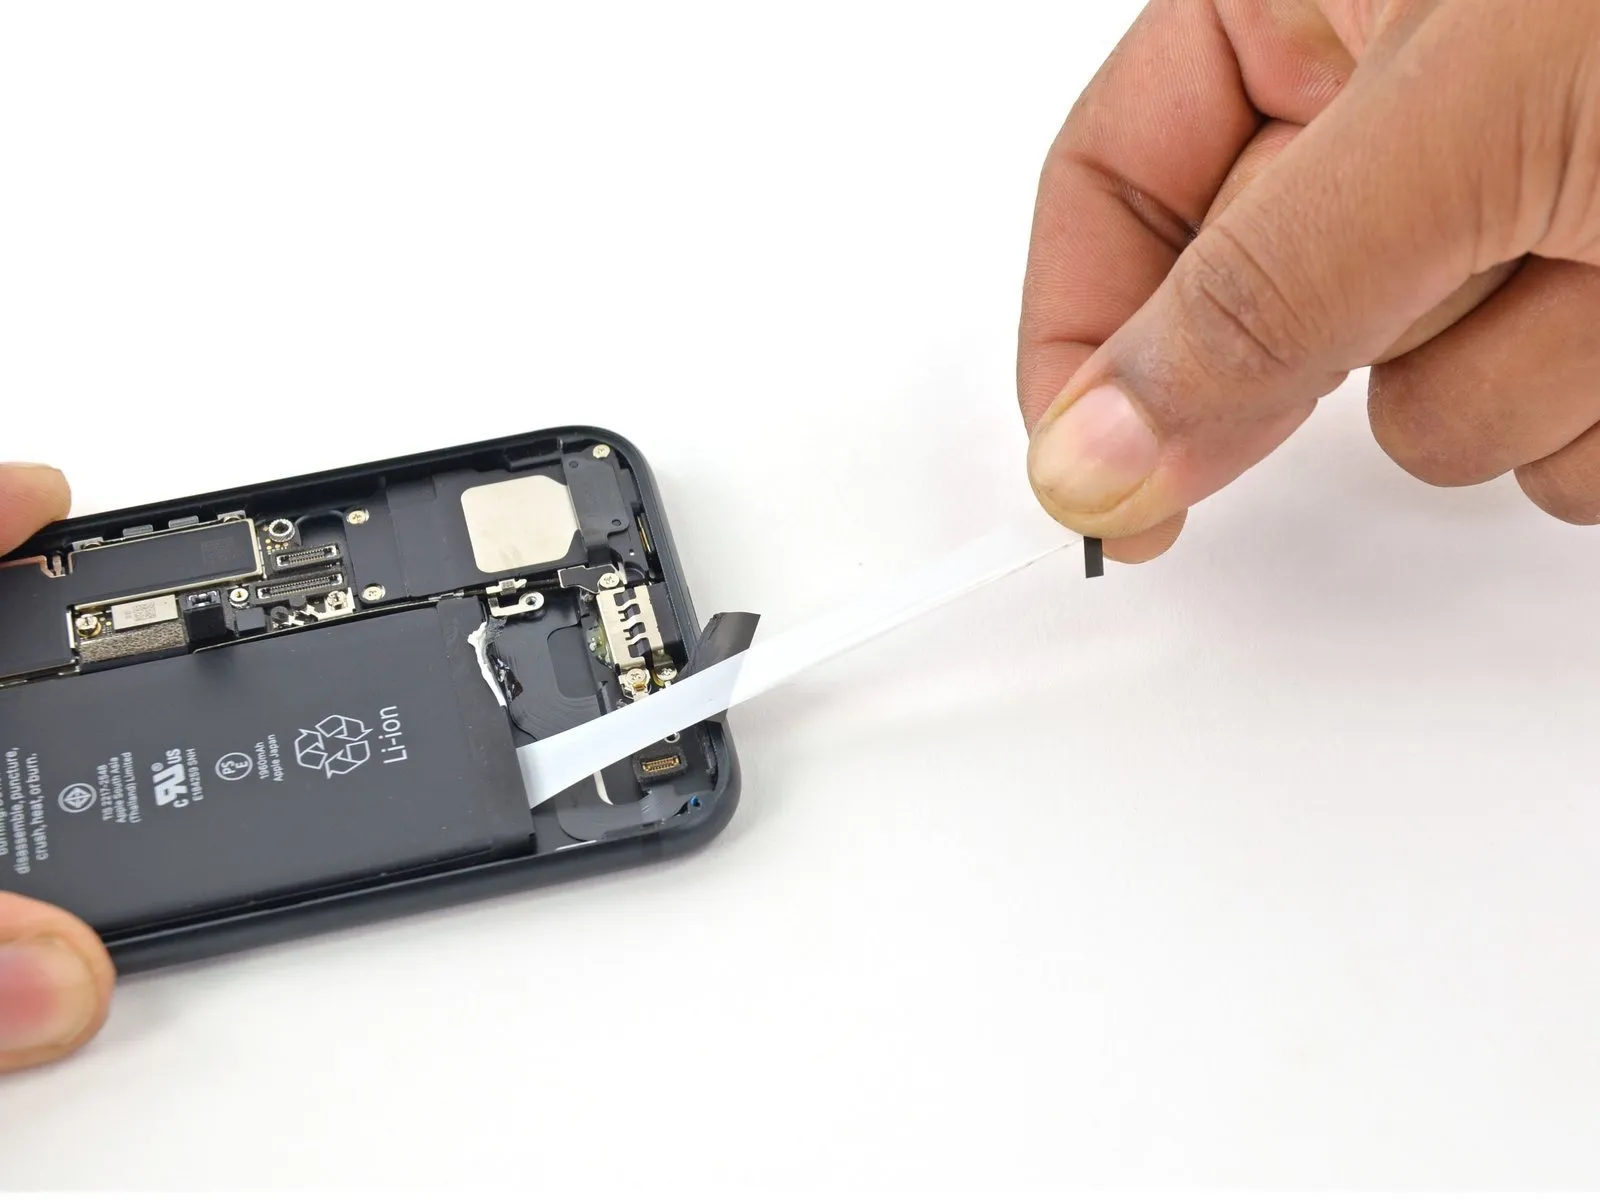
- Apply consistent, even force to the strip, ensuring it remains taut as it disengages from the space between the battery and the rear case; to optimize the process, limit the pulling angle to 60 degrees or less.
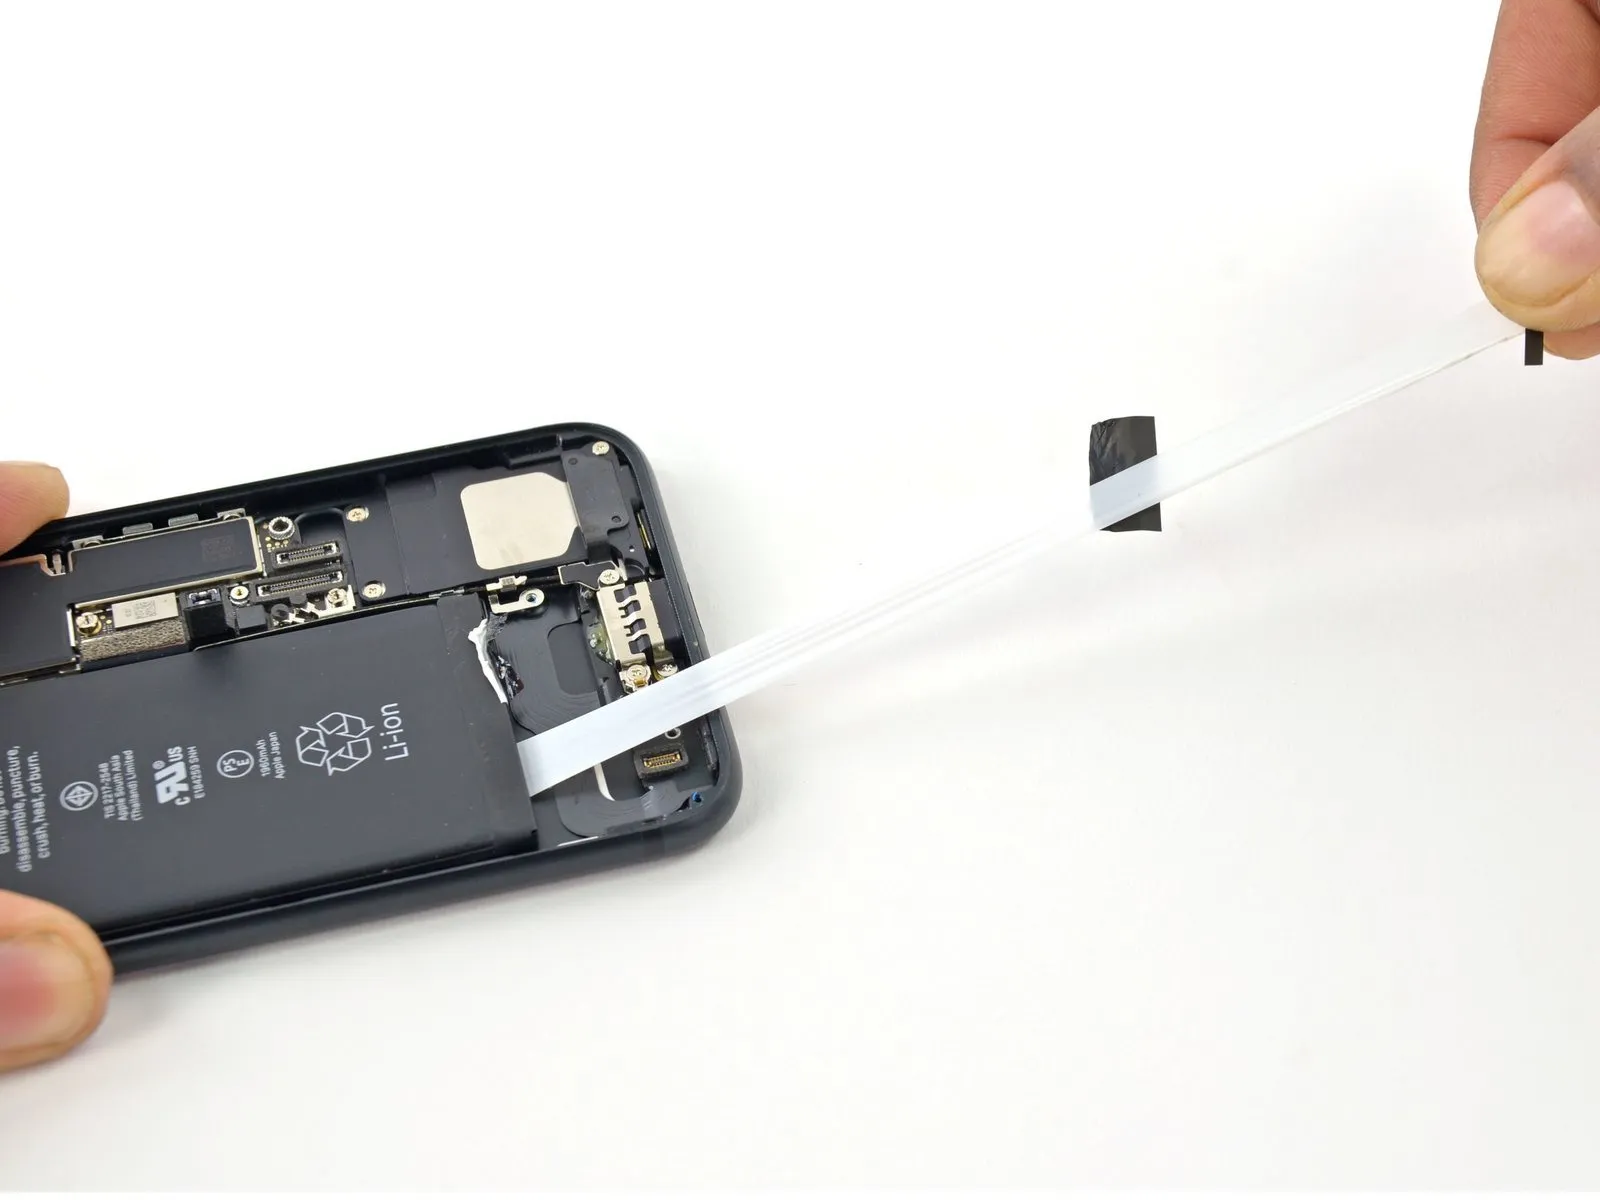
- Expect the strip to extend significantly, potentially several times its initial measurement. To maintain tension and progress, reposition your grip closer to the battery as needed while continuing to pull.
Step 31
Perform the identical procedure on the remaining strip.
To prevent the battery from being ejected forcefully during separation, maintain consistent pressure on it while detaching the second strip.
Having completely detached both adhesive strips, proceed directly to the subsequent instruction.
Should the adhesive strips securing the battery become detached and inaccessible, proceed to the subsequent instruction.
Step 32 | Methods to unstick the battery from the case


- Apply a small amount of adhesive to the rear case where the battery is adhered, in the event that the original adhesive strips have detached.Use rubbing alcohol, which is isopropyl alcohol.Ensure at least 90% of the area located beneath the battery is cleared of obstructions, paying close attention to any adhered strip(s).
- Allow approximately one minute to elapse before carefully raising the battery.
To prevent damage to the volume control cable located beneath, avoid using the spudger in the space positioned between the volume down (-) button and the battery's top edge. - Applying force to the logic board can result in device damage.
To prevent damage, avoid using excessive force when releasing the battery. Should the adhesive still resist separation, add additional alcohol droplets to soften it. Ensure the pry tool does not create any dents or holes in the battery's casing during the removal process. - To free a battery adhered to the rear cover, apply heat using an iOpener or hair dryer to the area immediately behind the battery; the surface should reach a temperature just above comfortable touch.
Exposure to excessive heat poses a risk of battery ignition in the iPhone. - To release the battery from the back cover, use dental floss or, for greater leverage, a 0.009-inch E string from a 12-string guitar set. Insert the floss or string between the battery and the rear case at the top corners, join the ends, secure them around a folded piece of cloth, and then apply consistent tension to separate the components.
Step 33
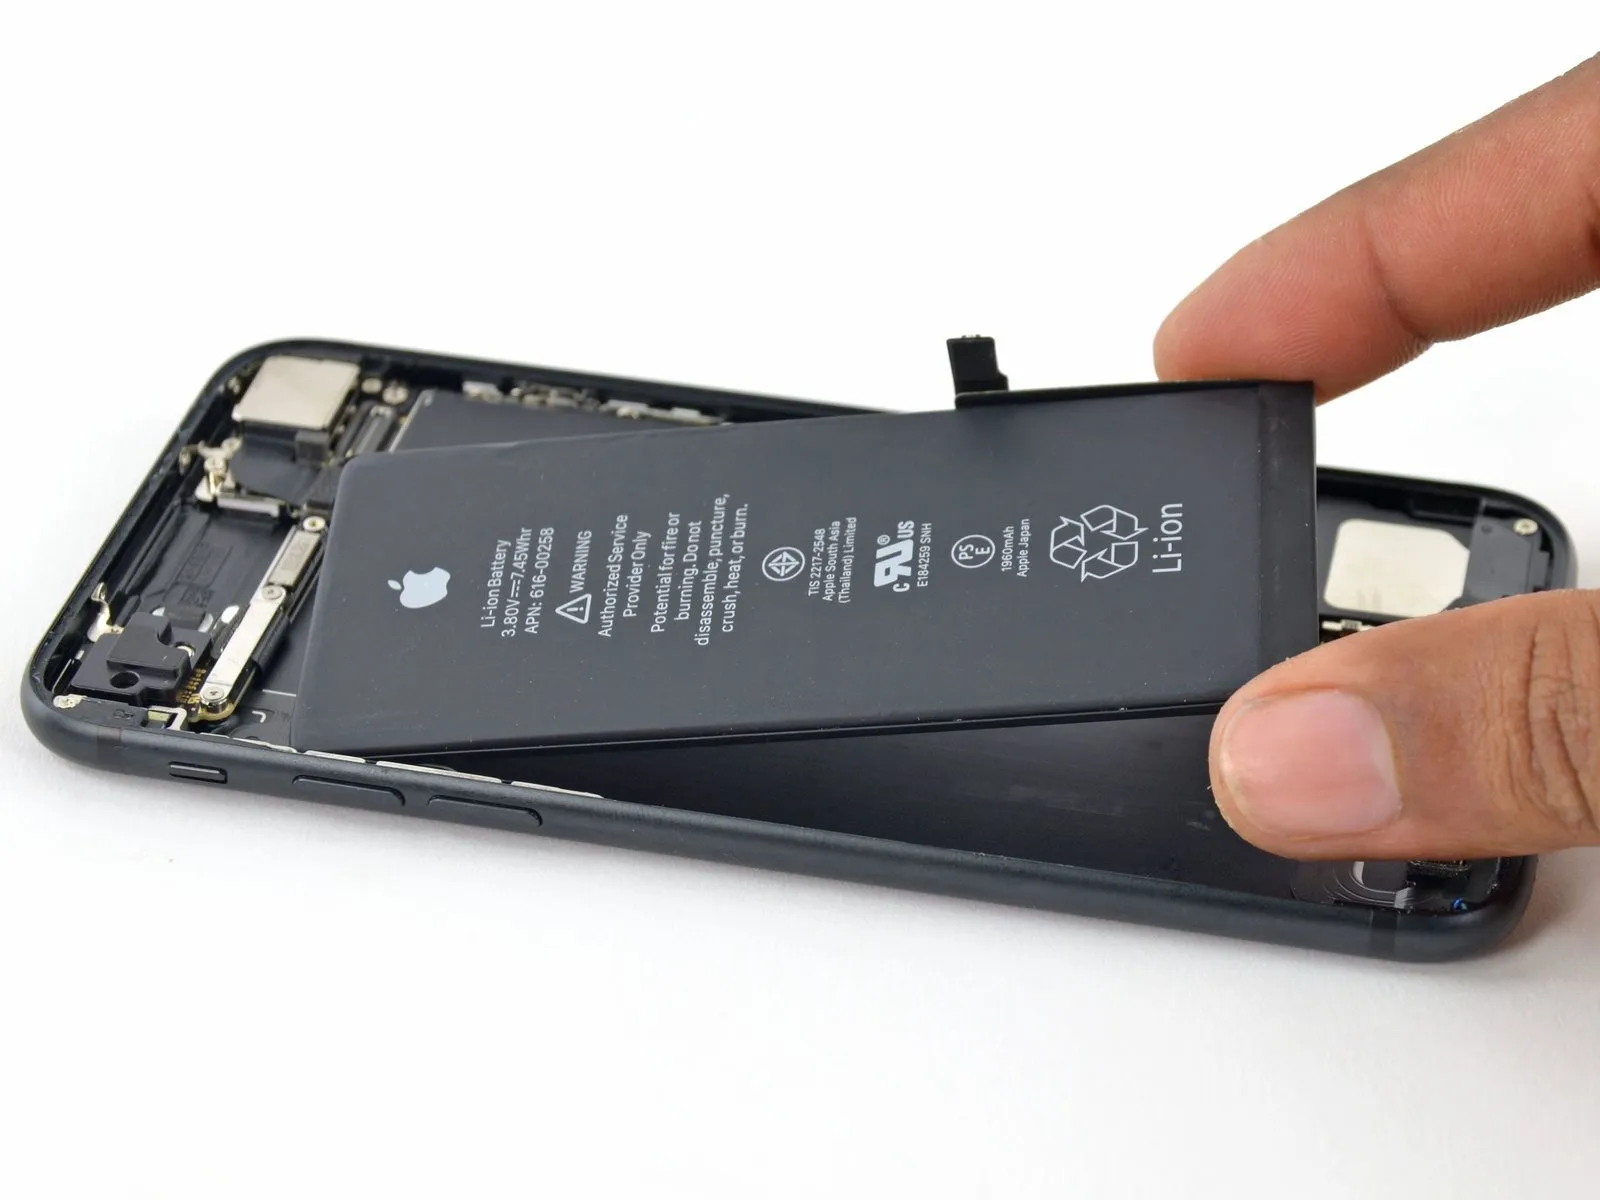
- Disconnecting the power source, carefully take out the battery located within the rear case.
- Carefully slide the protective plastic covering off the new battery, ensuring you don't snag or damage the ribbon cable during removal.
- To prevent damage, ensure any residual alcohol solution is completely removed by wiping with a clean cloth or by permitting it to evaporate fully prior to battery installation.
- To guarantee correct positioning within its designated space, briefly plug the battery connector back into the logic board socket prior to securing the new battery.
- Secure the battery in place, then sever its electrical connection before proceeding with the remaining assembly steps.
- To secure a battery lacking factory-applied adhesive, follow the instructions detailed in this guide for adhesive strip replacement.
- Following reassembly, execute a forced restart to proactively resolve potential problems and streamline any subsequent diagnostic procedures.