iPhone 7 Plus Screen Replacement
Discover the process of substituting the display on your iPhone 7 Plus.iPhone 7 PlusThe replacement component incorporates the front assembly, earpiece speaker, and EMI shield, pre-mounted for a simplified repair procedure.
- The necessary steps involve detaching the existing display.screen
- Carefully relocate the home button to the replacement screen.screen
- Confirming correct operation is essential.
Step 1 | Pentalobe Screws
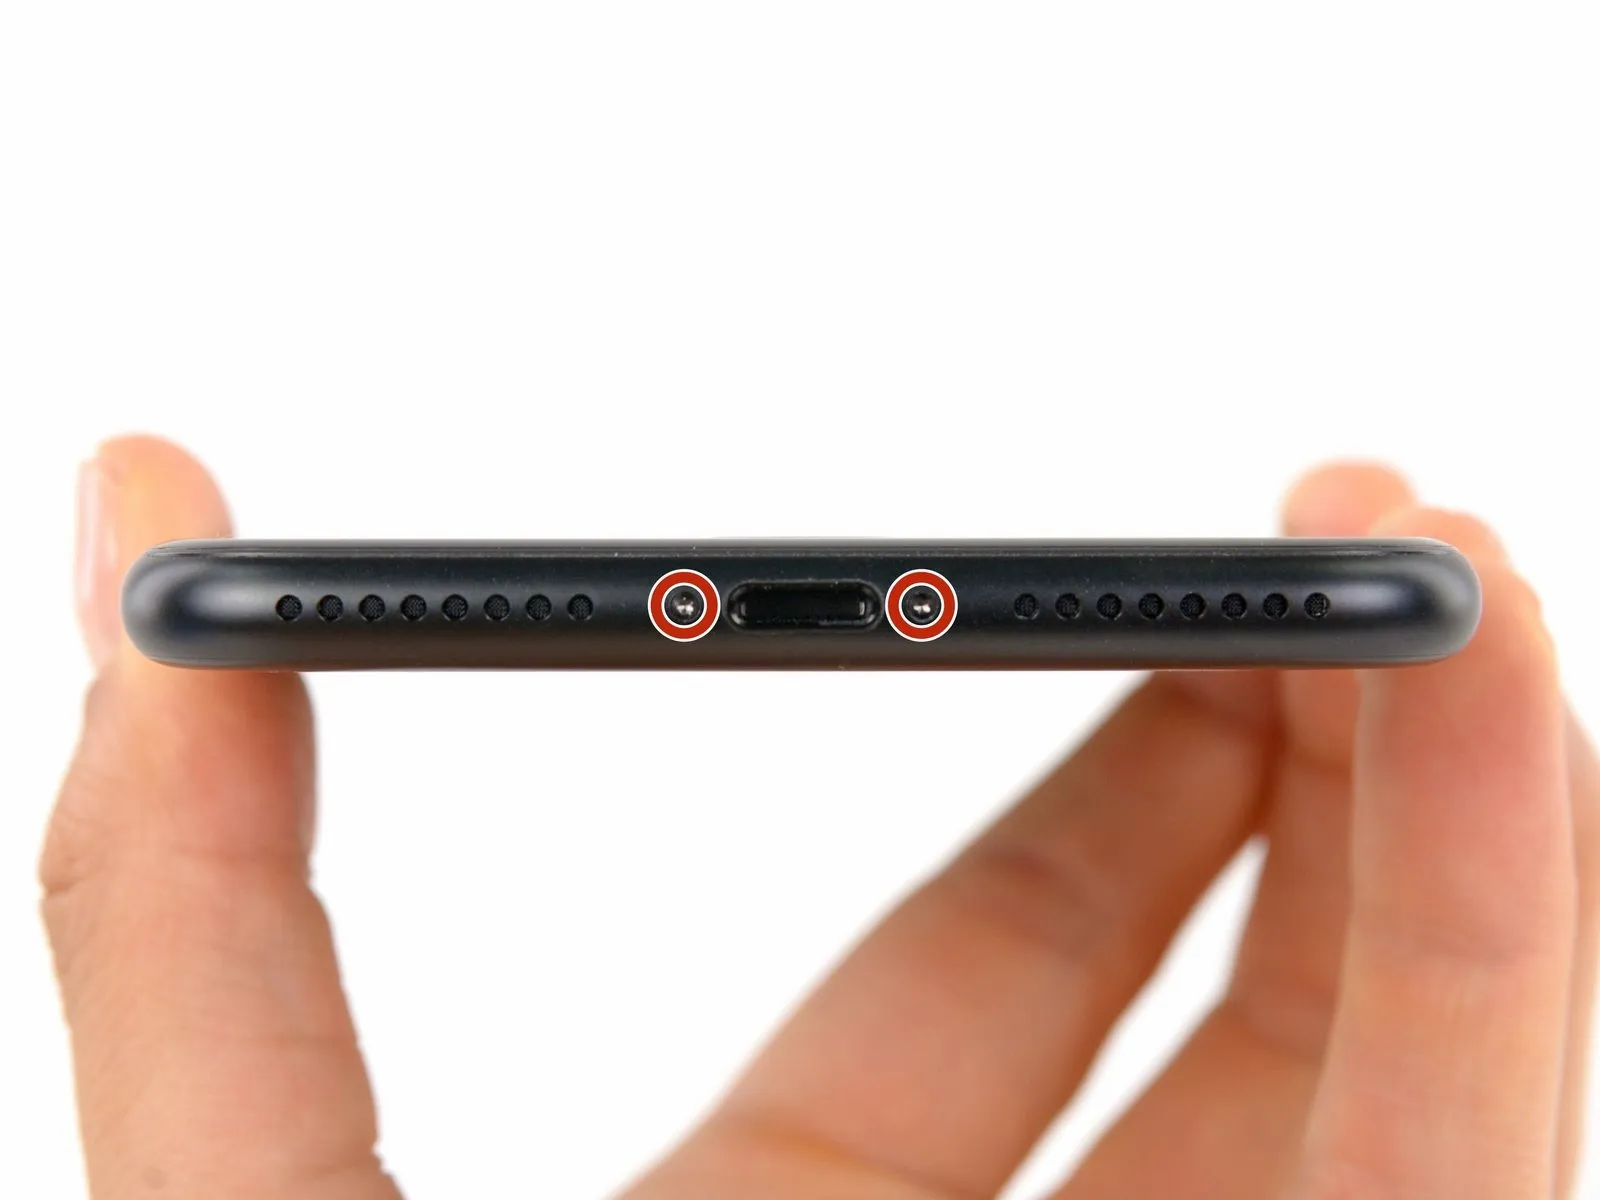
- As a preliminary precaution, ensure your iPhone's battery is depleted to less than25%Because a fully charged lithium-ion battery presents a fire hazard and potential explosion risk if damaged.
- Deactivate the iPhone's power supply prior to commencing the disassembly process.
- Detach the pair of3.4 mm pentalobe screwslocated along the iPhone's lower edge, utilizing a P2 screw bit if a set of bits is available.
- Separating the iPhone's display assembly will degrade its water resistance; therefore, prepare replacement seals beforehand, or exercise extreme caution to prevent moisture contact if you intend to reassemble the iPhone without new seals.
Step 2 | Mark your opening picks


- To avoid potential harm to your device, ensure the opening pick does not penetrate excessively; this procedure details how to identify the safe insertion depth by marking the pick.
- Determine the distance of3 mmfrom the pick's leading edge and use a permanent marker to create a visible indicator on the opening pick.
- For enhanced precision, consider marking other points on the pick with varying distances.
- As an alternative method, affix a coin to the pick's tip, positioning it precisely 3 mm from the edge.
Step 3 | Anti-Clamp instructions


The following three procedures illustrate the function of the Anti-Clamp tool, which was specifically engineered to simplify the initial opening process; if you choose not to utilize this tool, proceed past three steps to find an alternative approach.
Detailed instructions regarding the Anti-Clamp's operation can be found in a separate, dedicated guide.
- To release the Anti-Clamp's gripping arms, retract the blue handle towards the rear.
- Carefully position the arms across either the left or right side of your iPhone’s frame.
- Place the suction cups close to the lower edge of the iPhone, situated directly above the home button—one on the device’s front face and one on the rear.
- Apply pressure by compressing the cups together to establish a secure suction hold on the intended area.
- Should the iPhone’s surface prove too slick for the Anti-Clamp to maintain a firm grip, applying adhesive tape can generate a more textured interface.
Step 4


- To secure the arms, advance the blue handle in its direction.
- Rotate the handle in a clockwise directionthrough a full 360-degree arcor until the suction cups begin to deform.
- Maintain the precise alignment of the suction cups; should they become misaligned, slightly release the suction cups and reposition the arms.
Step 5


- Apply warmth to aiOpenerand carefully guide it between the arms of theAnti-Clamp.
- Alternative heat sources, such as a hair dryer, heat gun, or hot plate, are acceptable; however, excessive temperatures may compromise the display or internal battery, so exercise caution.
- Position theiOpenerto rest along the lower edge of the iPhone's casing.
- Allow a period of sixty seconds to permit the adhesive to soften and create a separation.
- Introduce anopening pickinto the newly formed space.
- Should theAnti-Clamp fail to generate a satisfactory separation, increase the heat applied to the area and rotate the handle by ninety degrees.
- Avoid excessive rotation, limiting adjustments to ninety-degree increments, and pause for sixty seconds between each adjustment. Allow theAnti-Clamp and time to facilitate the separation process.
Step 6 | Heat the display
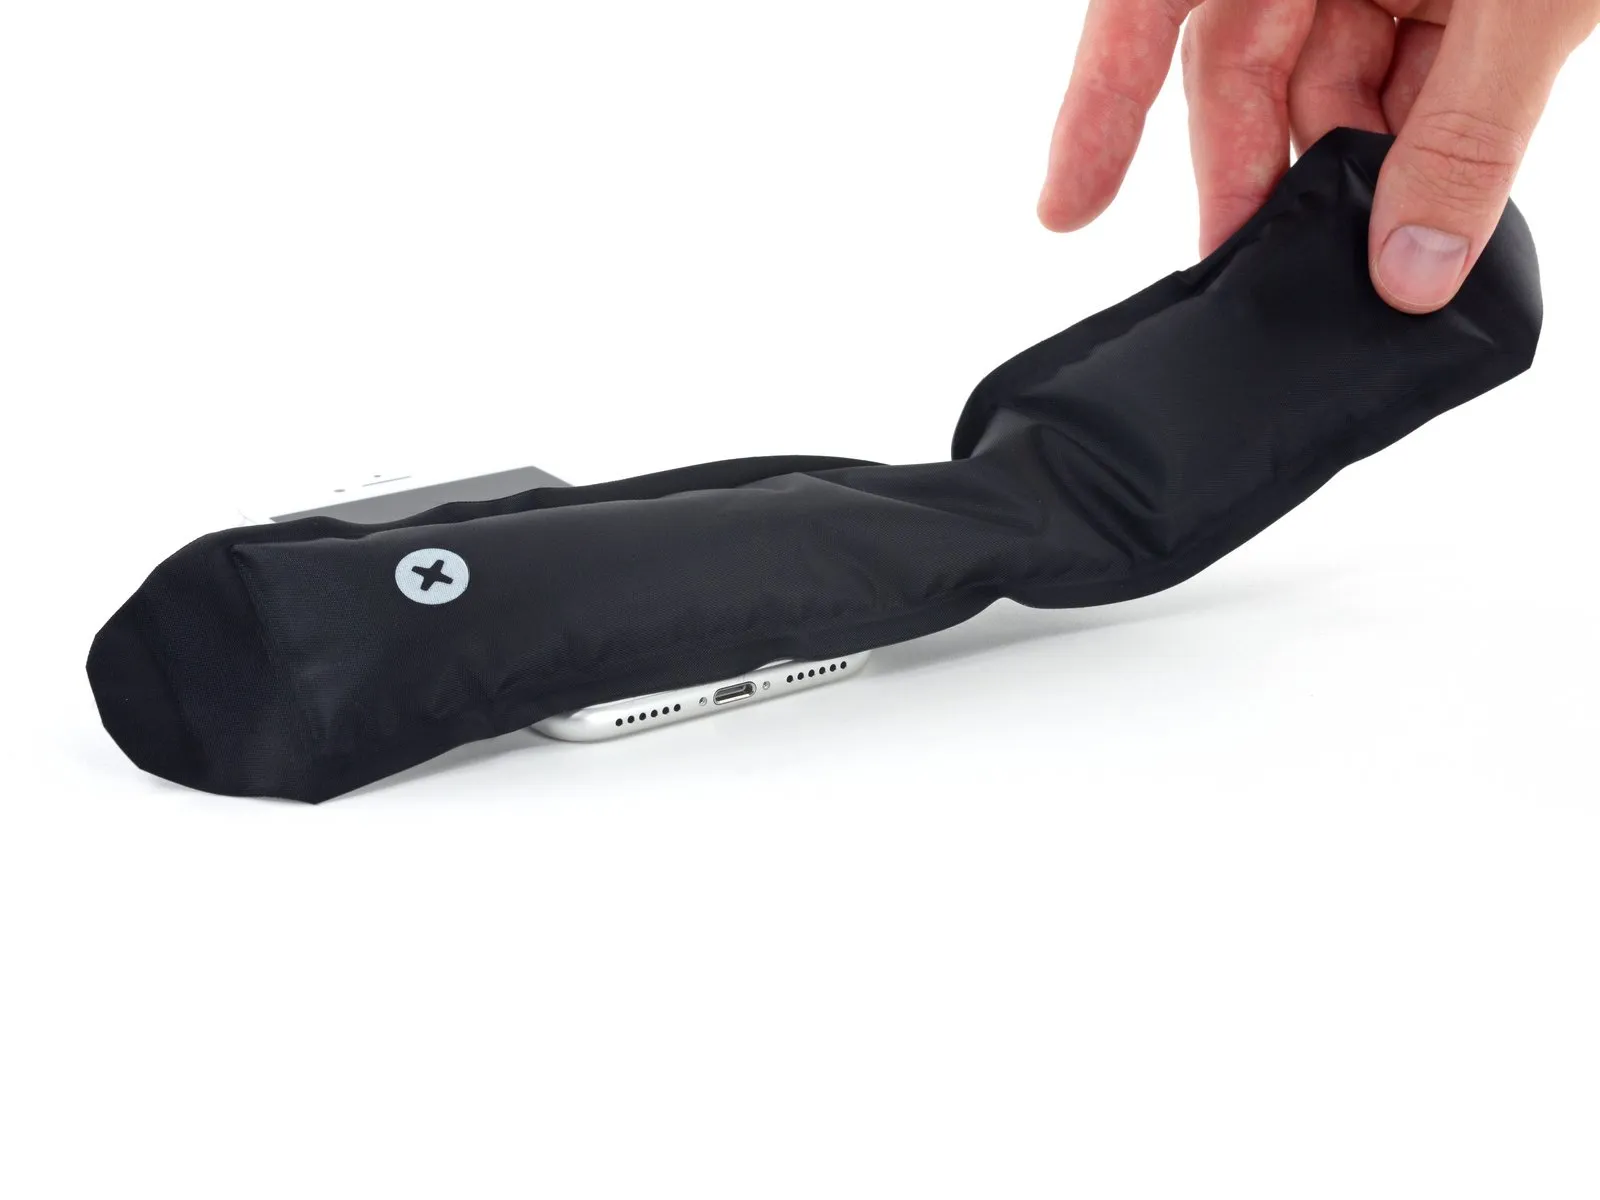
The following three procedures detail the process of detaching the display assembly with the aid of a suction cup.
Applying heat to the bottom edge of the iPhone facilitates the loosening of the adhesive bonds holding the display in place, thereby simplifying the separation process.
Employ a hairdryer, or alternatively prepare aniOpenerand apply it to the lower edge of the device for approximately 90 seconds to reduce the adhesive's tackiness.
Step 7 | Separate the display
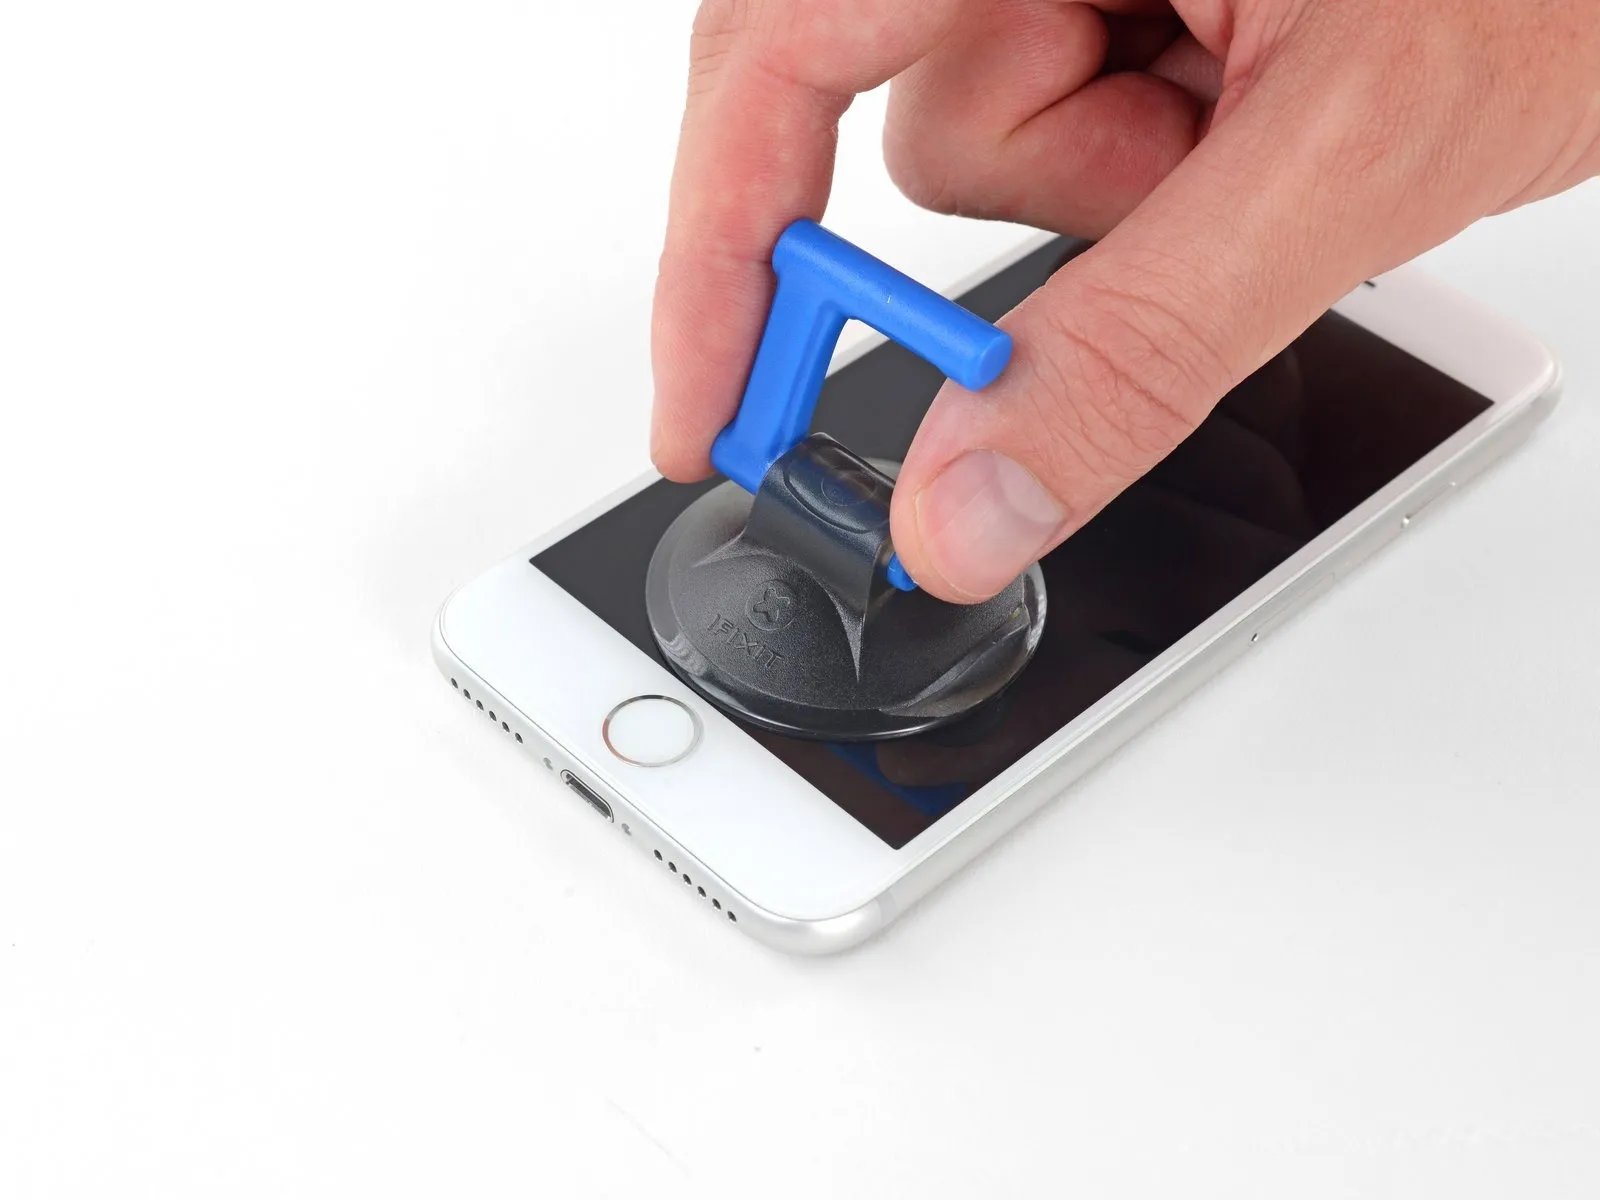

Securely attach a suction cup to the bottom portion of the front panel, positioning it slightly above the home button's location.
Ensure the suction cup's surface area remains clear of the home button to guarantee a complete and airtight bond between the suction device and the front glass.
Step 8
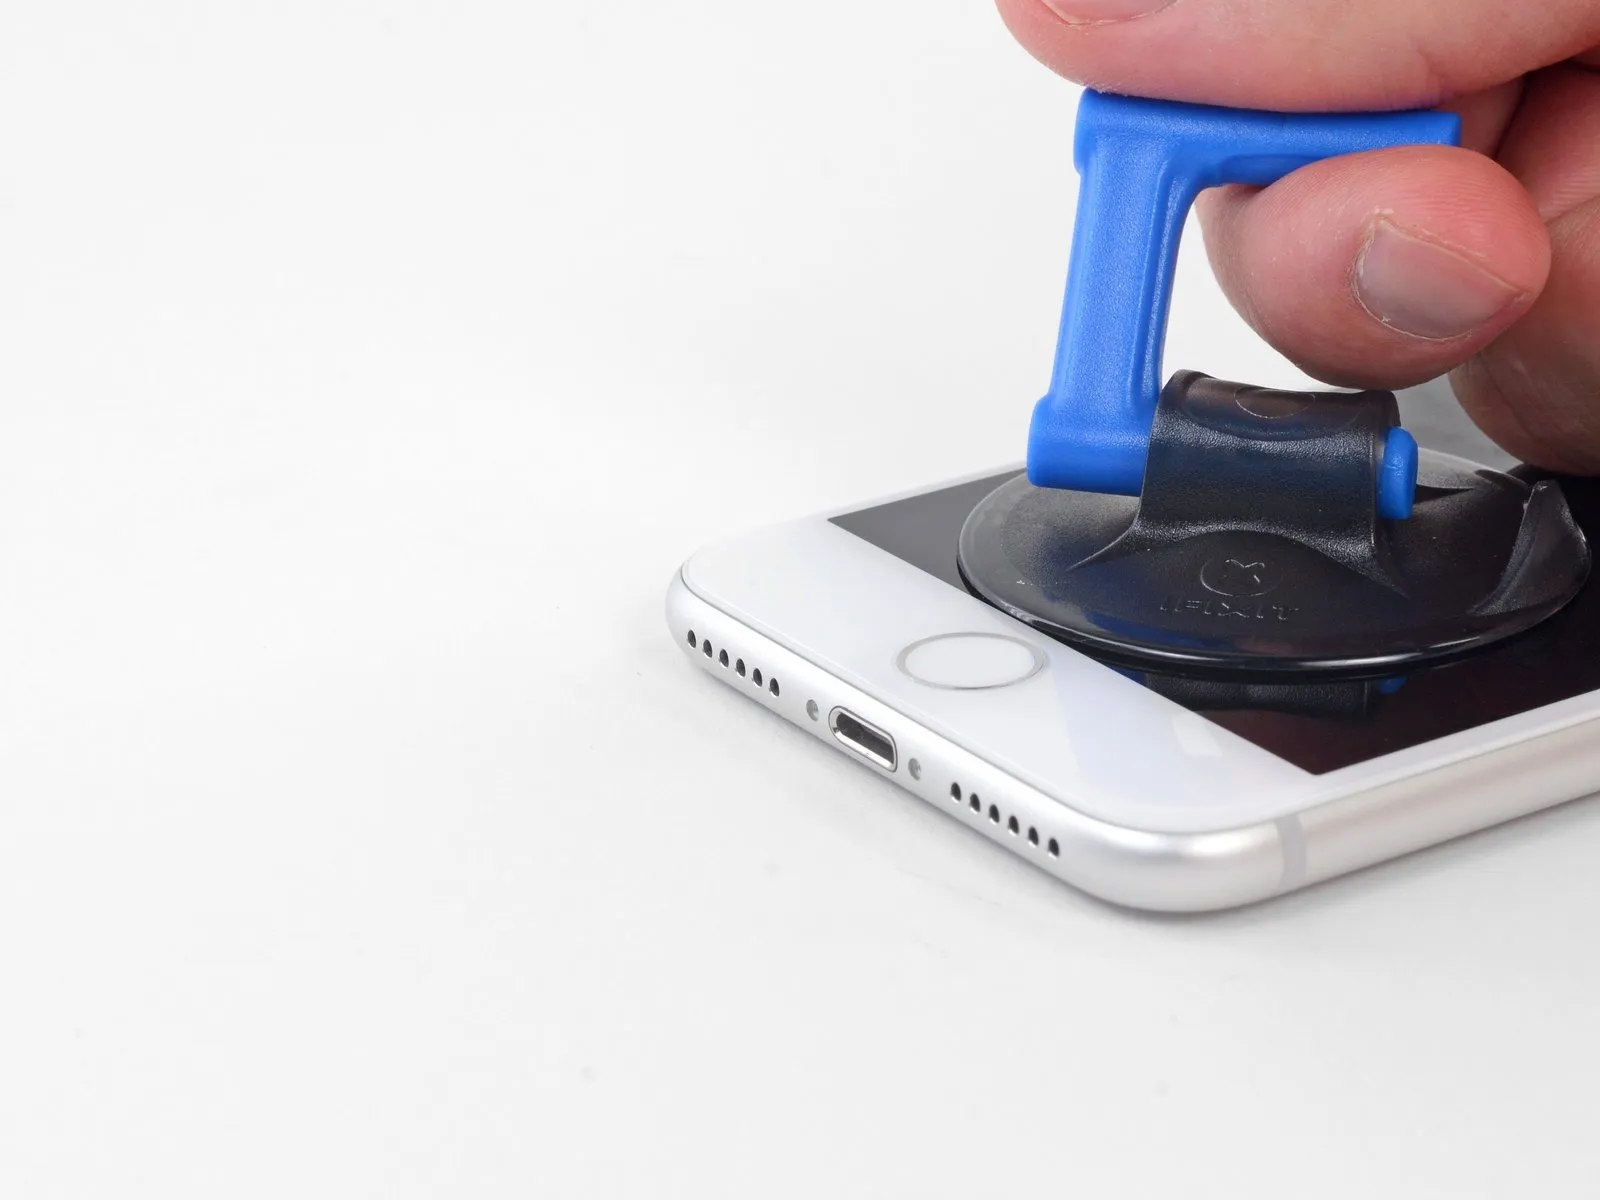


Apply steady, forceful upward pressure to the suction cup to generate a small separation between the display assembly and the device's surrounding structure.
Carefully slide anopening pickwithin the newly formed separation.
The screen is secured by a robust, waterproof adhesive; establishing this initial space requires considerable effort. Should you encounter difficulty in creating this gap, apply additional heat and gently move the screen in an upward and downward motion to reduce the adhesive's strength, allowing for sufficient space to accommodate your tool.
Step 9
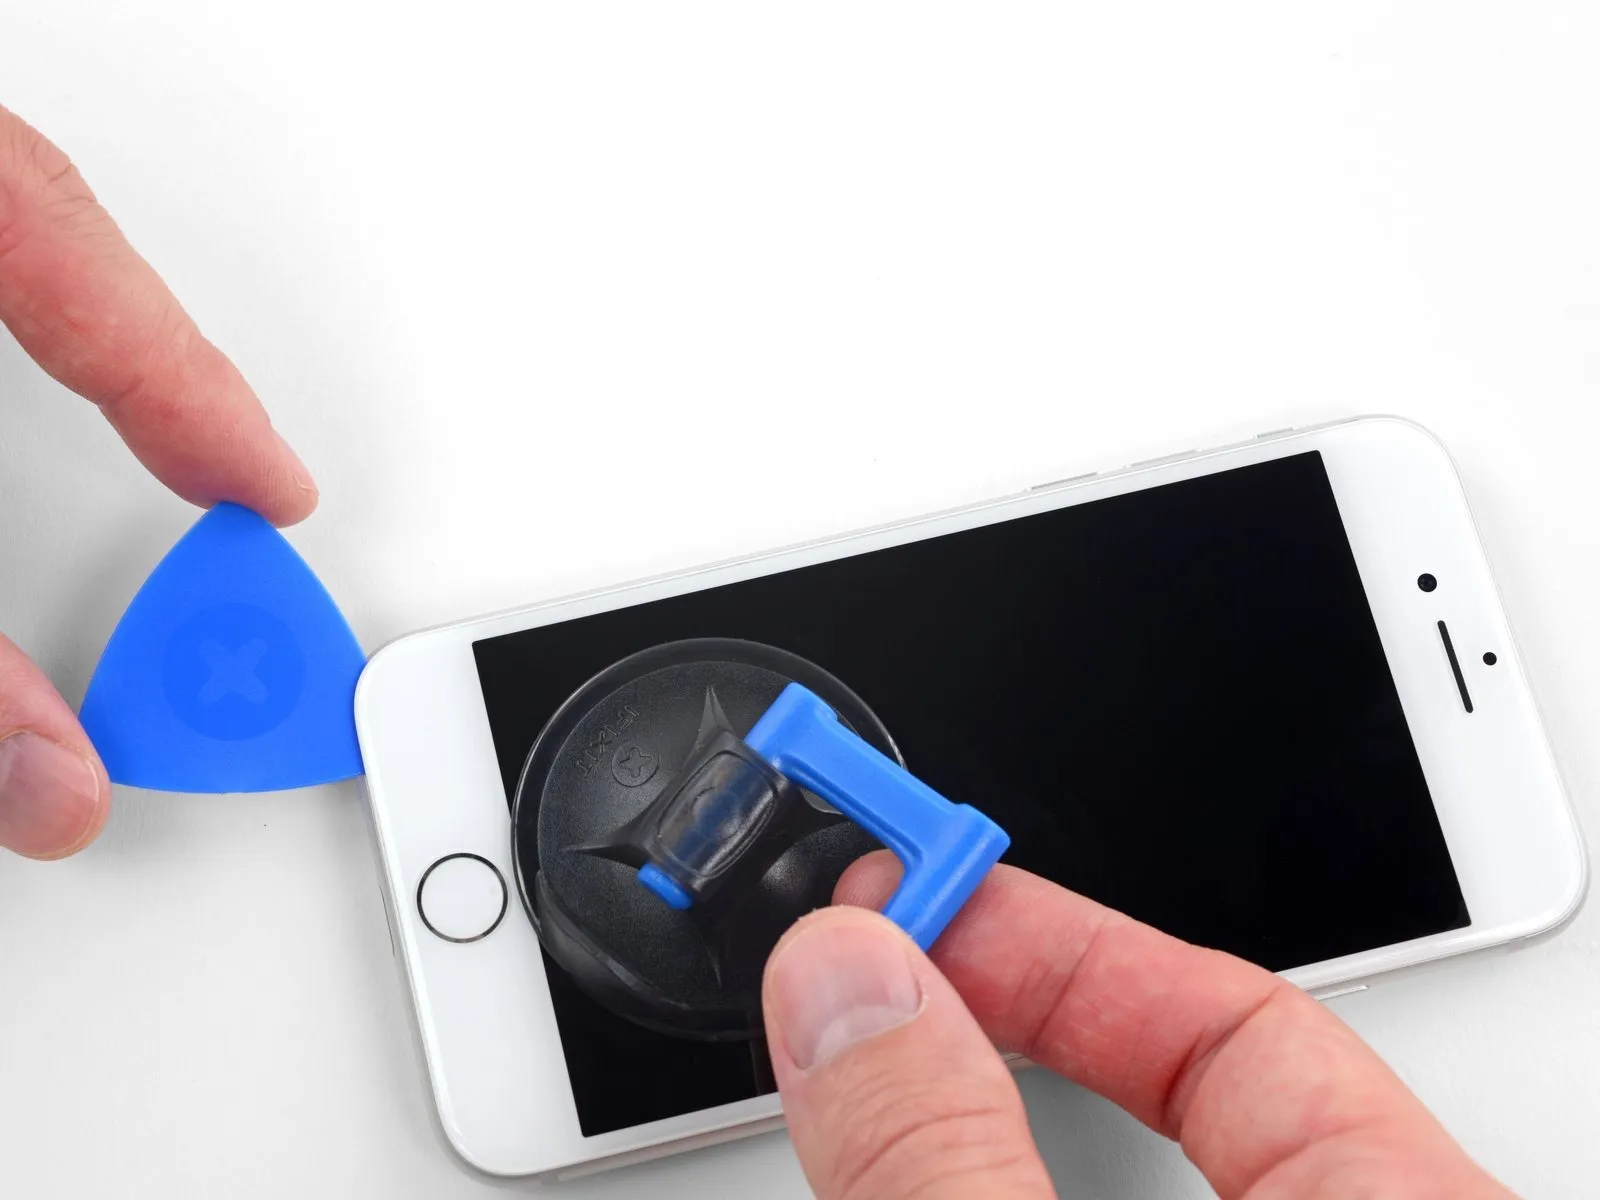


- Begin separating the display assembly from the chassis by inserting a prying tool beneath the lower edge of the phone's left side, carefully working it upwards towards the volume buttons and the silent switch to sever the adhesive bond.
- Cease the separation process in the vicinity of the upper-left corner of the display.
- Avoid attempting to dislodge the display's upper edge from the rear casing, because it is secured with fragile plastic retaining clips that are susceptible to damage.
Step 10 | Screen information

Along the right side of your iPhone, you'll find sensitive wiring; avoid inserting any tools in this area to prevent potential cable damage.
Step 11
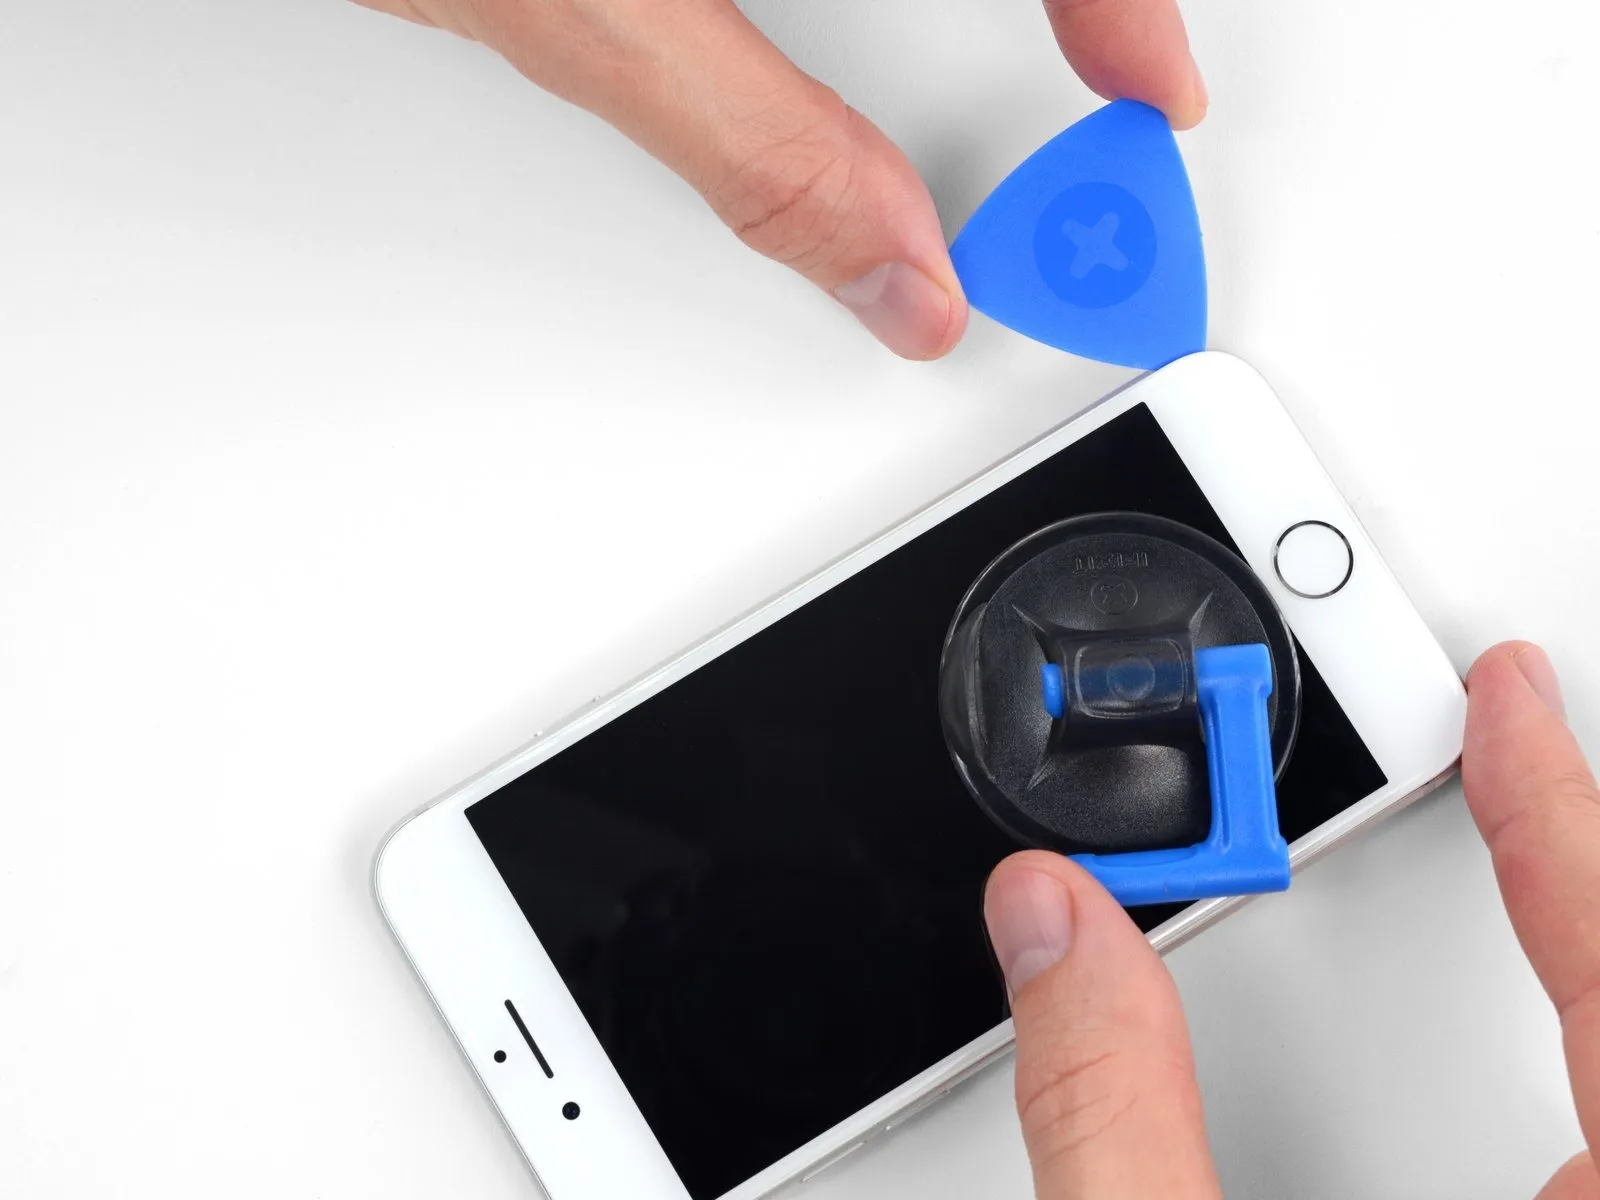


- To release the adhesive, carefully reposition your tool at the lower-right edge of the iPhone, then maneuver it along the corner and up the right side, sliding it to detach the adhesive.
- Ensure your opening tool does not penetrate beyond 3 mm, to prevent potential harm to the delicate display cable connections.
Step 12


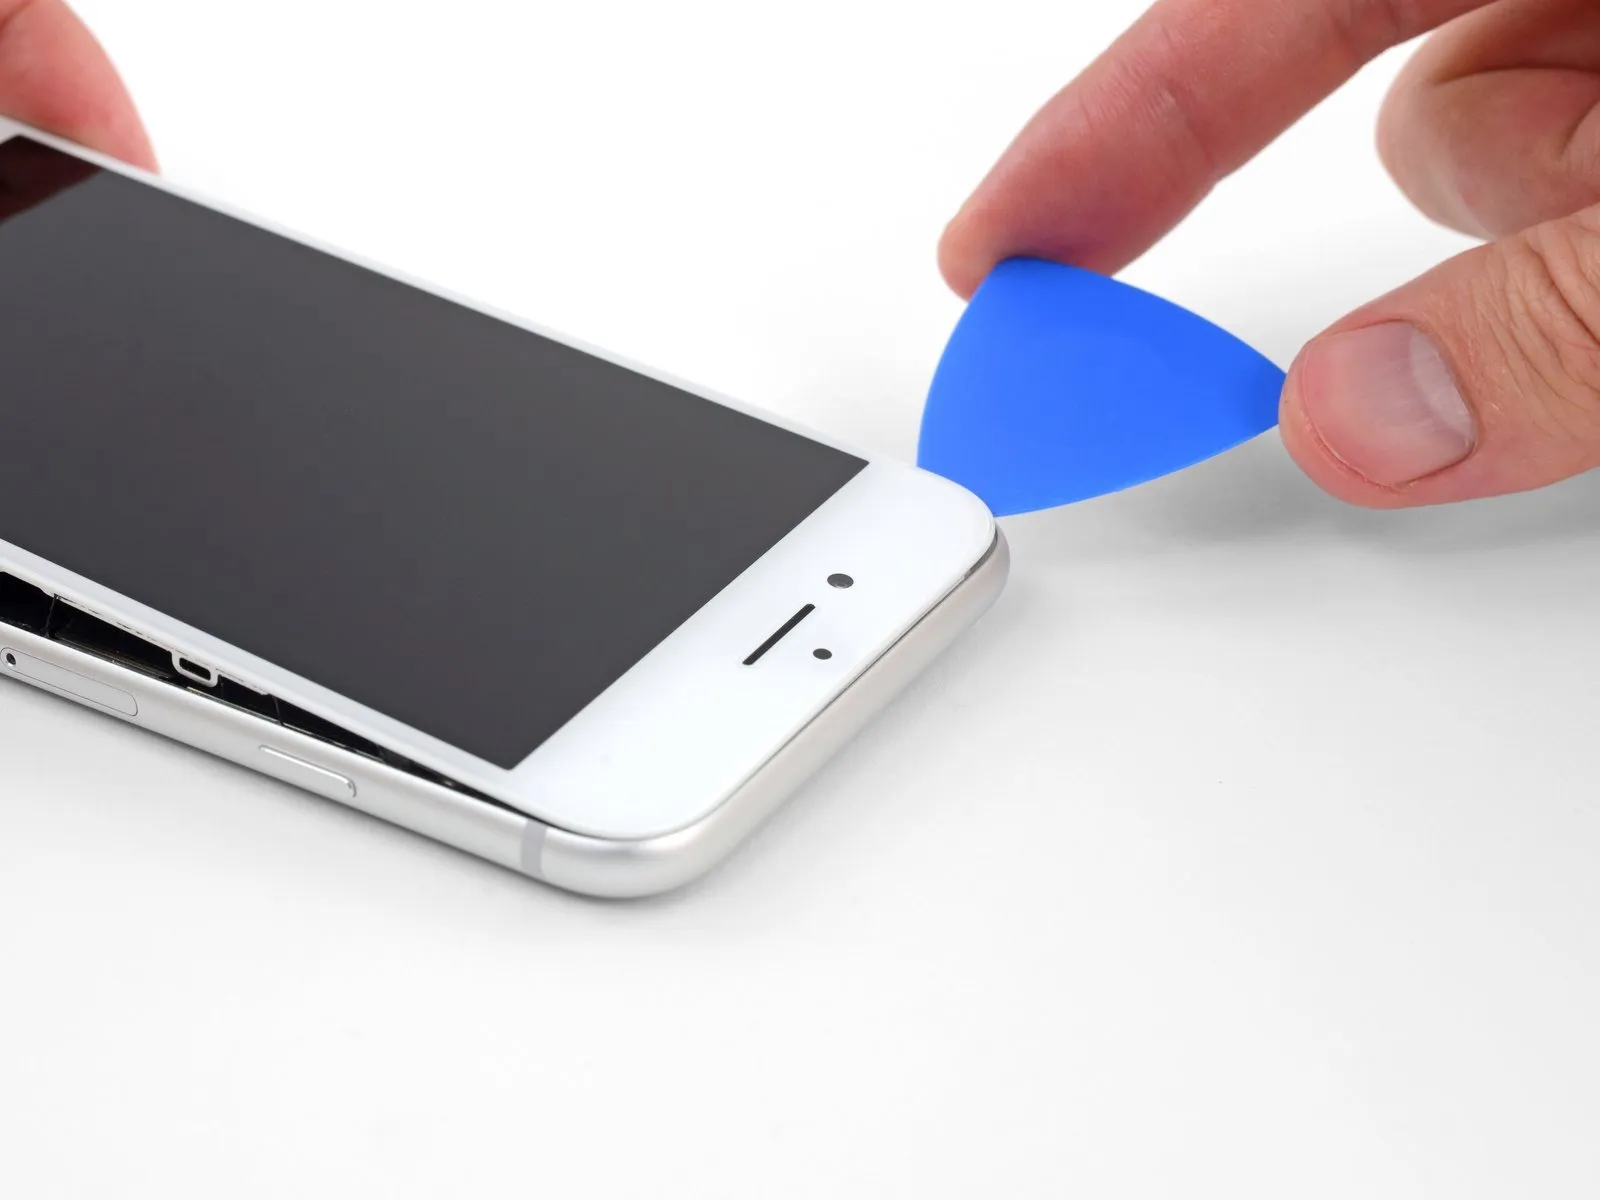
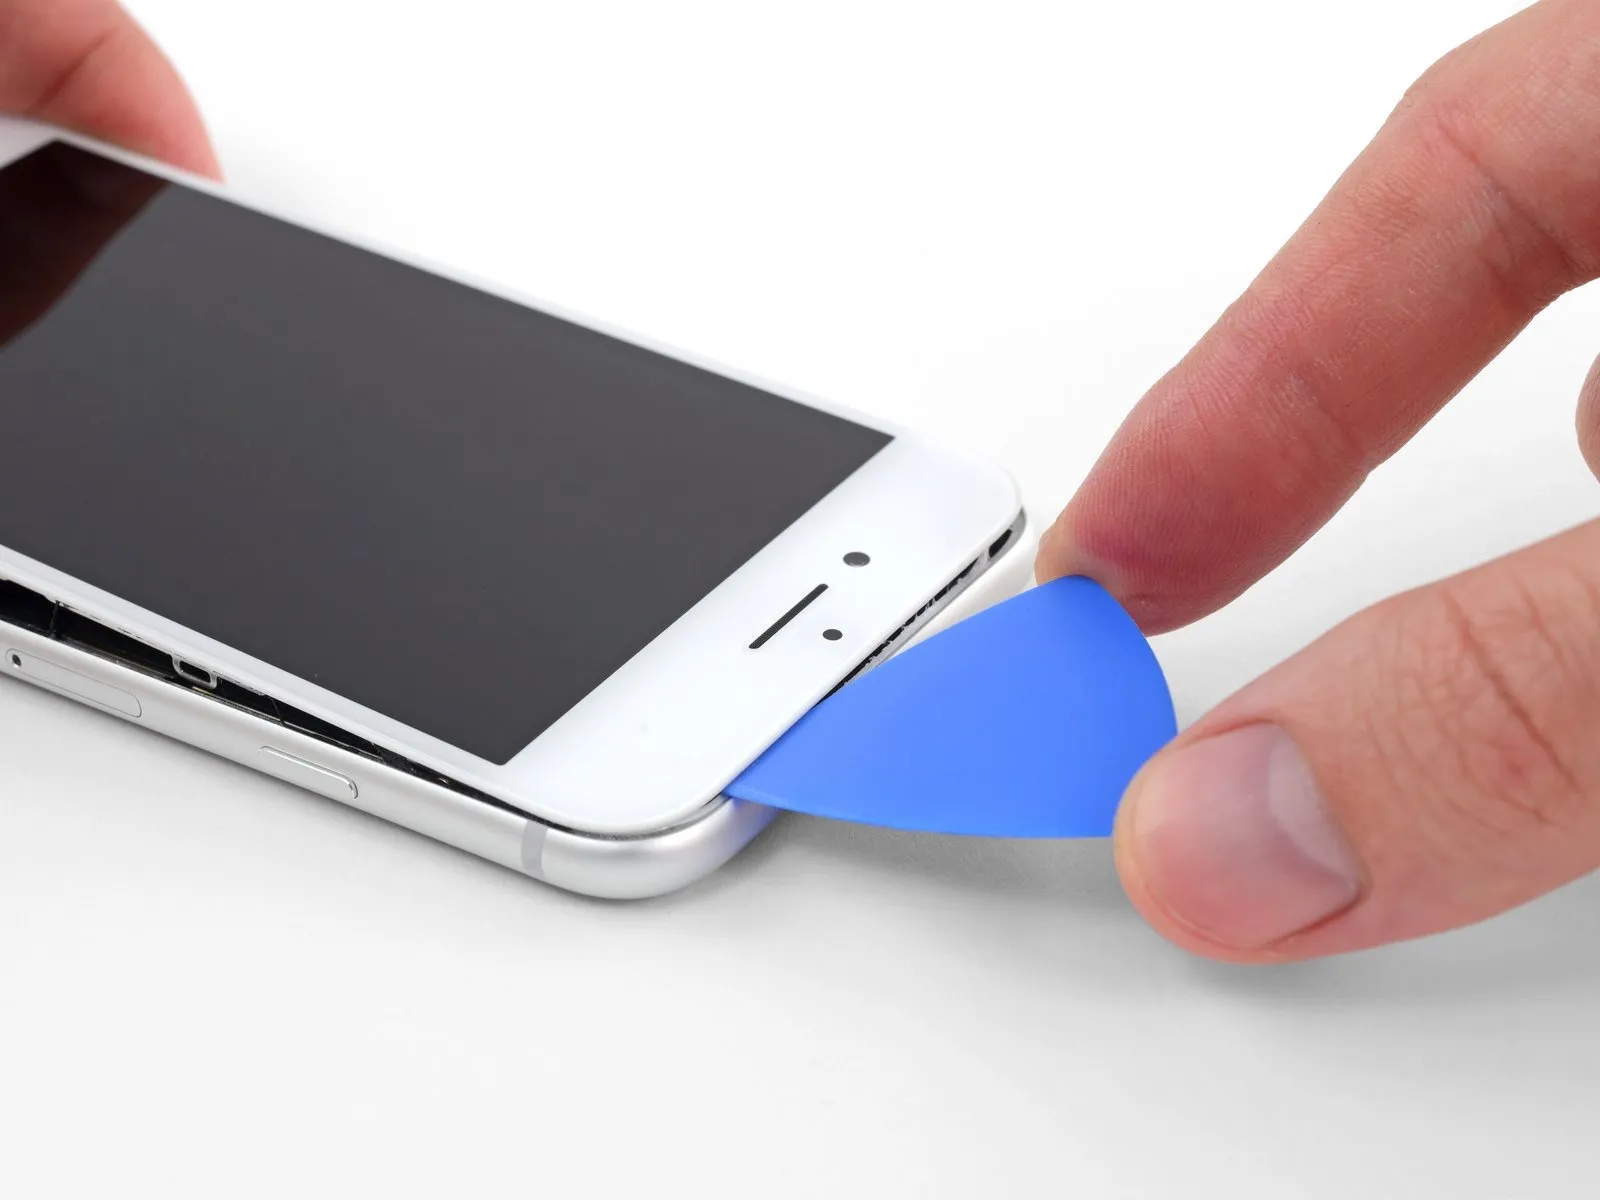
- Carefully elevate the display's lower border by applying upward force to the suction cup.
- Avoid lifting the display beyond an angle of15 degreesas exceeding this limit could potentially damage or sever the flexible ribbon cables that provide the display's electrical connections.
- Detach the suction cup from the front panel by grasping and pulling on the small projection located on its surface.
Step 13

Step 14


Step 15


- Initiate the iPhone's disassembly process by pivoting the display assembly upwards, originating from the left edge, mimicking the action of opening a book's cover.
- Refrain from completely detaching the display at this stage, because multiple delicate ribbon cables remain connected to the iPhone's logic board.
- Secure the display in an upright position using a support to maintain access to the internal components during the repair procedure.
Step 16 | Battery Disconnection
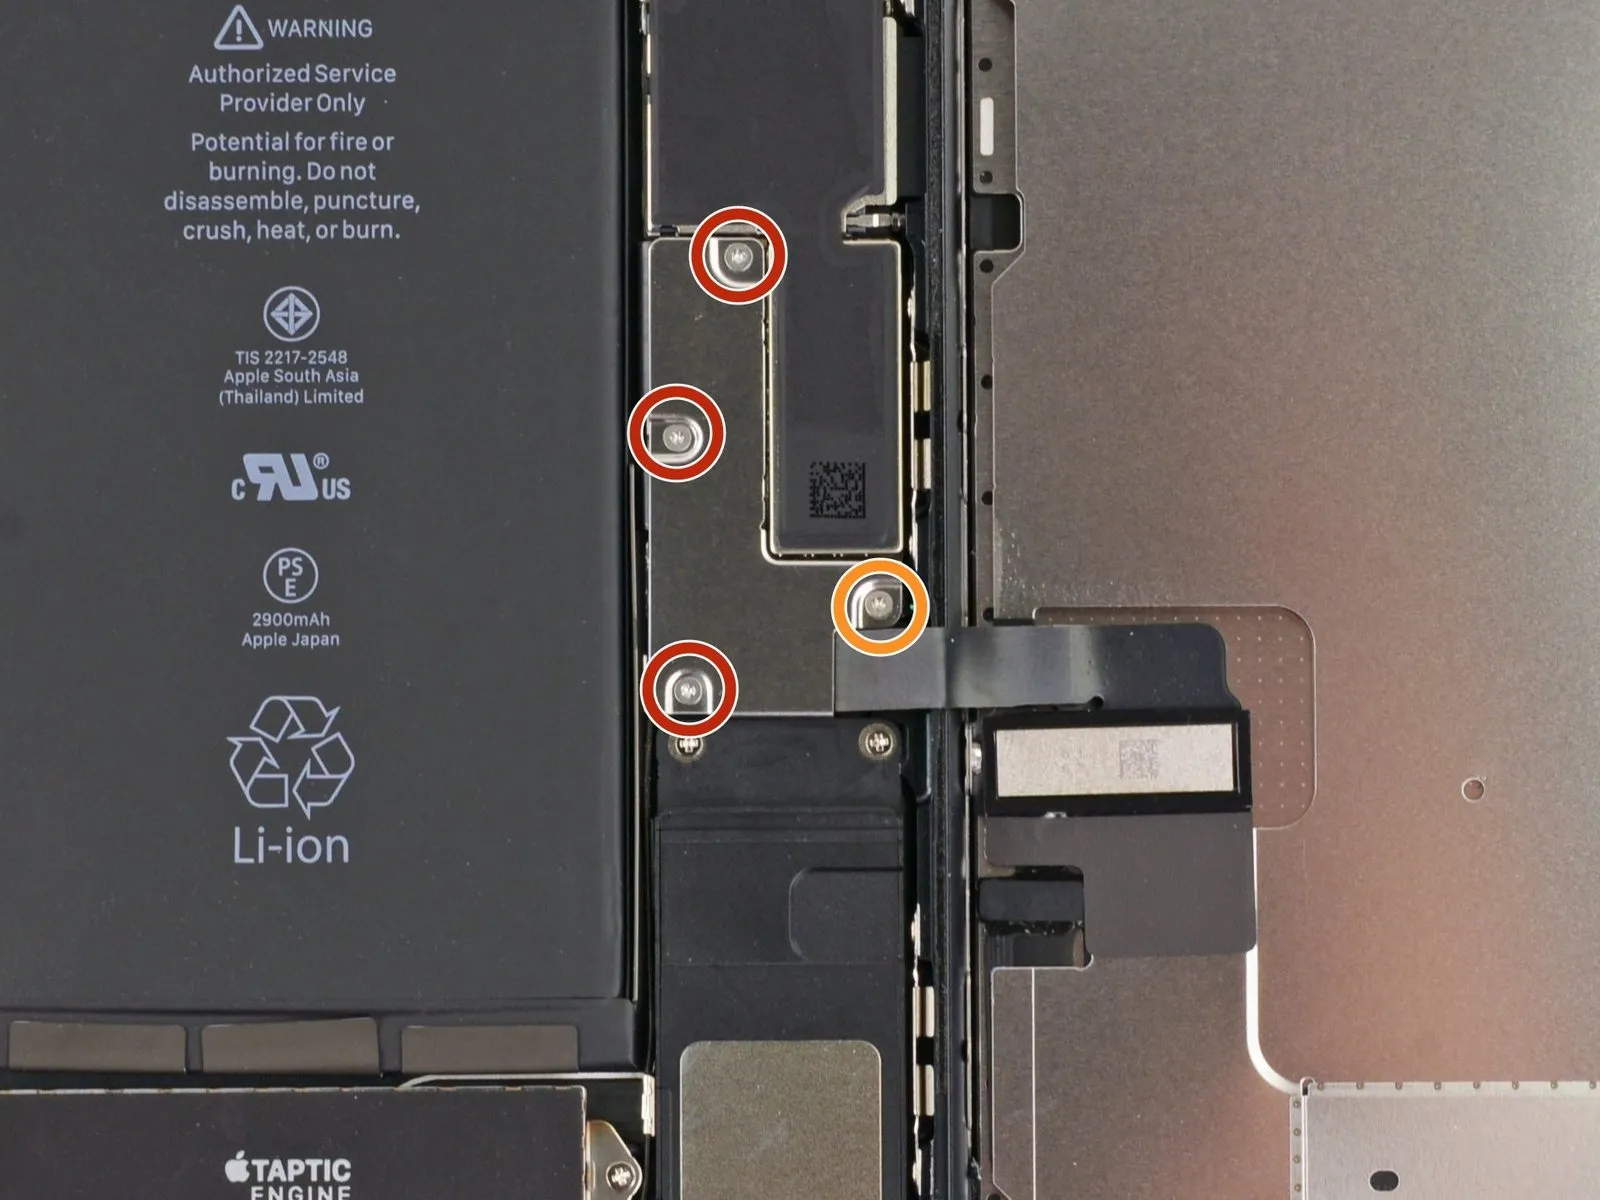
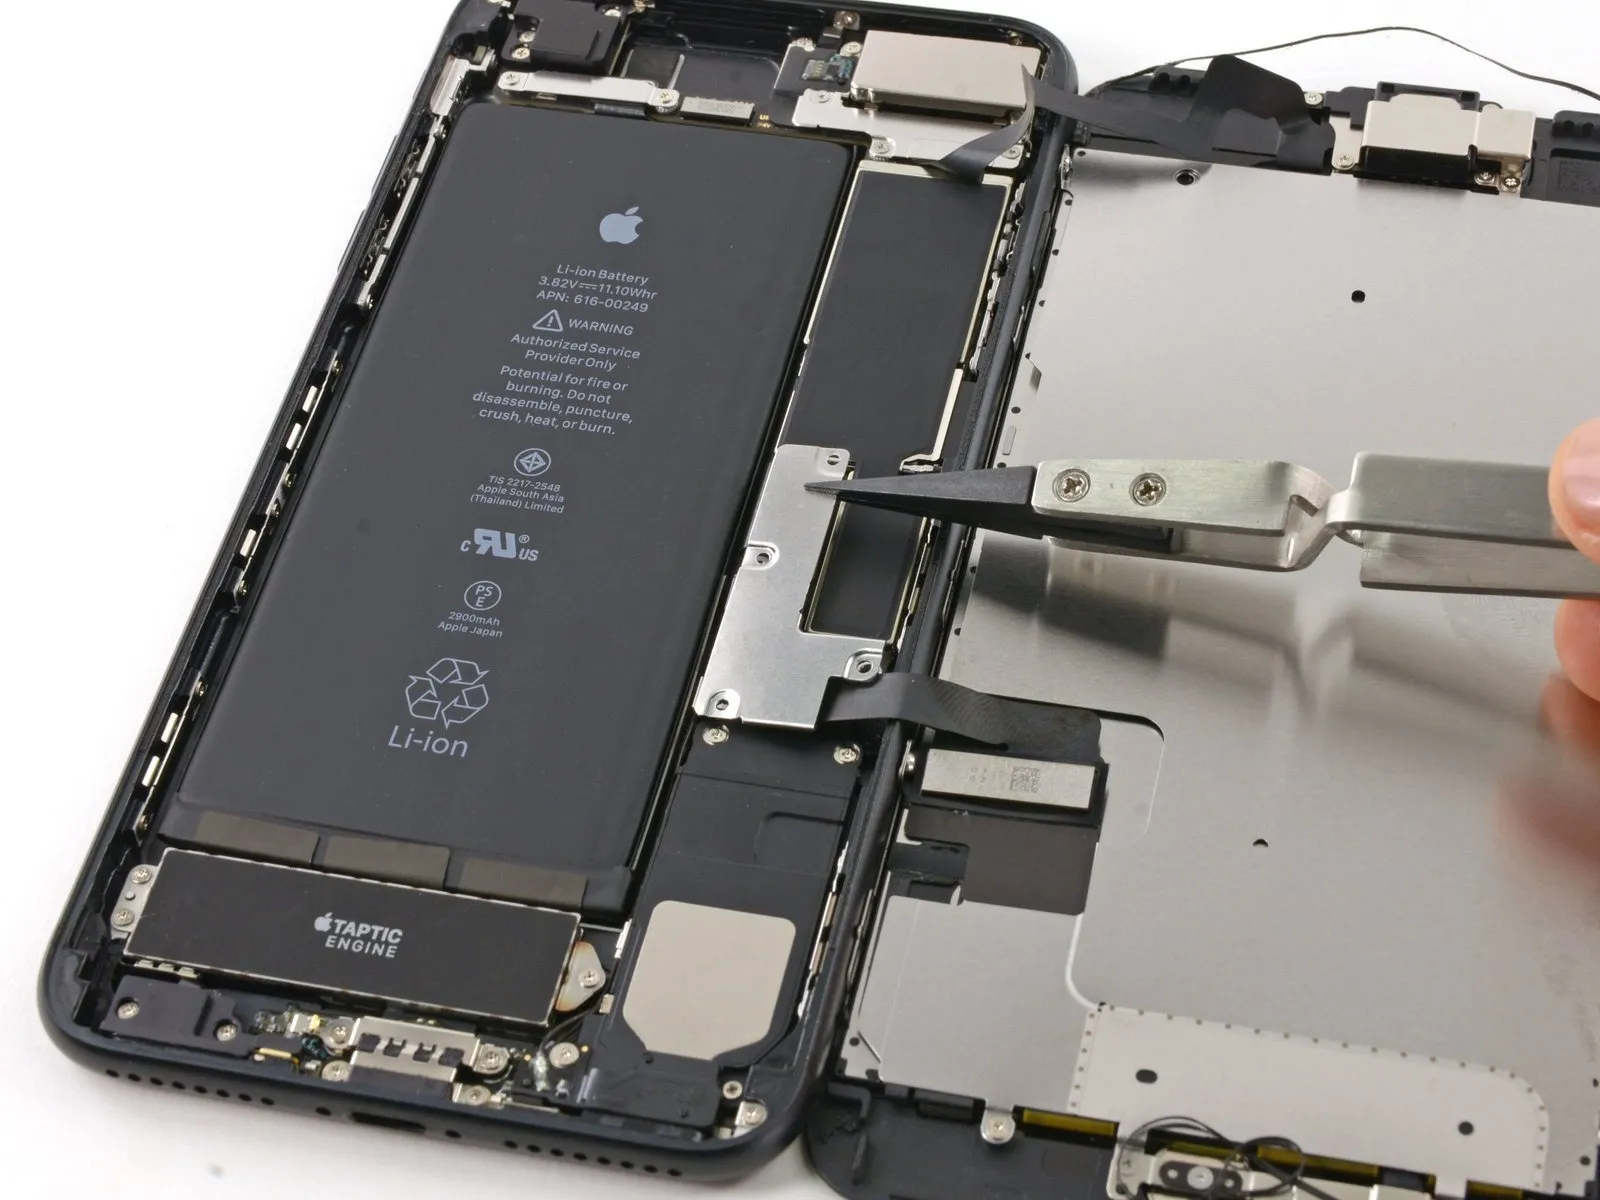
- To detach the lower display cable bracket from the logic board, carefully unscrew the four Y000 tri-point screws that hold it in place.
- Utilize three screws, each measuring 1.2 millimeters in length.
- Additionally, a single screw with a 2.6-millimeter dimension is also required.
Step 17

Step 18
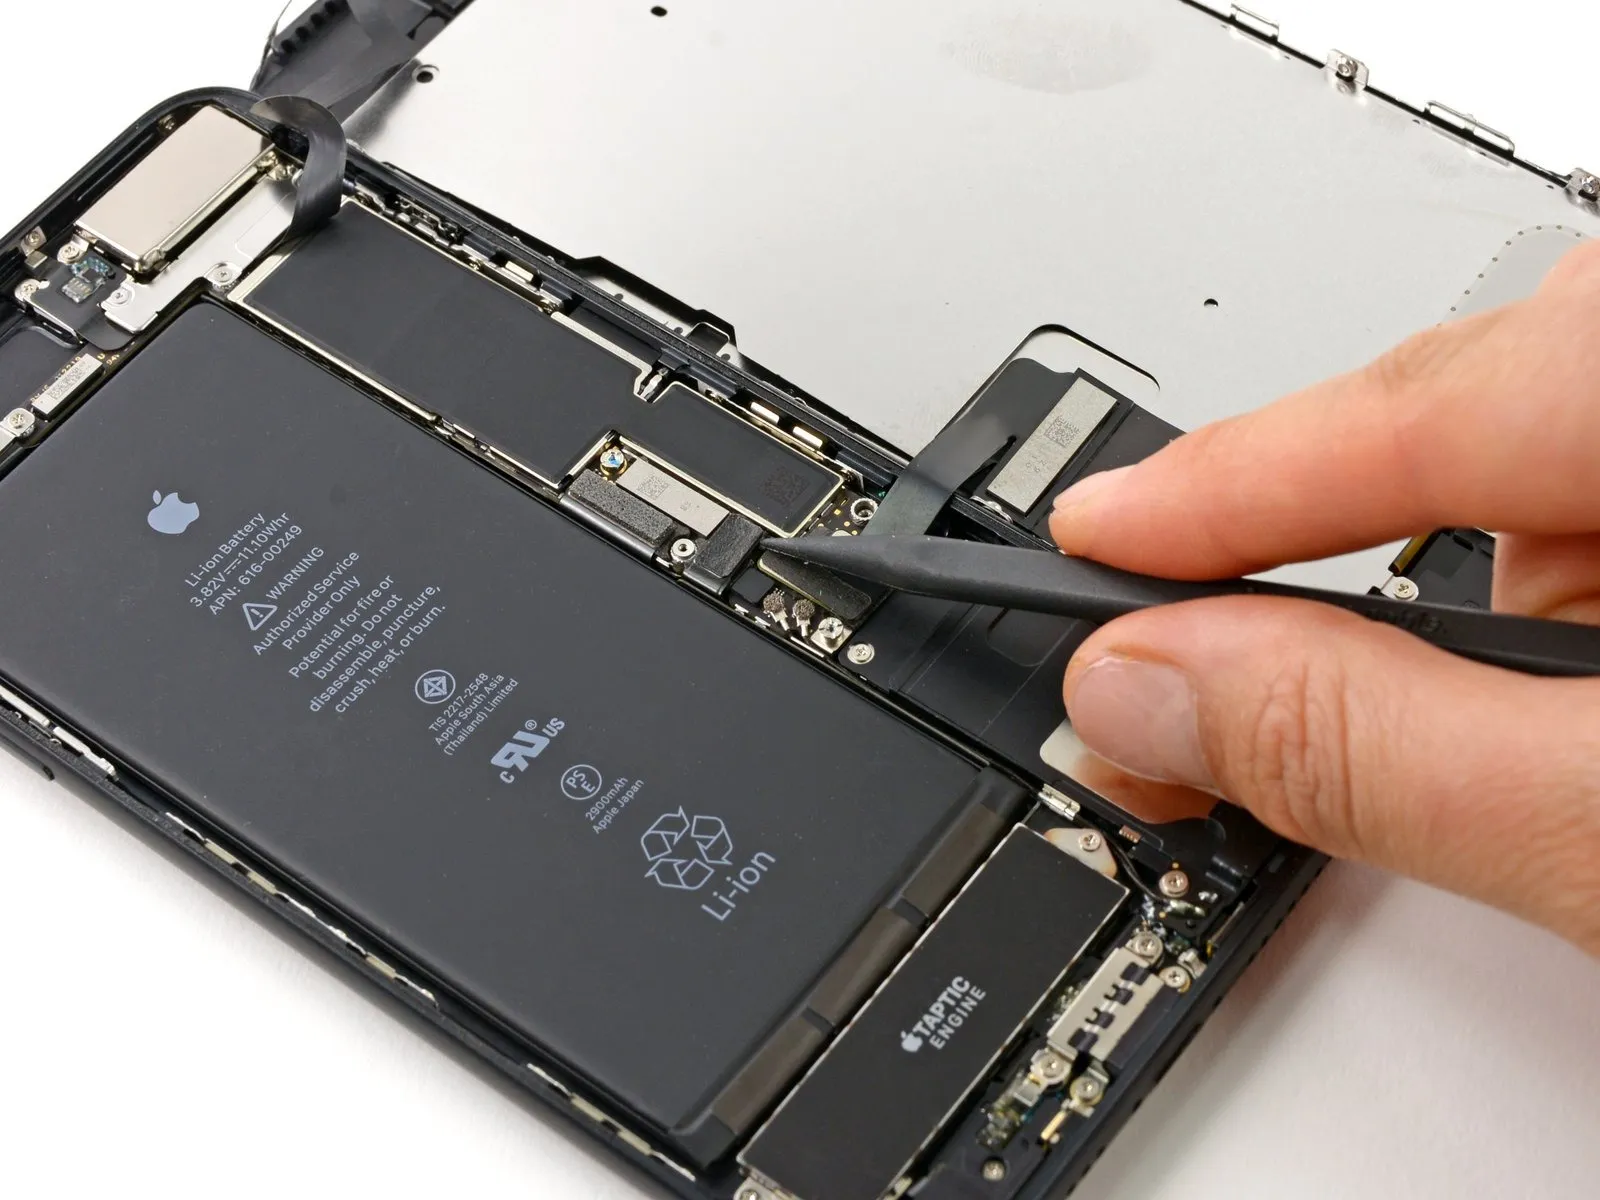


- Employ the tip of a spudgerto disengage the battery connector from its corresponding receptacle on the logic board.
- Gently elevate the connector cable a small amount to ensure it remains disconnected from the socket, thereby preventing any electrical current from reaching the device.
Step 19 | Display Assembly
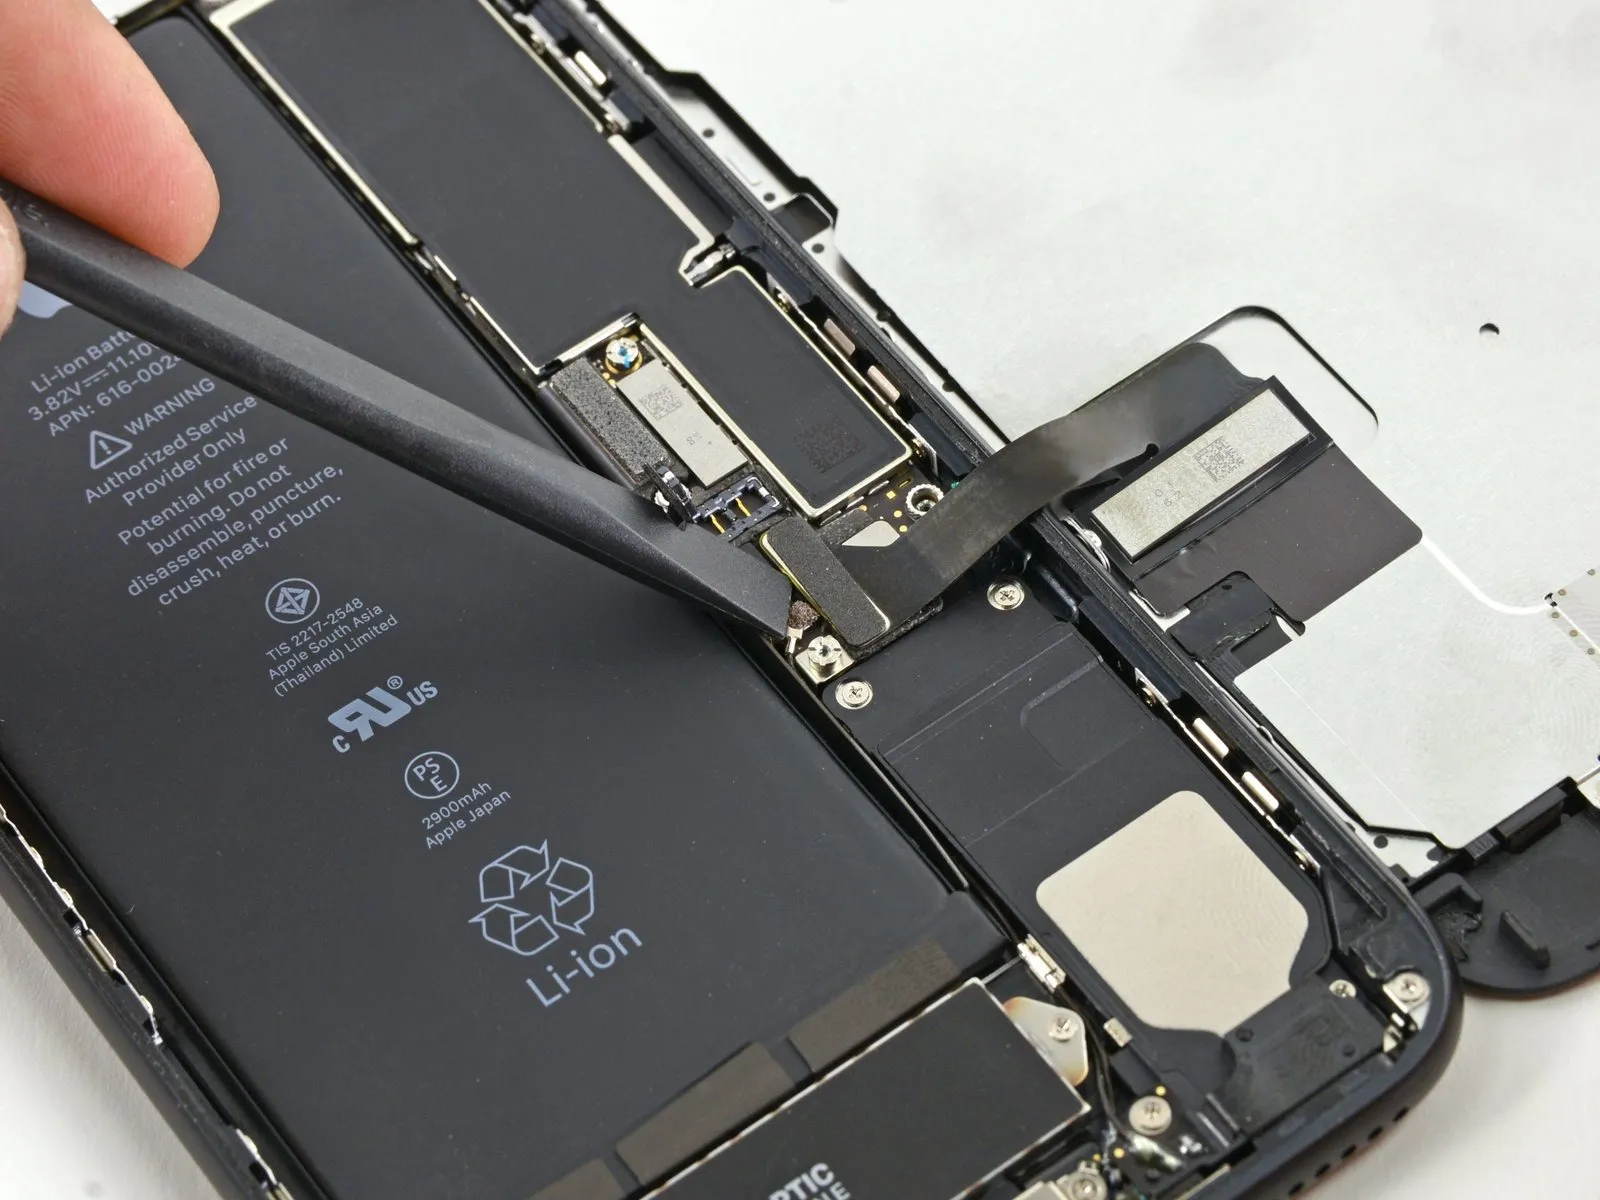


- Prior to detaching or reattaching any cables within this procedure, confirm the battery is disconnected to prevent potential electrical hazards.
- Employ the planar edge of a spudger or a fingernail to release the two lower display connectors, lifting them vertically away from their corresponding ports on the logic board.
- To secure the connectors during reassembly, apply downward pressure to one terminus until a distinct click is heard, then repeat the process on the opposing terminus; avoid applying pressure to the central section. Any slight misalignment during this process can result in connector bending, potentially leading to irreversible damage.
- Should you observe a blank display, the appearance of white lines, or a diminished or absent touch response following reassembly, attempt to carefully detach and reconnect both cables, ensuring they are completely and properly aligned.
Step 20
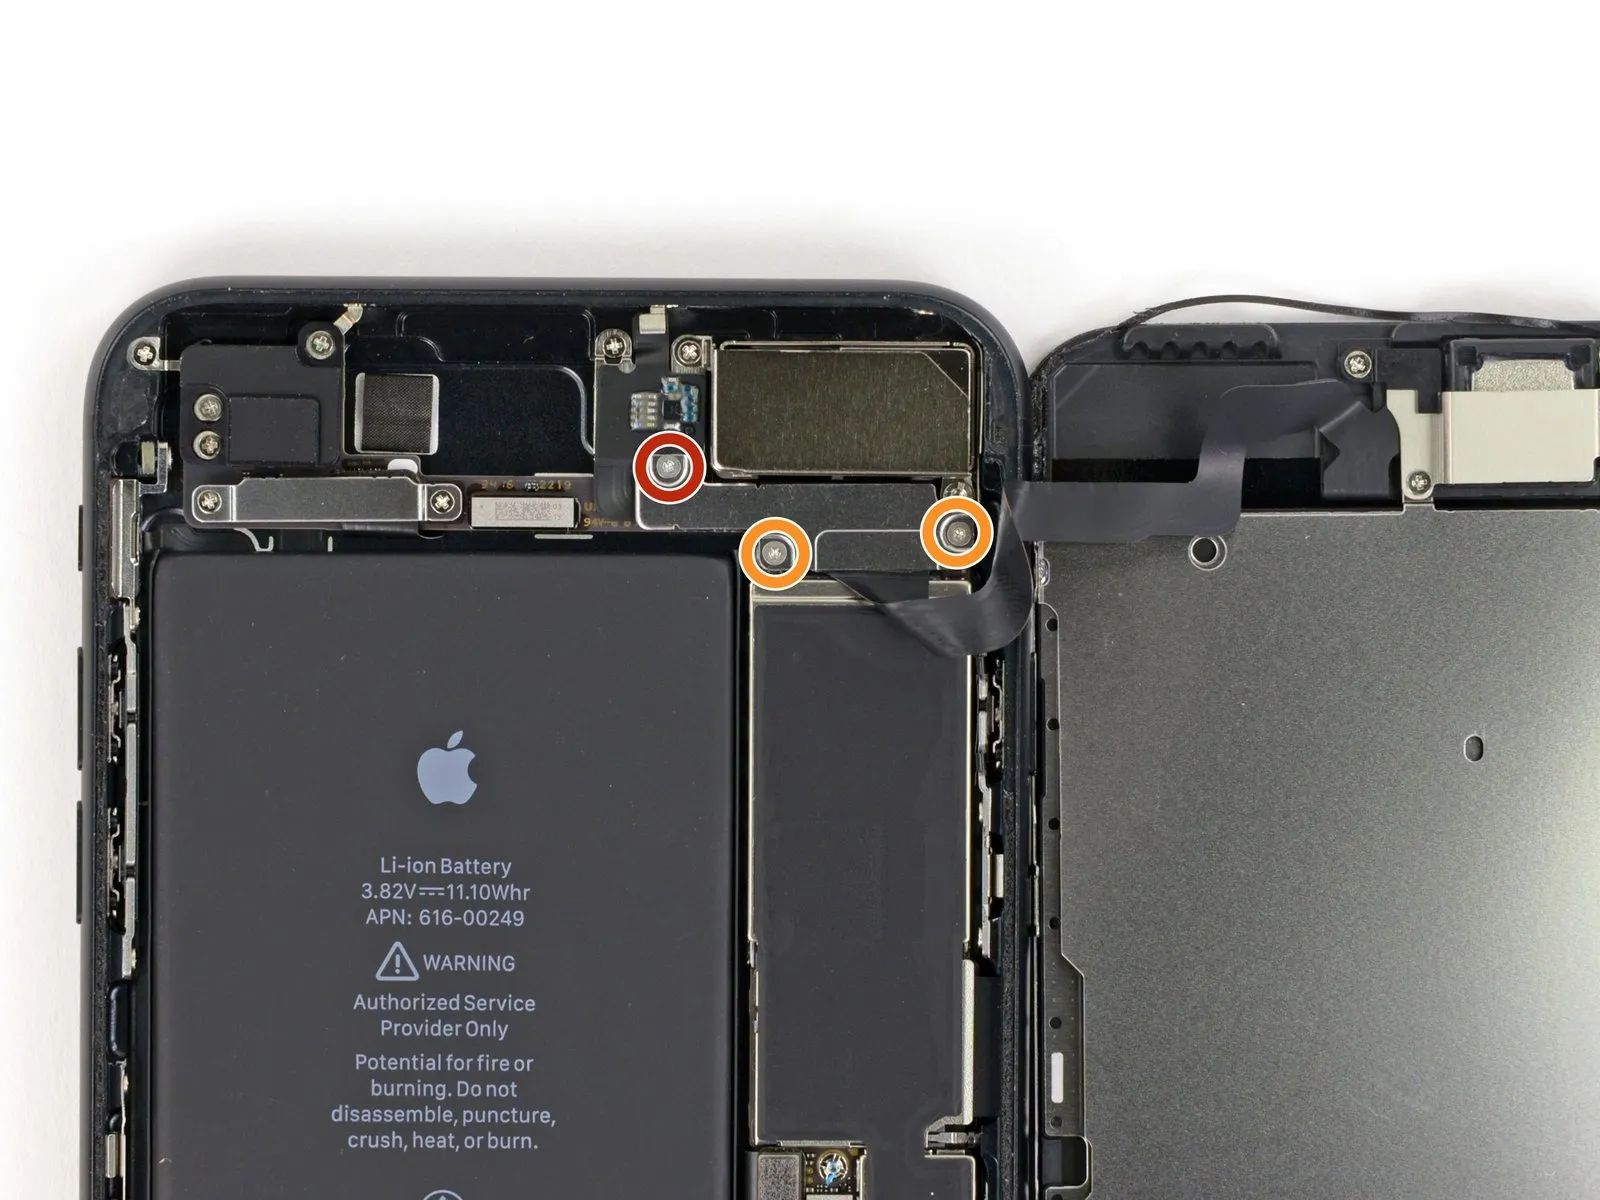


- To detach the bracket that covers the connector for the front panel sensor assembly, first eliminate the three screws that hold it in place, utilizing a tri-point Y000 driver.Y000The bracket is fastened with a combination of screw sizes; specifically, one 1.3 mm screw and two 1.0 mm screws.
1.3 mm1.3 mm
1.0 mm1.0 mm - Following screw removal, the bracket can then be taken off.
Step 21
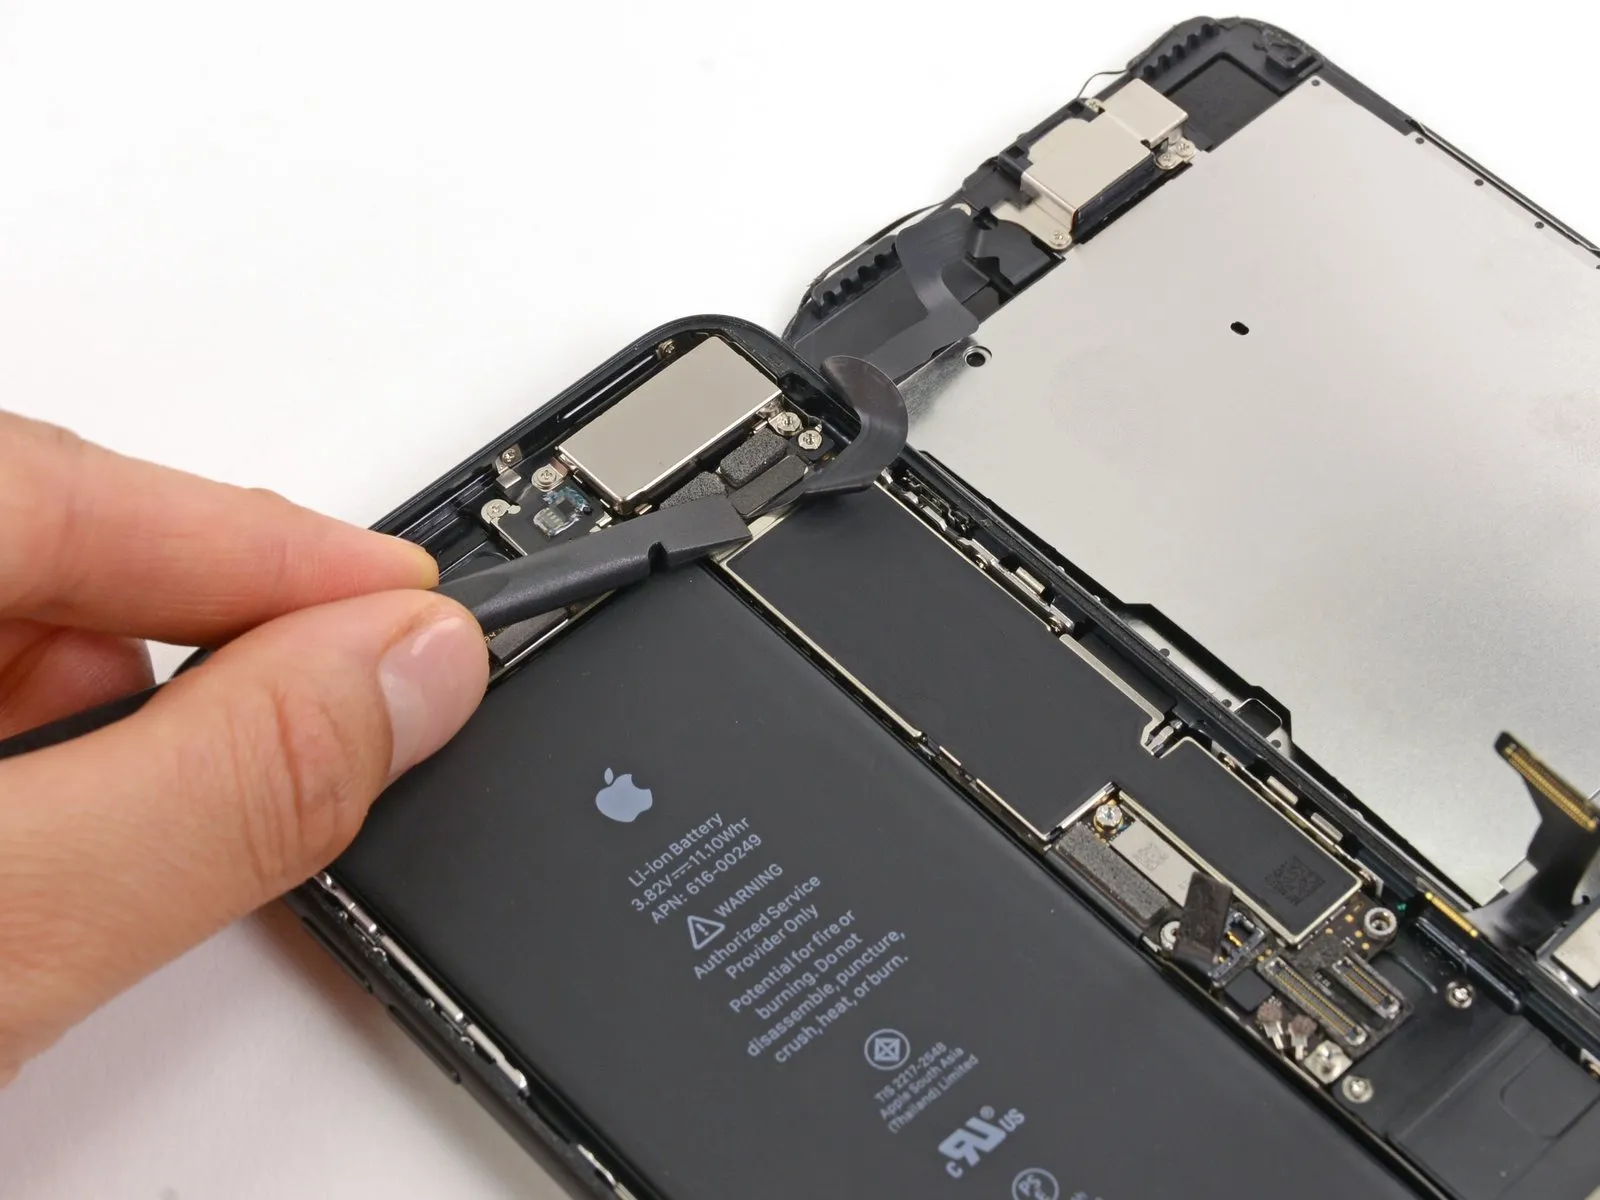

- To prevent damage, detach the connector linking the front panel sensor assembly to the socket on the main circuit board.
- For optimal results and to avoid deformation, reattach this press-fit connector by engaging one side at a time.
Step 22
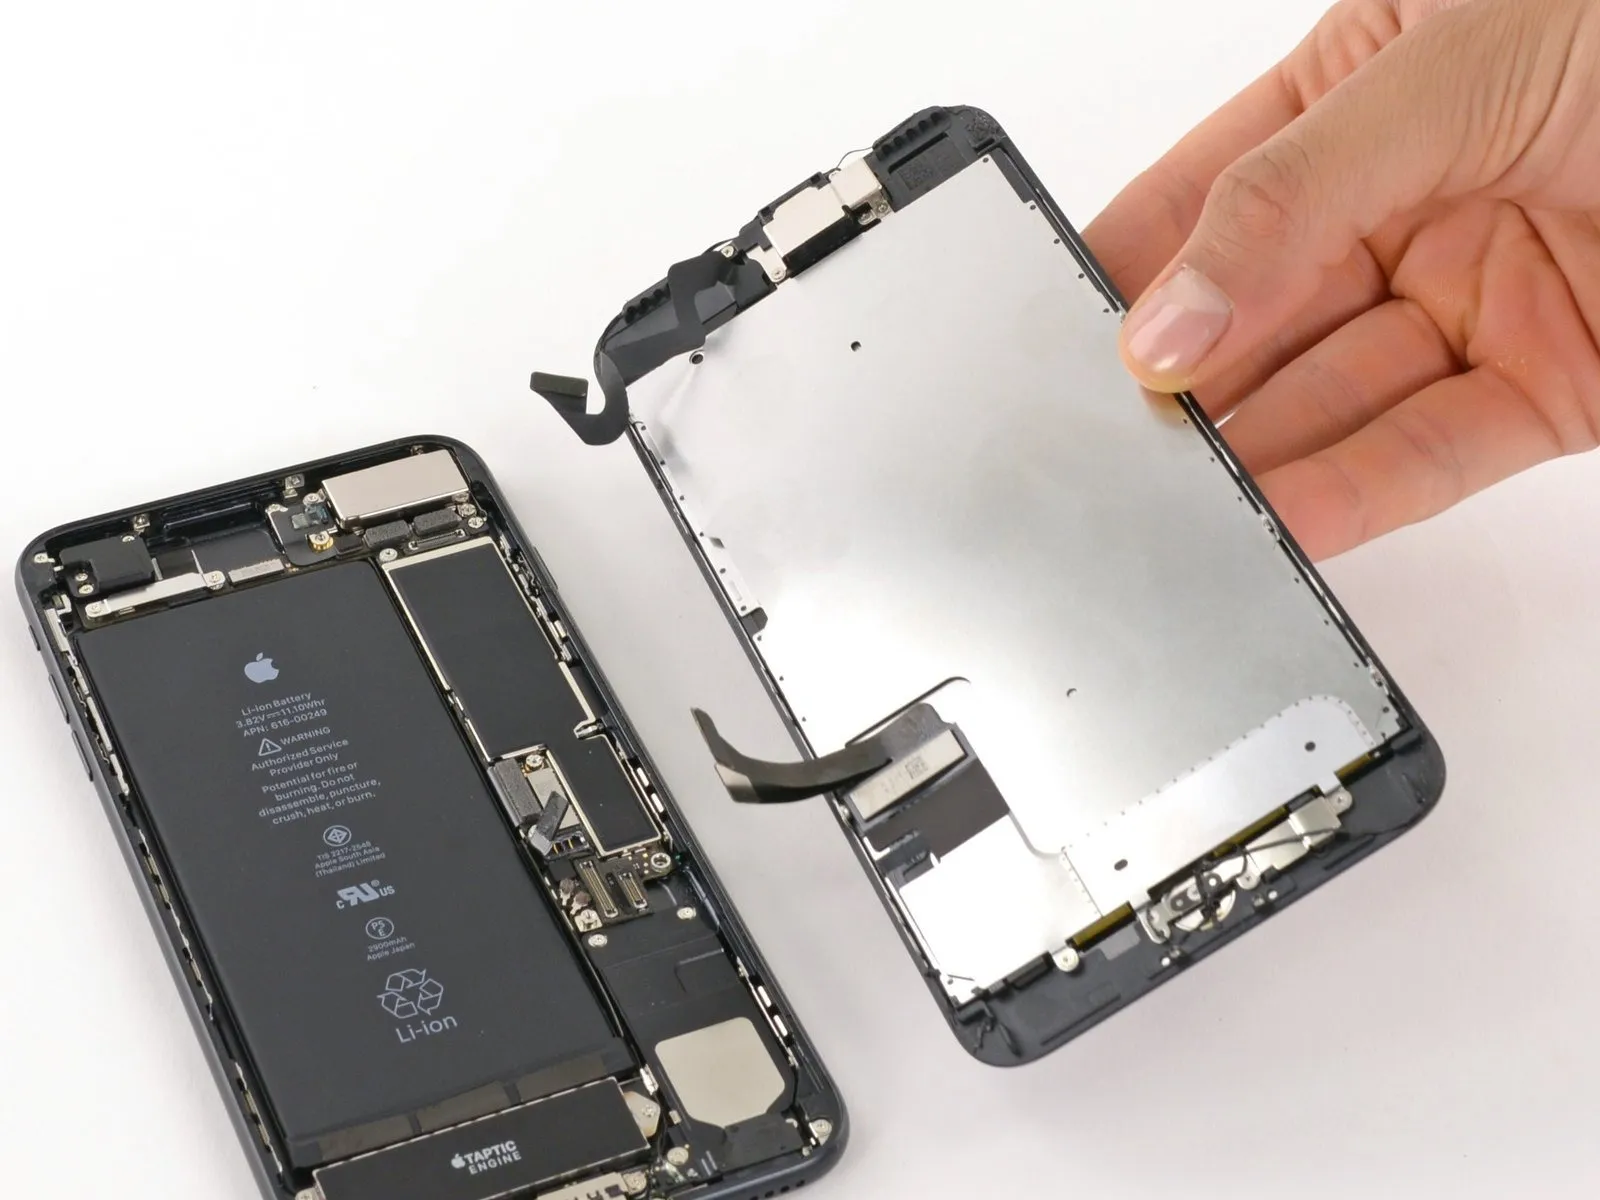
- Detach the display unit from the device.
- When putting the device back together, halt at this stage should you decide to substitute the adhesive securing the display's perimeter.
Step 23 | Home/Touch ID Sensor

- To detach the bracket covering the home/Touch ID sensor, first, unscrew the four Y000 screws that hold it in place.
A single 1.1-millimeter screw is required.
Three screws, each measuring 1.3 millimeters, are also present. - When putting the device back together, exercise caution and avoid excessive tightening of these screws, as this could impair the functionality of the home button.
Step 24

- Detach the retaining clip that fastens the home button and Touch ID sensor assembly in place.
Step 25


- Carefully detach the home button cable connector by inserting a prying tool beneath its left side to release it from the receptacle.
- Should the entire connector assembly lift unexpectedly without releasing, apply downward pressure to the cable's upper portion using the broad side of yourspudger, concurrently maintaining upward pressure on the connector's left edge. Exercise extreme caution to prevent any harm to the cable or connector, as doing so will render the sensor inoperable.
Step 26


- Gently lift the connector situated beneath the assembly and reposition it to allow access to the home/Touch ID cable.
- Damage to your iPhone is a significant risk during this procedure; therefore, proceed with deliberate slowness and meticulous tool placement. Any harm inflicted upon the Touch ID components necessitates replacement exclusively by Apple.
- Should the connector resist lifting, apply heat using a hair dryer or iOpener to loosen the adhesive bond, then attempt separation again.
- Avoid complete disconnection of the connector; instead, elevate it slightly to facilitate removal of the underlying home/Touch ID sensor cable.
Step 27

Applying warmth to the region surrounding the home button and Touch ID sensor can loosen the adhesive securing the fragile cable, which will simplify its safe removal.
Turn the display assembly so the reverse side faces up; then, utilize a hairdryer or an iOpener, directing heat to the display's lower edge for approximately 90 seconds to reduce the adhesive's tackiness.
Step 28
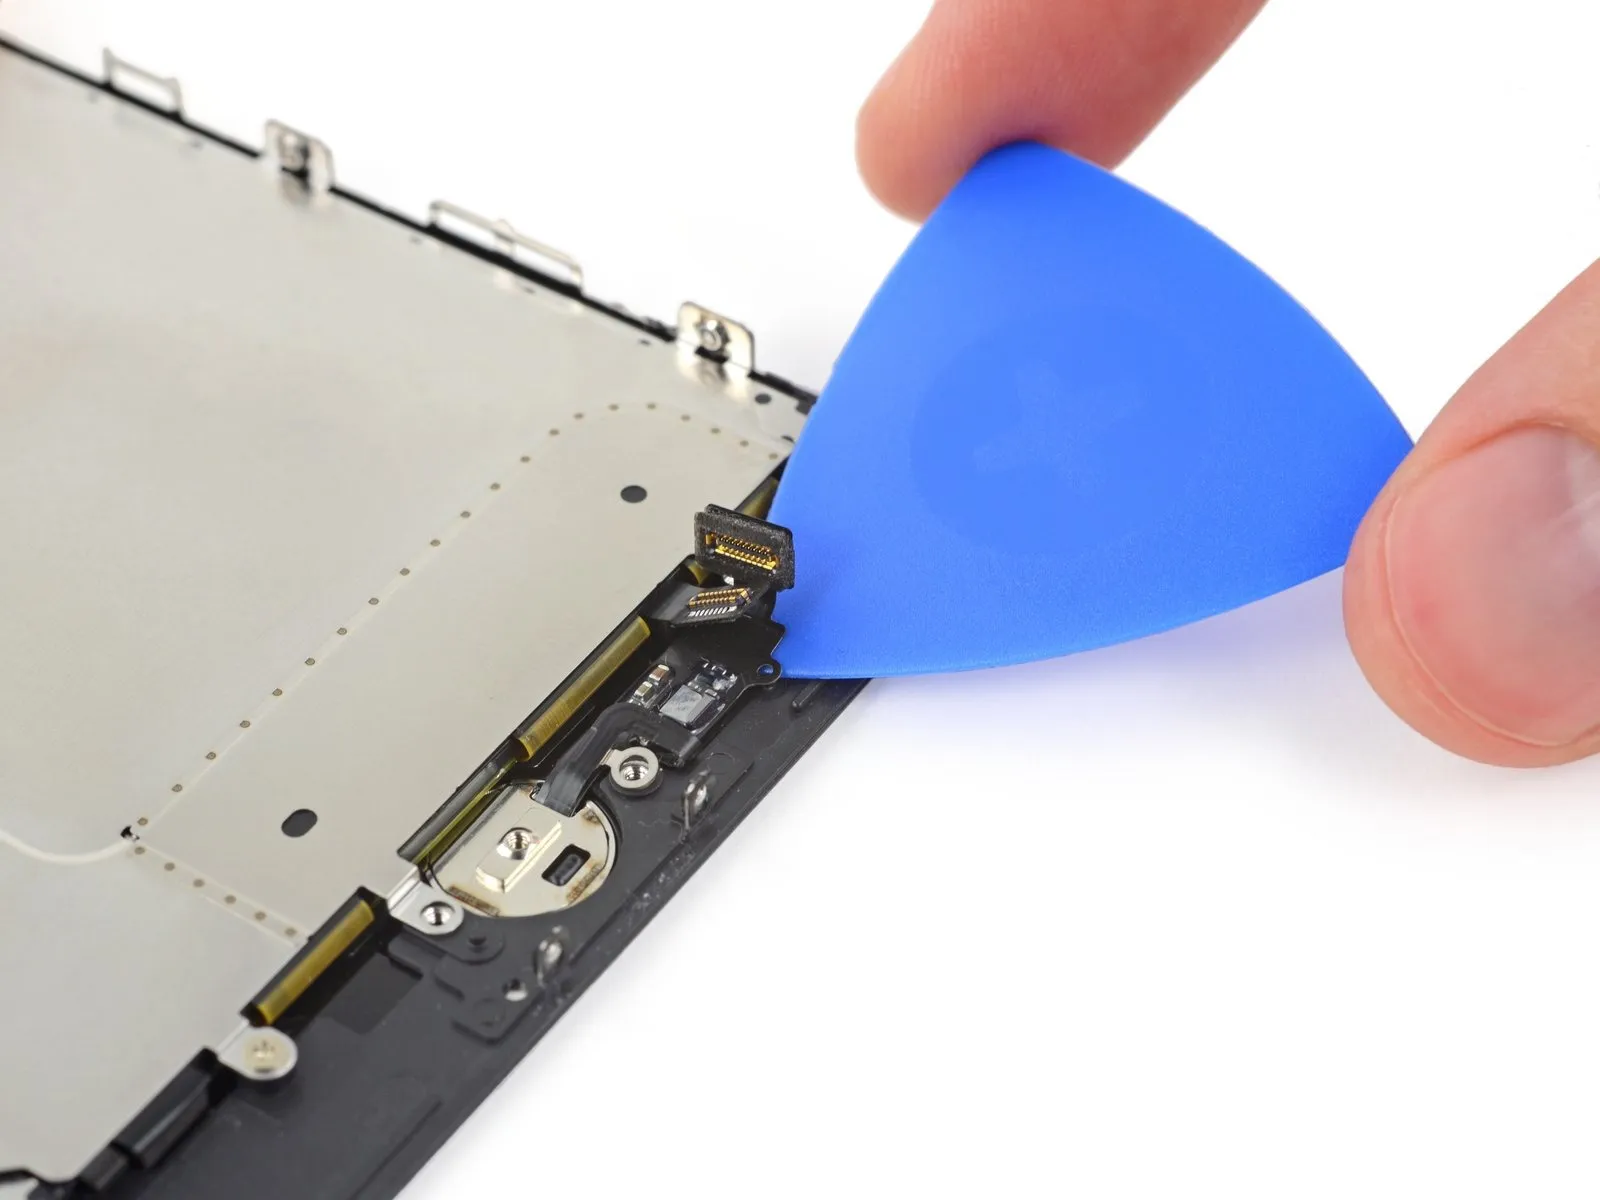


Carefully disengage the adhesive securing the home/Touch ID sensor cable to the rear surface of the display panel, utilizing a prying tool.
Step 29

- Detach thehome/Touch ID sensor assemblyby raising it upwards through an opening on the display's front surface.
- During reassembly, initially route the cable through the aperture located on the display's front.
- The newly acquired component might already include a supplementary Y000 screw positioned to the right of the Home Button; discard this extra screw to facilitate proper reinstallation of the home button bracket.
- Utilize this instructional document to affixreplacement display adhesiveto your screen.